NetSuite offers many different ways to communicate with NetSuite: SuiteTalk, SuiteScript, and others. While SuiteTalk is a standard SOAP api, NetSuite users can develop their own custom integration with SuiteScript (similar to JavaScript) and expose it as a RESTFul API through RESTlet. Once it is exposed through RESTlet, users can call this API directly with the HTTP Request in Studio or through their preferred browsers, but they need to configure HTTP header with the proper authentication method (i.e. NLAuth nlauth_account=YOURACCOUNT,nlauth_email=YOUREMAILADDRESS, nlauth_signature=PASSWORDS,nlauth_role=YOURROLE).
latest report
Learn why we are the Leaders in API management and ipaas
With Anypoint Connector for NetSuite v7.3.0, after users configure the connector as they would to use SuiteTalk (SOAP API), they can easily make a RESTlet call with the GET/POST/PUT/DELETE methods. The following shows how to create a RESTlet in NetSuite and use it with Anypoint Connector for NetSuite v7.3.0.
First, we need to create a custom integration in JavaScript in NetSuite and expose it through RESTlet.
JavaScript example
The following JavaScript example is provided in the NetSuite RESTlet document. Create a sample.js file based on the example:
Configure NetSuite to expose your SuiteScript(JavaScript) through RESTlet.
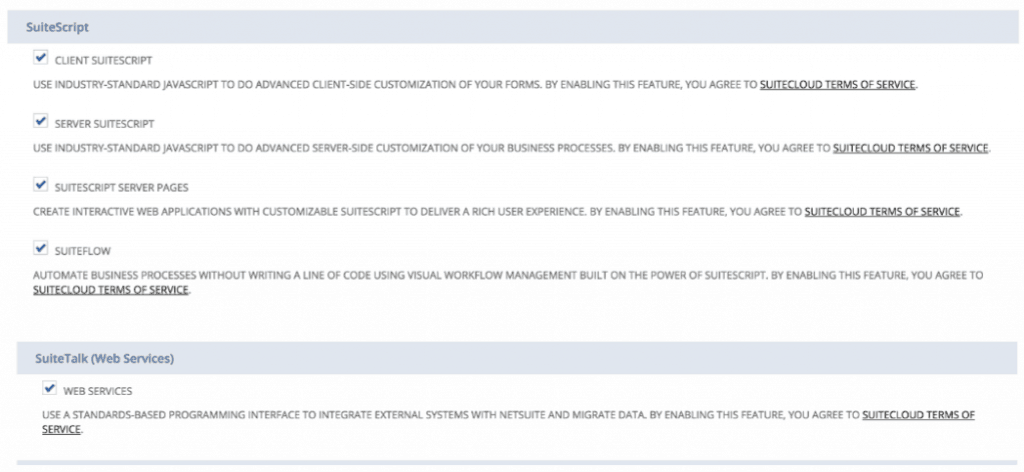
Enable SuiteScript and Web Services under Setup -> Company -> Enable Features -> SuiteCloud.
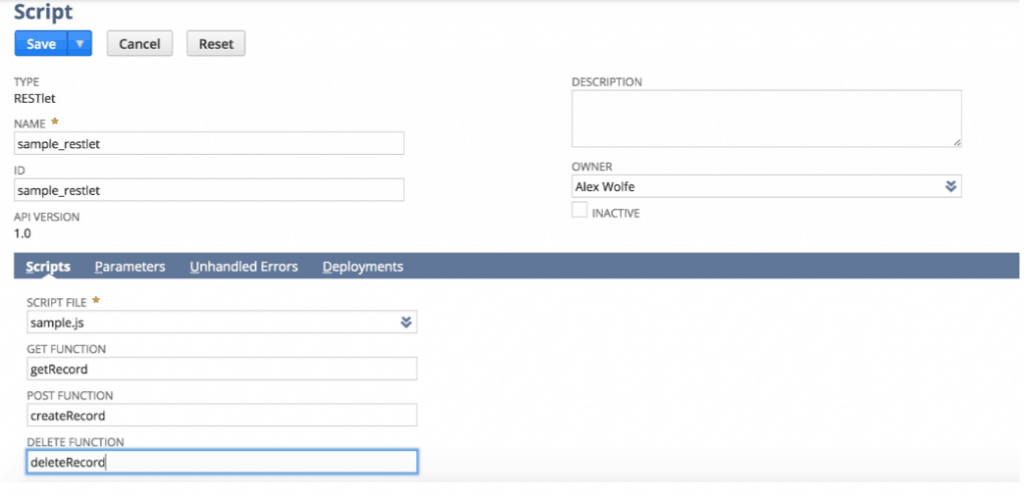
Create a new script and upload the script file you created in the previous step. Go to Customization > Scripting > Scripts > New.
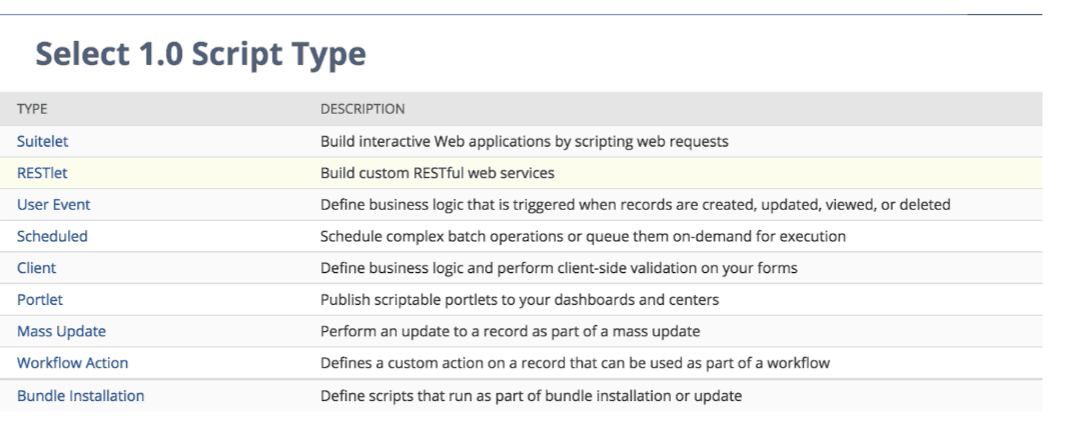
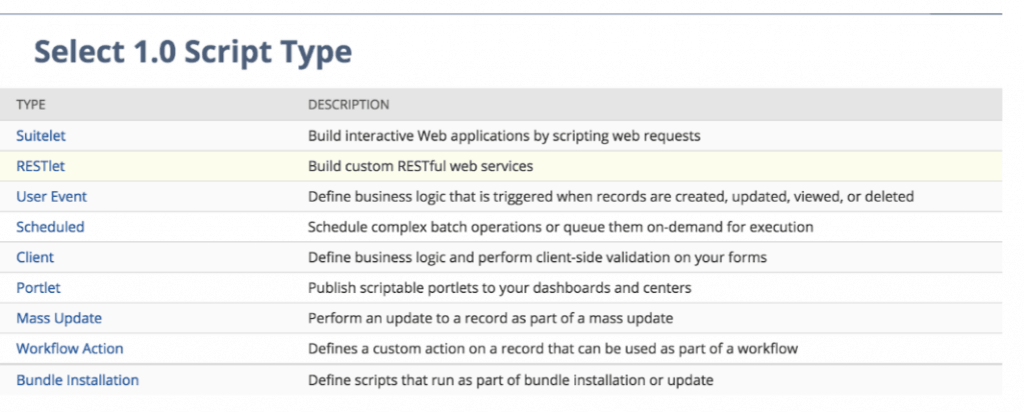
Select the sample.js, click on “Create Script Record,” and select “Restlet.”
Fill out the following form based on the sample.js, and “Deploy Script.”
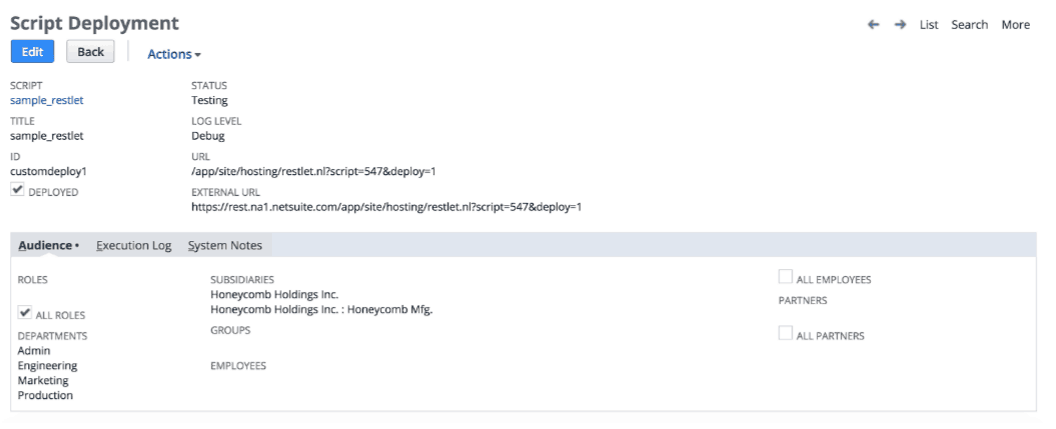
After you set your “Audience,” you will see the following image. The script value and the deploy value (i.e. script=547&depoly=1) in the External URL will be used for the NetSuite Connector to call the RESTlet.
Installing the NetSuite Connector
Now, you are ready to call your first RESTlet with the updated NetSuite Connector. Before you move on to the next step, please make sure you have the right version of the connector downloaded from the Exchange.
Import/Configure a RESTlet
Find the demo-restlet app from this page, and import it to Studio. The following demo app is preconfigured to work with the SuiteScript example above.
Once you import the demo app, select “Global Element” and open the NetSuite Configuration by clicking on “Edit”.
Make sure RESTlet endpoint and Endpoint has the right values for your NetSuite environment. You can specify your NetSuite configuration directly here, but I recommend you use the mule-app.properties. In mule-app.properties, configure the following keys:
netsuite.email= netsuite.password= netsuite.account= netsuite.roleId= netsuite.applicationId= netsuite.script=547 (Your Script value from the External URL) netsuite.deploy=1
Run the Restlet demo
After you start the demo app in Studio and hit localhost:8081/ with your browser. You will see a simple HTML page allowing you to interact with this demo app for “Insert Record” (Post), “Get Record” (Get) and “Delete Record” (Delete).
When using Get Record with ID = 500 and Record Type = Customer, the following is the response I receive:
For new users, try the above example to get started, and for others, please share with us how you use or are planning to use the NetSuite Connector! Also, explore the Anypoint Exchange to see other resources you can leverage today.

 After you set your “Audience,” you will see the following image. The script value and the deploy value (i.e. script=547&depoly=1) in the External URL will be used for the NetSuite Connector to call the RESTlet.