I am thrilled to announce the NetSuite OpenAir Connector v1.0.0 today. In this blog post, I will cover how to use the connector to get filtered project information from NetSuite OpenAir.
How MuleSoft uses the NetSuite OpenAir Connector
NetSuite OpenAir has over 1,500 customers and is a widely used professional services automation software (PSA). Internally, we also use OpenAir and have over 100 users who are registered in the system.
At MuleSoft, we have two user stories for OpenAir:
- As a Solutions Architect, I'd like to send my Google Calendar information to OpenAir, so that I don't have to enter timesheets manually.
- As a Finance Manager, I'd like to send information about a new worker from Workday or NetSuite to OpenAir, so that I don't have to manually provision workers whenever a new employee joins the Services Team.
One of our rockstar Solutions Architects at MuleSoft implemented the Google Calendar to OpenAir integration by using the NetSuite OpenAir Connector. Once the integration is in production, it is expected to save 30-40% of his time spent on logging timesheets. As a result, we could save more than 100 hours per month at MuleSoft. More metrics to come on this soon. Stay tuned!
Let's get real
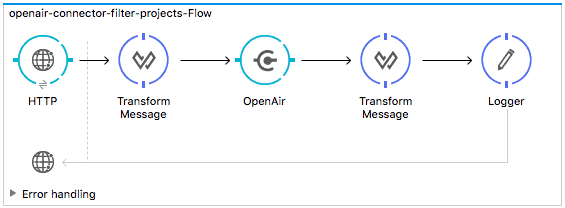
Let's now go into a specific use case. Follow the steps below to learn how to get filtered project information from NetSuite OpenAir using the connector:
Step 1: Configure the connector
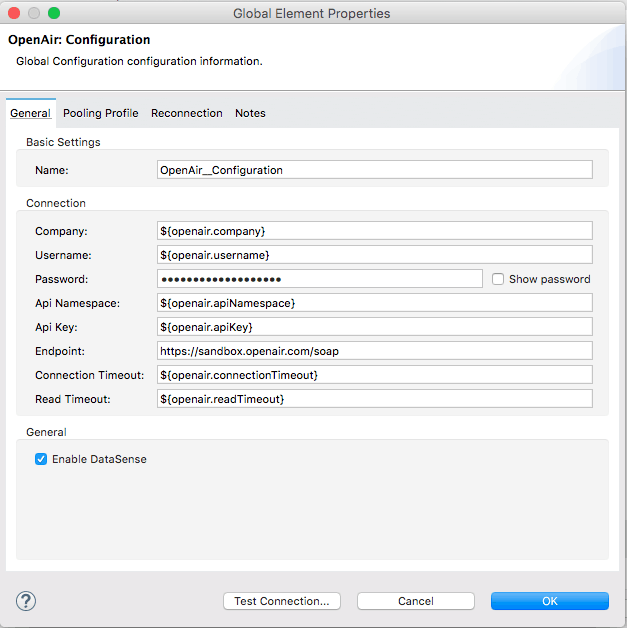
In order to configure the connector, CompanyID, Username, Password, API Namespace, API Key, and URL for your OpenAir environment are required, but Connection Timeout and Read Timeout are optional.
Step 2: Select an operation and oaObject
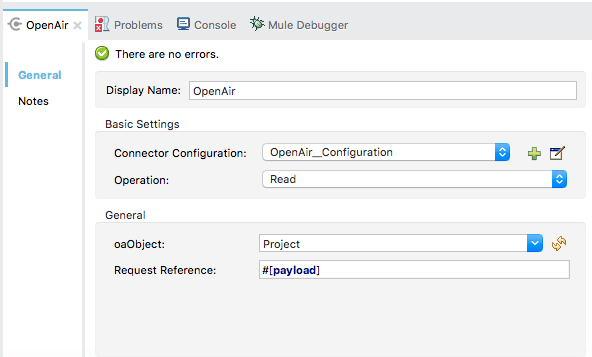
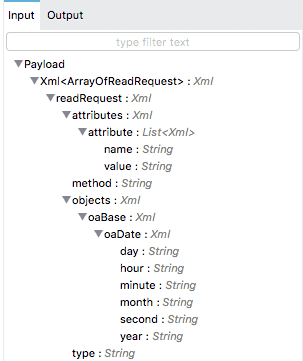
Once you select “Read” as an operation and “Project” as an oaObject, you can see from DataSense that the OpenAir Connector expects a XML-based request.
Step 3: Create an XML-based request with DataWeave
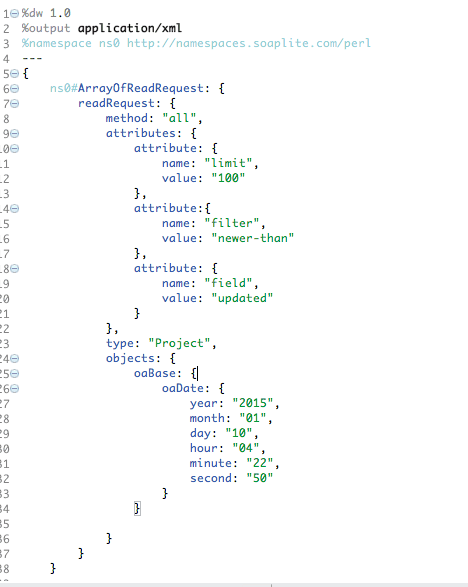
Since the connector supports XML-based requests, DataWeave is a natural choice to submit the request. For those who are not familiar with DataWeave, the DataWeave Language is a powerful template engine that allows you to transform data to and from any kind of format (XML, CSV, JSON, Pojos, Maps, etc). To see filtered information for projects that have been updated since January 10, 2015, configure your XML request with the below setup.
Step 4: Receive the filtered project information
Once the above configuration is complete, the connector will only return projects updated after January 10, 2015.
….
“copy_approvers”: “”,
“sold_to_contact_id”: “0”,
“auto_bill_override”: “”,
“auto_bill”: “1”,
“az_approver”: “0”,
“prj_staffing_plan__c”: “”,
“auto_bill_cap”: “”,
“picklist_label”: “Honeycomb Services : Account audit template”,
“rm_approvalprocess”: “0”,
“copy_project_billing_rules”: “”,
“filtersetids”: “3”,
“notify_issue_closed_project_owner”: “”,
“ta_approvalprocess”: “0”,
“te_approvalprocess”: “0”,
“prj_allow_expense__c”: “1”,
“current_wip”: “0”,
“updated”: “2015-06-08 18:03:54”,
“id”: “7”,
“auto_bill_cap_value”: “0.00”,
“rv_approver”: “0”,
“rv_approvalprocess”: “0”,
“active”: “1”,
“notify_issue_created_project_owner”: “”,
….
For new users, try the above example to get started, and for others, please share with us how you are planning to use the OpenAir connector!