This post was written by one of the stars in our developer community, Ashish Goyal.
ServiceNow is a cloud computing platform that helps enterprises to move faster. With ServiceNow, enterprises can replace unstructured work patterns from the past with intelligent workflows in the future. Businesses get thousands of requests from customers, IT incidents, and HR cases on a day-to-day basis. They move on their own paths, moving to and fro, between humans, machines, and across different branches. In the process, they follow very unstructured and undocumented paths.
With the ServiceNow Cloud platform, all employees and customers can make requests on a single cloud platform. Every branch or team working on these issues can prioritize, find the root cause of the issue, get real-time insights, and drive it towards real-action to get results. This improves the service levels and enables users to get work done at lightspeed.
Enter MuleSoft!
MuleSoft customers use ServiceNow in various use cases. A customer may use ServiceNow to create and manage IT incidents. Some ServiceNow customers use ServiceNow for asset procurement, change management, access requests, incident management, and managing HR processes.
In this post, I’d like to walk you through a simple demo app to show you how to create an incident using Anypoint Connector for ServiceNow, in case you lose access to VPN.
Before you start with the demo app, please make sure you download the ServiceNow Connector from Anypoint Exchange.

ServiceNow Connector Demo
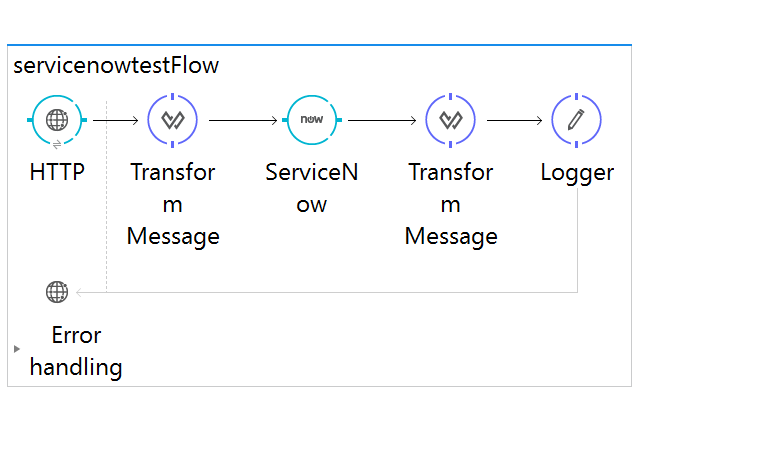
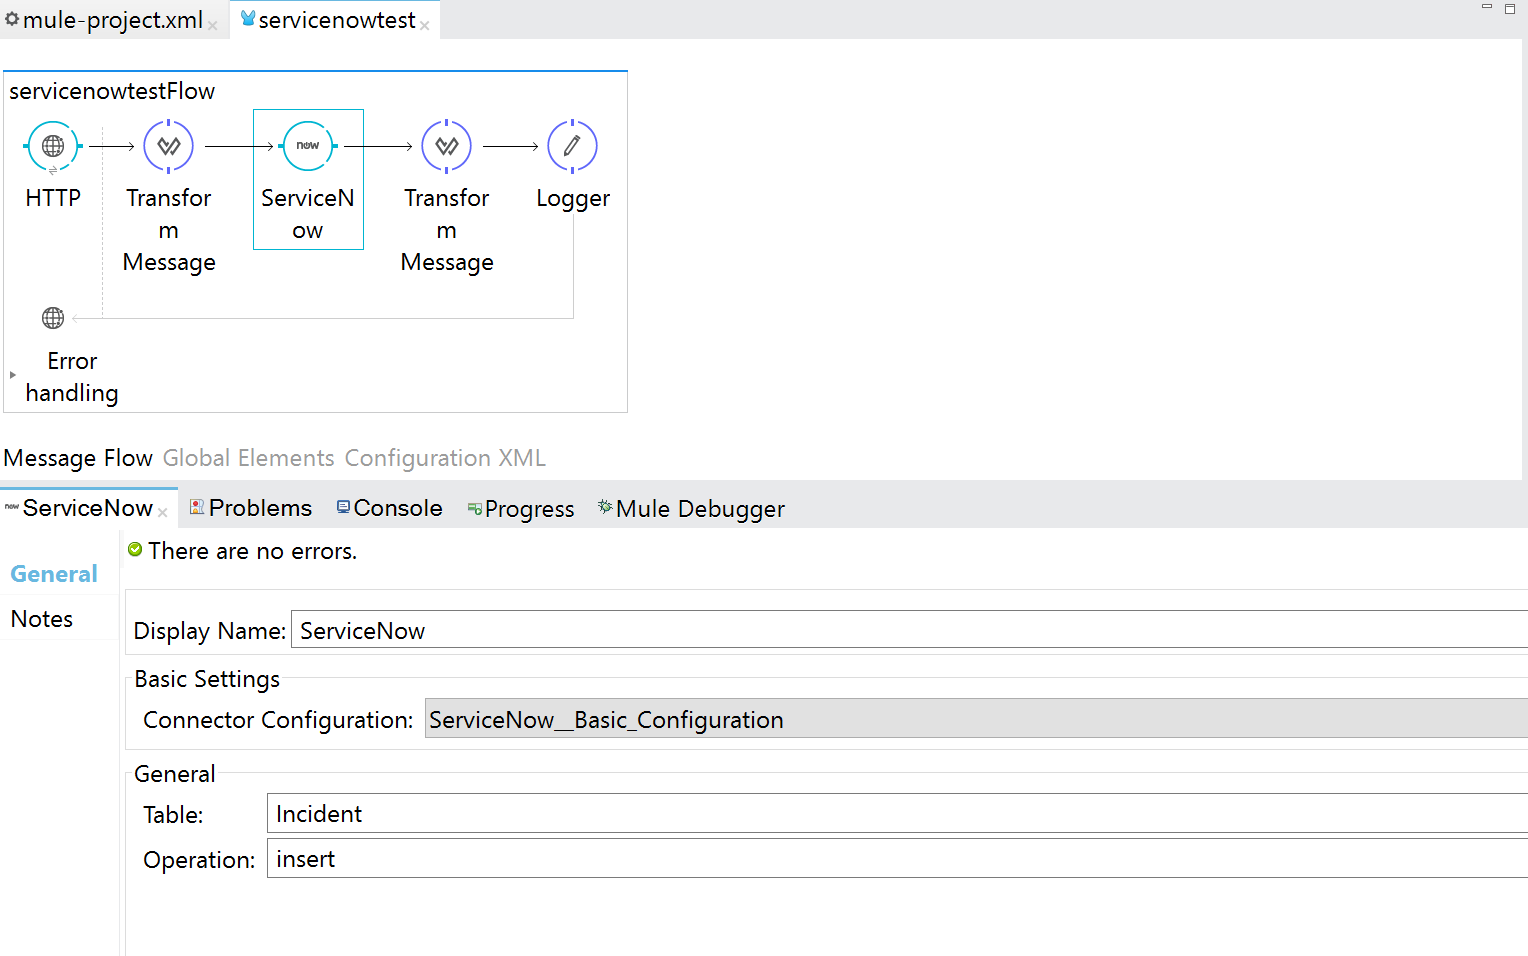
After you install the ServiceNow Connector, create a new project in Anypoint Studio and name it serviceNowdemo. Please drag and drop the connectors as shown in the below flow:
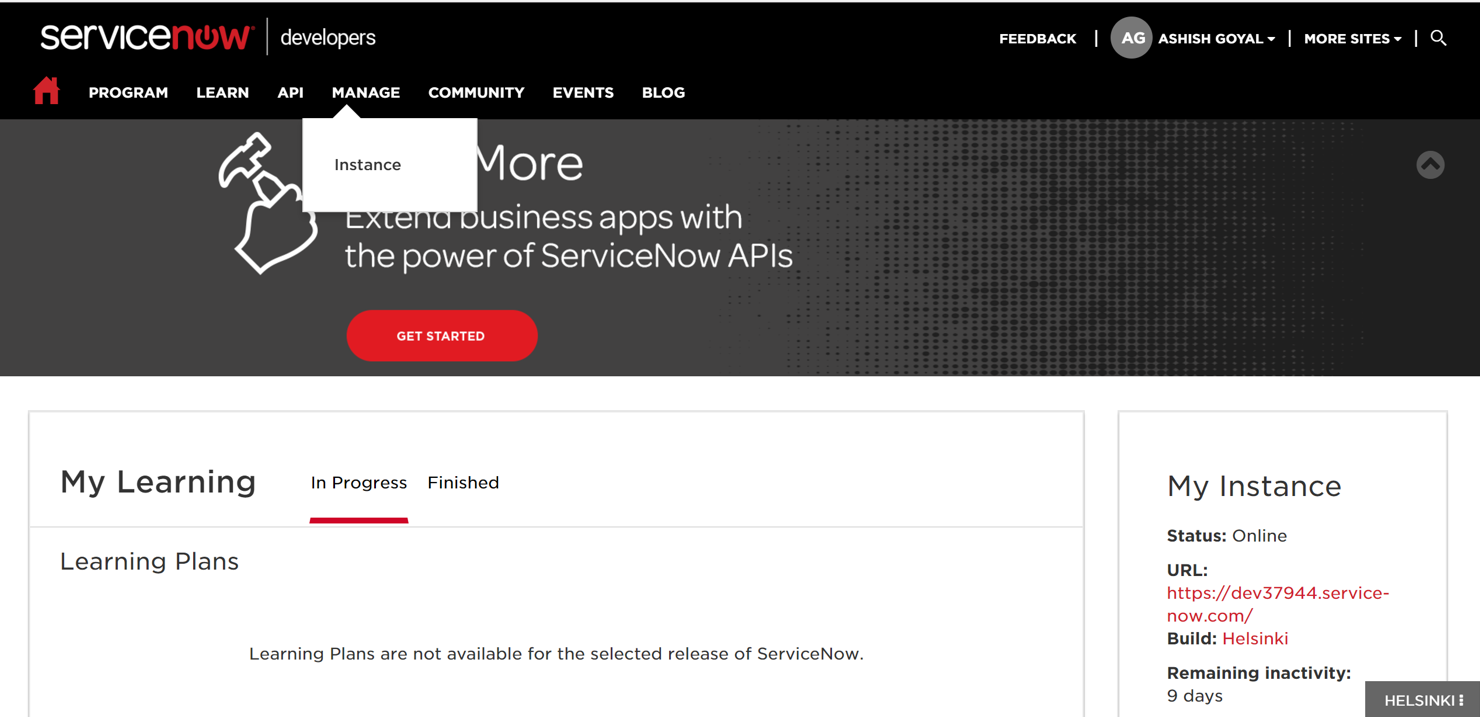
Once you have all the pallets. To configure the ServiceNow Connector, you need to have an account with ServiceNow. Next, create a developer’s account with ServiceNow. It’s free. Once your account is created, you can go to the “Manage > Instance” option to see the instance allocated to you from ServiceNow.
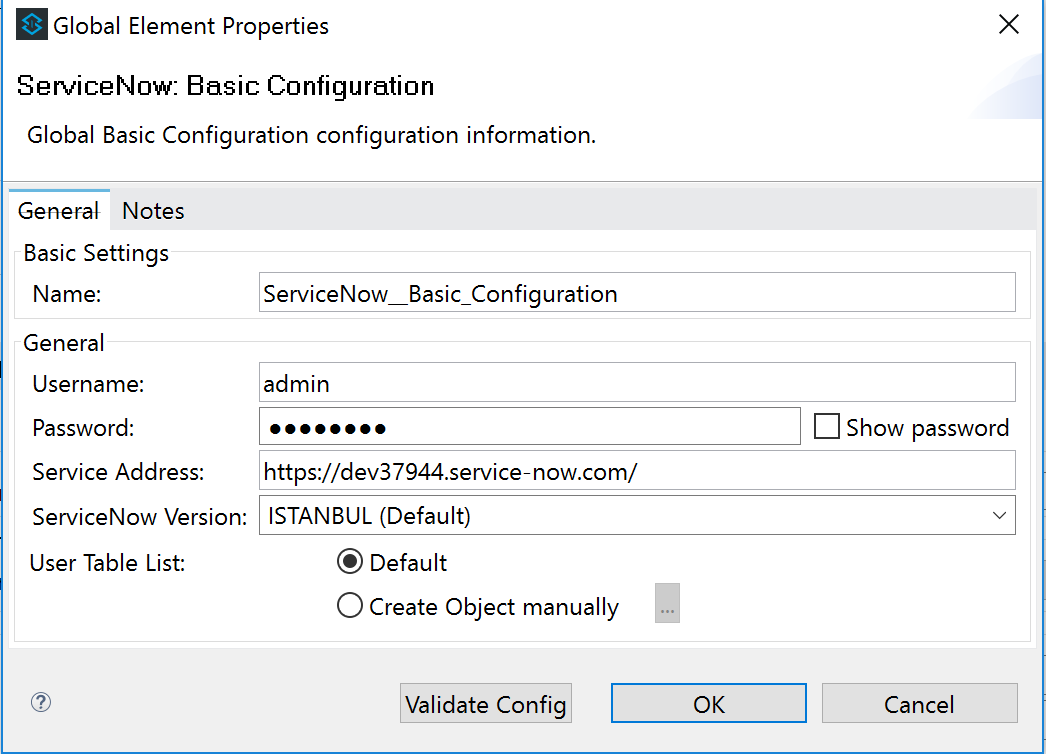
You will need the username, password, URL, and ServiceNow version of this instance to configure the ServiceNow Connector. Keep these details handy to configure your ServiceNow Connector. You can see the below snapshot for my configurations:
The HTTP listener is the first component of my Mule flow. For the HTTP listener, I am using port 8091 and the path as “/createIncident.”
For the Transform Message component, Mule will sense the data for the configuration you will select on the ServiceNow Connector and populate the output for the columns of the table. Mule uses DataSense when we use Transform Message anywhere in the flow. For this demo, I have selected the Incident table and Insert operation in ServiceNow Connector as shown in the below snapshot:
The Transform Message will be auto-populated with all of the fields of the Incident table. This is really wonderful:
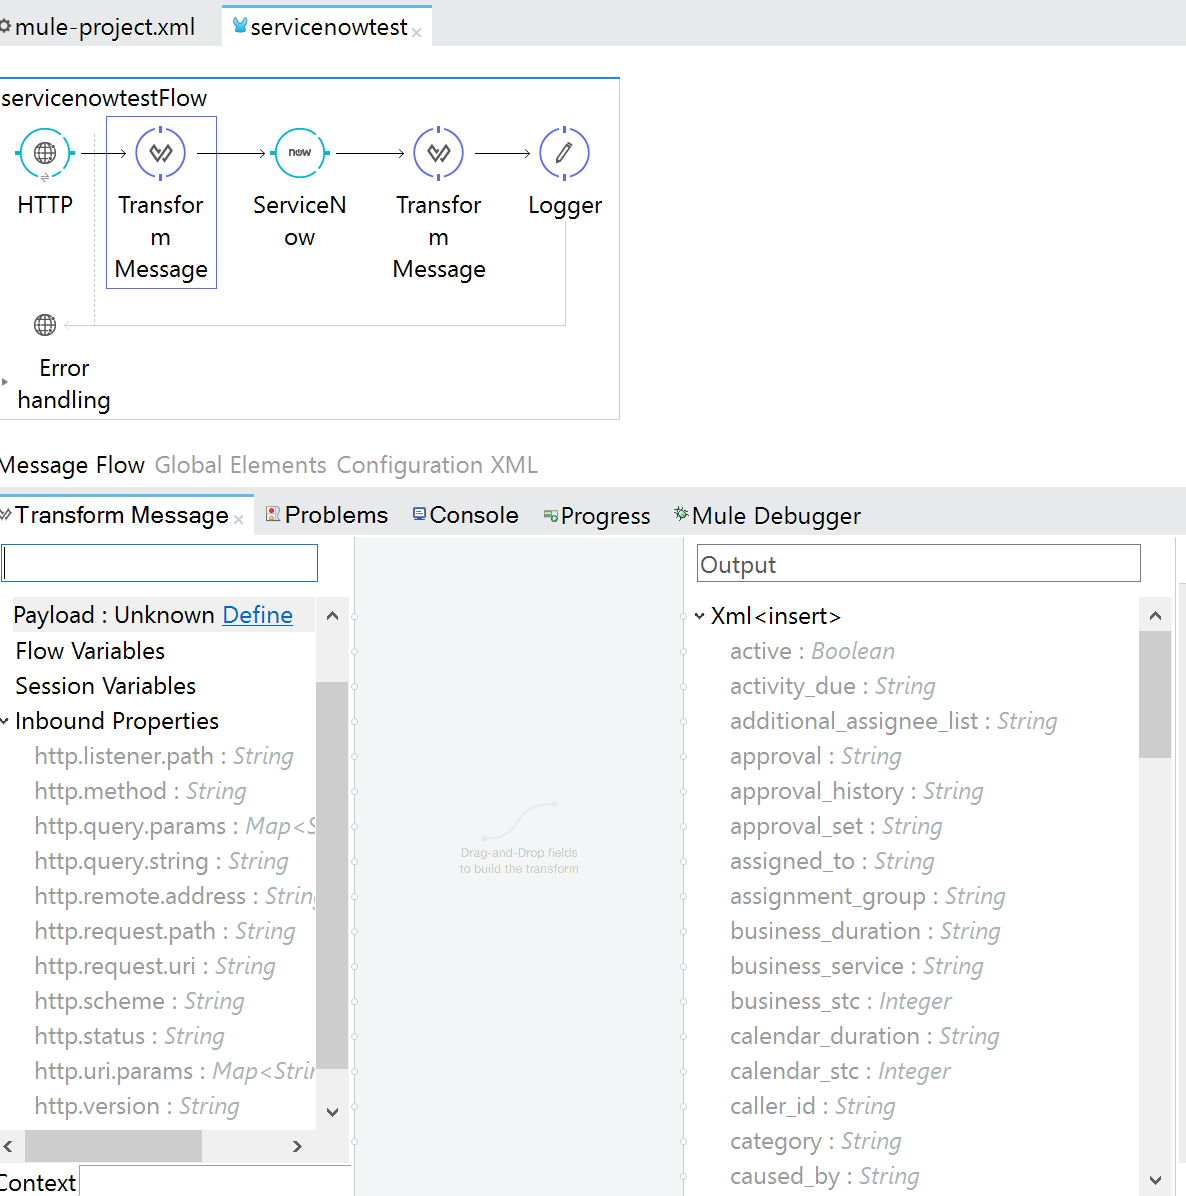
We will use DataWeave to map some of these fields in Transform Message. For this demo, I am using the below DataWeave code:
%dw 1.0
%output application/xml
%namespace ns0 http://www.service-now.com/incident
---
{
  ns0#insert: {
    comments: "This is very urgent. Please resolve it quickly",
    short_description: "Cannot Access the VPN",
    state: "New"
  }
}
This is just for this demo. You can add more fields based on your experience with ServiceNow. You have to go through some of the documentation of ServiceNow to understand the purpose of the other fields in the table. If you want to use the connector to manage HR operations or procurement, you have to select a different table and operation and configure the Transform Message component accordingly.
In my second Transform Message component, I am providing the payload with an output as application/JSON:
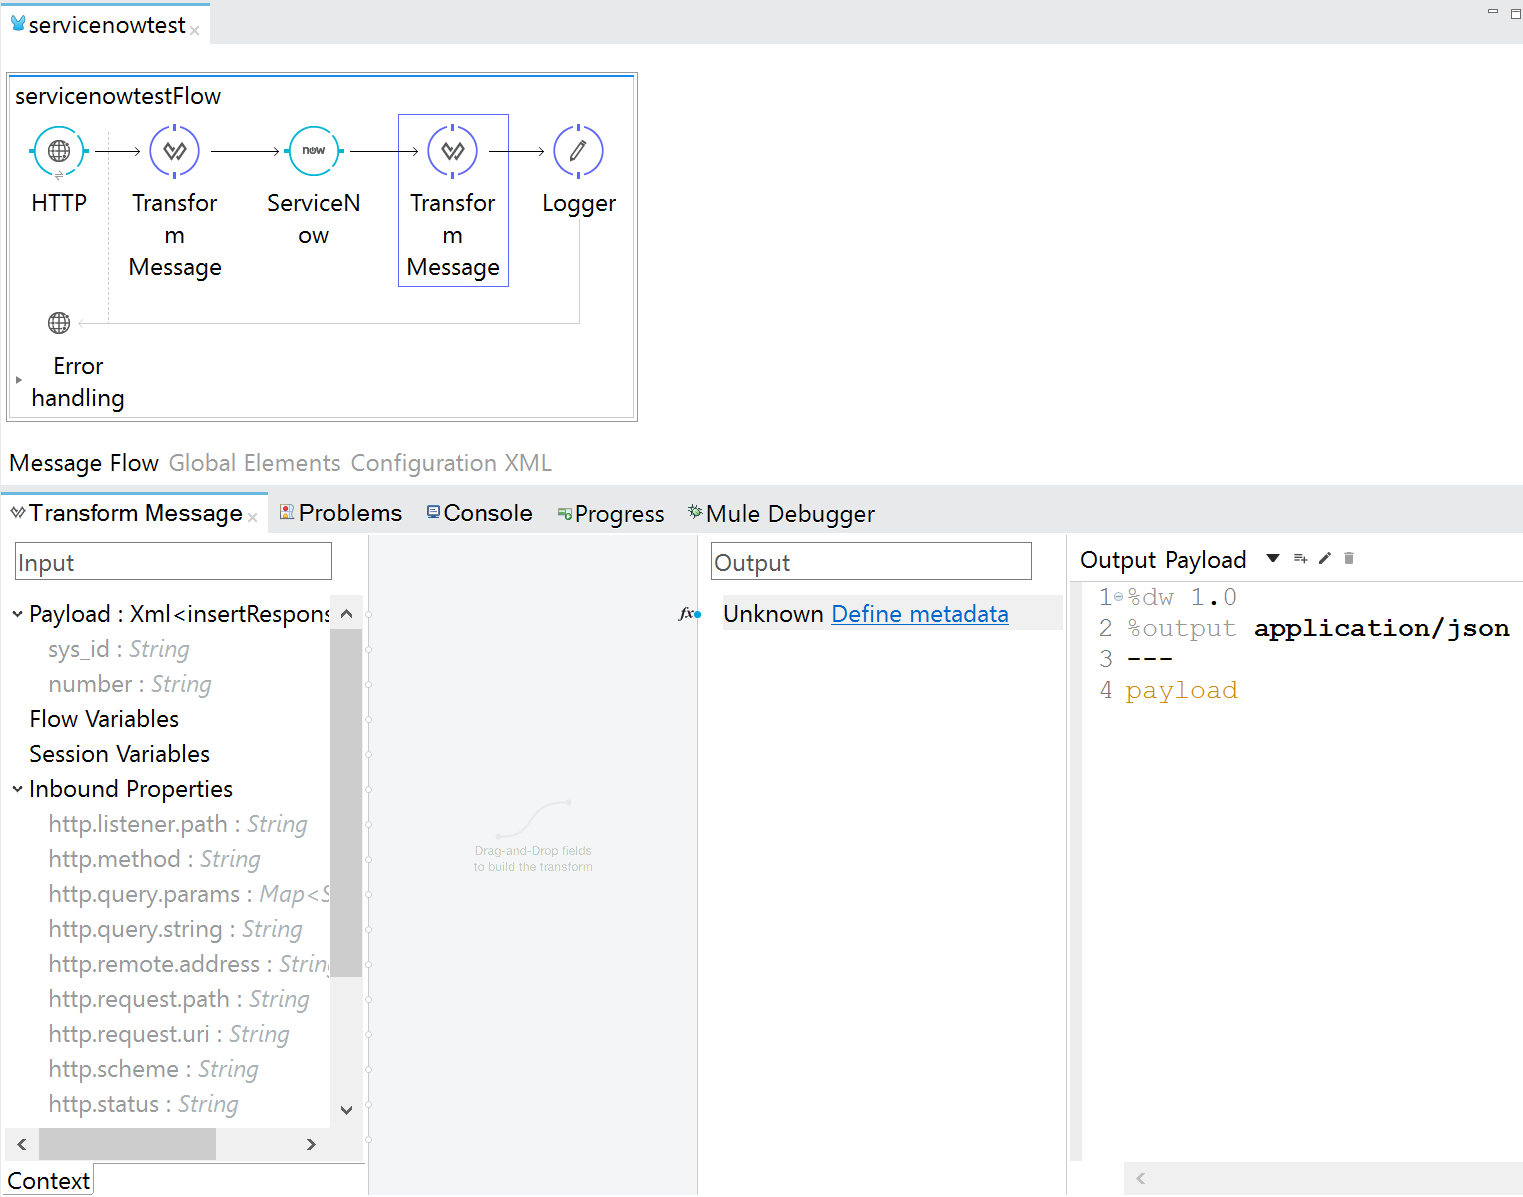
%dw 1.0
%output application/json
---
payload
This transformation is done to log the payload for tracking purposes in this demo. You can use the payload returned from ServiceNow to send the incident details to the users.
Once we have configured all components, our app is ready to be deployed and tested. Just run it and deploy it on your Mule Runtime environment.
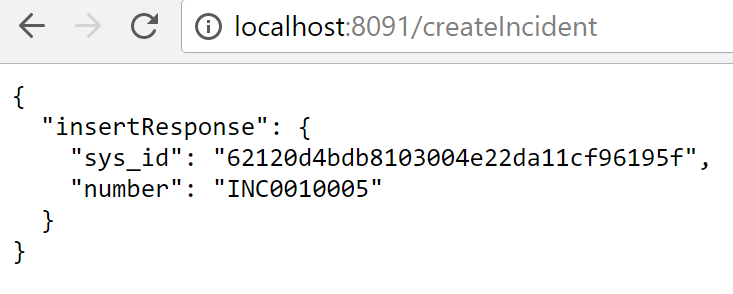
Now, your app is ready to create an Incident through ServiceNow. If you open your browser and hit you will see the following page.
You will also get a similar response on the browser :
This will create an Incident in ServiceNow portal under the Incidents page.
You need to browse through your ServiceNow instance (this is my personal ServiceNow instance). Please go to your ServiceNow instance to access the incidents.
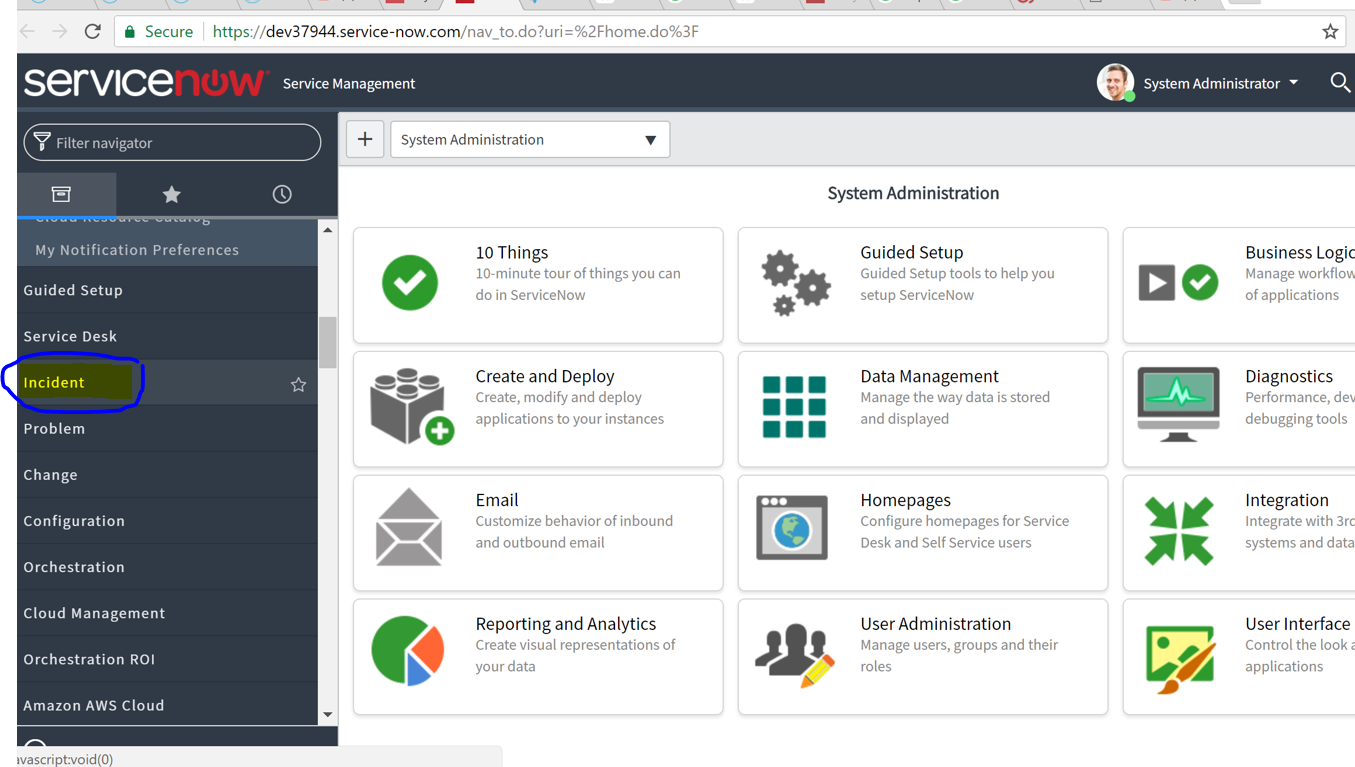
Click on “incident” and Select “ALL” options on the incident page. It will show all incidents created on this instance. You have to filter based on your incident number.
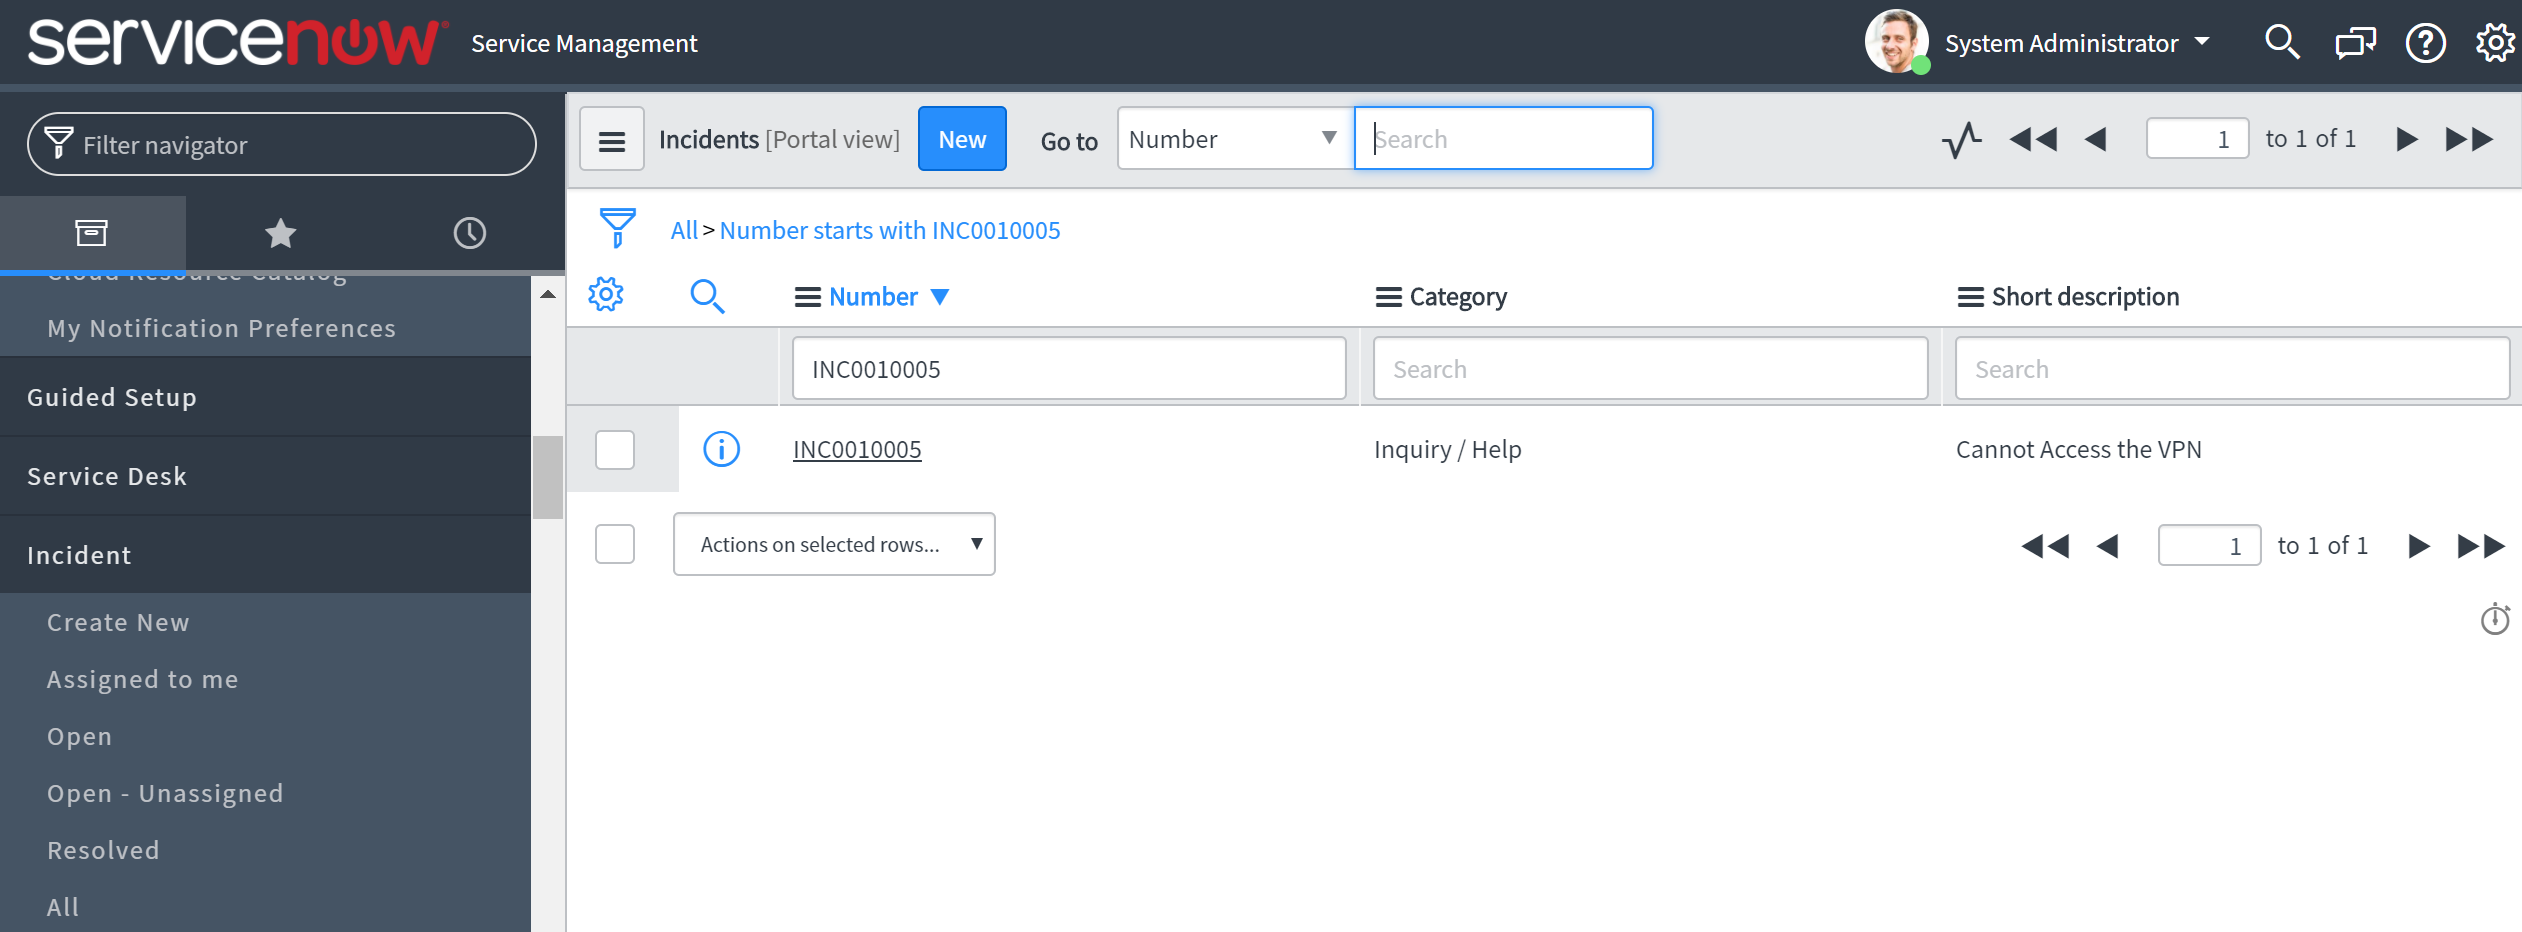
You can see that the incident has been successfully created. You can click on the incident number and check that the details are the same ones provided in your Mule app.


We have provided these details in the Transform Message component while writing the DataWeave code. We can also see that all details related to the creation of the incident have moved from Mule to ServiceNow.
This was a very basic use case of ServiceNow Connector. For new users, try the above example to get started, and for others, please share with us how you plann to use the Anypoint Connector for ServiceNow! Also, explore Anypoint Exchange to see other resources you can leverage today.
This article first appeared on Dzone.