
If you haven’t heard about the AsyncAPI support in Anypoint Code Builder (ACB), this is your perfect chance to see it in action. In part one of this content series, Design AsyncAPI Specifications With a Practical Example, we designed two AsyncAPI specifications for a practical example. After designing them, we get to the fun part: developing or implementing our APIs in ACB.
Please note that you will need an Anypoint Platform enterprise account to follow the steps in this post since we will use Anypoint MQ as the message broker for these applications. This is not available for free trial accounts.
AsyncAPI specifications summary
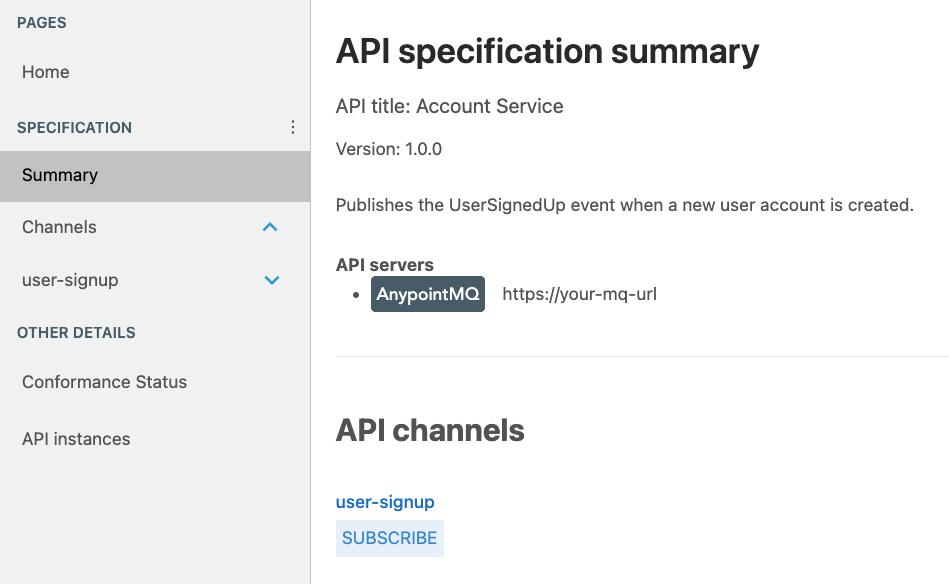
Let’s quickly recap the AsyncAPI specifications we created in the previous article. First, we created the Account Service specification, containing a user-signup channel and a subscribe operation. This means the Account Service will publish a message to the user-signup queue when a new account is created.
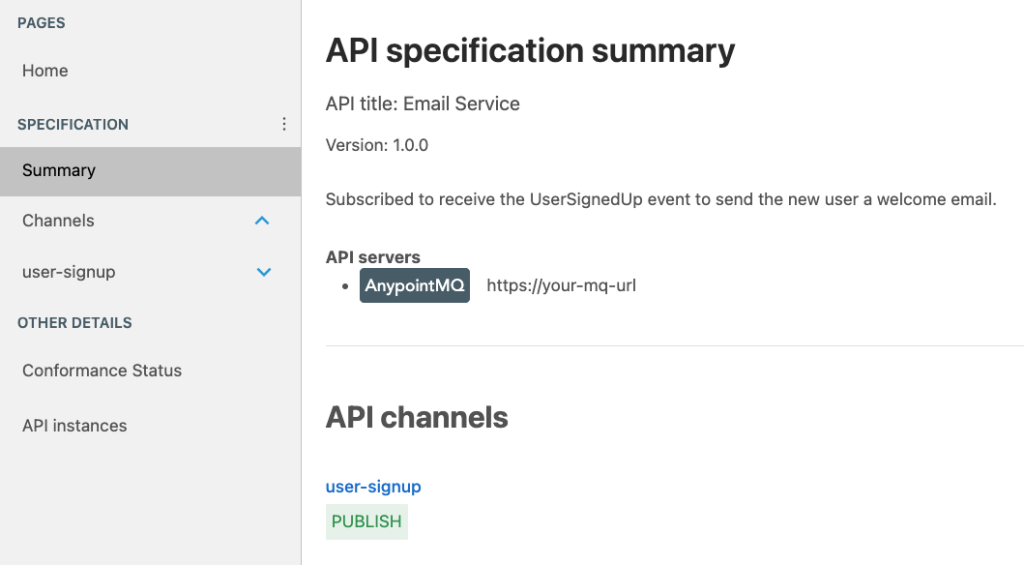
After that, we created the Email Service specification, also containing a user-signup channel but now using a publish operation. This means the Email Service will receive a message from the user-signup queue after the new account is created and will send a welcome email to the new user.
It might sound a bit confusing that we’re using the publish operation in the specification when the implementation will have a subscribe connector. Please look at the previous article for a complete explanation of how we designed these specifications and why we have to use these operations. Now that we understand how the specifications work, let’s start with the implementation.
Create the Anypoint MQ Queue
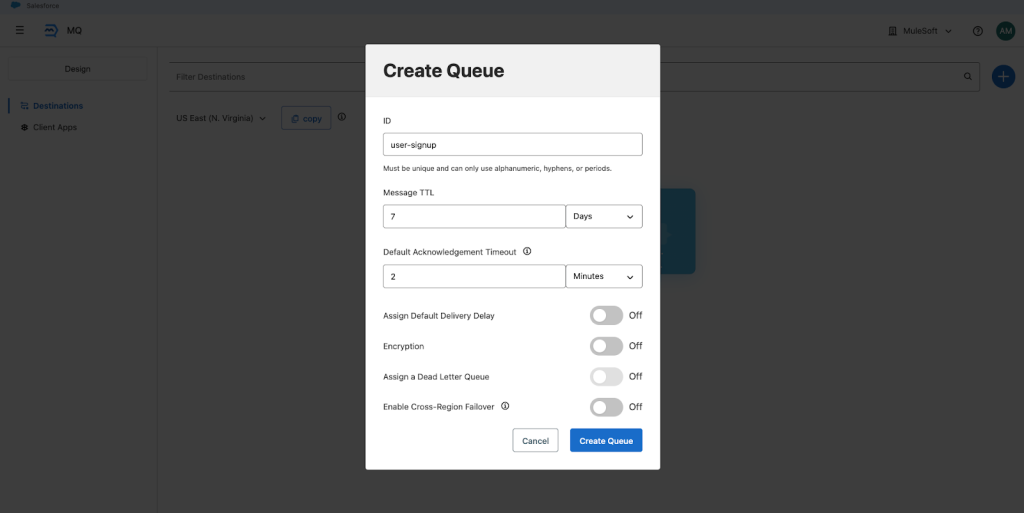
As previously mentioned, you will need an enterprise Anypoint Platform account to use Anypoint MQ. Log in to your enterprise account and head to the MQ section. Once inside, create a new queue using the blue plus button on the top-right side of the screen and name it user-signup. We’ll leave all the default options for this example. Click on Create Queue.
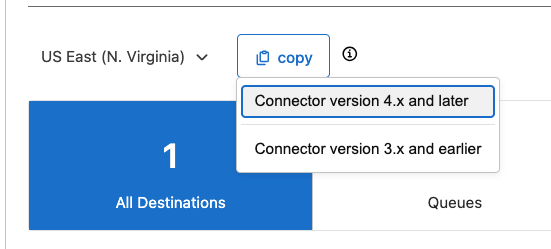
Once you create the queue, click on the copy button at the top and select Connector version 4.x and later. Save this URL because we will use it for the implementation.
After that, head to the Client Apps section on the left side of the screen. Create a new client app using the blue plus button on the top-right side of the screen and name it asyncapi. This name can be whatever you want, this is just an example. Click on Save Changes.
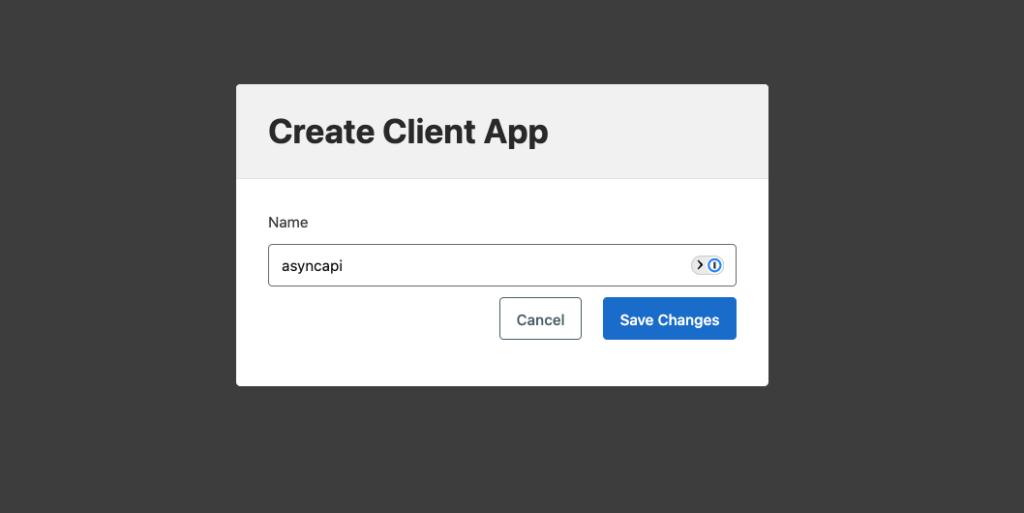
Once the app has been created, make sure you copy the Client App ID and the Client Secret. We will use these during the implementation.

That’s it for the MQ part! Now let’s head to ACB to start developing our apps.
Implement the Accounts App
Make sure AsyncAPI is enabled for your Anypoint Platform account. Then, open your Visual Studio Code in the Anypoint Code Builder tab and select the Implement an API quick action. You will see some prompts to sign in to your Anypoint Platform account. Follow them.
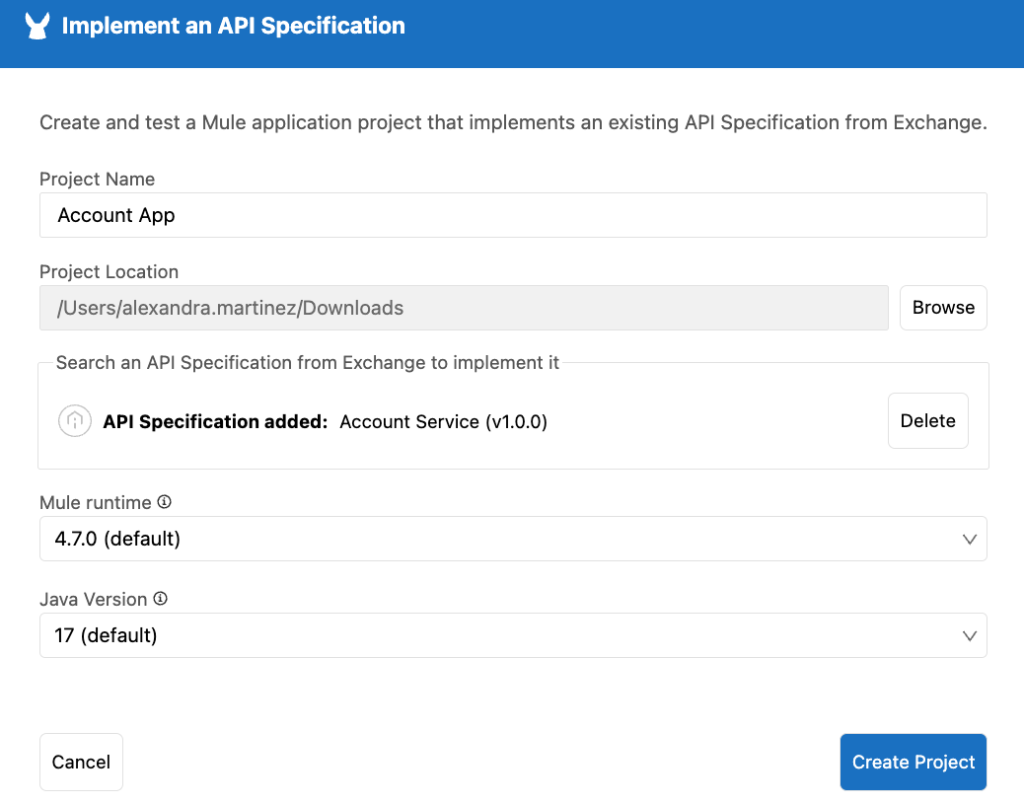
Once you’re logged in, add a project name and search for the Account Service asset from Exchange. Once you’re ready, click on Create Project.
Head to the global-configs.xml file under src/main/mule and replace the Anypoint MQ’s url (url=”https://your-mq-url”) with a property (url=”${anypointmq.server.AnypointMQ.url}”). Add an HTTP Listener Configuration to this file too. Save the file.
Head to the dev-properties.properties file under src/main/resources and make sure you have the following properties in this file:
anypointmq.server.AnypointMQ.clientAppId=

anypointmq.server.AnypointMQ.clientSecret=

anypointmq.server.AnypointMQ.url=
Add the appropriate values from your Anypoint MQ information and save this file.
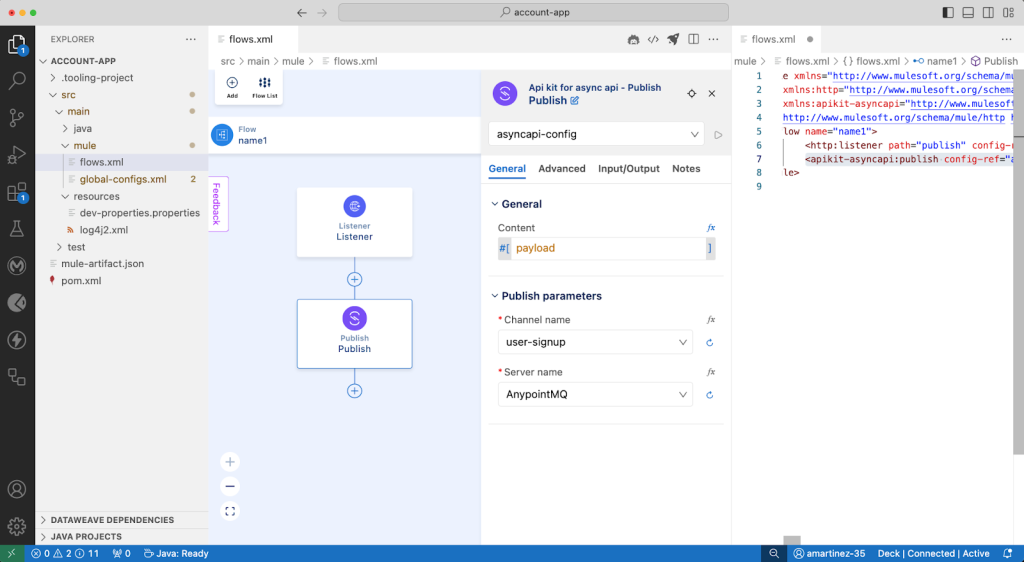
Finally, head to the flows.xml file under src/main/mule. Add a flow, an HTTP Listener with a publish path, and a Publish connector from the APIKit for AsyncAPI module (not from Anypoint MQ). Set it up using the options given to you from the specification.
Once you’re done, save the file and deploy your app to CloudHub. Retrieve the app’s URL from Runtime Manager so we can call this app later.
Implement the Email App
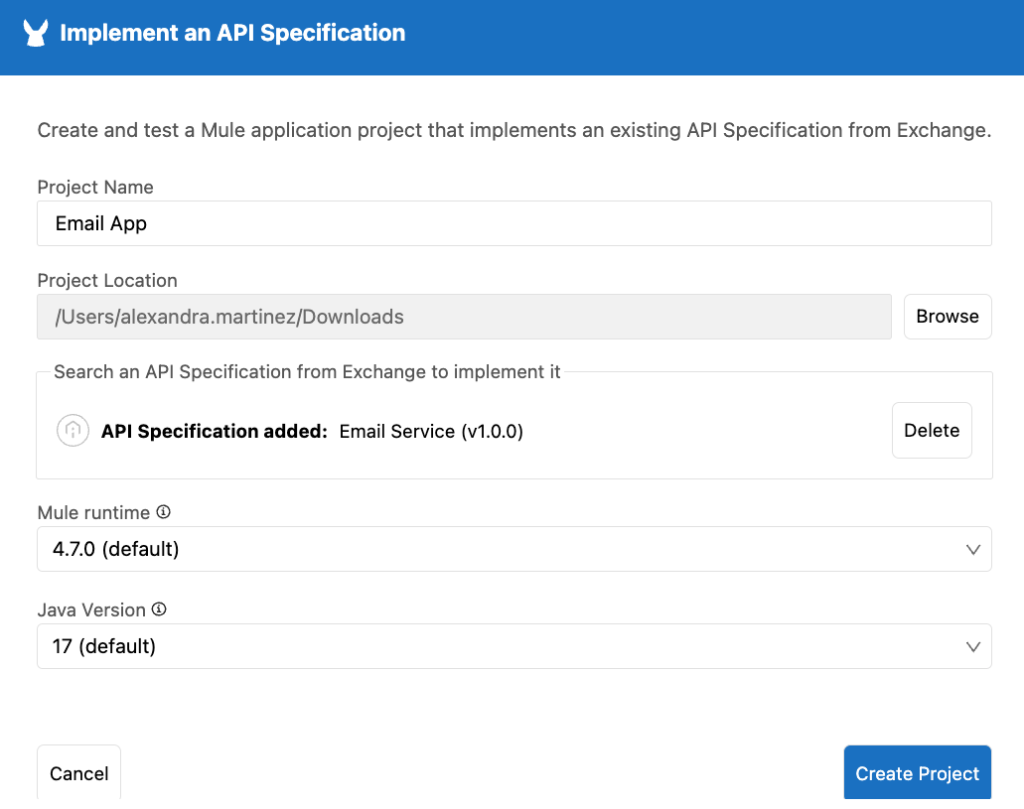
Open a new VS Code window or close the current project and open a new one. Once again, click on the Implement an API option from ACB and select the Email Service specification.
Head to the global-configs.xml file under src/main/mule and replace the Anypoint MQ’s url (url=”https://your-mq-url”) with a property (url=”${anypointmq.server.AnypointMQ.url}”). Save the file.
Head to the dev-properties.properties file under src/main/resources and make sure you have the following properties in this file:
anypointmq.server.AnypointMQ.clientAppId=

anypointmq.server.AnypointMQ.clientSecret=

anypointmq.server.AnypointMQ.url=
Add the appropriate values from your Anypoint MQ information and save this file.
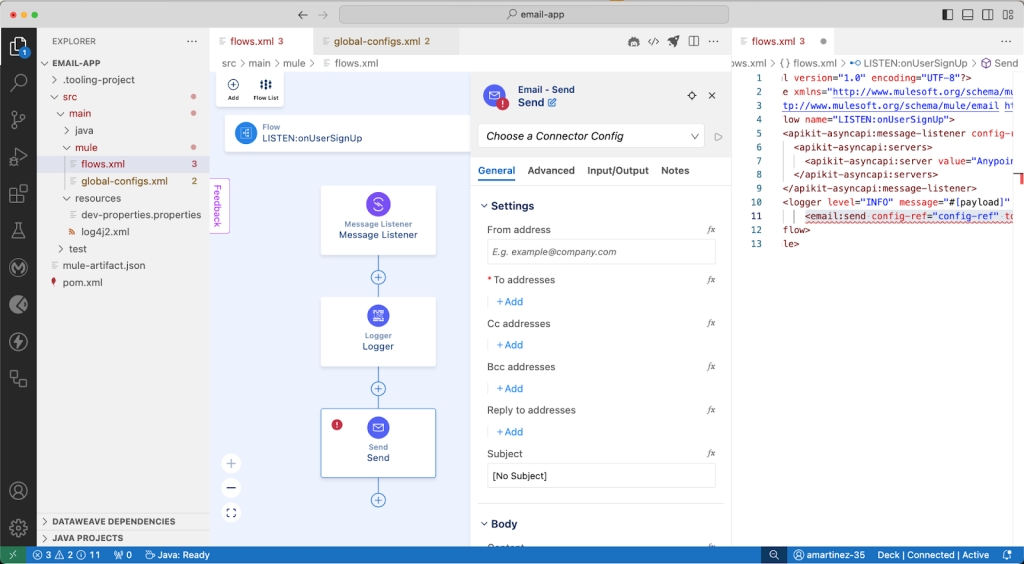
Finally, head to the flows.xml file under src/main/mule. Note that you already have a flow, a Message Listener component, and a logger. This is where you would add the needed configuration to send an email to the new user account. However, we won’t implement this logic in this post for practical purposes. You can see the documentation for further information.
Once you’re done, save the file and deploy your app to CloudHub.
Test the integration
Once both of your apps have been deployed to CloudHub, open any REST Client (Postman, ThunderClient, cURL, etc.) and make a call to your Account App’s URL.
For example: accountapp.us-e2.cloudhub.io/publish
Send the following body in the request:
{

  "firstName": "Alex",

  "lastName": "Martinez",

  "email": "fake@email.email",

  "createdAt": "2024-01-01T15:00:00Z"

}
Now if you head over to the Email App’s logs, you should see the JSON payload you just sent to the Account App.
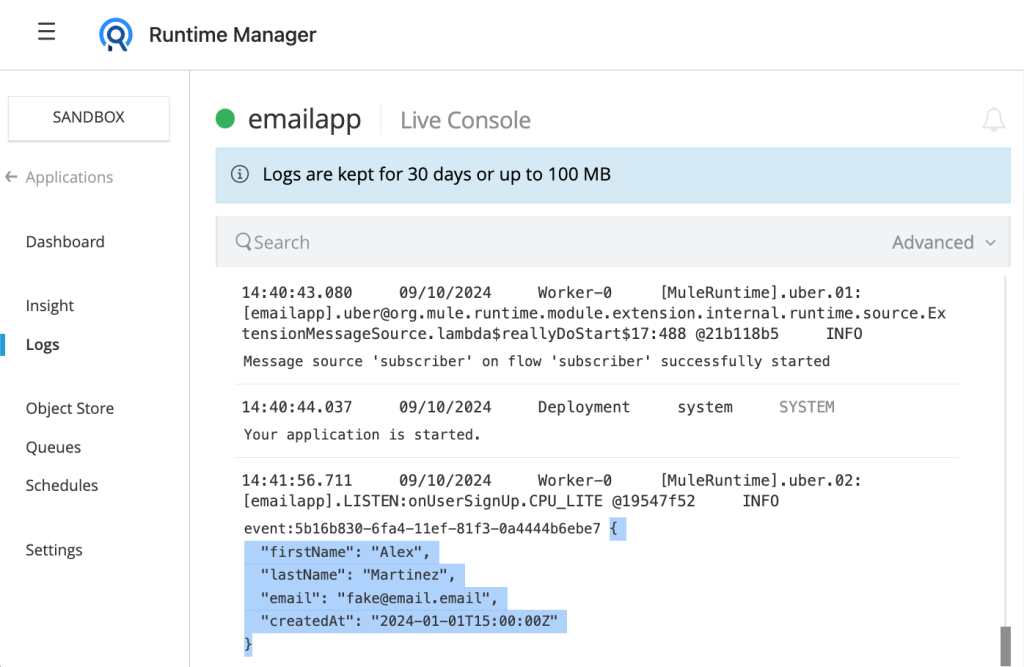
This means your payload was successfully published to the queue and the Email App was able to pick it up and process it.
Your first AsyncAPI spec in ACB
Congratulations on developing your first AsyncAPI specifications in Anypoint Code Builder! It wasn’t that bad, right? Now you can see the real added value of this new way of implementing AsyncAPIs. Instead of having to create all the code from scratch, you can base your implementations on your AsyncAPI specifications. It not only gives you a skeleton of the new app, but it also guides you on how to use best practices like using properties or keeping a global configurations file.
To continue learning, study the following resources for more information:


