MuleSoft customers now have immense flexibility to use their preferred third party tools such as Terraform, ArgoCD, and FluxCD to declaratively configure and deploy Mule applications on Anypoint Runtime Fabric. Rather than taking imperative actions using CLI or UI, or making custom integrations of CI/CD tools using MuleSoft APIs, you can now get the declarative functionality using the same tools that you preferably use for the rest of your Kubernetes ecosystem.
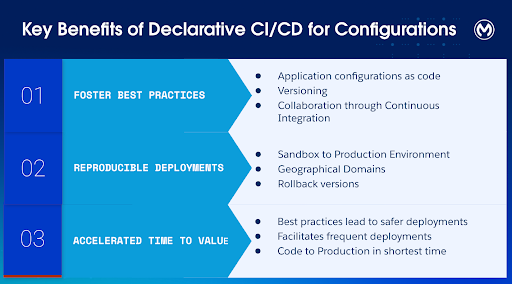
This enables you to treat Mule application configurations as code that you can manage solely through an access-controlled repository, creating a single source of truth. As you foster robust DevOps practices like versioning, traceability, and auditability of your application configurations, you build a strong foundation for better collaboration across IT, SRE, and development teams. This facilitates safe, rapid, and reproducible deployments across environments and geographic domains, accelerating the time-to-value of taking Mule applications from code to production.
MuleSoft’s Anypoint Platform is the industry leader for API-led connectivity, offering a unified hub for governance and flexible deployments. For hybrid models, Anypoint Runtime Fabric (RTF) allows users to run containerized Mule applications on their own Kubernetes clusters.
While the Runtime Manager UI is excellent for manual updates, our customers need better automation and traceability. To date, this required building custom API integrations or using Maven plugins – both of which demand significant maintenance to keep pace with new features.
To support a wider ecosystem of Kubernetes-native tools like ArgoCD and FluxCD that automatically manage configuration drift, we are introducing Anypoint Controller.
Anypoint Controller: A Kubernetes-native interface
Built using the Kuberentes’ well-established Operator pattern, Anypoint Controller enables you to declare MuleSoft applications as a Kubernetes Custom Resource that you can deploy using Kubernetes APIs or kubectl. Many deployment tools including Terraform Kubernetes provider, ArgoCD and FluxCD support Kubernetes Custom Resource, allowing you the flexibility to pick and (if needed) later switch to different tools without any significant overhead.
You can specify all of the deployment related configurations. For example, you specify the amount of CPU and Memory to be allocated for your applications, the number of replicas, whether you want rolling deployments, and more through a single deployable file. There are some additional new capabilities that you can configure exclusively on, such as Secrets mounting that you can learn more about from the user guide.
Adopting the deployment tool means that you:
- Create new versions of the template file when you wish to make updates through Git operations, and not through UI or CLI to ensure the template is the single source of truth. To reinforce this, UI only offers a ReadOnly view for applications deployed using Anypoint Controller.
- Automatically deploy newer versions following your established deployment pipelines.
- Anypoint Controller detects any changes to the declared state, and automatically takes actions to meet the desired state.
- Optionally, you may put checkpoints in your deployment pipelines to identify and rollback to previous versions safely.
Getting started with Anypoint Controller
Now, let’s go over how you can deploy and manage your Mule application deployment using Terraform, a popular CI/CD tool that supports Kubernetes deployments.
Prerequisites:
- Running Kubernetes cluster where you want to deploy your Mule apps
- Mule application published on MuleSoft Exchange
You’re now ready to install your Runtime Fabric and to install the Anypoint Controller to the Kubernetes cluster.
How to install Anypoint Runtime Fabric Agent with Anypoint Controller enabled on Kubernetes
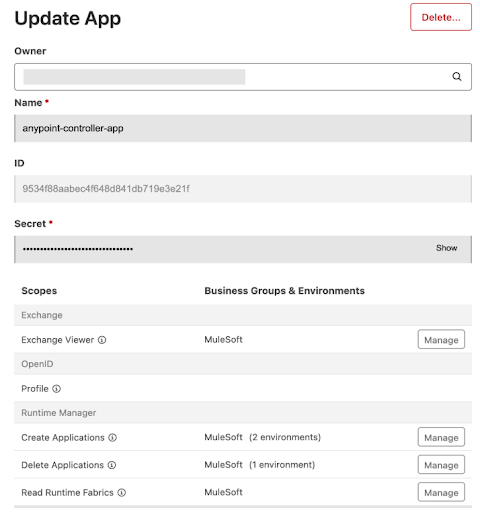
Create a Connected App on Anypoint Platform to provide credentials and permissions to Anypoint Controller. At minimum, you need to provide the permission to Read RTF, Create, and Delete Applications.
Use the ID and Secret from the Connected App and create a Kubernetes Secret for them in the same namespace where you will install the RTF as described below.
apiVersion: v1
kind: Secret
metadata:
  name: anypoint-credentials
  namespace: <same-as-rtf-namespace>
type: Opaque
data:
  anypointcredentialid: <from-connected-app-id>
  anypointcredentialsecret: <from-connected-app-secret>
To install Runtime Fabric, go to Runtime Manager and create a new Runtime Fabric using Helm. The UI guides you to download a values.yaml file. Then, update the values.yaml file with the following configurations to install the Anypoint Controller and the Custom Resource Definition of Mule applications.
[source,yaml]
----
global:
  crds:
    install: true

agent:
  rtfd:
    anypointController:
      enabled: true
----
Next, install the RTF agent using the updated values.yaml file.
[source,bash]
----
helm install rtf-agent <chart-repo>/rtf-agent \
  -f values.yaml \
  -n <rtf-namespace>
----
Now you’re ready to define Mule applications as a Kubernetes Custom Resource using your preferred tool.
Defining Mule applications
Depending on your preferred tool, you may either create a yaml file for the Mule applications or use the tool specific template file. Here we are using the Terraform.
All the parameters that you would otherwise define through the Anypoint Platform UI or Mulesoft APIs can now be defined in the format that your deployment tool understands. For example, you can define the specifications such as the runtime version, the environment, the artifact ID, the number of replicas, and the resources to allocate to your application.
Here is an example of a Mule application described as a Terraform file:
resource "kubernetes_manifest" "hello_world_app" {
  manifest = {
    apiVersion = "rtf.mulesoft.com/v1"
    kind       = "MuleApplication"

    metadata = {
      name      = "hello-world-app"
      namespace = "mule-apps"
    }

    spec = {
      target         = "production-rtf"
      businessGroup  = "MyOrg/Engineering"
      environment    = "Production"
      runtimeVersion = "4.8.0:2e-java8"

      application = {
        group      = "my-org"
        artifactId = "hello-world"
        version    = var.app_version
        packaging  = "jar"
      }

      replicas = 2

      resources = {
        requests = {
          cpu    = "500m"
          memory = "1Gi"
        }
        limits = {
          cpu    = "1000m"
          memory = "2Gi"
        }
      }
    }
  }
}
----
Deploying the Mule application
To deploy, you can run a simple Terraform apply command. Terraform creates a plan of what changes it will make to the custom resource and will prompt you to confirm if you want to proceed with the changes. You can add the auto-approve flag to skip this interaction.
[source,bash]
----
terraform apply -auto-approve
----
Since this is the first time, the plan is to create the Mule application custom resource. The real benefits of deploying through an automated tool are realized for future updates. Any update to the Mule application configuration would follow the exact same steps. You will create a new version of the configuration file to reflect your desired state of your application configuration. As you push through the deployment, Anypoint Controller would identify that the desired state has changed and take the necessary actions.
As a result, you are assured that the configuration in the runtime always matches what you have defined in the configuration file.
Automate deployments with Anypoint Controller
With the addition of Anypoint Controller to deploy Mule applications to Anypoint Runtime Fabric, you can now use a wide breadth of tools available to automate deployments. To learn more, check out the user guide and accelerate your DevOps with automated, declarative deployments.