Enterprise technology continues evolving with AI agents moving beyond simple chat interfaces to autonomous digital workers. To empower these agents to act across an entire organization, a robust integration layer is essential. This is where MuleSoft for Agentforce comes in, providing the crucial connectivity that allows AI agents to access and act on data from any system.
Powering MuleSoft for Agentforce
By combining MuleSoft’s integration capabilities with Agentforce’s autonomous agents, organizations can unlock powerful new use cases. For example:
- Increase order completion from abandoned cart: An agent can receive a high-level task, such as “Send abandoned cart emails to users from the last 7 days.” The agent can then use MuleSoft APIs to query the e-commerce system, retrieve customer data, and trigger the email-sending process through a marketing API.
- Real-time customer logistics agent: Queries real-time logistics and inventory data via MuleSoft APIs, sends updates to customers on delayed orders, recommends rerouting from nearer warehouses, reducing cancellations and improving satisfaction.
7 steps to set up the integration
Here are the steps needed to invoke MuleSoft APIs from Agentforce agents:
1. Establish a trusted relationship
You need to establish a secure connection between your Salesforce org and the MuleSoft Anypoint Platform. This is done by exchanging tenant keys between the two platforms.
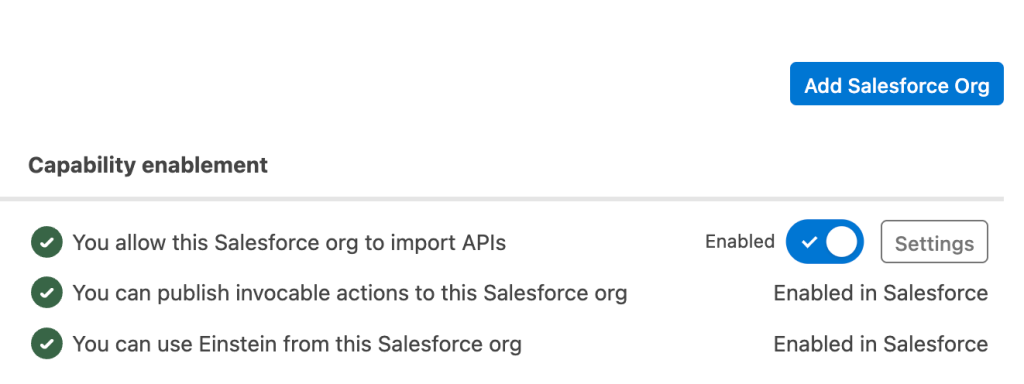
- Obtain Salesforce org tenant key: In Salesforce, navigate to Setup > Quick Find > Anypoint Platform Setup. Click View Connection Info and copy the Salesforce org tenant key
- Enter tenant key in Anypoint Platform: In the MuleSoft Anypoint Platform, go to Access Management > Salesforce. Click Add Salesforce Org button, paste the Salesforce org tenant key you copied in Step 1, and click Add
- Provide Anypoint Platform org key: The Anypoint Platform will provide an org key. Copy this key
- Complete the connection in Salesforce: Go back to your Salesforce org, paste the Anypoint Platform org key, and click Connect
- Enable a trusted relationship: In your Anypoint Platform account, go to Access Management > Salesforce and toggle the setting to enable the trusted relationship for your Salesforce org
2. Create and implement an API spec
- Create API spec: You can either use the guided method within the Design Center, create an API Spec manually, or let AI create one for you with Anypoint Code Builder
- Publish the API spec: Once the API spec has been defined with all the endpoints and examples, publish the API Spec to Exchange
- Implement the API spec: You can let Anypoint Studio or Anypoint Code Builder auto-implement the API spec from Exchange and scaffold flows for you
- Check response type: Ensure the API sends the same response type as what the Agent would expect. E.g. application/json
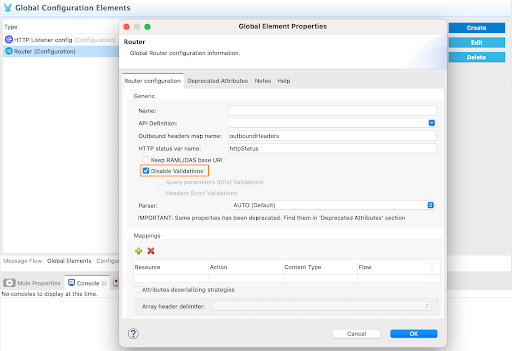
An alternative for testing is to Disable Validations for the Router element in the Global Configuration Element Properties pane - Deploy the API: Deploy the API to CloudHub
3. Import APIs into the API Catalog
You can now import your APIs from Anypoint Exchange into the Salesforce API Catalog.
- Tag APIs in Exchange: To make the API discoverable, ensure the API Spec has the sf-api-catalog tag in Anypoint Exchange
- Create an API instance: Create an instance of the API Spec from Exchange within API Manager
- Add a consumer endpoint: The API must have a Consumer Endpoint defined in API Manager. Use the URL of the CloudHub app as the Consumer Endpoint
- Sync the API Catalog: In Salesforce, navigate to Setup > Quick Find > API Catalog. Under the MuleSoft tab click Start the sync or press the refresh button. This will import the tagged APIs. Note this can take a few minutes
4. Activate API Actions
Once the APIs are in the API Catalog, you need to activate their operations as Agent Actions.
- Activate actions: In the Salesforce API Catalog, select the imported API and click Activate Actions
- Configure connection: Select the Destination URL, click Create and Continue. This process automatically creates the necessary external credentials, named credentials, permission sets and permission set groups in Salesforce
5. Configure permissions
Assign the necessary permissions to users so they can access the new API actions.
- Manage user assignments: After activating the actions, click Manage User Assignments
- Assign permission set: Select the user or users who need access and assign the new permission set that was automatically created in the previous step
6. Create a new Agent Action
Now, you can create a new Agent Action that references the activated API operation.
- Create agent action: In Salesforce, navigate to Setup > Quick Find > Agentforce Assets
- Select API and operation: Under the Actions tab in Agentforce Assets Library click + New Agent Action, select API as the reference action type, MuleSoft as the reference action category, and choose the specific API operation you want to use from the reference action dropdown
- Configure inputs/outputs: Define the instructions for the Agent Action, including the input and output parameters
7. Add the Agent Action to Agent Builder
Finally, add your new Agent Action to the Agent Builder to make it available for use by an agent.
- Go to Agent Builder: Navigate to Agentforce Agents under settings in Salesforce and open your agent in Agent Builder by clicking Open in Builder
- Assign action to topic: Click the Topic for your agent where you want to add a new action and click over to the This Topic’s Actions tab. Click the New dropdown, and select Add from Asset Library and choose the Agent Action you created in the previous step
Once saved, press the Refresh icon in Conversation Preview and test the integration by providing a prompt to your agent that triggers the MuleSoft API operation.
A job well done
Congratulations! Using the guidelines above, you just built an API Specification, shared it in Exchange, implemented the API, deployed it to CloudHub, synced it with Salesforce and were able to call the API from an Agent Action in Agentforce. Go ahead, share your win with others!