There’s a lot of talk about the new AsyncAPI support in Anypoint Code Builder. Still, before implementing some APIs (or services) with event-driven architecture (EDA), it’s important to understand why we chose this architecture. Not only that, but it’s important to understand how to design our specifications properly before implementing the APIs.
We’ll show you how to design some AsyncAPI specifications in Design Center that can be applied to a practical use case. This practical example was inspired by content from the official AsyncAPI website.
Use case and architecture
Let’s say we need to implement some architecture to handle the following feature: every time a new user account is created or a new user has signed up on your website, you need to send a welcome email to that new user.
You could handle this use case with synchronous APIs. However, that means you’re gonna make the user wait until the email is sent instead of just sending a “successfully subscribed” message to your website and handling the welcome email later.
But since you know all about AsyncAPI and EDAs, you’re choosing to create two different services (or Async APIs): one to handle the account signups and another one to send the welcome email. This way, your new users don’t have to wait until they receive the email to continue navigating your website. Instead, they’ll receive it whenever it’s processed by a message queue.
This architecture would look like the following:
Based on this architecture, we’ll have one single queue and two different services to handle the feature. So, we’ll need to create two AsyncAPI specifications: one for the Accounts service and one for the Email service.
Let’s start by designing the Accounts service in Design Center. You will need an Anypoint Platform account for this. If you don’t have one already, you can get a free 30-day trial when signing up. After you log in, navigate to Design Center to get started.
Accounts Service
Once you’re in Design Center, click on Create > New AsyncAPI. Add the name Account Service and the specification language AsyncAPI 2.6 (YAML). Click Create API.

Note: For this article, AsyncAPI version 3.0 is already available at time of writing, but it was not yet supported by Design Center.
We can get started by adding a description:
asyncapi: '2.6.0'
info:
  title: Account Service
  version: '1.0.0'
  description: Publishes the UserSignedUp event when a new user account is created.
Then, we want to add the servers we will be using in this specification. We will create an AnypointMQ server to implement it in the next post. It should look like this:
servers:
  AnypointMQ:
    url: https://your-mq-url
    protocol: anypointmq
After that, we’ll be adding the channels section. In this case, we will only have one queue (or channel) called user-signup. The Accounts service will publish the user information to the queue. This means we have to select a subscribe operation for this queue. It sounds weird to have a subscribe operation when we are publishing, but imagine you’re describing the actions from the queue’s perspective. In that case, the queue is expecting to receive a message from the Accounts service.
channels:
  user-signup:
    subscribe:
      operationId: emitUserSignUpEvent
      message:
        $ref: "#/components/messages/UserSignedUp"
Finally, we have to define the components section with the UserSignedUp message, as we just defined in the previous line. In this case, our message will contain an object with the following fields: firstName, lastName, email, and createdAt.
components:

  messages:

    UserSignedUp:

      payload:

        type: object

        properties:

          firstName:

            type: string

            examples:

              - Alex

          lastName:

            type: string

            examples:

              - Martinez

          email:

            type: string

            examples:

              - fake@email.email

          createdAt:

            type: string

            examples:

              - 2024-01-01T15:00:00Z
The full specification should look like this. Make sure you’re able to see the correct servers and channels on the right of the screen before continuing.

If everything looks good, keep this tab open in your browser (we’ll need it later) and open a new tab. Navigate to Design Center on the new tab. Now, let’s design the Email Service.
Email Service
Follow the same steps as before to create a new AsyncAPI specification, but the name for this one should be Email Service.
Same as before, let’s start by adding a description:
asyncapi: '2.6.0'

info:

  title: Email Service

  version: '1.0.0'

  description: Subscribed to receive the UserSignedUp event to send the new user a welcome email.
Then, make sure you use the same server as before:
servers:

  AnypointMQ:

    url: https://your-mq-url

    protocol: anypointmq
The channel name (user-signup) should also match the previous one because we are using the same queue for both services. But in this case, we are not using the subscribe operation. Instead, we will use publish. Again, if you see it from the queue’s perspective, the queue will publish this message to the Email service.
channels:

  user-signup:

    publish:

      operationId: onUserSignUp

      message:

        $ref: "#/components/messages/UserSignedUp"
Finally, the component should also match the one on the Accounts service:
components:

  messages:

    UserSignedUp:

      payload:

        type: object

        properties:

          firstName:

            type: string

            examples:

              - Alex

          lastName:

            type: string

            examples:

              - Martinez

          email:

            type: string

            examples:

              - fake@email.email

          createdAt:

            type: string

            examples:

              - 2024-01-01T15:00:00Z
The full specification should look like this. Make sure you’re able to see the correct servers and channels on the right of the screen before continuing.

If everything looks good, now it’s time to publish our specifications!
Publishing to Exchange
At the top-right side of the screen, you’ll see a Publish button. This will publish our specifications to Exchange, where we’ll be able to reuse them to implement these APIs later. Once you press the button, make sure the versions look correct and the LifeCycle State is Stable. Click on Publish to Exchange. Repeat this process for both specifications.

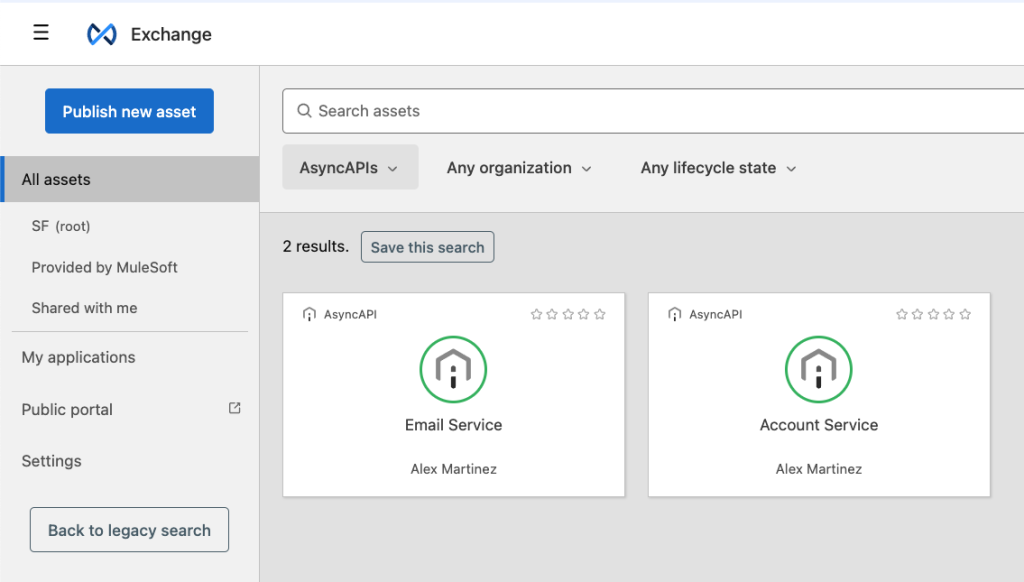
After this, you can navigate to Exchange to make sure both specifications were published correctly.

And that’s it! Congratulations, you successfully designed your first AsyncAPIs using a practical example. Next step: implement these APIs using Anypoint Code Builder!
Ready to design AsyncAPI specs
Designing AsyncAPI specifications in Design Center is pretty much the same feeling you get when designing other API specifications like RAML or OAS. You get suggestions of what to write next, a visual preview of what you’re designing, and you can publish your specifications to Exchange for others to discover.
To continue learning more, check out our resource list:
Watch:
Read:


