
The latest release of Anypoint Code Builder (June 2024) includes the ability to create a new Mule project and scaffold its flows using the APIKit configuration for an AsyncAPI specification. However, this AsyncAPI functionality was released on June 25, 2024, in an Open Beta version.
If you are familiar with the API specifications (RAML or OAS) we have been able to create with MuleSoft’s Design Center for years, AsyncAPI is another type of specification: one that is unique to designing event-driven architectures (EDA). With AsyncAPI, you can create specifications to define how your EDA will work. You can define servers, messages, operations, channels, and more. Unlike the HTTP resources, methods, or status codes generated in RAML/OAS.
We’ll cover how to:
- Enable the AsyncAPI Open Beta for your account
- Create an AsyncAPI specification in Design Center
- Publish the specification to Anypoint Exchange
- Scaffold the Mule flows in Anypoint Code Builder
Let’s begin by enabling the Open Beta version for your Anypoint Platform account.
Enable AsyncAPI Open Beta
Log in or sign up to Anypoint Platform. Once inside, head to Code Builder by clicking the Get Started button from the home page. You will see a message about the AsyncAPI Implementation Beta at the top of the screen. Click the Join Beta button, accept the terms and conditions, and click Get Access.
Please note that this can only be done by an organization administrator. If you are using a free trial account, you are the admin by default.

Once you see the green checkmark, you and every other user in the organization can start using this functionality in either Anypoint Code Builder or Anypoint Studio. However, we will learn how to use it in ACB for this post.
Now let’s design and publish our first AsyncAPI specification.
Publish an AsyncAPI specification
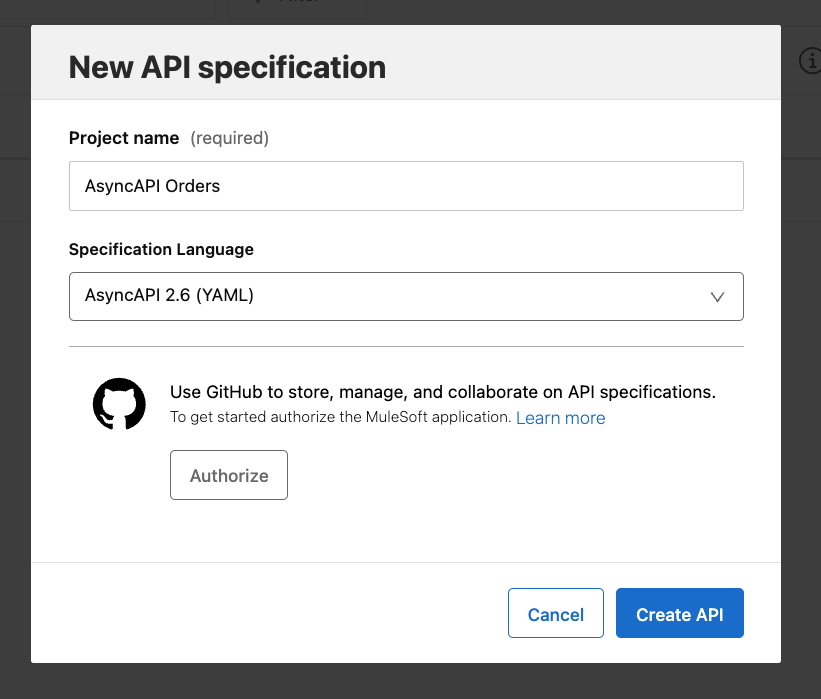
Head to Design Center from the hamburger menu on the top left of the screen. Click on Create > New AsyncAPI. Add a name for your specification and select your preferred language. In our case, we are naming it AsyncAPI Orders and using the AsyncAPI 2.6 (YAML) language. Click on Create API.
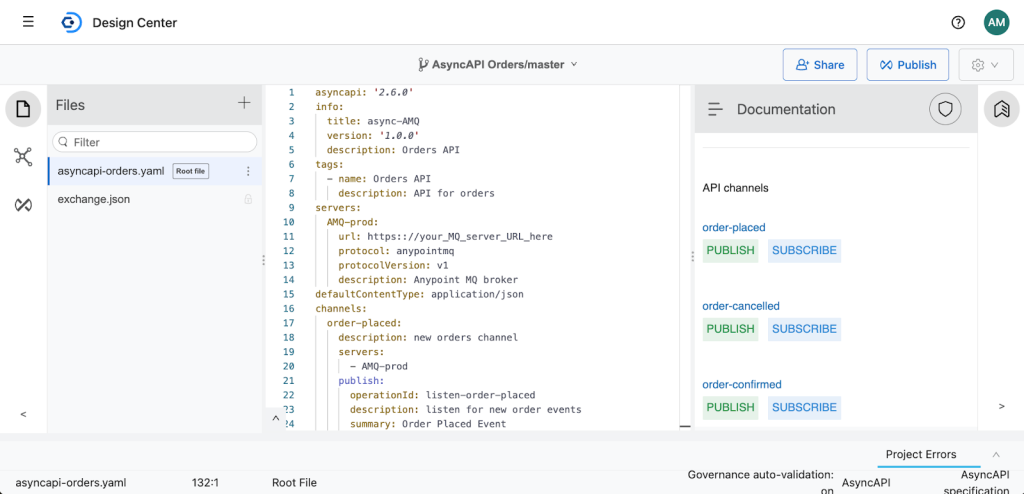
Once inside the editor, copy and paste this specification. In this specification, you will find:
- An example of an Anypoint MQ server
- Four channels: Order placed, cancelled, confirmed, and back-ordered
- Four messages: OrderPlaced, OrderConfirmed, OrderCancelled, and BackOrder
Note that you can add Rulesets from this section if you want to add governance to this specification. To do this, you can head to the Dependencies tab from the far left of the screen and add the Rulesets you want to verify. We won’t be adding them in this post, but it’s good to know you can do that from here.
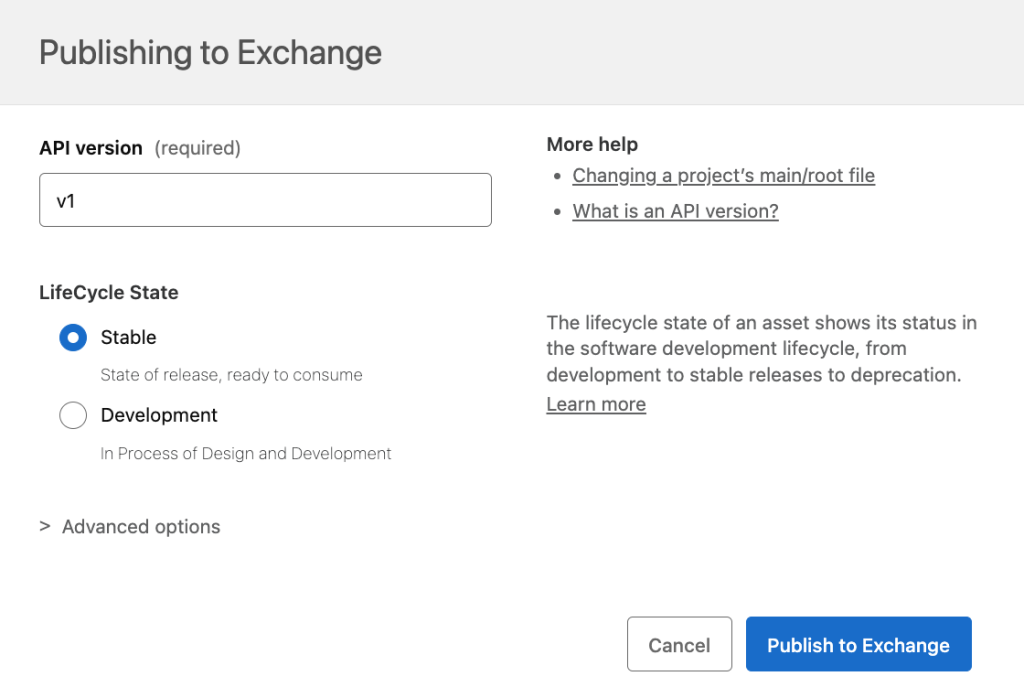
Once you are happy with the AsyncAPI specification, click on the Publish button at the top right of the screen. Verify your asset version and API version (1.0.0 and v1 accordingly), and make sure the Stable state is selected. Otherwise, you won’t be able to scaffold the flows for this specification. Click on Publish to Exchange.
After it is published, you are now ready to start implementing this specification!
Scaffold the flows
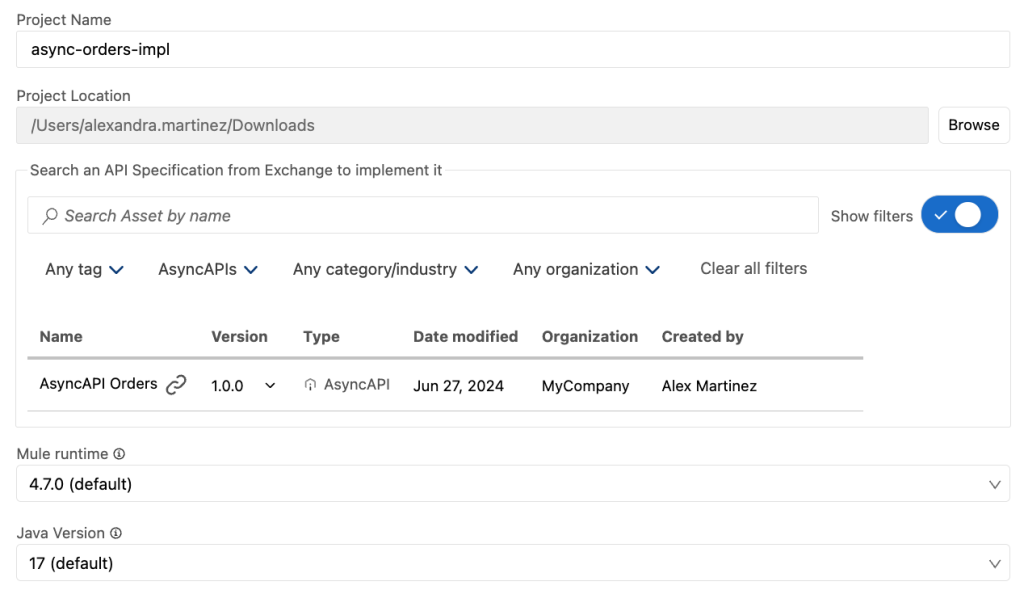
Head to Anypoint Code Builder and click on Implement an API. Follow the prompts to sign in to the Anypoint Platform account where you enabled the open beta version. Once logged in, you can search your specifications by name or using the filters. Click on the Add Asset button next to the specification you just published to Exchange.
After the asset has been added, click on Create Project to start scaffolding the flows and creating the Mule project.
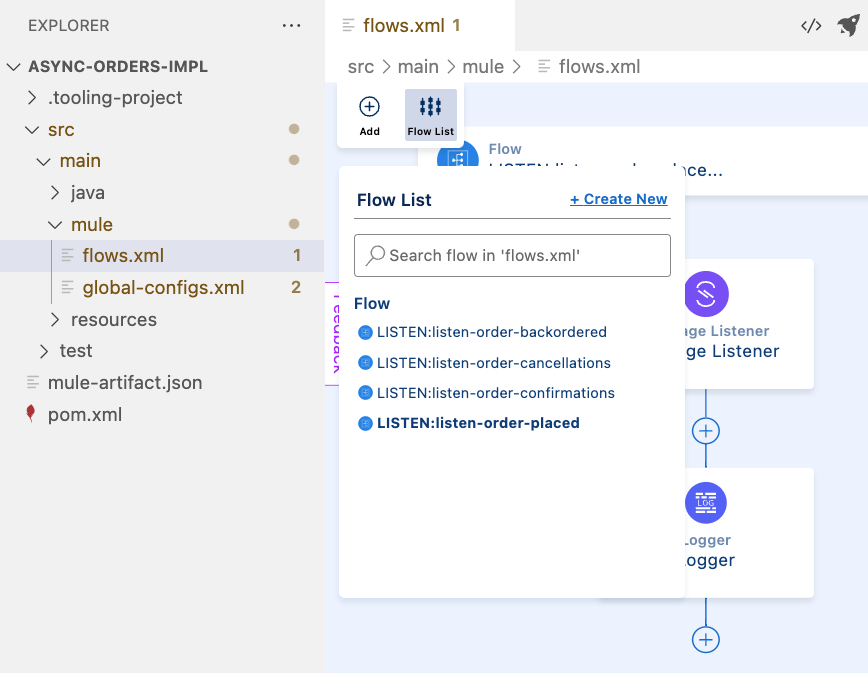
Once the project finishes processing, notice there are two files under src/main/mule – one containing all the implementation flows and the other one containing all the global configuration elements. This matches our best practices when organizing Mule projects!
You can also notice that there are a total of four flows created; one for each channel we defined on our specification.
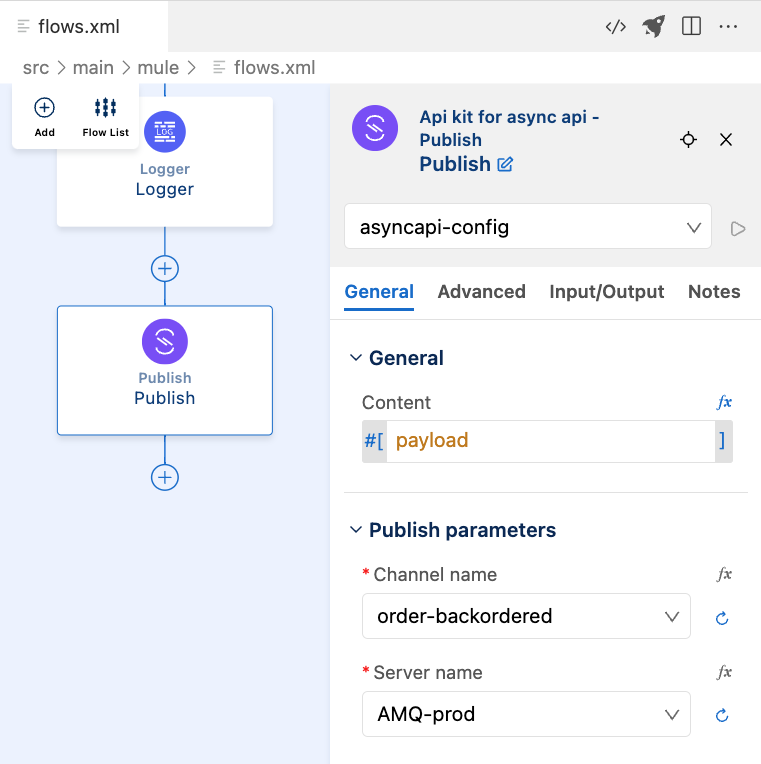
Each of these flows is created with a Message Listener component. You might be wondering where exactly is the publishing taking place. You would have to add the Publish component when you design the logic of your implementation to make sure the messages are being sent to the appropriate channel after being transformed correctly.
To add a Publish component, you can click on the + button in the canvas, and select Connectors > APIkit for AsyncAPI > Publish. Once the component is added to the flow, you can click on it to open the config panel and select the appropriate values for the connector configuration, channel name, and server name. Below is an example of what this looks like.
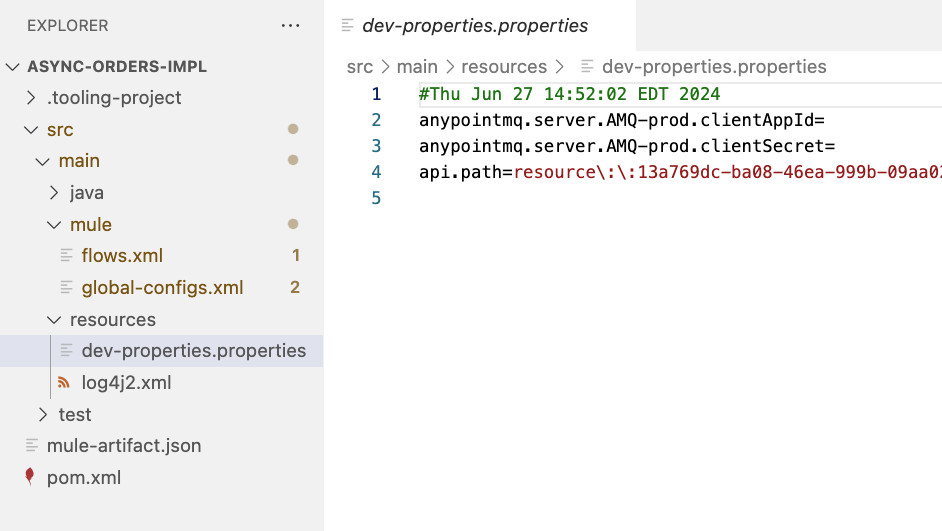
Furthermore, under src/main/resources, there is a properties file included. Again, following best practices, the naming convention of the file contains the environment (in this case, dev). Here, you will be able to find the properties to add the Anypoint MQ credentials to connect to your broker’s instance.
Not only the flows were scaffolded, but the new project contains best practices too! Isn’t that amazing?
Conclusion
We can easily see the usefulness of scaffolding your flows from a previous specification. You might have seen APIKit in action before when creating REST API Specifications. You can scaffold flows using APIKit for different specifications like GraphQL or OData. Now the AsyncAPI support has been added to this toolkit’s belt.
The ACB team is continuously gathering feedback to improve the tool in future releases. Check out the following resources to learn more about Anypoint Code Builder and to send your feedback: