Organizations running Apache Tomcat in production on Windows often want to run Tomcat as a Windows service. This removes the need for someone to be actively logged into the server and provides an easy way to integrate with Windows management tools. In this blog, I will explain the easiest way to run Tomcat as a Windows service and how you can do this for multiple instances as well.
Running an instance of Apache Tomcat as a Windows service is not complicated, if you download the correct distribution of Tomcat (Windows service Installer). However, running multiple instances of Tomcat as Windows services is a more complicated process. To avoid issues, you would have to:
1. Uninstall the service that the installer has installed ( if you used the service installer)
2. Run the service.bat command and give it an unique name ( so, next service install would not fail )
service.bat install MyTomcat2 ( you have to download the zip distribution to get service.bat )
2. For each instance, edit server.xml and manually modify all ports to unique non-default numbers
3. Go to Service Control Manager by running ‘services’ from Start menu and change the startup type for each instance to be “Automatic”
You would have to repeat this process for each instance that you want to install, which can get tedious and potentially quite error-prone.
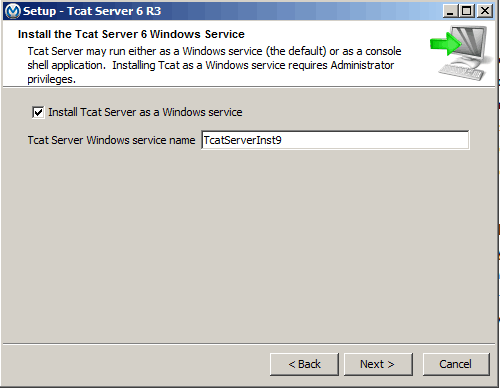
The Tcat Server installer provides a much better experience by enabling you to select a name for the service and also by enabling you to install multiple Tomcat instances on the same box. All you have to do is to run a standard install of Tcat Server on Windows, and it will automatically install Apache Tomcat as a Windows service. It can detect name conflicts and pick unique service names for the Windows services. (The installer also detects port conflicts, so you don’t run into start-up issues due to port conflicts).

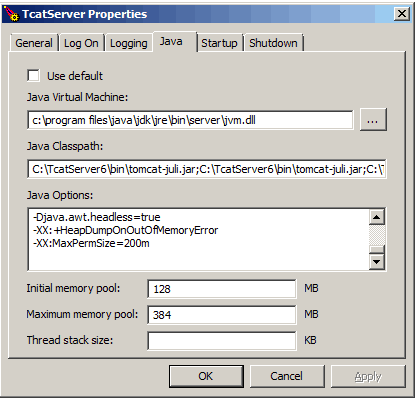
Once you have installed Tomcat as a service, you might want to modify the JVM start parameters. With Tcat Server, you can simply run ‘tcatserverw.exe’ from your bin folder. Go to the “Java” tab and enter the start parameter values (for ex: increase memory size).

Thats it! You can repeat this process for as many Tomcat instances as you want to run as Windows services.
Displaying console messages in Windows
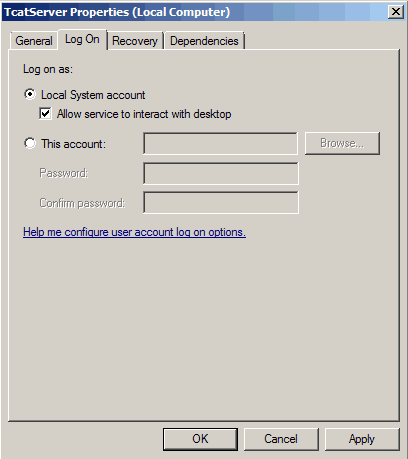
While running Tomcat as a Windows service works great, at times, you may want to read the console messages to debug problems. By default, Windows services do not display the console messages. However, you can easily enable the service to display the console messages. Go to Start menu and type ‘services’ to open the Service Control Manager. Once in there, select ‘TcatServer6’ ( or whatever name you chose during install) and double click on it. You will get the service options that include whether you want the service to start automatically or manually. Click on ‘LogOn’ tab. Select ‘Allow Service to Interact with desktop’ option. (This only works with the System account — if you using a special account to run Tomcat service, you will not have this option).

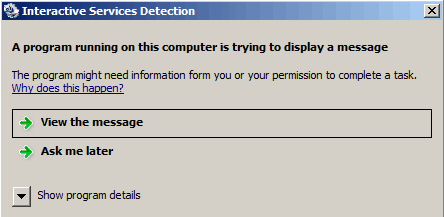
From now on, any time you receive a console message, you will get a dialog as shown below. Clicking on ‘View the message’ will show you the console window.

Tcat Server is free for use in development – download your copy here.


