MuleSoft’s newest AI and automation tool, Intelligent Document Processing (IDP), used for end-to-end Document processing and automation, went GA on April 29, 2024.
IDP helps users extract information from the document and perform further analysis with the help of Einstein AI capabilities. Under the hood, IDP uses AWS textract to extract information from the document. You can further integrate the data extracted from IDP with Anypoint Platform, Flow, and RPA to speed up your integrations.
We’ll teach you how to extract data from the document with the help of IDP and further integrate it with Anypoint Platform. But first, let’s go over the prerequisites for building integration with IDP.
Getting started with IDP
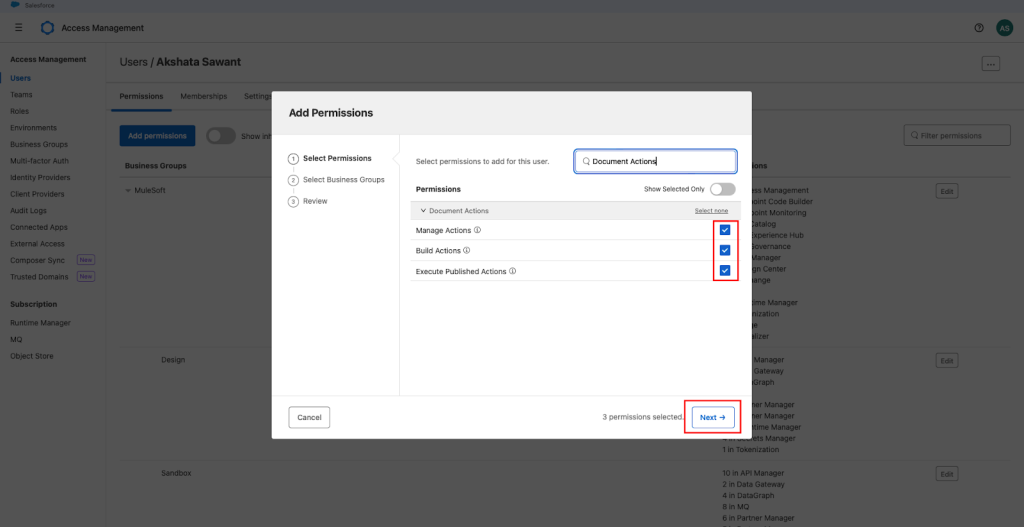
Before you begin, you need to have valid access rights. Navigate to Access Management → Users → Select the user you want to permit → Permissions → Add Permissions. Under the Document Actions tab, select all the permissions you want to give to the user.
Next, select your Business Group.
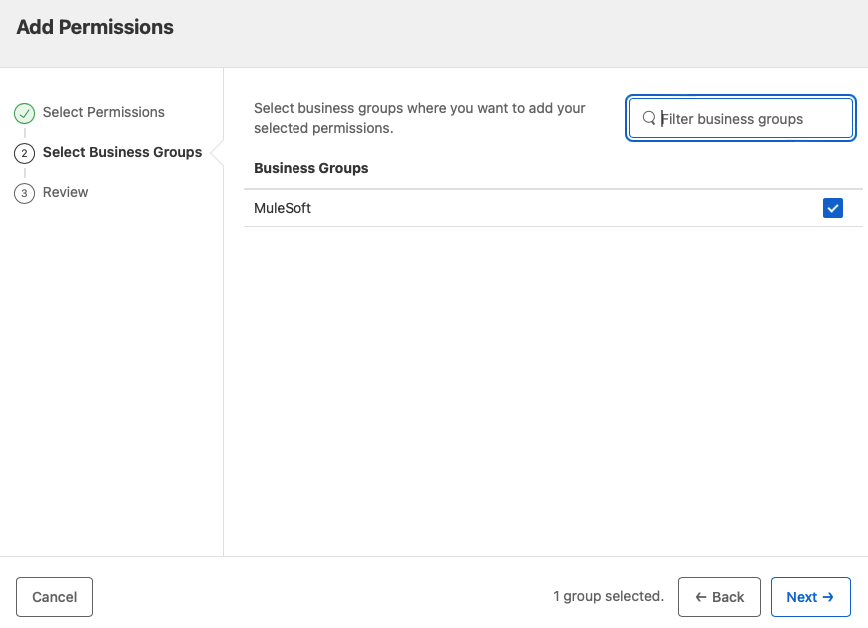
Then, review and add permissions. Once you’ve given all the necessary permissions to the user, hop on to IDP’s page to get started with IDP.
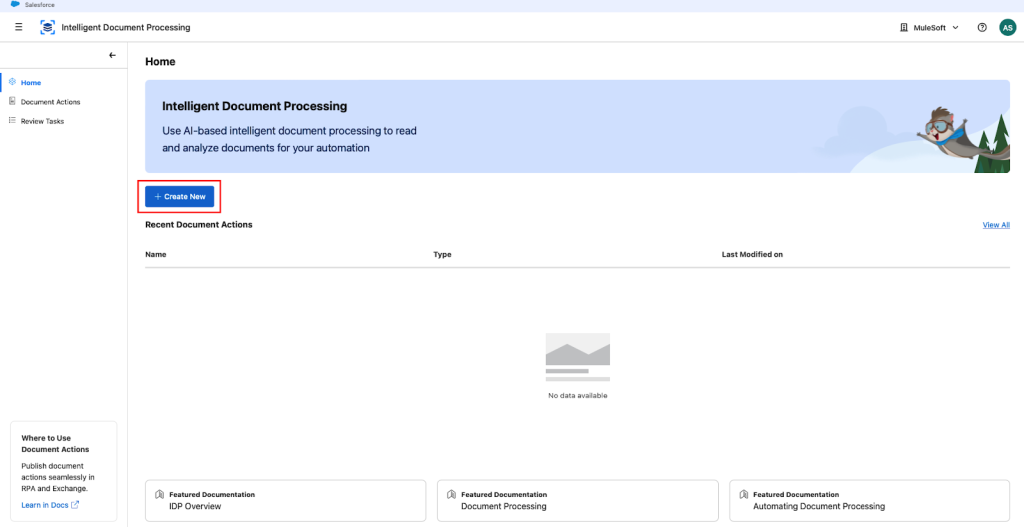
Creating your first Document Actions
To extract and process information from the document, create a Document Action. Document actions involves a series of steps from uploading a document, to running the IDP engine, extracting data fields, adding prompts, and more.
Click Create New to create your first Document Action.
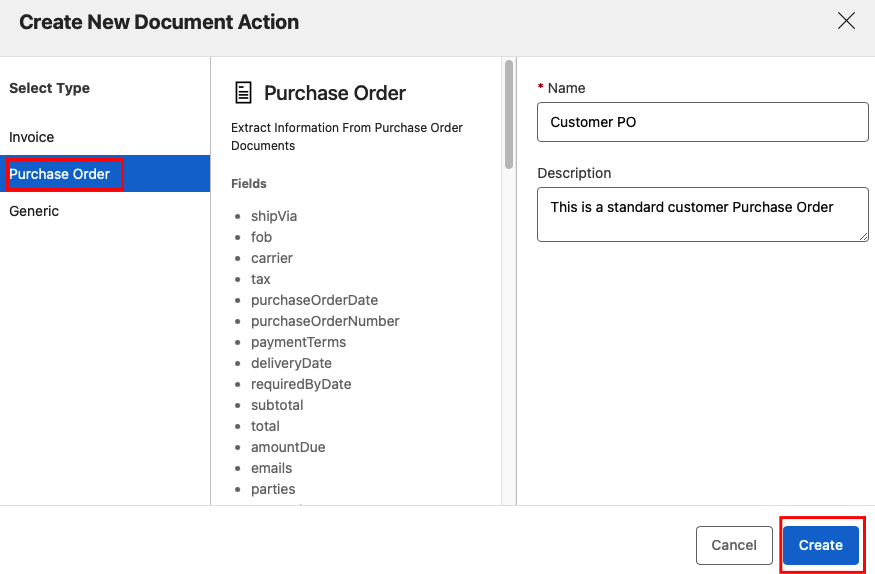
Select the type of Document Action. Add name and description to your Document Action and click create. As of the Spring 2024 release, you can process three documents with IDP: Generic, Invoice, and Purchase Order documents.
You’ll be prompted to select files that you want to be processed by IDP. Upload the document and click on Run to process the document.
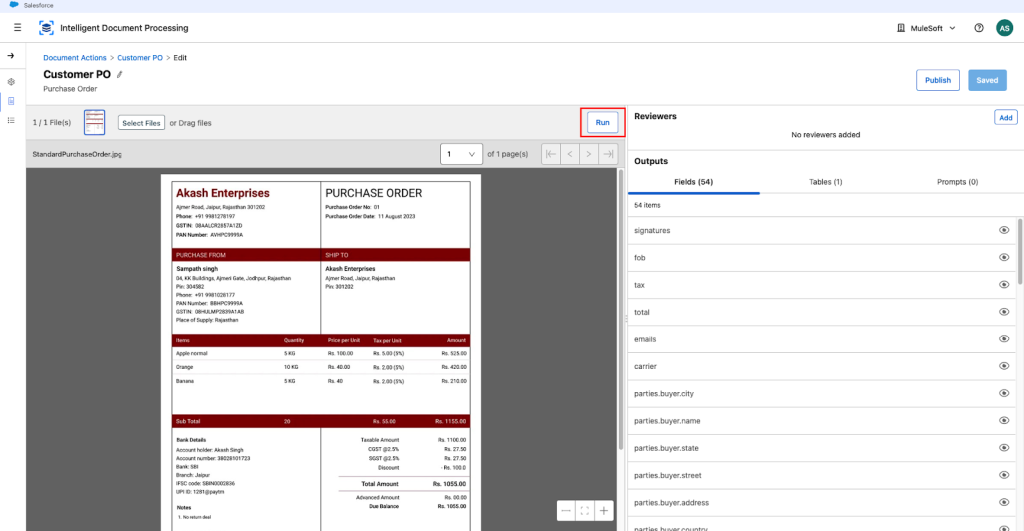
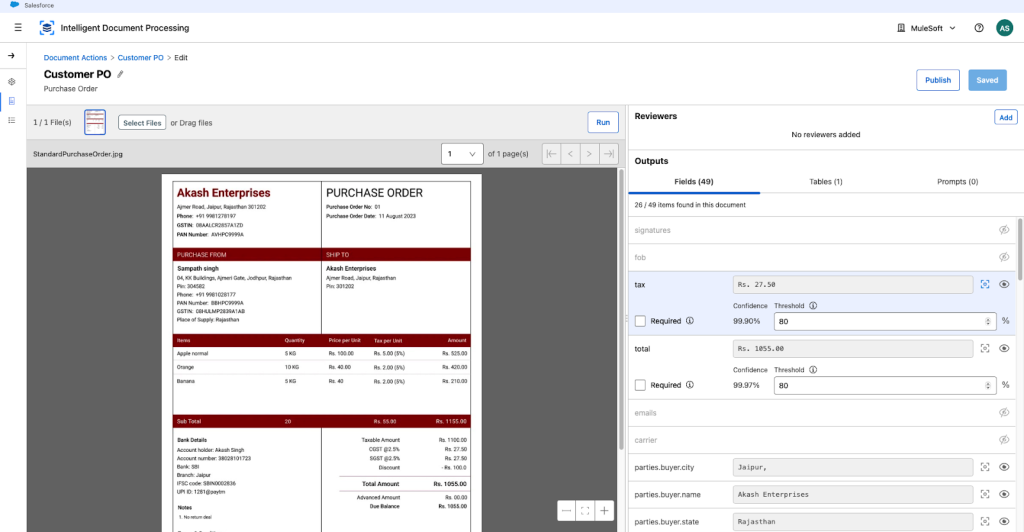
Here, AWS textract is doing the magic under the hood. Relevant information from your document will be extracted and assigned to standard fields. You can:
- Click on the scan icon next to a particular field and trace the field value on the document
- See the confidence percentage to help you trust the information
- Mark the field as required if you always want it to be included. If the required field is not extracted by IDP, the document will be sent for a review.
- Hide or unhide a particular field by clicking on the eye icon next to the field to avoid a null value or sensitive information in the response payload.
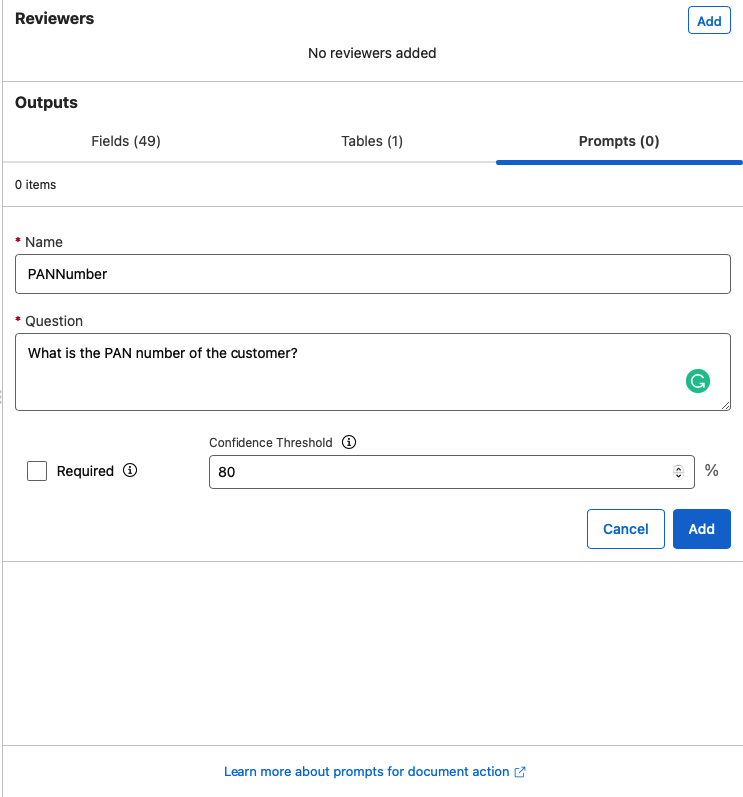
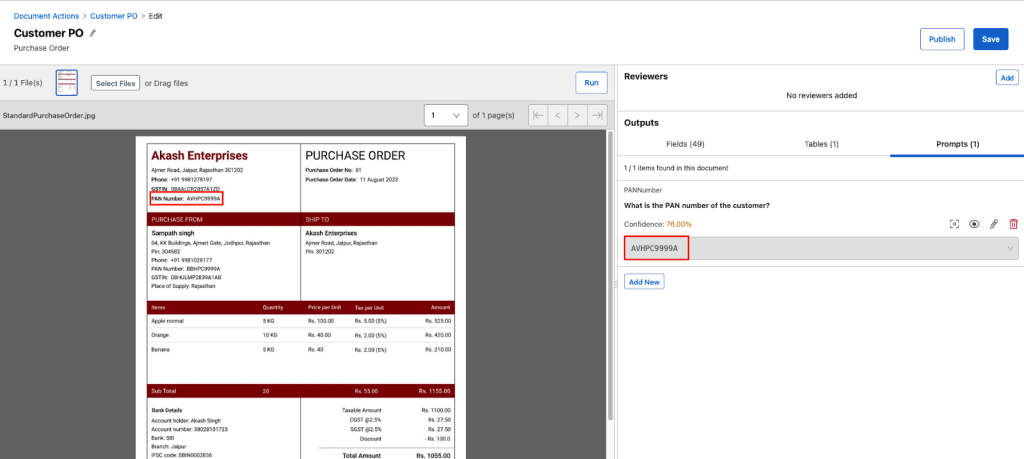
Additionally, you can add custom fields and use Prompts to get information from the document with the help of AI. In the Prompts section, give an appropriate prompt name and description and re-run the document action and IDP will fetch the information for you. You can further choose to view, hide, edit and delete the information.
For example, here we want the PAN Number of the customer:
After adding the prompt, make sure you re-run the document.
You will need to add at least one reviewer to review and approve your Document. Human intervention helps you to validate the results, build trust, and ensure reliability.
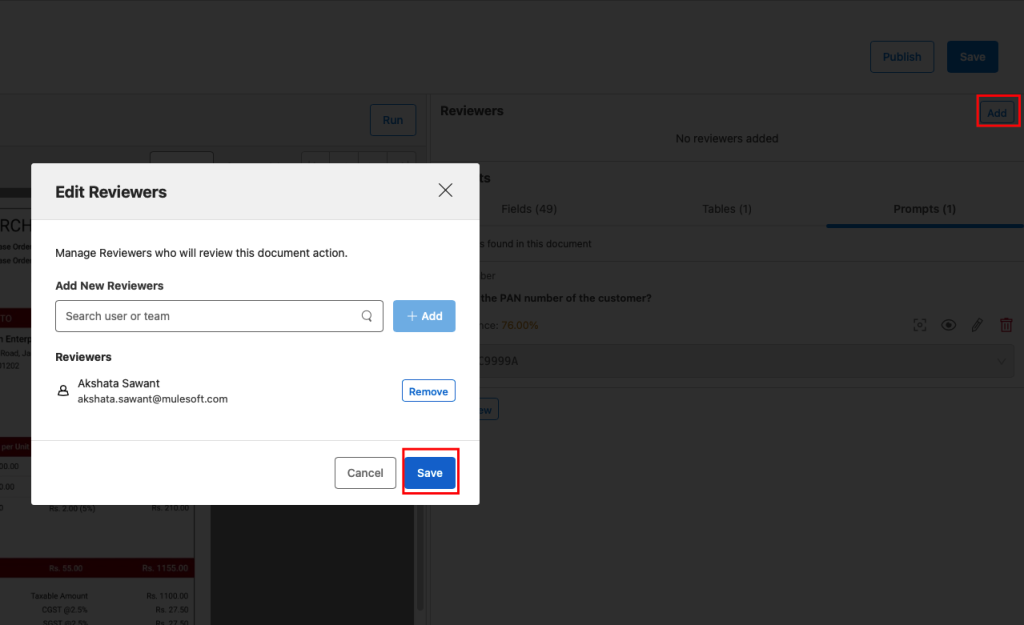
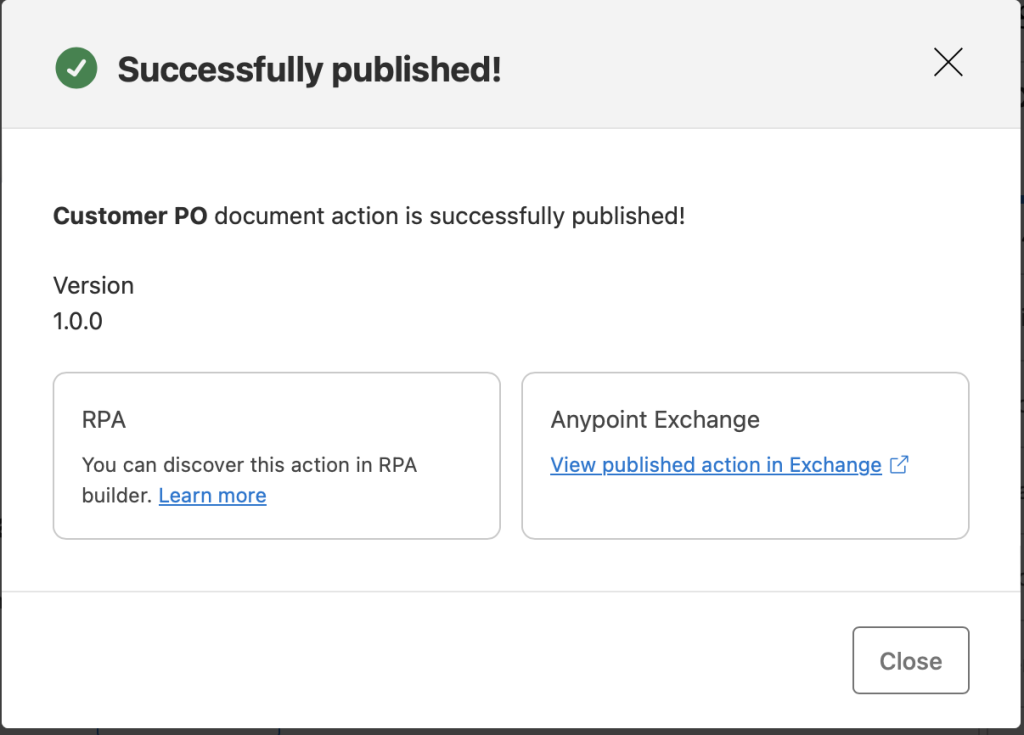
Once you’re done adding the reviewer, save the Document Action. Then, publish the Document Action to Anypoint Exchange and RPA.
Testing the Document Action
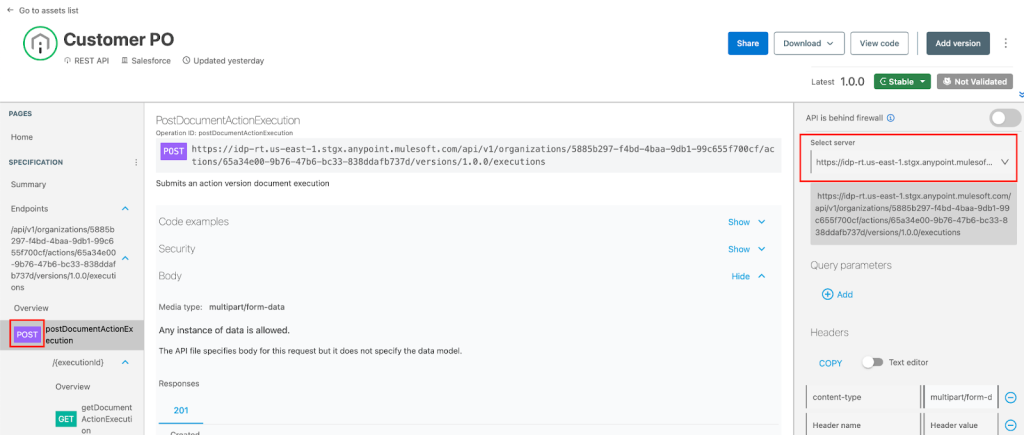
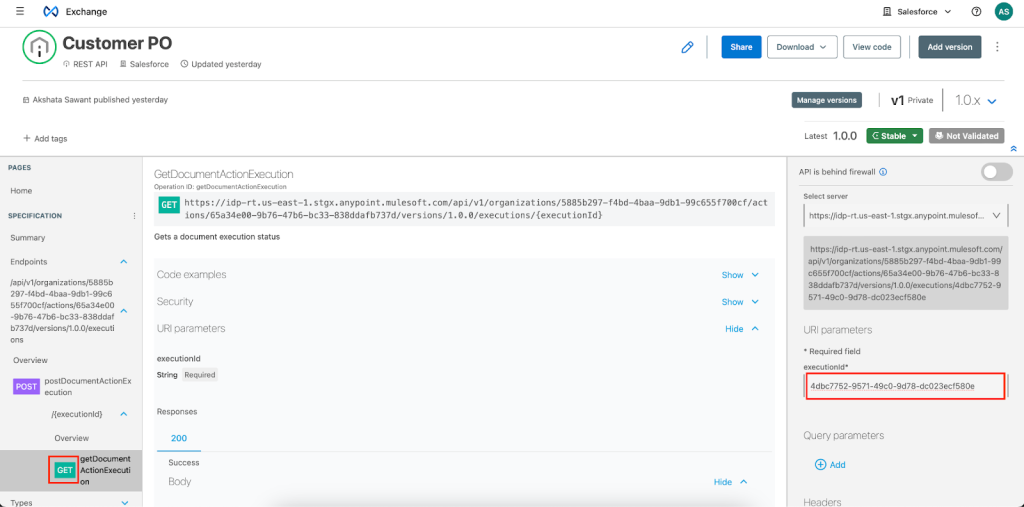
In Anypoint Exchange, you can find our published document as a REST API and see the newly created POST and GET endpoints.

Now go ahead and test the POST method.
Select the POST method → Choose the Server.
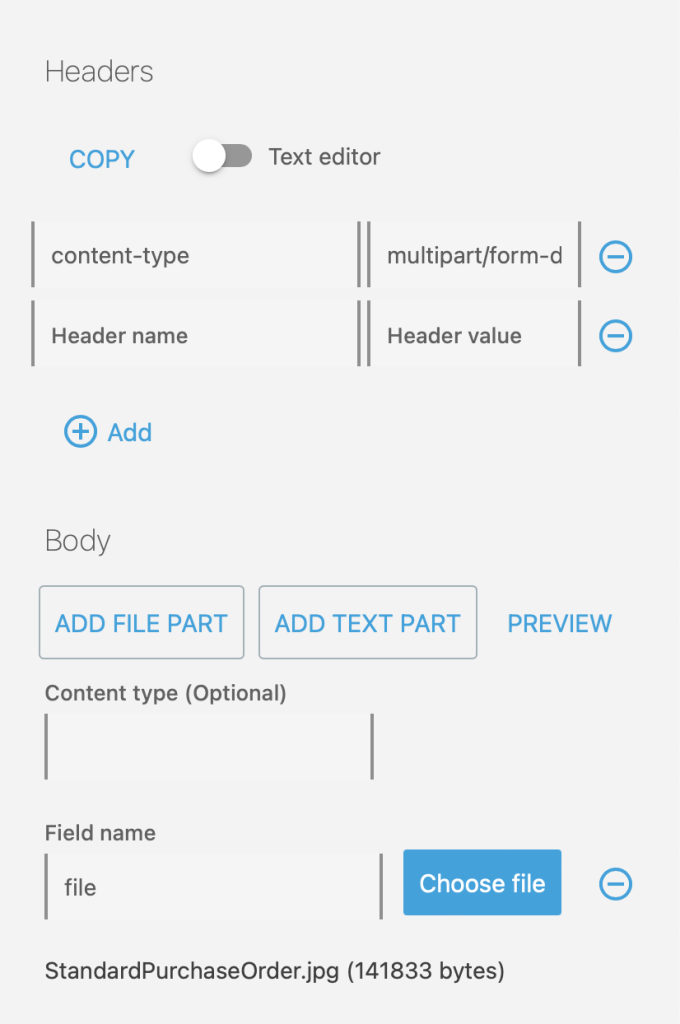
Then upload the document in the Body section.
To generate security credentials, go to Access Management in Anypoint Platform to build a Connected App. Add scopes in the Document Actions, and select your Business Group.
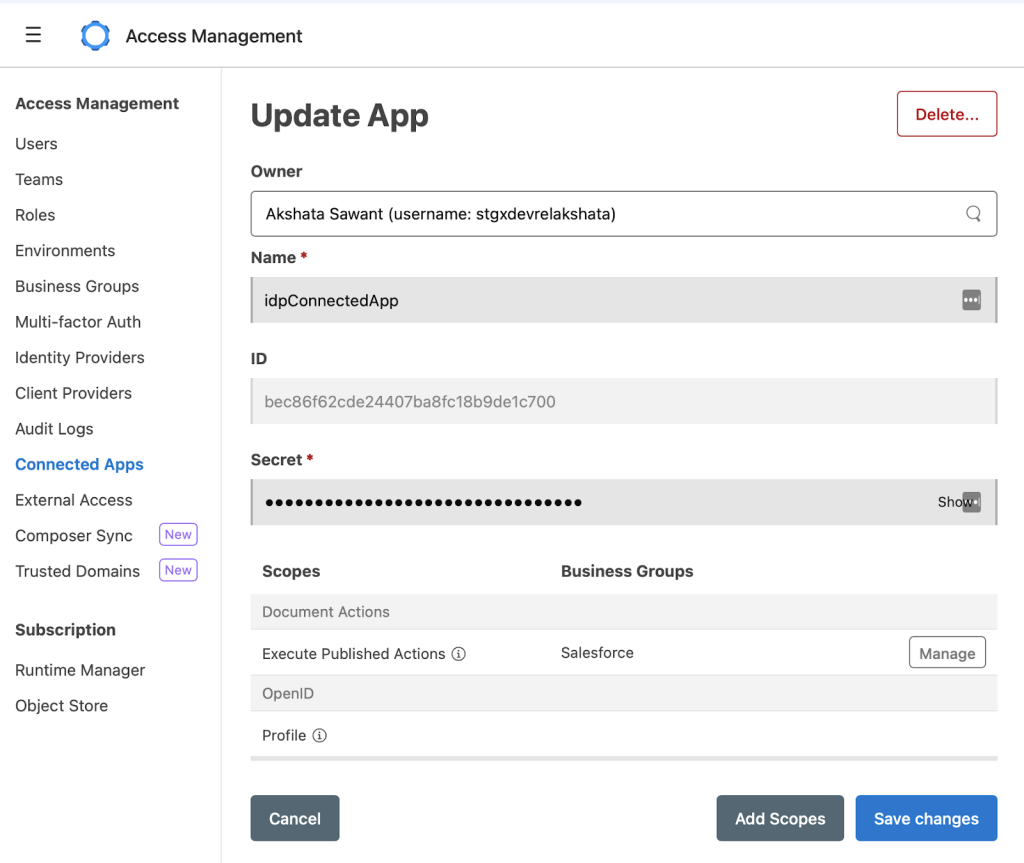
Once your Connected App is read, save ID and Secret as we will use this for testing out Document Action API in Anypoint Exchange.
Add the Client ID and Client secret. Select Advance settings. Choose Credential location as “Authorization Header,” generate a token, and hit Send.
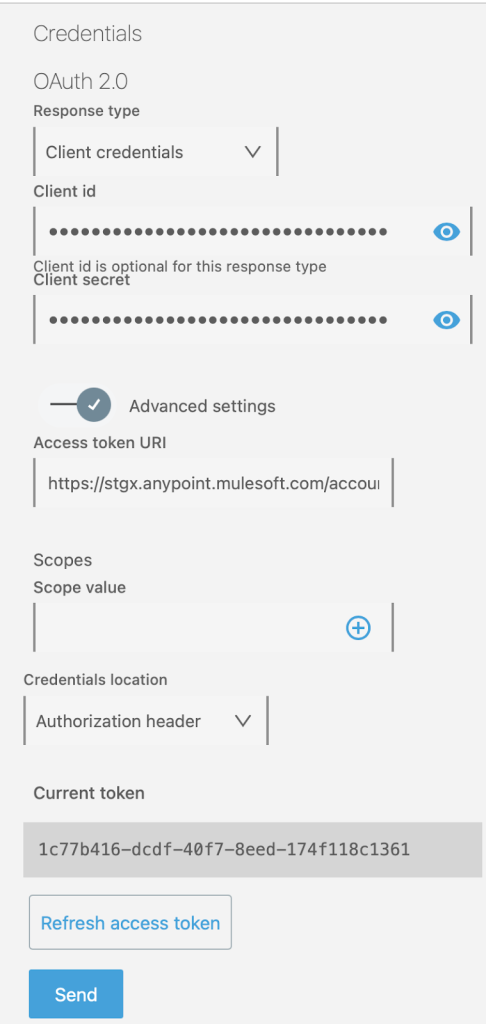
You will receive a response as 200 OK along with Document ID and Document name in the response payload.
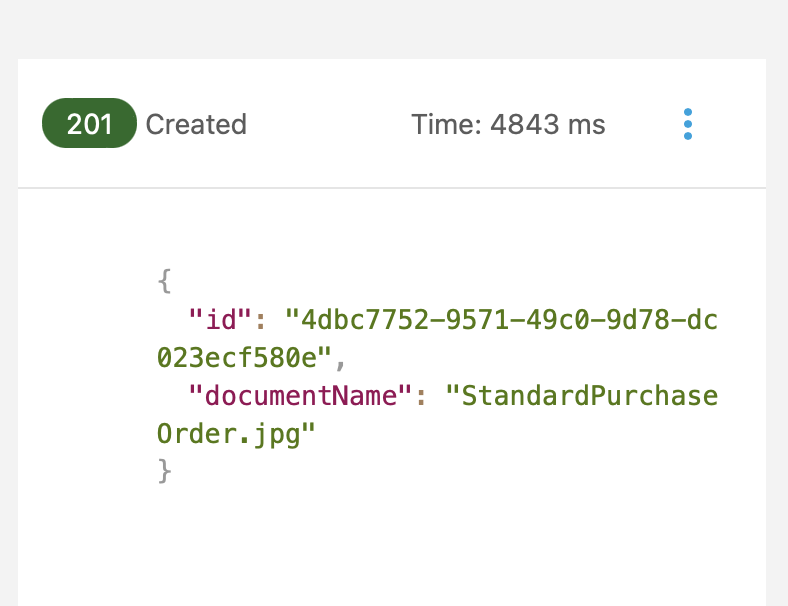
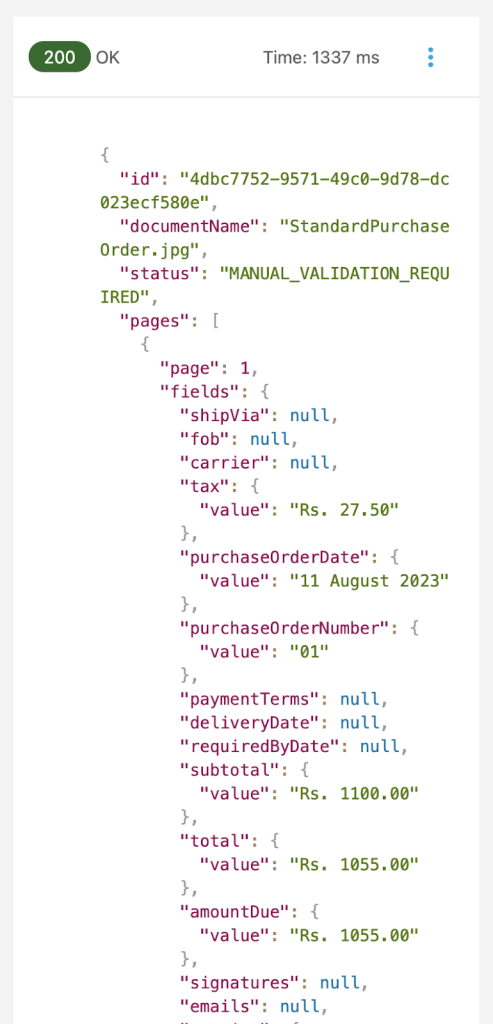
Save the Document ID to further test the GET endpoint. Now we’ll test out the GET endpoint based on the execution ID. Select the GET method. Enter the Execution ID and enter the security credentials similar to post endpoint. Hit Send.
You will get a 200 OK response and a payload containing the extracted information from the document.
Ready to go with IDP
Now that we’ve learned the basics of IDP, you know how to create the first document action and publish the document action to Anypoint Exchange. We’ve also learned how to test IDP’s REST API endpoints. Don’t wait – go ahead and integrate IDP with RPA and Anypoint Platform for end-to-end automation! Want to learn more? We’ve got resources to enhance your learning:
Read:
Watch: