We’ve already covered synchronizing Mule APIs from Anypoint Exchange into Salesforce using API Catalog. After importing Mule APIs using API Catalog, we can integrate them using Flow, Apex, or Agents and trigger the API Operations. Now, let’s delve into integrating the APIs imported with Agentforce.
4 steps to integrate MuleSoft APIs with API catalog
We will guide you through the process of integrating Mule APIs using the API Catalog so you can ensure a seamless and secure connection that leverages the full potential of both platforms. Here are the steps we’ll follow:
- Activate API Actions
- Manage Permission Sets
- Create a new Agent Action
- Add a new Agent Action to Agent Builder
1. Activate API Actions
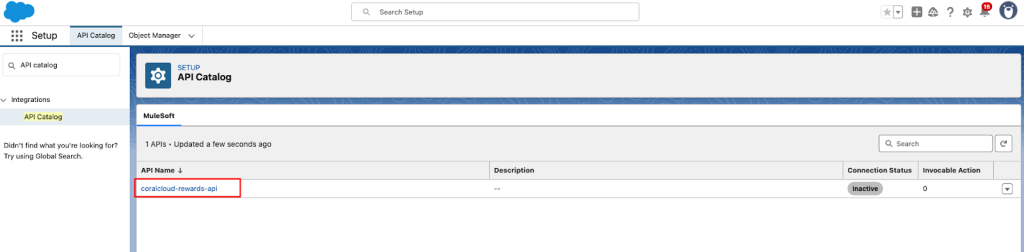
After synchronizing your Mule APIs, you’ll see them in the API Catalog. In order to use these APIs and their operations with Agents as Actions, you need to enable API Actions. Once the API actions are activated, you can invoke the Mule APIs as Agent Actions.
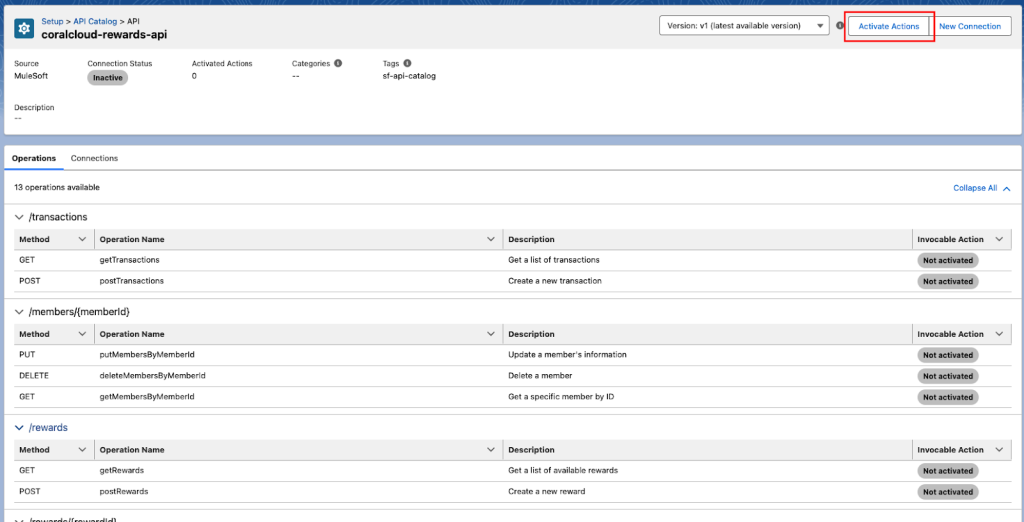
Select the API you want to use (in this case, coralcloud-rewards-api). If there are issues, check if APIs in Exchange have the sf-api-catalog tag.
Click Activate Actions.
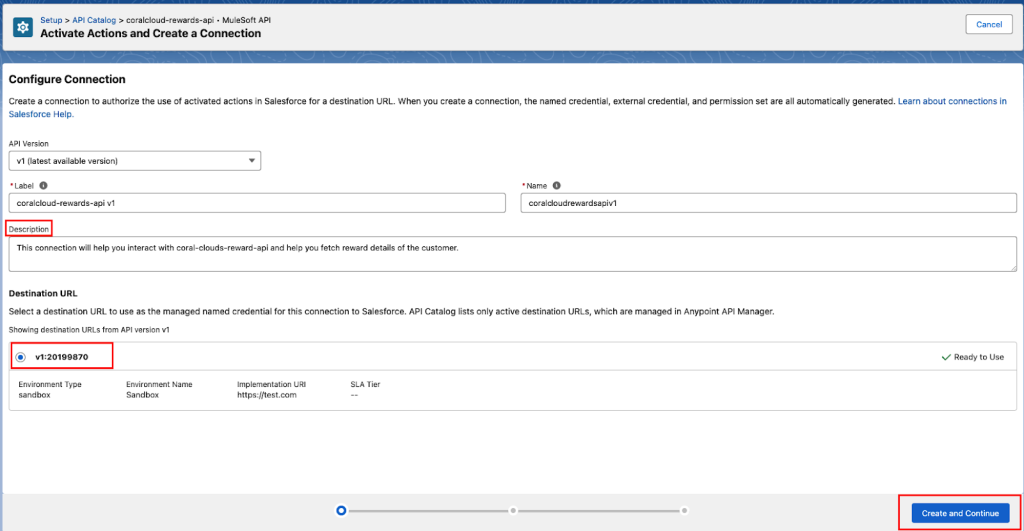
Enter the description for your connection and leave the remaining details to default or you can edit them. Select the Destination URL. Click Create and Continue.
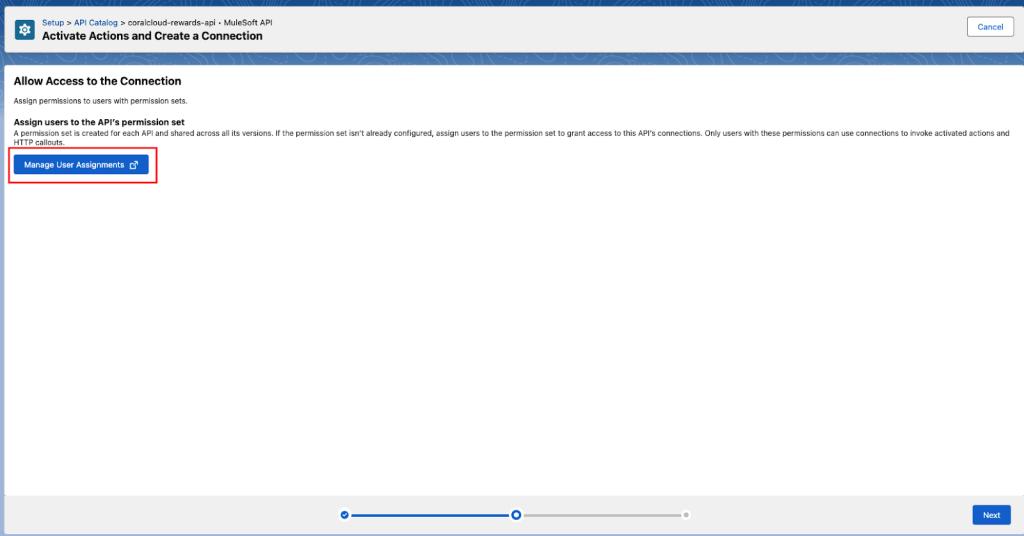
Next, click Manage User Assignments and add permissions to your user.
2. Manage Permission Sets
Go to Manage Permissions Sets in order to enable permissions for your user. For more information on managing permission sets, view the Help page.

Click on Add Assignments.
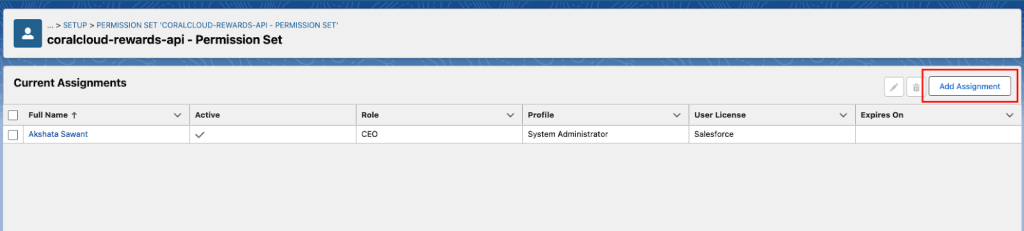
Select the user you want to assign permission.

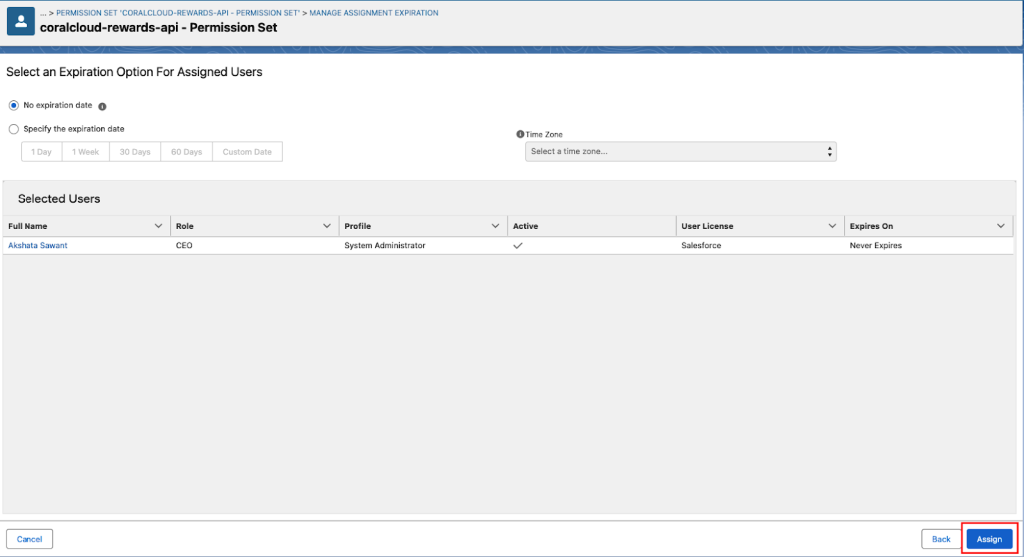
You can further set an expiration date or leave it default and click Assign.
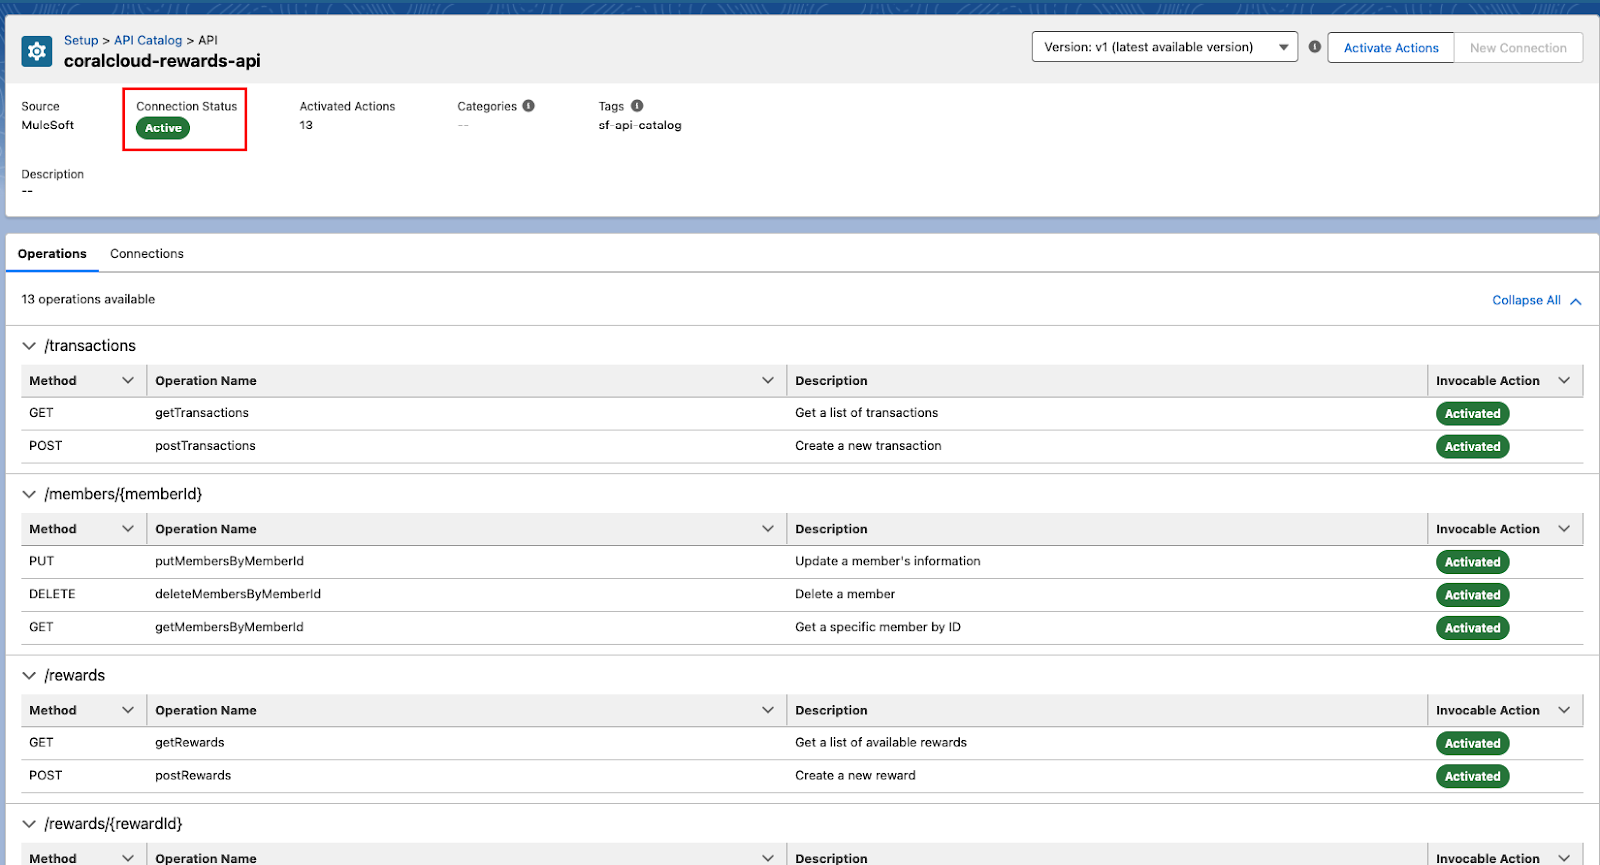
Once completed, you’ll see that your connection has been activated and your API operations are ready to use.

Now, your API Actions are active.
The Create Connection process creates the required objects in Salesforce automatically, including:
- External credentials
- Named credentials
- External Services
- Invocable Actions
- Permission Sets
The UI prompts you to allow access to actions and gives a link to the connection’s permission set in Salesforce Setup. We will further go ahead and review our permission sets.
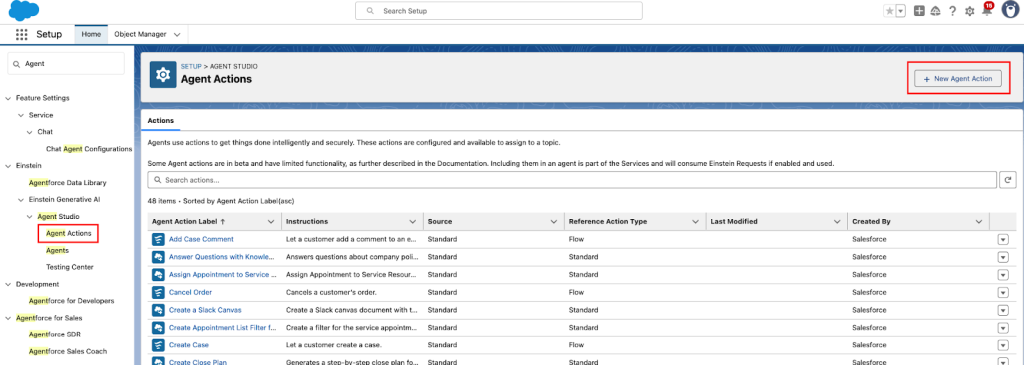
3. Create a new Agent Action
Now, we’ll create a new Agent Action to integrate our API operations with Agents. You can also use these API Operations with Flow or Apex Classes. Go to Agent Actions from Setup → Quick Find. Click on + New Agent Action.
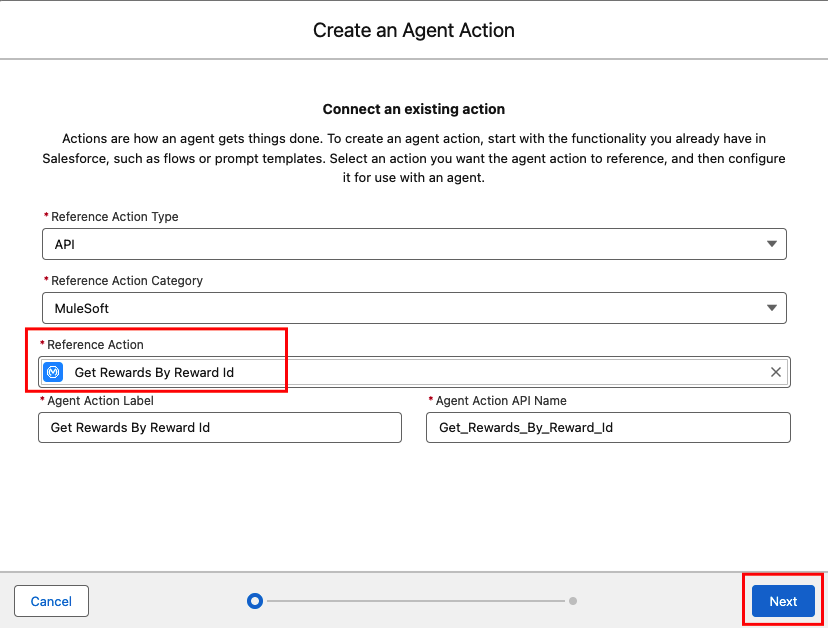
For the Reference Action Type, select API. For the Reference Action Category, select MuleSoft. For Reference Action, select the API operation that you wish to use. In our example, we’ll choose the Get Rewards By Reward ID operation. Further configure Agent Action Label and Agent Action API Name, or you can keep it default.
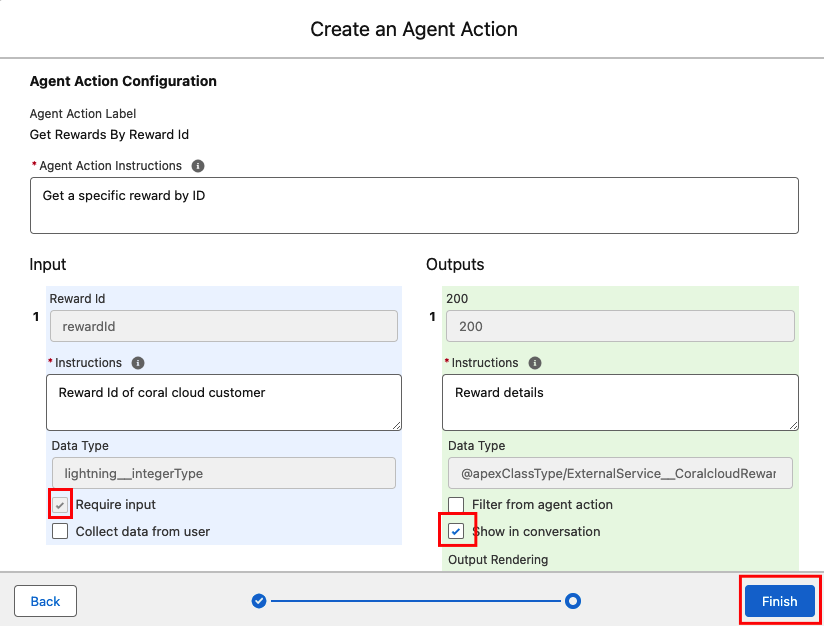
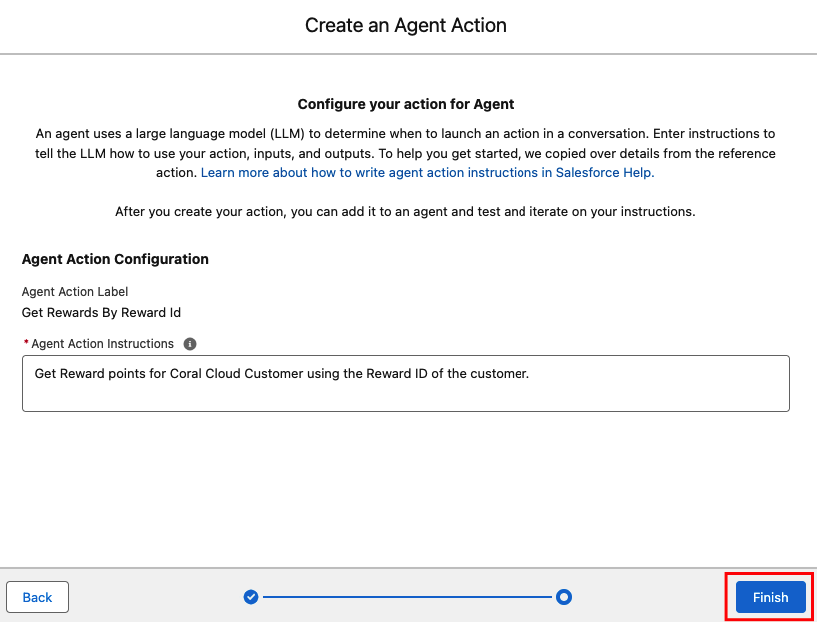
Now, we’ll configure Inputs and Outputs for our Agent Action. Enter Agent Action Instructions and instructions for input and the output parameters. Click Finish.
4. Add a new Agent Action to Agent Builder
Now let’s add a new Agent Action to Agent Builder to integrate our API Actions with Agents. Go to Agent Builder from your Copilot (Setup → Quick Find → Your Copilot → Open Builder)and navigate to your topic. From the dropdown list under New, select Add from Assets Library.
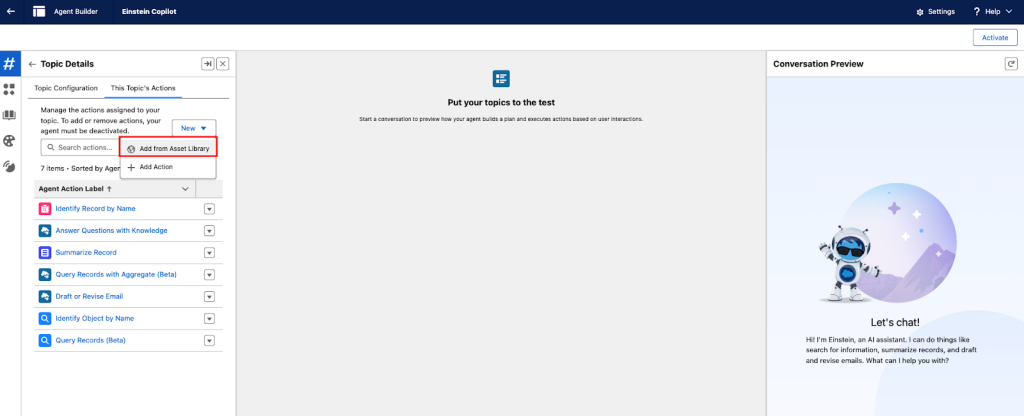
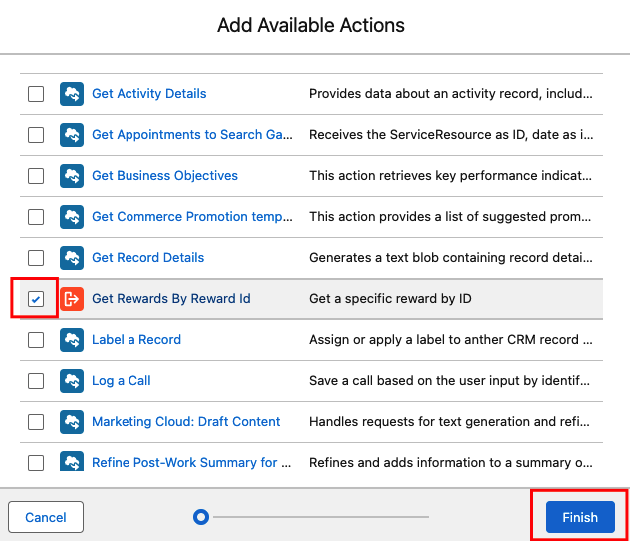
Select the newly created Agent Action from Step 3. Click Finish.
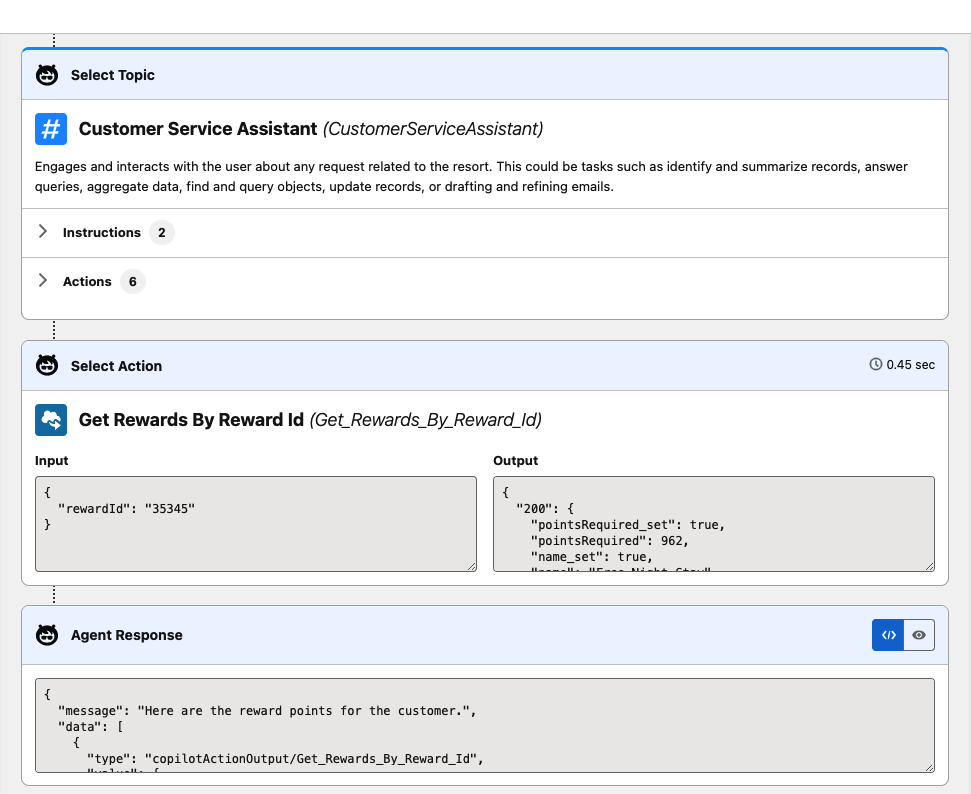
Let’s test out our new Agent action by entering the prompt: “Get me the rewards points for the customer with Reward ID 35325”.
Leverage Agents for Mule API operations
To optimize Salesforce automation, MuleSoft API integration with Agentforce via the API Catalog enables streamlined API management. By activating API actions, configuring permissions, and constructing Agent Actions within Agent Builder, users can directly trigger Mule API operations through Agents. This integration simplifies operational workflows and empowers developers to create sophisticated, API-powered interactions within the Salesforce environment.