
In the AI era, change is inevitable, and artificial intelligence has evolved from a buzzword to a transformative force in business processes across industries. To help you leverage AI to its full potential, we explore how to seamlessly integrate and create intelligent solutions using Einstein Copilot and APIs and how MuleSoft is accelerating the AI journey.
Getting started with Einstein Copilot
Einstein Copilot is a model built on top of the Einstein Trust layer, set to be available across all Salesforce Cloud. It possesses comprehensive knowledge of these Clouds, enabling it to execute a variety of tasks seamlessly.
Understanding Copilot actions
Copilot Actions are predefined steps designed to accomplish specific tasks. For instance, if you need to send an email to a customer regarding their order status, Copilot can fetch the customer details, update Salesforce records, and draft the email accordingly – all within a single Copilot Action trigger.
Copilot, APIs, and MuleSoft
APIs are integral to integration architecture, providing a reusable and scalable approach across various platforms. Consider our previous example: customer details are retrieved from an end system through a MuleSoft API, Salesforce records are updated, and an email to the customer is triggered. This process represents a custom Copilot Action, showcasing the synergy between Copilot, APIs, and MuleSoft.
Building intelligent integrations
To invoke a MuleSoft API as a Copilot Action, the easiest method is through External Services. However, as of Salesforce Release Spring 2024, Copilot actions can be triggered via Flow, Apex Classes, and Prompt Builder. Future updates will introduce more Copilot action options, such as directly invoking external services from Copilot.
Now, let’s go through a step-by-step procedure for building intelligent integrations:
- Get your MuleSoft API ready
- Create your Named Credentials
- Import MuleSoft APIs as External Services
- Trigger External Services with Flow/Apex
- Create Copilot Actions
1. Get your MuleSoft API ready
We need to ensure that our MuleSoft API is ready for consumption. There are a few things that we need to keep in mind:
- You need to build an API with OAS
- Publish your API to Anypoint Exchange to make it discoverable
- Ensure your Mule App is HTTPs enabled
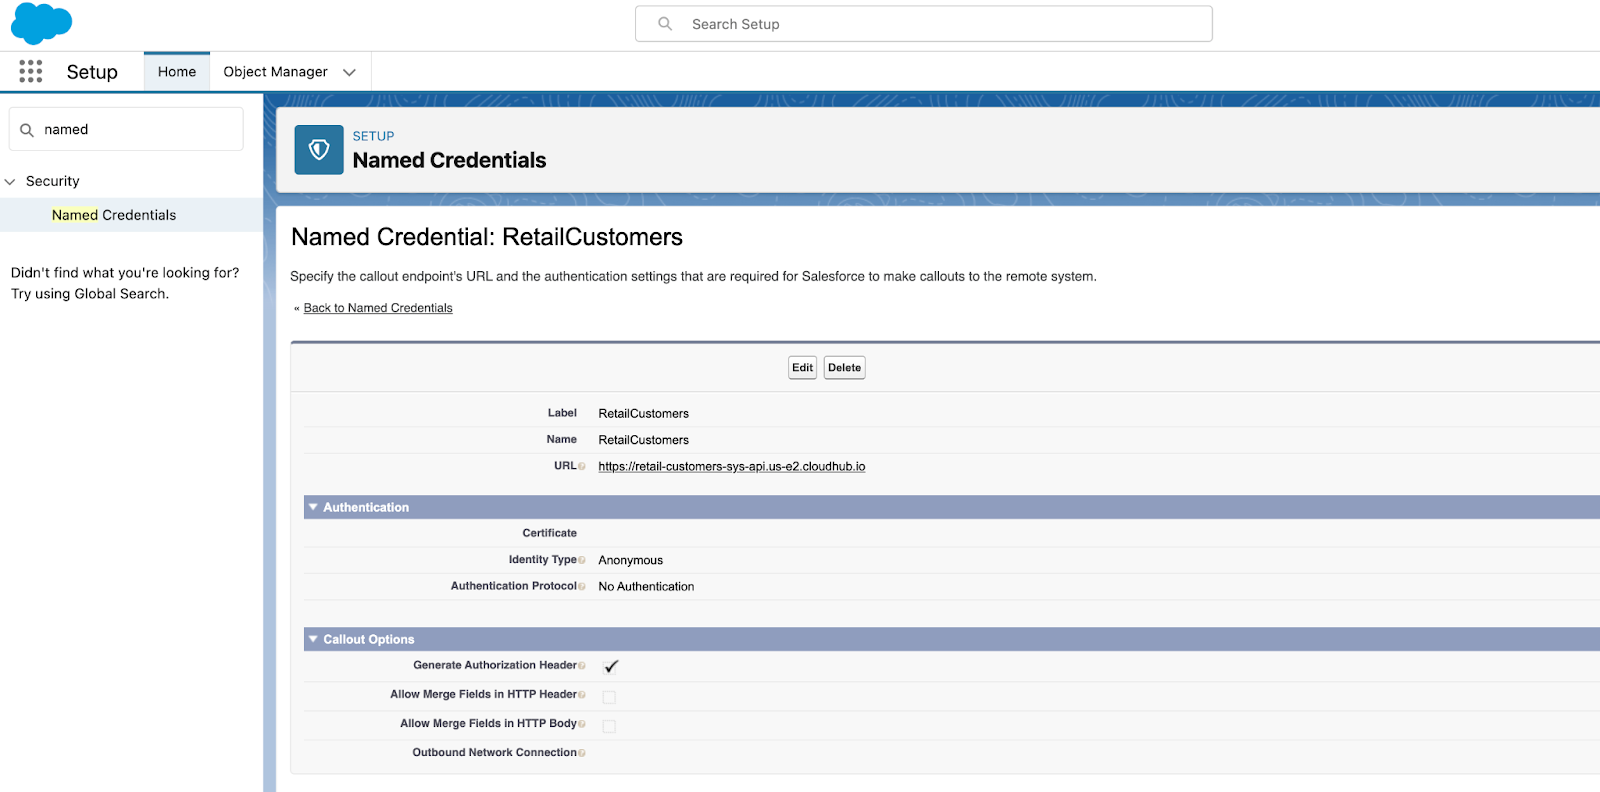
2. Create your Named Credentials
Once your Mule API is ready and your Mule application is deployed, you need to create a named credential for your application. This will contain your credentials and the URL of your API. For this example, we’ve used a basic non-authenticated named credential, but make sure to use next-generation secure named credentials for production implementations.
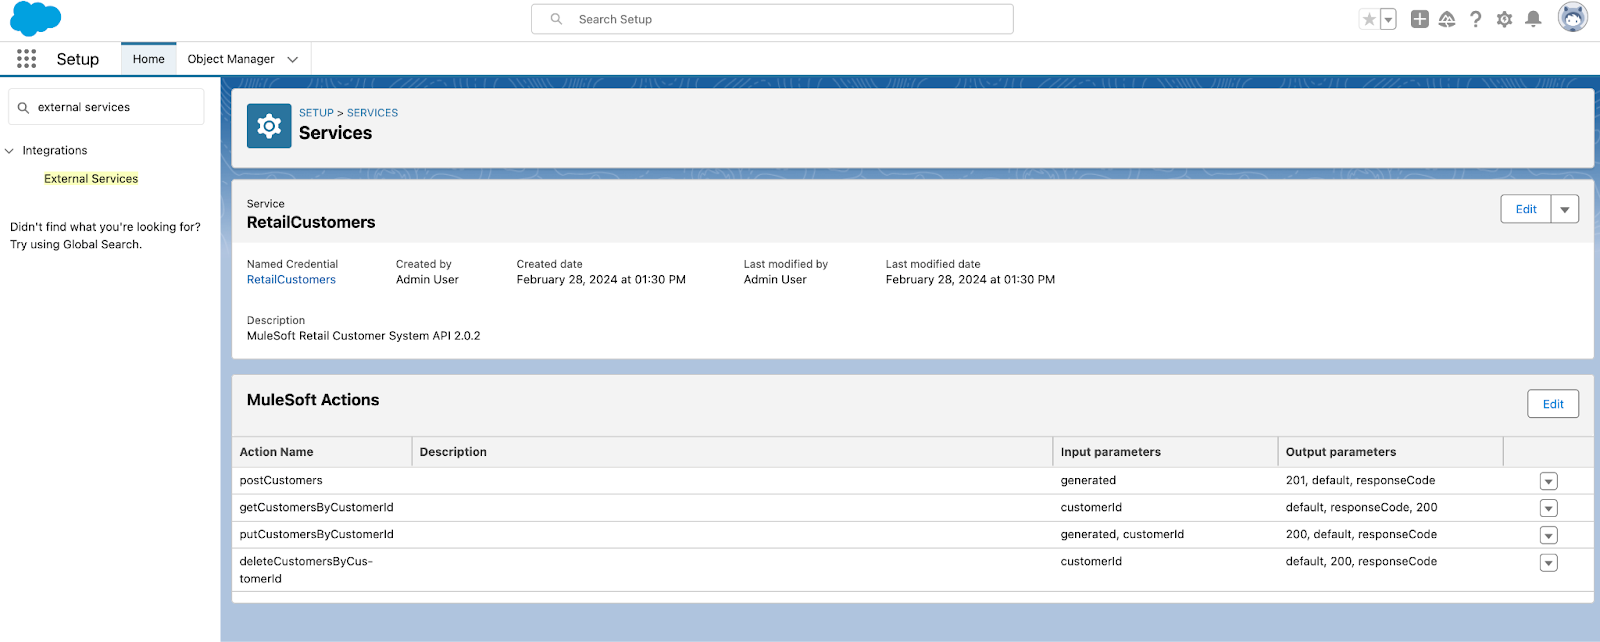
3. Import MuleSoft APIs as External Services
If you’ve already published your MuleSoft API in Anypoint Exchange, you can import them as External Services on the Salesforce Platform. Once you import your API as external services, you can see a list of all the methods, and input and output parameters. These are your MuleSoft actions. You don’t have to generate a separate schema or any mapping as your API is built with OAS specifications.
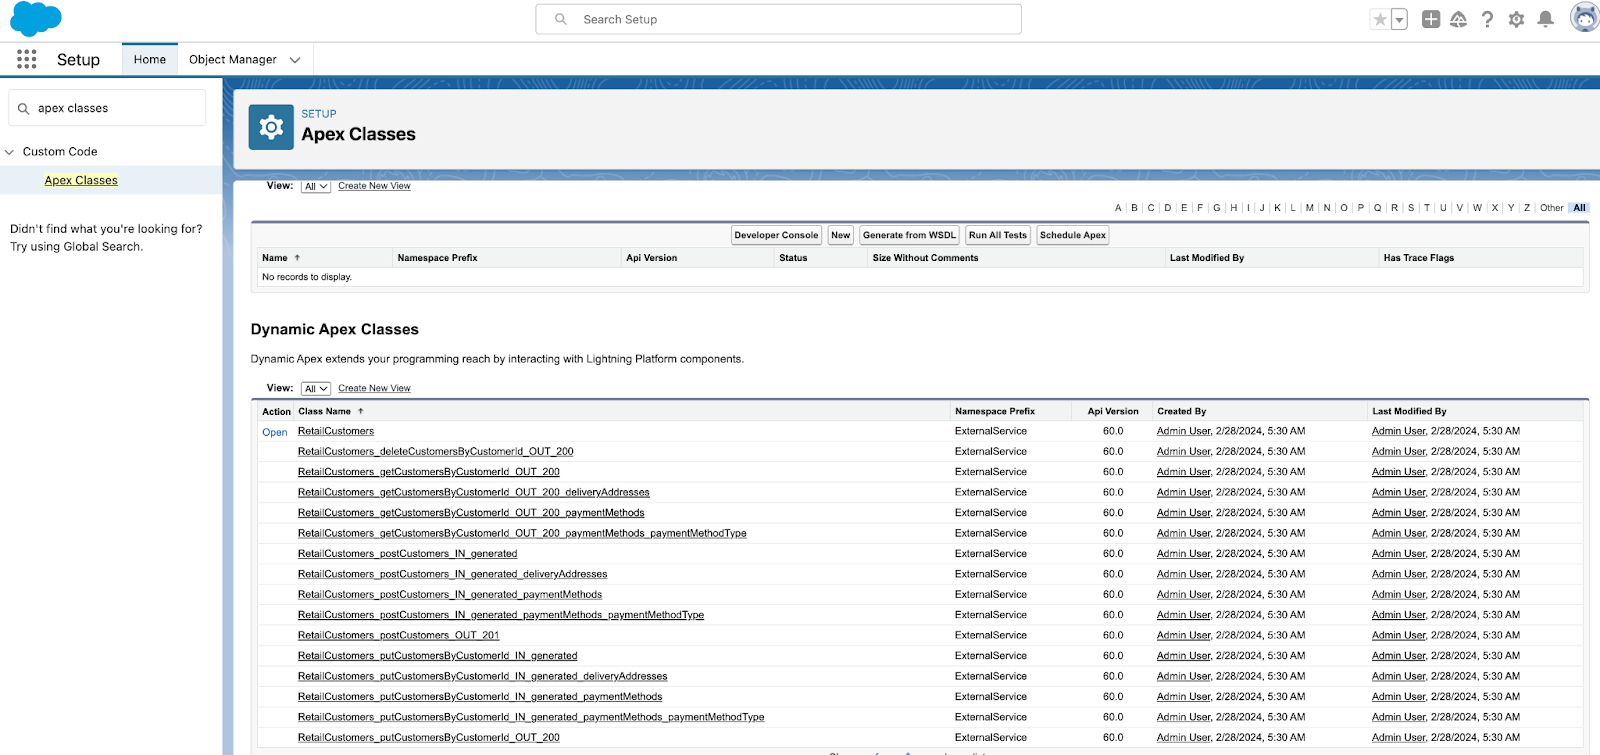
Salesforce automatically creates Apex classes that contain invocable methods to use your MuleSoft actions.
4. Trigger External Services with Flow/Apex
Now we will trigger our external services via Flow or Apex Classes. You can generate a simple flow and invoke MuleSoft Action as part of a Flow action.
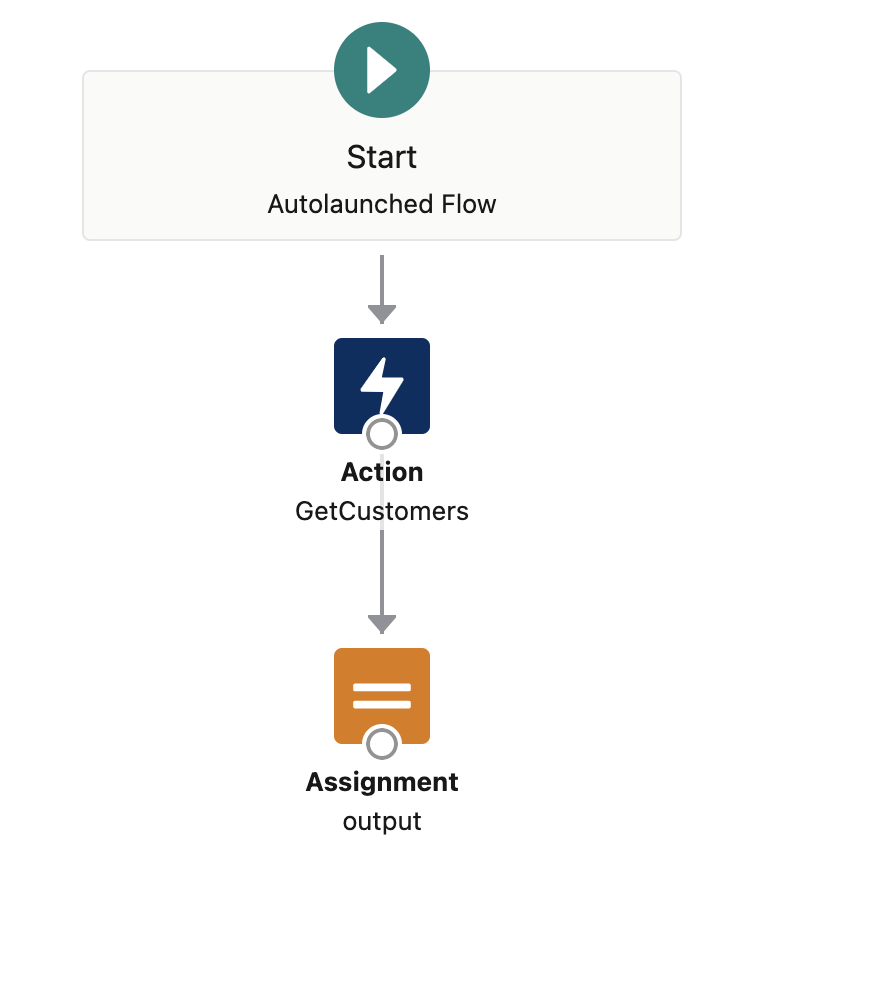
Make sure you define input and output variables with proper descriptions as this will be helpful while working with Copilot Actions. Similarly, you can also invoke External services via Apex Classes.
For reference, here’s an example of an Apex Class that you can use for invoking external services:
public with sharing class RetailCustomerAPI {

    public static void getCustomers(String customerId){

       ExternalService.MyNameSpace09.RetailCustomer retailCustomerService = new ExternalService.MyNameSpace09.RetailCustomer();

        ExternalService.MyNameSpace09.RetailCustomer.getCustomersByCustomerId_Request request = new ExternalService.MyNameSpace09.RetailCustomer.getCustomersByCustomerId_Request();

        request.customerId = customerId;

       ExternalService.MyNameSpace09.RetailCustomer.getCustomersByCustomerId_Response response = retailCustomerService.getCustomersByCustomerId(request);

        System.debug('response code :' + response.Code200);

    }

}
To create custom copilot actions with MuleSoft APIs, you need to invoke External service either via Flow or Apex and not both.
5. Create Copilot Actions
Once you’re done with creating the Flow or Apex class, go to the Copilot Actions menu to create your custom Copilot Actions. You can select the Flow or the Apex Class as the Referenced Action Type.
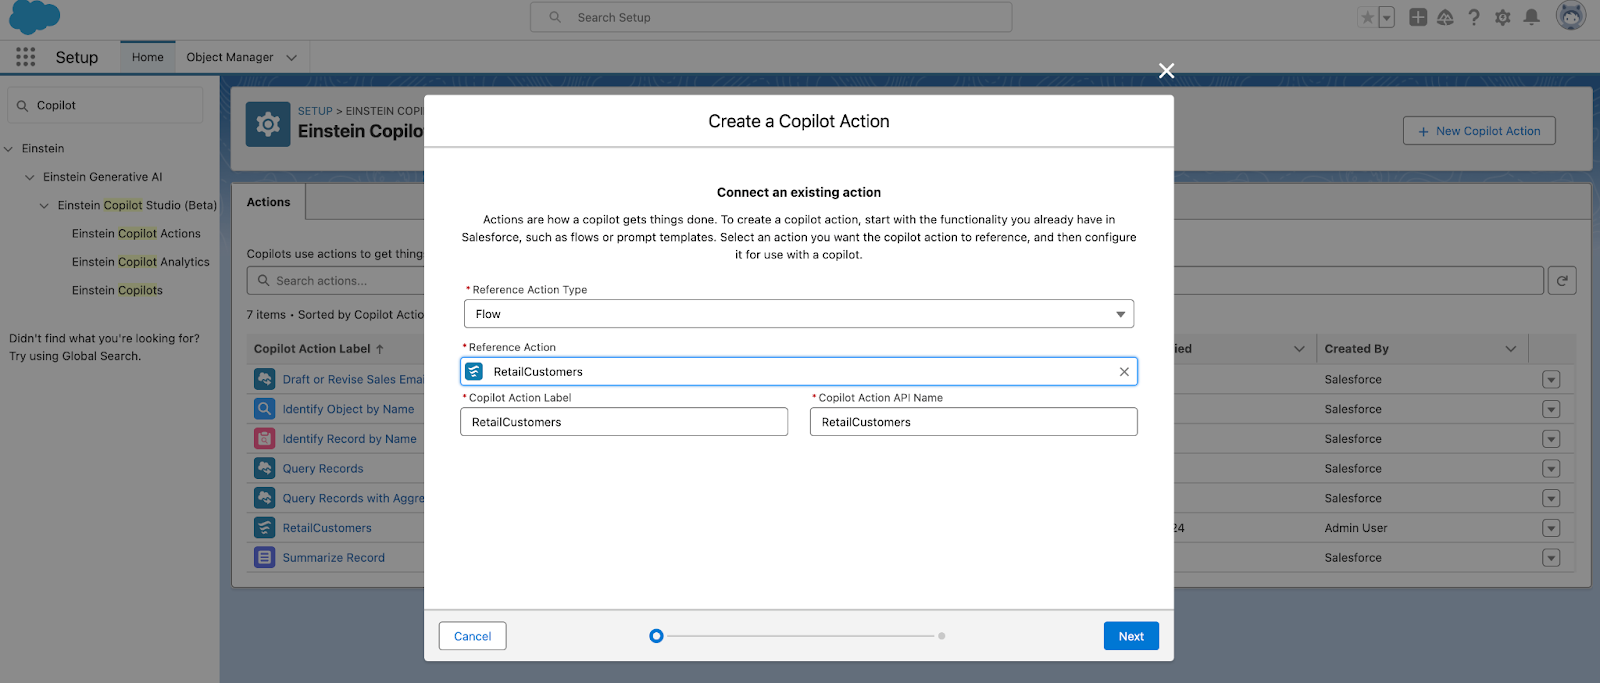
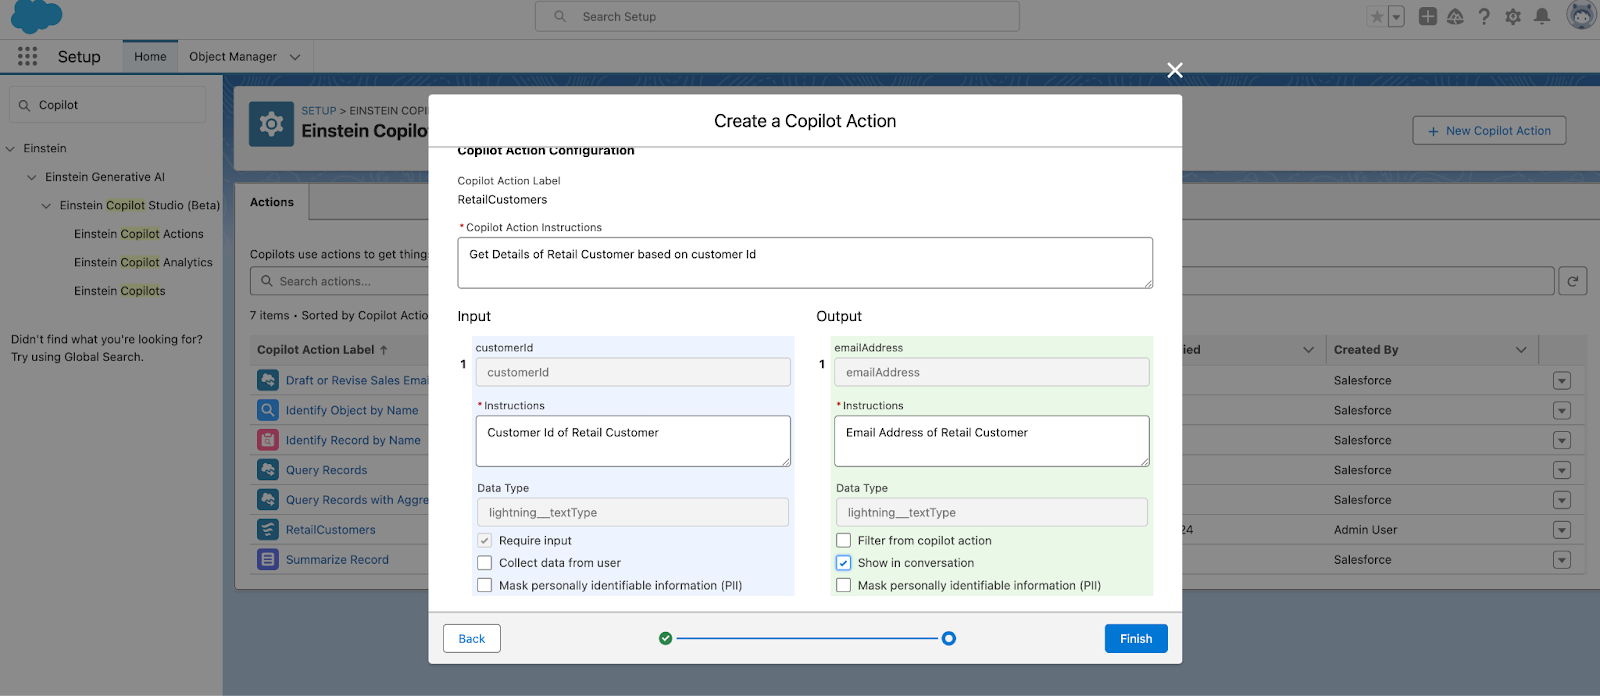
Further, select the appropriate Input and the desired output. Ensure all the descriptions are accurate; it’s vital as that is how Copilot will decide when to use a particular action.
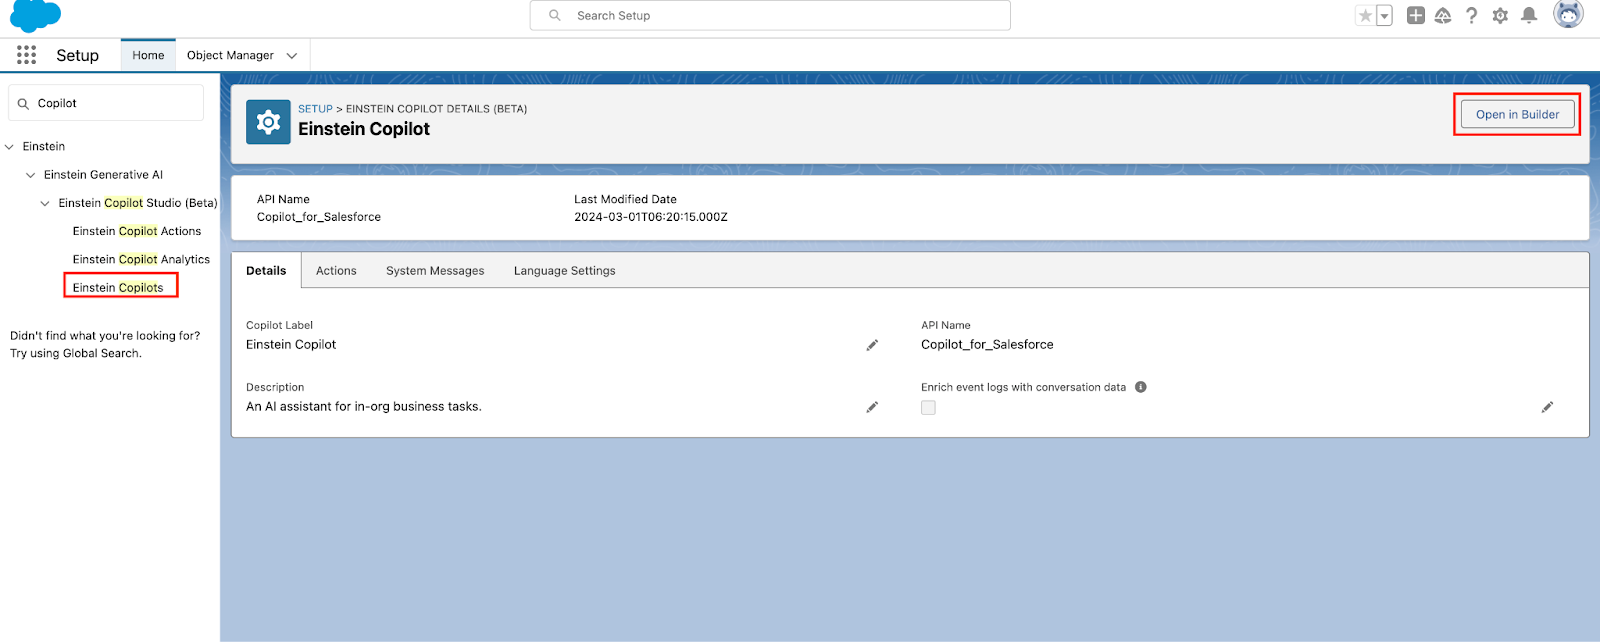
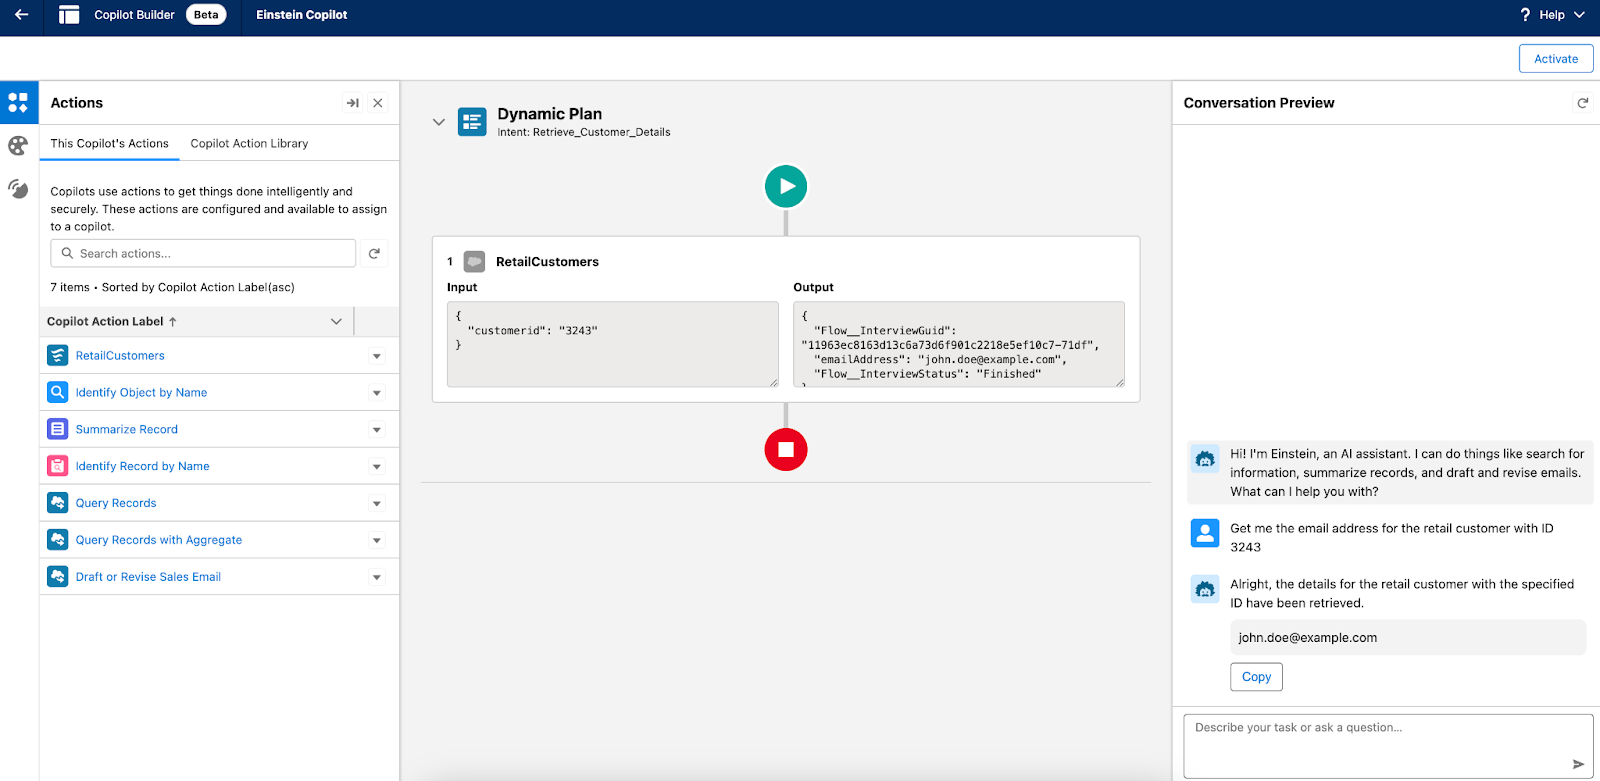
Once you’re done creating the Custom Action, head towards Copilot Builder. Copilot Builder is a testing environment for Copilot where you can test the Actions with prompts.
You need to add the newly created Action to the existing Copilot Actions.
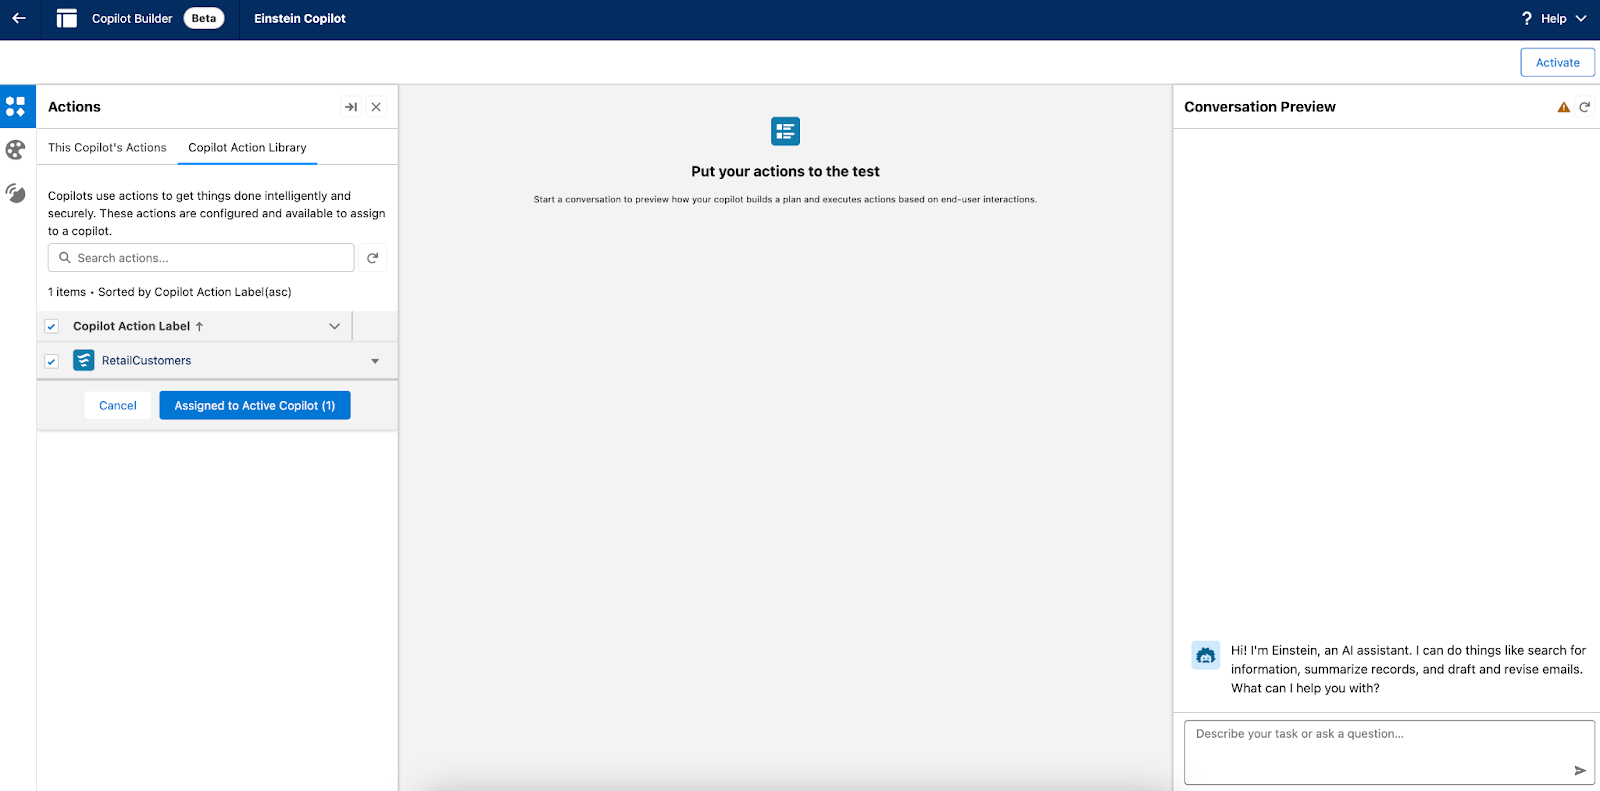
Once done, you can enter the prompt and wait for the magic to happen!
Copilot + APIs + MuleSoft
The diagram below portrays the sequence of steps involved in building intelligent integrations with Copilot and MuleSoft.
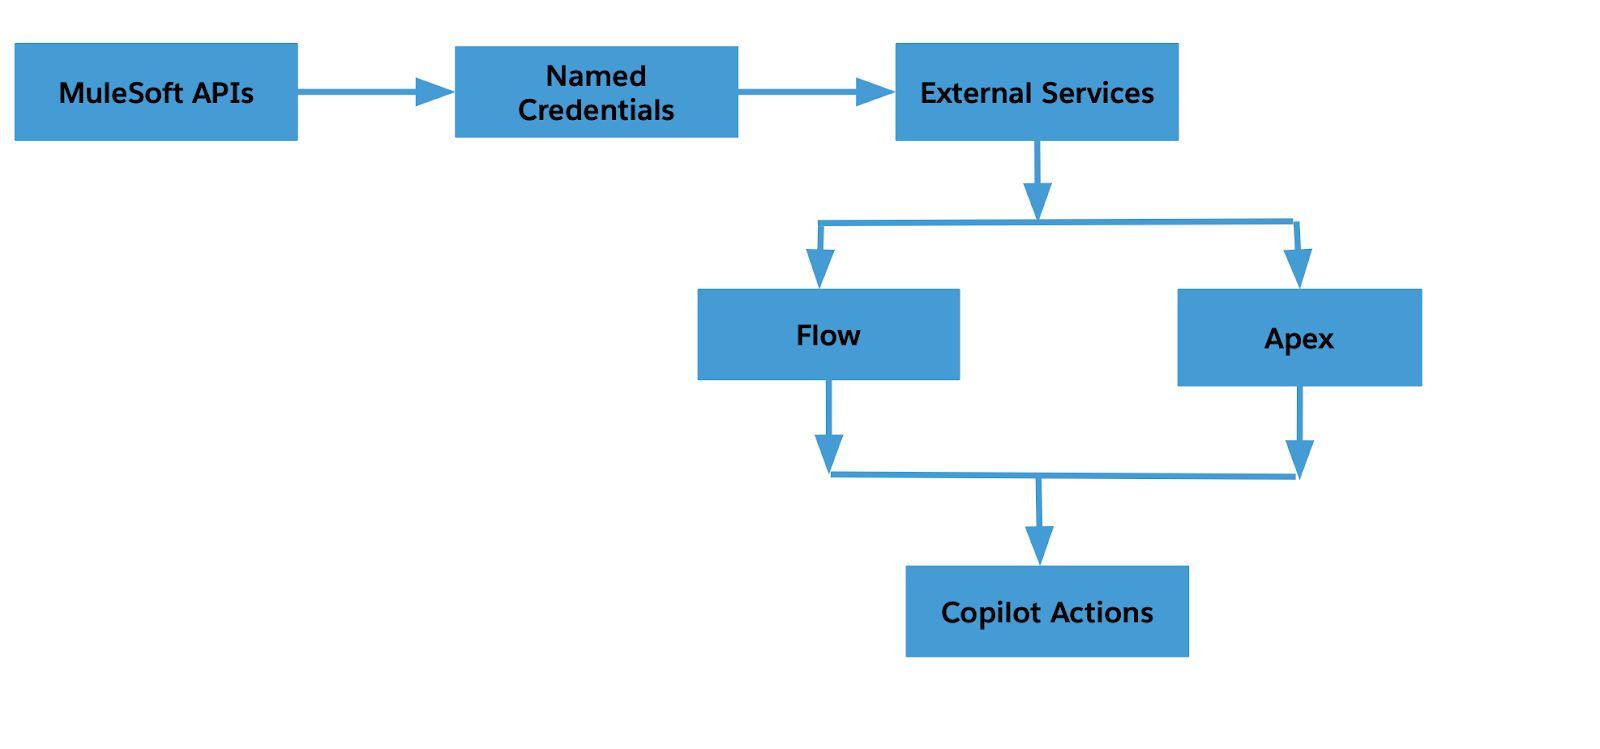
You are now versed in the basics of Copilot, Copilot Actions, and the relationship between Copilot, APIs, and MuleSoft, covering all the steps involved in building intelligent integrations with MuleSoft and Copilot. If you want to learn more, take the Quick Start: Einstein Copilot Trailhead module and watch our session, Optimize Integration with Copilot Actions, APIs, and MuleSoft, presented at TDX24.


