Hello There! If you remember a couple of months back we started a series regarding the Google Cloud Connectors Suite. In the first post we introduced the suite, took a look at how to install the connectors in Studio and built a very simple yet cool iApp that takes contacts from a Google Spreadsheet and turns them into Salesforce contacts, Google Contacts, Google Calendar Events and Tasks. Then on the second post we gave some quick code examples of common usage on the connectors.
On this post we’ll wrap up the series by discussing a very important element of the first post’s sample iApp: The DataMapper. If you’re not familiar with it you can find more information about it on its documentation page, but in a nutshell it’s Mulesoft tool for mapping complex data structures (XML, CSV, JSon, Pojos, Maps, Fix width record files, etc) into any other format while optionally adding some transformations on the way. If you follow the documentation link you’ll find DataMapper most common use case scenarios. But here I’m going to show DataMapper in a different light: Uses of DataMapper that goes beyond the obvious.
Why is DataMapper important to a Google Connectors series?
Simple: Google has a gazillion of APIs. Each one targets a different set of business requirements and thus specifies its own domain model which in turn translates to different sets of data structures. If like in our example you want to turn a spreadsheet row into a Google Contact, you’ll need to transform those different Pojos into instances of each other. Make no mistake: This is not something you need because Google APIs are so very different. Most integration scenarios will require you to map different data formats into each other. The more complex the integration, the most often you’ll find yourself in this situation. For example, in our application we need to transform data from a Google Spreadsheet into a Map that Salesforce can read. Additionally, real life apps will have additional requirements like skipping certain records, adding transformation rules and so forth. These are the kind of stuff that we’re going to discuss on this post and that you will certainly need when combining more than one Google connector in the same app.
DataMapper Rules!
In the first example we’re going to show the rules feature in DataMapper. Rules are basically expressions that you apply into the source data. When evaluated, each of those rules generate a value that is then used on the output. So, let’s consider the first case in the example in which we have a list of Row objects that need to be transformed into a List of Maps.
It all beings with a spreadsheet that looks like this:
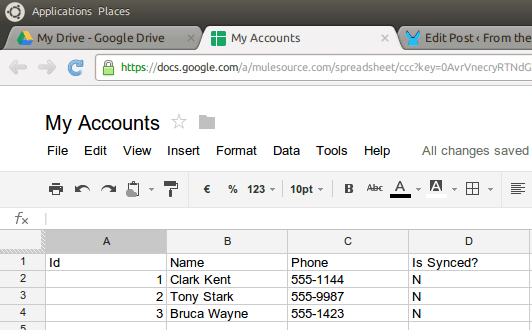
The Google Spreadsheetes connector represents this Structure using classes that look pretty much like this:
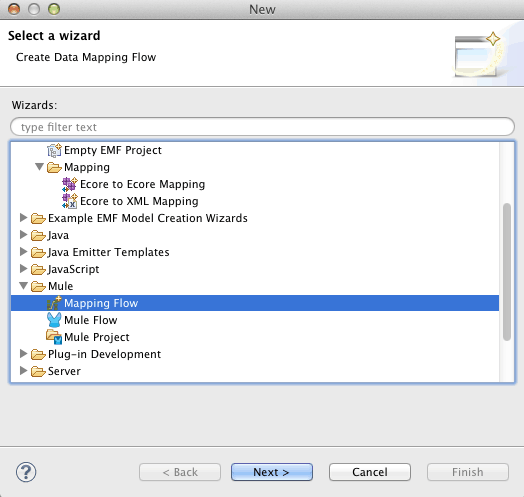
We’ll start by creating a new mapping that goes from a List<Row> to a List<Map, Object> using the File->New menu:
Then give it a name:
Next step is to select your source/destination data structures. The source is a List<Row> so you first need to select “Pojo” and use the options button to select the type. Once you’re there, select “Collection” and provide the actual Pojo class as shown in the next figure:
Then, to select the destination type use the Maps option and select the user defined option:
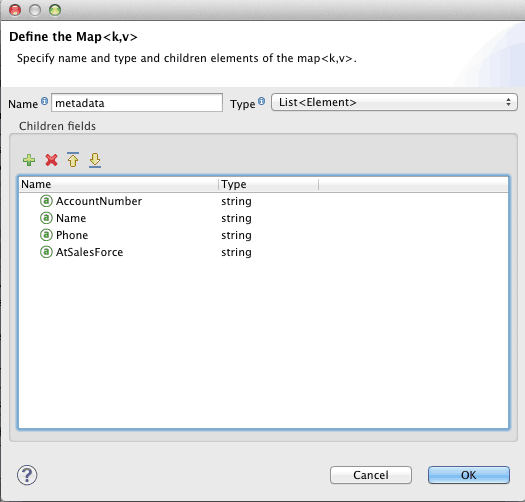
After pushing into the edit fields button, you’ll get a dialog like the one below. We’ll create fields in the map, one per each column in the spreadsheet. Also notice that on the upper right corner of the dialog the List option was selected to tell DataMapper we don’t want to just reduce the List<Row> into one Map<K,V> but instead we want to create a List<Map<K,V>> in which each map represents the data on each element of the list (aka each row):
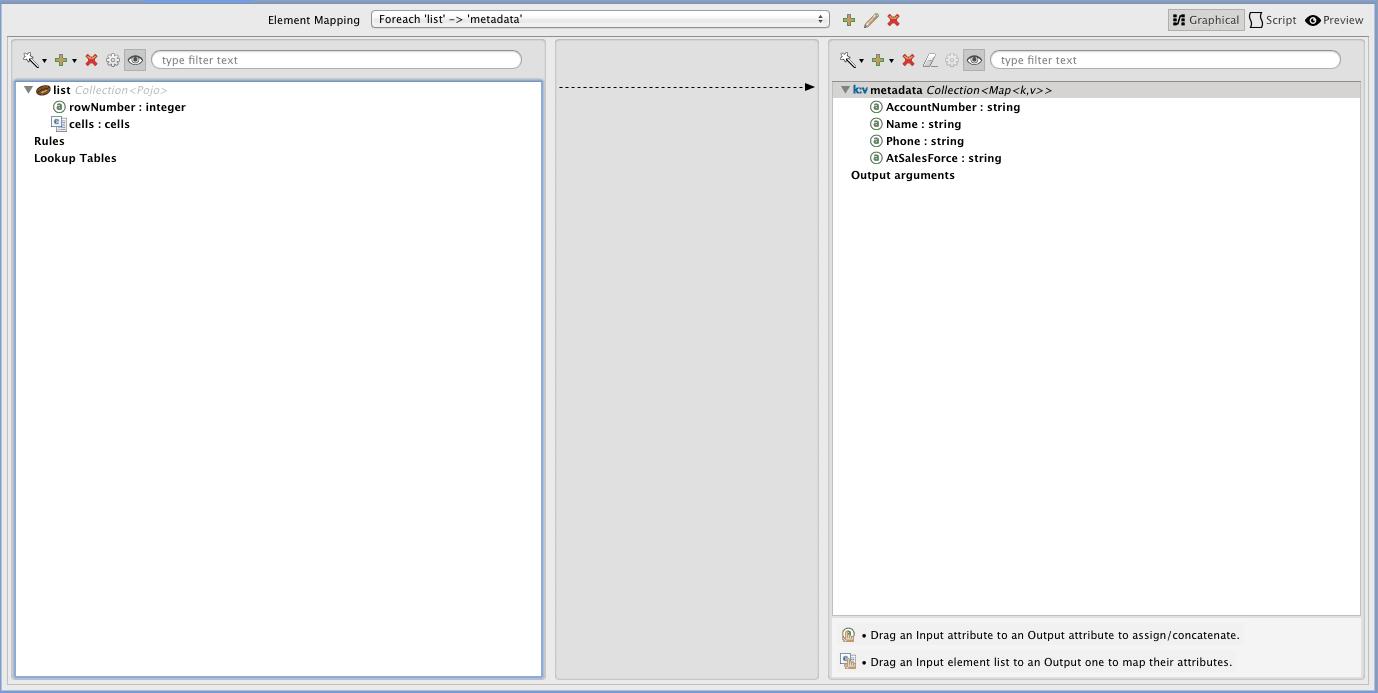
The resulting empty mapping looks like this:
So now is when the need for rules appears. If you look at the List<Row> in the left hand side of the mapping, it turns out that the data that we actually want to map is not at the top level Row object itself but in each of the elements of the cells collection. It also turns out that we want the value of the cell at position zero to go to the first map field, the one at position one to go the second and so forth. So let’s see how we can create rules that extract this values and make it available for mapping:
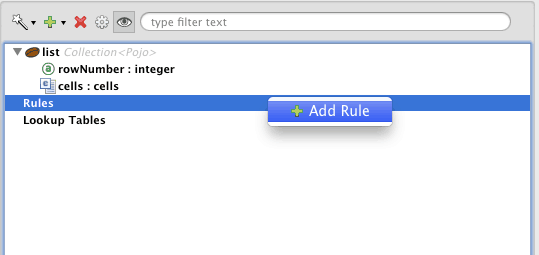
First right click on the rules label and select the add rule option:
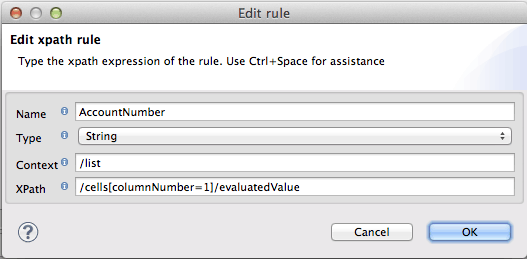
The rule then should look something like this:
The magic happens in the XPath expression field. You’ll see, if the input source were an XML, you could actually use XPath here. But when the input is a Pojo or a List of pojos, you can actually use a jxpath expression. Mega cool huh? So, in this expression we select the cell item with column number one and then we extract its evaluated value. Finally, repeat the process for the other fields. Presto! you have a set of rules that are assignable. All you have to do next is drag & drop those rules into the fields in the right hand side of the screen (aka the destination data structure). The finished mapping looks like this:
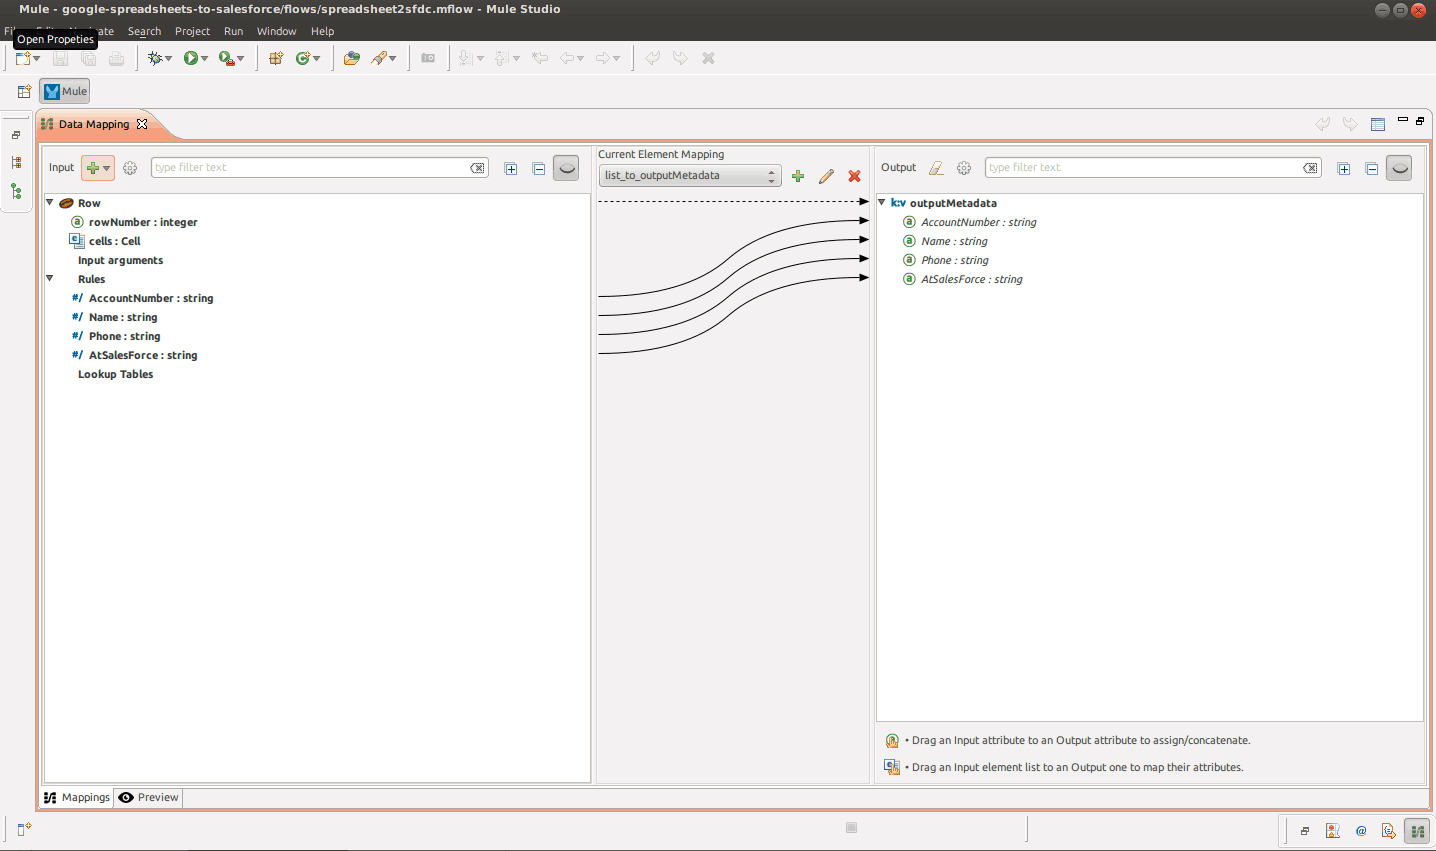
That’s it! You have just transformed data coming from a Google Spreadsheet into a List of Maps that you can feed into the Salesforce connector!
Self Transformation
Another use case present on the example is the one in which you have a list of items that you don’t want to map into something else but simply modify it. DataMapper can also be used for that by simply defining a mapping in which source and destination are of the same type. Can’t I just do the same with Java or Groovy transformers? You can indeed, and for the simple example we’re about to show that could even be a better approach. However, DataMapper adds value by allowing you to do everything graphically without the need of coding. Also, a DataMapper transformation would be easier to maintain if it turns out that new requirements makes the transformation more complex.
In the examples case, what we want is to take the List<Row> that the Google Spreadsheet connectors gave us and change the value of the “AtSalesForce” flag that indicates if that given row has been synced.
Let’s start by creating a new mapping just as we did before, only that in this case the source and destination types will be the same: List<Row>. The mapping will look like this:
As you can see, DataMapper is smart enough to identify that the two data structures are much alike and therefore automatically generated the “trivial transformations” for you, automatically mapping fields that have the same name and are of the same type. However, if you look at the upper center corner of the figure above you’ll see a small combo box that says “for each lists” and “for each cell”. The first (and selected one) makes reference to the top level Row objects that are being mapped. The second option makes reference to the child List<Cell> lists. If you select that option your mapping view will change to something like this:
The figure above shows you the mapping for the child cells list. As before, DataMapper fills into the obvious mappings for you. So what we want to do now is to change the valueOrFormula field of the cell that corresponds to the “AtSalesForce” column. How do we do that? Well, if you click on the valueOrFormula field on the right hand side of the mapping you’ll see something like this:
The image above shows that for each mapping item, you get a text box with the mapping expression. In this case, it says “just use whatever value came in the input”. However, we can change that to this:
This simple ternary expression basically says:”if column number is 4 and the rowNumber is not 1 (because at row one we have the headers) the map a “Y”, otherwise, just use whatever value the source carries.
That’s it, you just modified a value in a nested list of objects without writing one single line of code!!
Loosing weight
Finally, let’s see a final use case in which what you want is to filter a collection. Again, this takes basis on a mapping in which the source and destination types are the same. Considering the following mapping in which we go back to the List<Map<K,V>>:
The two sides of the mapping look a like but there’s one small difference: The one at the right has lost the AtSalesForce flag. No particular reason for that other than in the context of the example app, that flag was no longer needed after the transformation. As before, DataMapper has automatically filled the obvious transformations but, wasn’t this about filtering? Yes it was! This mapping is going to be fed with a List<Map<K,V>> in which some of those maps are going to have an entry with key “AtSalesForce” with a value of “Y” and others are going to have a value of “N”. We want to loose those and generate a List<Map<K,V>> in which only the entries with the “N” remain.
Again: Can’t I just do this with Groovy? Yes you can! But consider what happens if you don’t only have to filter, you also need to do some transformations. DataMapper becomes king in that scenario. So, look at the top of the figure above and click on the pencil icon:
This will allow you to edit the underlying element mapping where you can add a condition like this:
So the condition is clear, do the mapping if AtSalesForce has “N” as a value. Otherwise, that particular element is dropped.
Summary
What you should take away from this post is:
- Whenever you’re integrating two APIs, you’ll much likely need to transform the data in both format and sometimes values
- DataMapper documentation shows you the basic and most common use cases for it.
- In this post, we’ve demonstrated some “not as usual ones” that are nevertheless quite handy when dealing with complex real life applications
I hope you have find this useful. Remember that if you want to check out the code of the example app you can find it following this link.
Please reach out with any comments/questions.
See you next post!


