
Unit tests are executed at different stages during the development life cycle. As mentioned in the first blog post of this series, MUnit for Java Programmers: Introduction, unit tests play an essential role in the implementation, maintenance, and evolutionary stages of a project’s life cycle. Tests can be executed during each of these stages and the results are collected and analyzed. Should the application pass the series of tests it will continue on its journey through the project’s lifecycle. However, for execution to be possible a test harness is required. In this blog post, I will examine the ways in which JUnit and MUnit execute tests and provide results.
Test execution
MUnit test execution is dependent on the Mule runtime. The Mule runtime must be running successfully before the MUnit tests can be executed. This takes time and adds a delay to test execution. In contrast, JUnit has a lightweight test harness and tests run almost immediately. This is important to consider when designing processes that require test execution. Typically tests are executed as part of a CI/CD pipeline and during development. For MUnit tests it may be convenient to execute a subset of those tests. This allows only those tests that are relevant to the development undertaken to be executed.
Executing a subset of JUnit tests
JUnit provides an annotation-driven and marker-interface approach to defining subsets of test cases. The test is annotated with the @Category annotation which is configured with a marker interface representing the name of the tag by which to classify the test case.
@Test @Category(Assertion.class)
public void testAssertEquals() {
  String actual = "animals";
  assertEquals("All animals are equal, some more than others", actual, "animals");
}
interface Assertion {}
FIg 1: The test case is annotated with the marker interface.
An empty class is annotated with the test case classes that contain annotations for the given marker interface.
@RunWith(Categories.class)
@IncludeCategory(Assertion.class)
@SuiteClasses({AssertionTest.class, OnlyCatTest.class})
public class AssertionTestSuite {}
Fig 2: The test suites and category are configured in one test suite class.
Executing a subset of MUnit tests
The tagging of test cases is much simpler in MUnit. Any test can be tagged with one or more tags. This is done at the munit:test element.
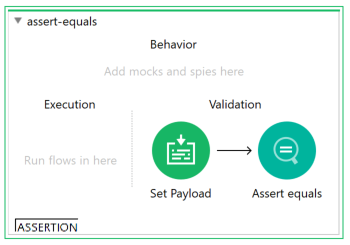
<munit:test name="assert-equals" tags="assertion">Fig 3: Test case tagged “assertion.”
To execute a subset of cases, the MUnit tests can be executed using the Maven Plugin. All tagged tests or a subset of tagged tests can be executed from the command line.
mvn clean test -Dmunit.tags=assertion,mockFig 4: Executed only those test cases annotated assertion and mock.
Alternatively, the POM file can be configured to execute a set of tagged test cases.
<plugin>
  <groupId>com.mulesoft.munit.tools</groupId>
  <artifactId>munit-maven-plugin</artifactId>
  <version>2.2.1</version>
  <configuration>
    <munitTags>assertion</munitTags>
  </configuration>
</plugin>
Fig 5: Configure the MUnit Maven Plugin to execute only test tagged assertion.
In addition to specifying the tag, you can specify the actual MUnit test configuration XML file to execute when the test is launched.
mvn clean test -Dmunit.test=assertion-test-suite.xml
mvn clean test -Dmunit.test=.*suite.xml (regular expression)
mvn clean test -Dmunit.test=assertion-test-suite.xml#assert-equals
<munitTest>assertion-test-suite.xml#assert-equals</munitTest>
Fig 6: The various ways you can execute subset of tests.
Ignore feature in JUnit tests
JUnit allows tests to be ignored by annotating test cases with the @Ignore annotation.
@Test @Ignore
public void testAssertThatHasItems() {
  assertThat(Arrays.asList("cat", "dog", "hamster"),
             hasItems("cat", "hamster"));
}
Fig 7: Ignore this test when tests are executed.
Ignore feature in MUnit tests
MUnit allows tests to be ignored by setting the ignore attribute of the munit:test element to true.
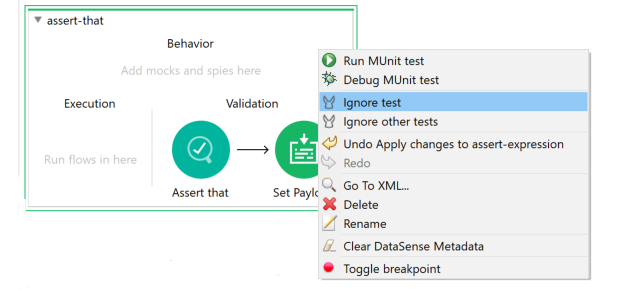
<munit:test name="assert-equals" tags="assertion" ignore="true">Fig 7: Set the ignore attribute to true.
All tests can be skipped by setting the -DskipTests flag on a Maven execution or the skipMunitTests element in the POM file.
mvn clean package -DskipTests
<skipMunitTests>true</skipMunitTests>
Fig 8: Configure Maven to execute tests.
Sleep and timeout with JUnit
Time-related behavior can be simulated in JUnit by sleeping a thread. There are various ways to do this but one way is to use the sleep() method from the java.util.concurrent.TimeUnit class. Timeouts can be tested for using either the org.junit.rules.Timeout rule or set the timeout property of the @Test annotation.
@Rule
public Timeout globalTimeout = Timeout.millis(1000);

@Test
public void testSleep() throws InterruptedException {
  TimeUnit.MILLISECONDS.sleep(5000);
}

@Test(timeout = 500)
public void testTimeOut() throws InterruptedException {
  TimeUnit.MILLISECONDS.sleep(5000);
}
Fig 9: The timeout and sleep set in test case.
Sleep and timeout with MUnit
MUnit replicated sleep functionality by configuring the sleep event processor with a time to wait value and time unit.
<munit-tools:sleep time="1" doc:name="Sleep" timeUnit="MINUTES"/>Fig 10: Configure the sleep event process to wait.
Timeout is configured on the munit:test element with the timeOut attribute. By default, MUnit tests will timeout after two minutes.
<munit:test name="timeout-test-suiteTest" timeOut="5000">Fig 11: Set the timeOut attribute on munit:test element.
Maven and MUnit
As we have already seen, MUnit tests are executable via the Maven command mvn clean test, thanks to the MUnit Maven Plugin. This plugin also configures the test coverage report allowing you to configure the test coverage percentage and the report format.
<plugin>
  <groupId>com.mulesoft.munit.tools</groupId>
  <artifactId>munit-maven-plugin</artifactId>
  <version>2.2.1</version>
  <executions>
    <execution>
      <id>test</id>
      <phase>test</phase>
      <goals>
        <goal>test</goal>
        <goal>coverage-report</goal>
      </goals>
    </execution>
  </executions>
  <configuration>
    <coverage>
      <runCoverage>true</runCoverage>
      <formats>
        <format>html</format>
        <format>console</format>
      </formats>
      <requiredApplicationCoverage>80</requiredApplicationCoverage>
      <requiredResourceCoverage>10</requiredResourceCoverage>
      <requiredFlowCoverage>80</requiredFlowCoverage>
    </coverage>
   </configuration>
</plugin>
Fig 12: The MUnit Maven Plugin provides a range of configuration options.
The test coverage report’s default location is {project root}targetsitemunitcoverageassets.
Test results and MUnit
Surefire reports can be configured to generate when MUnit tests are executed via Maven, mvn surefire-report:report. By default, Surefire reports are located in the {project root}targetsurefire-reports directory and the HTML report is located in {project root}targetsite.
<plugin>
  <artifactId>maven-surefire-plugin</artifactId>
  <version>2.20.1</version>
  <configuration>
    <groups>com.mulesoft.assertion.AssertionTestSuite</groups>
  </configuration>
</plugin>
Fig 13: Configure that Maven Surefire Plugin to generate test reports.
Conclusion
This series of blog posts explored the MUnit testing framework from the perspective of a Java programmer showing that there are striking similarities between the way a Java developer would implement tests and how a Mule developer would meet the same requirement. In many cases, the approach replicates fthe JUnit approach exactly, such as in assertion testing. In other cases, MUnit forms its own view on how tests should be applied, such as the implementation of Spies.
Any experienced Java developer will have no issues adapting to unit testing implementation using MUnit.
If you are interested in learning more about MUnit and related DevOps related activities essential for the implement production-ready Mule applications then consider our course Anypoint Platform Development: Production-Ready Development Practices (Mule 4).


