RosettaNet is a subsidiary of GS1 US, formerly the Uniform Code Council, Inc. (UCC), aimed at establishing standard processes for the sharing of business information (B2B). The RosettaNet standard is based on XML and defines message guidelines, interfaces for business processes, and implementation frameworks for interactions between companies. The standard is widely spread in the global semiconductor industry, but also in electronic components, consumer electronics, telecommunication and logistics.
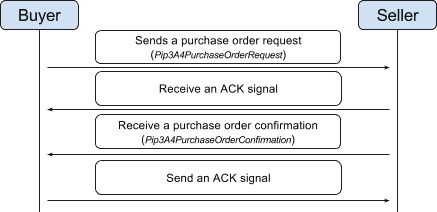
As part of broadening MuleSoft’s coverage in B2B, we are excited to release Anypoint Connector for RosettaNet! In this blog post, I’d like to walk you through simple demo apps to show you how to use RosettaNet Connector to send and receive RosettaNet messages. The demo apps demonstrate the following Purchase Order diagram.
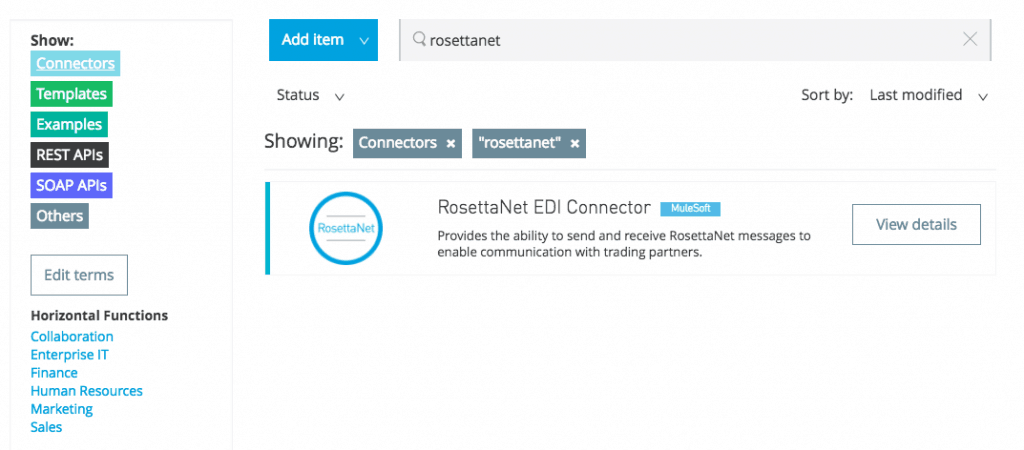
Before you start with the demo app, please make sure you have the RosettaNet Connector v1.0.0 downloaded from the Exchange.
After you install the RosettaNet Connector, download “rosettanet-buyer-app” and “rosettanet-seller-app” from this page and import them into Studio. You can run these two apps in the shared domain in Studio, but to show the logged messages clearly, I will use two Studios: one for the buyer app and the other for the seller app.
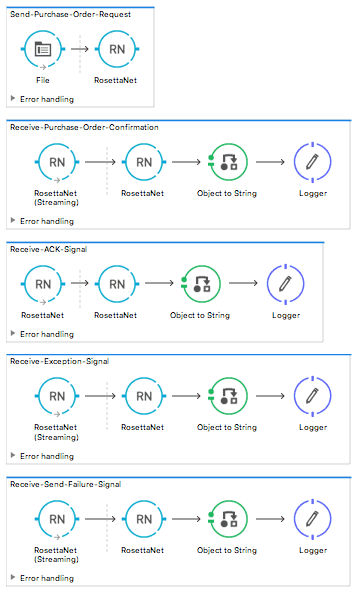
Buyer App
The buyer app performs the following actions:
- Send a purchase order to a seller.
- Receive a signal from the seller. There are three different types of signals
- ACKNOWLEDGE: this signal means the purchase order is received by the seller.
- EXCEPTION: this signal means the purchase order is sent to the seller, but the seller sends an exception. Among many reasons, one would be an invalid purchase order.
- SEND_FAILURE: this signal means the RosettaNet Connector fails to send the purchase order. Each PIP message has the number of retrials and the connector tries to resend the message up to the specified number. If it fails, SEND_FAILURE signal would be generated.
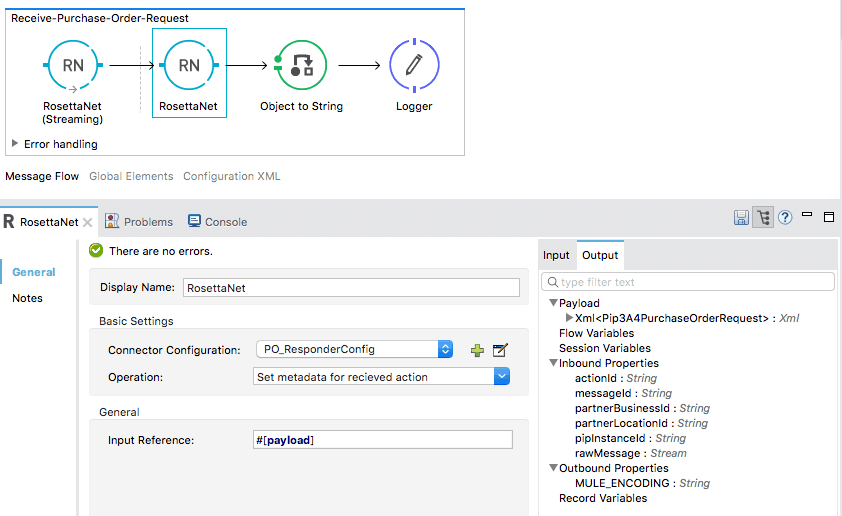
- Receive a purchase order confirmation from the seller.
- Send a signal to the seller. This is handled by the RosettaNet Connector automatically.
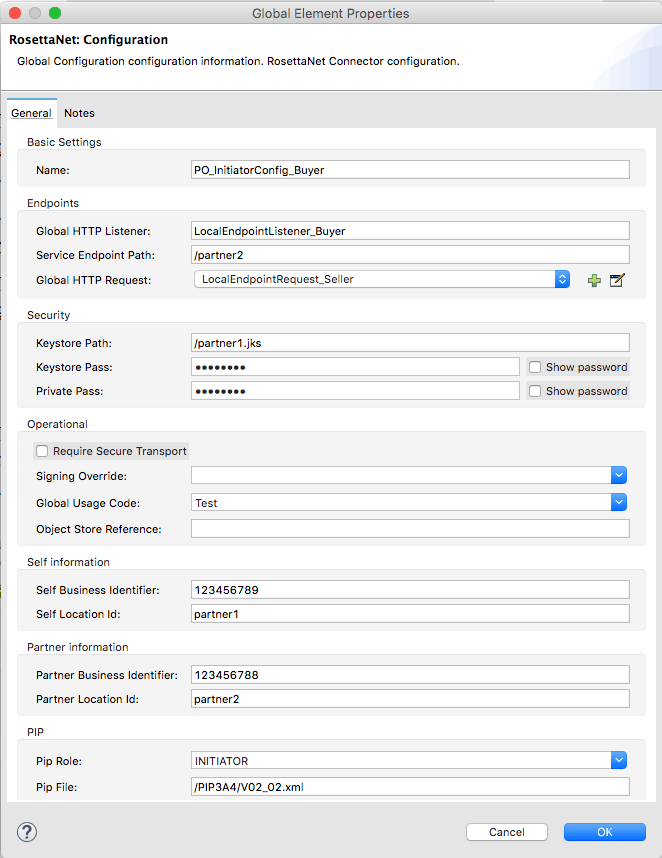
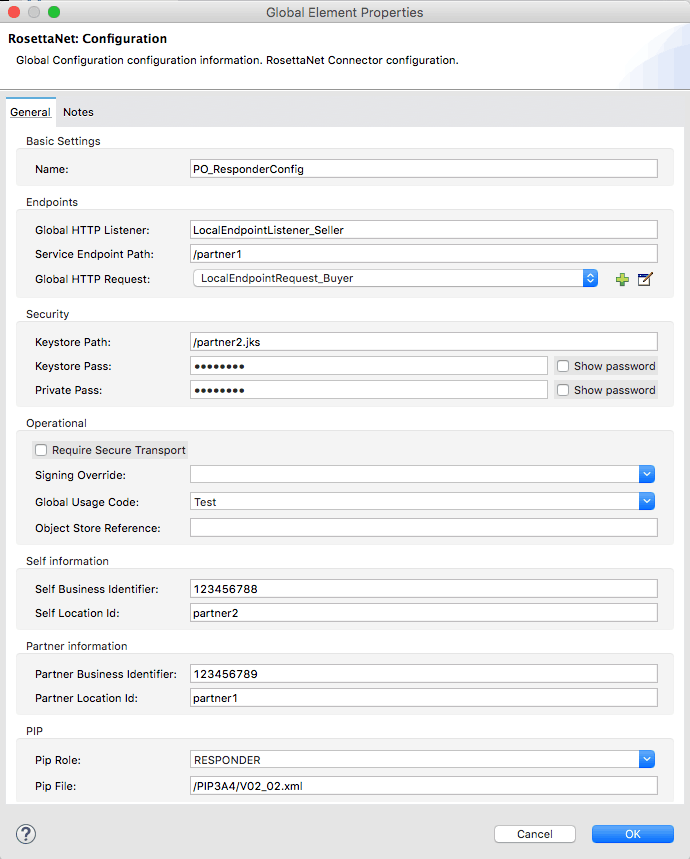
Once you load the buyer app, go to Global Elements to configure the RosettaNet Connector go to Global Elements. There are three configurations you need to complete:

- HTTP Listener (This is the endpoint where the buyer app receives RosettaNet messages from the seller app.)
- Name: LocalEndpointListener_Buyer
- Host: localhost
- Port: 8082
- Base Path: /rnif
- HTTP Request (This is the endpoint where the buyer app sends RosettaNet messages.)
- Name: LocalEndpointRequest_Seller
- Host: 0.0.0.0
- Port: 8081
- Base Path: /rnif/partner1
- RosettaNet Connector Configuration
- Endpoints
- Global HTTP Listener Reference: LocalEndpointListner_Buyer
- Service Endpoint Path: /partner2 (This is the endpoint path the buyer app receives RosettaNet messages from the seller app.)
- Global HTTP Request Reference: LocalEndpointRequest_Seller
- Keystore(partner1.jks) which includes partner1(buyer) private key and cert, partner2 (seller) cert is located under “src/main/resources.”
- Endpoints
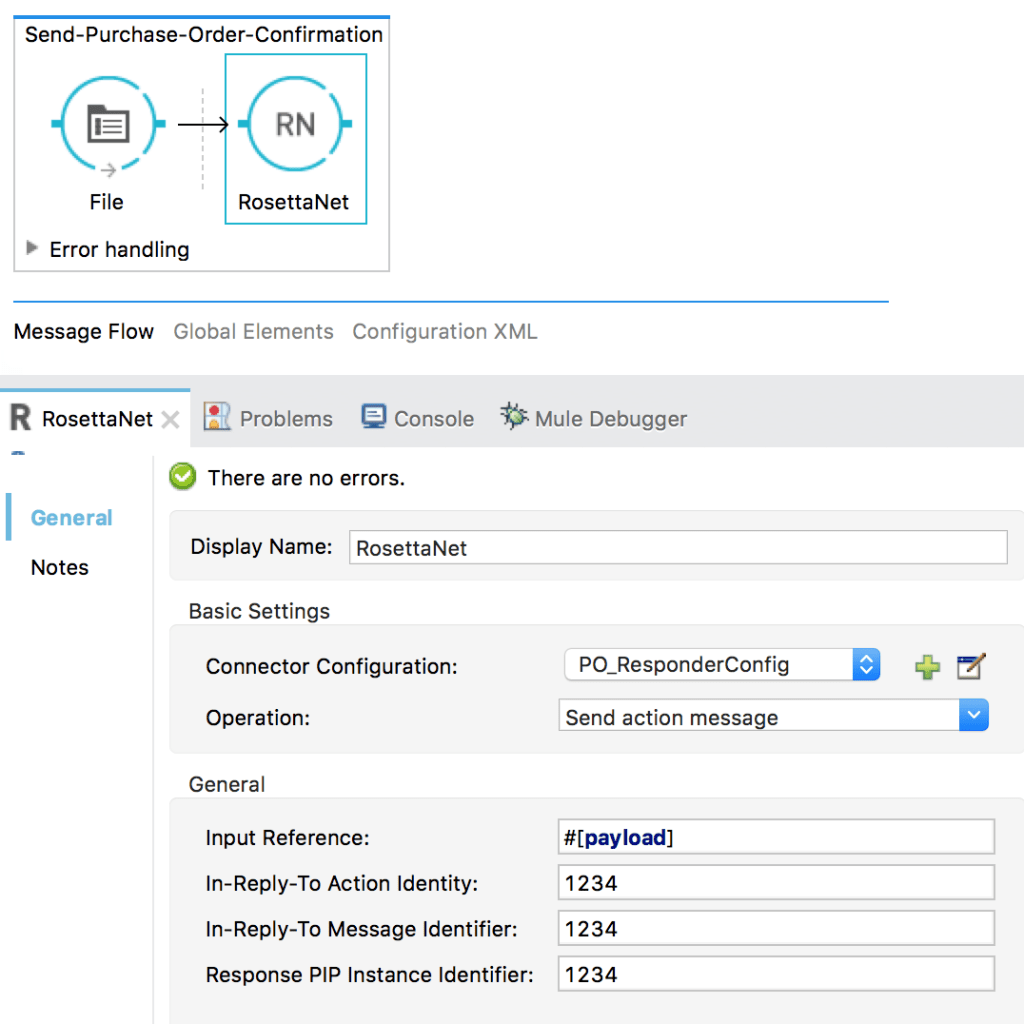
Before you start running the seller app, let’s take a look at the second flow, called “Send-Purchase-Order-Confirmation.” As you can see below, sending a purchase order confirmation expects four parameters:
- Input Reference: #[payload] <- a reference to the content of purchase order confirmation in xml format which the connector will use to generate a Purchase Order Confirmation in the RosettaNet format.
- The following parameters can be used to match a Purchase Order Confirmation with a specific Purchase Order Request. They can be found in the inbound properties (actionId, messageId, pipInstanceId) when a Purchase Order Request is received. A seller can store these values in a database or object store and reference them in the “Send-Purchase-Order-Confirmation” flow. If the seller use the same Mule flow for receiving a Purchase Order Request and sending a Purchase Order Confirmation, the following parameters will be automatically handled.
- In-Reply-To Action Identity (actionId)
- In-Reply-To Message Identifier (messageId)
- Response PIP Instance Identifier (pipInstanceId)
For the sake of simplicity, 1234 has been put in the demo app.
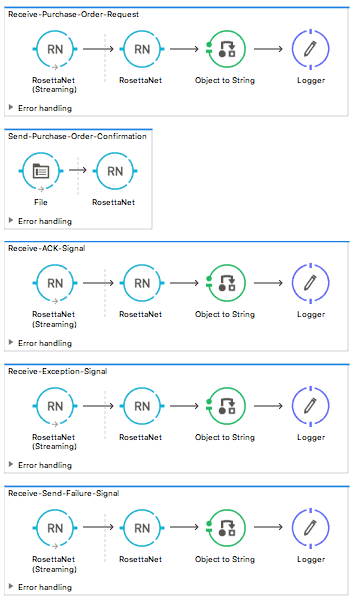
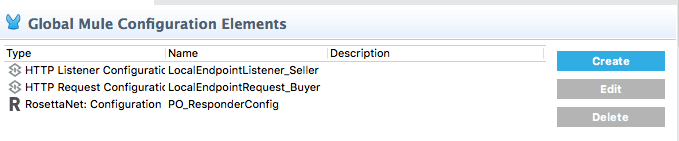
Once you load the seller app, go to Global Elements to configure the RosettaNet Connector go to Global Elements. There are three configurations you need to complete:
Sending a Purchase Order Request
Once you run the Buyer and Seller apps, please go to the Buyer app to send a purchase order. You can find a sample purchase order request under “po-out,” and drag and drop it to “po-in.” As you can see in your Studio console, the RosettaNet Connector generates a RosettaNet message based on the same purchase order request (xml), and sends it to the seller.
If you scroll down your Studio console, you will find the logged ack signal from the seller.
In the Studio console for Seller app, you will find that the purchase order request is logged, and the following auto-generated ack signal.
Sending a Purchase Order Confirmation
In the Seller app, You can find a sample purchase order confirmation under “confirm-out,” and drag and drop it to “confirm-in.” As you can see in your Studio console, the RosettaNet Connector generates a RosettaNet message based on the same purchase order confirmation(xml), and sends it to the buyer.
If you scroll down your Studio console, you will find the logged ack signal from the buyer.
In the Studio console for Buyer app, you will find that the purchase order confirmation is logged, and the following auto-generated ack signal.
For new users, try the above example to get started, and for others, please share with us how you are planning to use the RosettaNet Connector to process your RosettaNet messages! Also, explore the Anypoint Exchange to see other resources you can leverage today.