This tutorial is the first in a series of blog posts that explain how to integrate Mule and Social Media.
Today’s post will focus on connecting to Twitter and sending a tweet (if you don’t know what Twitter is read this). Subsequent tutorials will cover:
Mule Server and Studio versions
For this integration, I am using the latest version of Mule ESB Community Edition with Mule Studio (1.0.0). This sample can also be run in standalone Mule ESB Community Edition and Mule ESB Enterprise Editions.
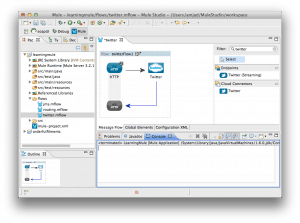
Mule Studio comes with built-in Twitter connector we can straight away use in Studio. Lets build a new twitter flow that looks like below. We will create an HTTP inbound end point that forwards request to Twitter connector. Finally, the Twitter connector returns a twitter4j.StatusJSONImpl object that will be transformed using an expression-transformer to display response object’s string representation.

Let’s build the sample now.
- Create a new Mule flow and name it “twitter“.
- Drag and drop a new HTTP inbound end point on to “twitterFlow1”. Double click on HTTP icon to bring up properties dialog. Specify “addtweet” for Path field.

- Click on “Global Elements” tab and click on Create to bring up Global Type dialog box. Select “Twitter” from “Cloud Connectors” section. Leave default values and click Ok. We need to configure twitter account to generate necessary security tokens. I will explain this process in next section.

- Drag and drop Twitter connector next to HTTP inbound end point. Double click on Twitter icon to bring up properties dialog. Select Twitter connector we created in previous step for “Config Reference” field. Select “Update status” for Operation field. Finally specify “#[header:INBOUND:mymessage]” as Status. This expression extracts “mymessage” parameter value from HTTP request.


- Finally drag and drop an “expression transformer” next to “Twitter” connector. Double click on Expression icon to bring up properties dialog. Specify evaluator as “groovy” and expression as “payload.toString()”. More on expression transformers can be read from Mule 3 documentation.


Here is the completed flow. I have erased my generated keys.
Pretty simple, right? To explain in more detail:
In MuleStudio this syntax will be indicated as an error because MuleStudio is still trying to use the older version of the XSD.
Anyway, what do all these attibutes mean?
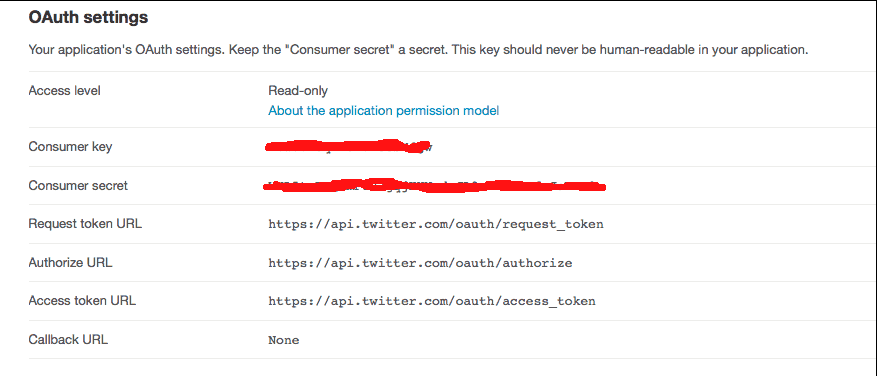
The “consumerKey”, “consumerSecret”, “oauthToken” and “oauthTokenSecret” are in fact keys that are generated by the Twitter application. (More on that in a minute.)
Configure Twitter
Before your are able to start using the Twitter integration you will have to do some configuration in your Twitter account.
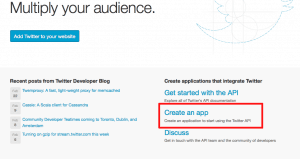
Go to the following url: https://dev.twitter.com and sign in with your Twitter username and password.
First, you should add an application:

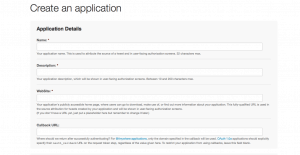
Fill in all the fields in the screen and agree to the “Terms and Conditions.”
Once your application has been generated, you can choose from a tab bar to configure your application in more detail:

You will see that the consumer key and consumer secret are already generated but the access level is Read-only. If you want to read more information on the Twitter permisson model you can click on the link.

To authenticate your application with your Twitter account you will have to generate authentication keys. This is not done by default:

Click the button to create your access tokens and the following screen will appear:

By default the access level is Read-only. If you need access to direct messages you will have to update your Access level. This can be done in the following ways:
Consumer keys
Go to the Settings tab and adjust the access level:

OAuth keys:
You should recreate your access token (after changing the access level in the settings tab) if you also want to update your access level of your OAuth keys.

Running the application
Right click on twitter.mflow and select Run As Mule Application. Once application has successfully started, you can test the application with the following URL: http://localhost:8081/addtweet?mymessage=hello. Do check your twitter account to see a new tweet with message “hello”.
A successful twitter update will result in following response:
If you ever try to tweet the same message twice you will get the following response from Twitter:
And that’s it! Have fun!
This is a guest post from Mule community member Tom Stroobants. Thank you Tom! (we’ll be sending you a cool T-shirt). If anyone else in the Mule community would like to write a guest post, please email us.


