This is second in series of how to DevOps articles, and is a follow-up to the MUnit blog – HowTo(DevOps) – Leveraging MUnit For Test Automation.
A core component of the continuous integration process, that includes the previously discussed test automation framework, is the build process. As soon as the developer commits the code to version control repository, the build tool compiles the source code runs unit and integration tests and generates feedback for the developers.
Although Anypoint Studio makes it easy to build and test Mule applications, support for popular build tools like Maven helps accelerate adoption of continuous integration practices within an organization. MuleSoft’s Anypoint Platform not only provides built-in Maven support for Mule applications but also for its testing framework MUnit.
Maven support in Mule can be categorized as follows:
- Build and run a new Maven project in Studio
- If you’re starting from scratch and you want to use Maven to build your project, begin by creating a new Maven-based project in Studio. You can then run the project with Maven from the command line, or run it directly from Studio.
- Mavenize an existing Studio project
- If you have built a project in Studio and want to convert it to a Maven project, you can use the built-in support in Studio to “Mavenize” the project.
- Create and run a new Maven in Mule
- If you want to use Maven to create your project for Mule (outside Studio), use Maven Tools for Mule. This is a Mule plugin that makes it extremely easy to create a Mule application by running Maven with a few simple parameters.
- Import an existing Maven project into Studio
- If you already have a Maven project you want to work on further with Studio, use the built-in functionality in Studio to import the pom.xml file.
Maven plugin for MUnit Example Walkthrough
MUnit provides a Maven plugin that allows you to run your MUnit tests as part of your continuous integration environment, directly from Maven itself.
The following example demonstrates mavenizing an existing Mule application that is also using MUnit. Even though this article has step-by-step instructions on downloading and preparing an existing project for below example, it will help to have walked through How-To Leveraging MUnit for Test Automation Guide blog. Also, this requires that Maven is installed on the local machine.
Steps:
- Download existing MUnit application – devops-munit-howto_1.0.0.zip, import into Anypoint Studio workspace and configure per readme file.
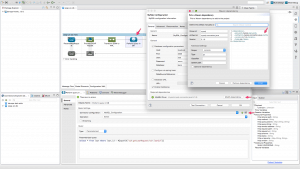
- Configure ‘Anypoint Studio ->Preferences’ to point to local Maven installation, test the installation by clicking on the ‘Test Maven Configuration button. Confirm that “Base command line for builds” field is configured to include -DskipMunitTests option, if not, please add the same explicitly
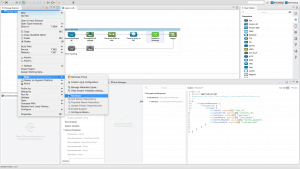
- Mavenize the existing application by right clicking on the project, then ‘devops-howto_1.0.0 -> Mule -> Mavenize’.
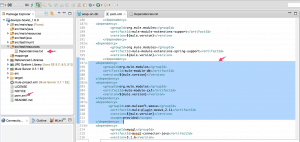
- Once the project is mavenized successfully, POM.xml is generated and saved in the root folder of the project. Maven also requires specifying dependencies for any external jars required, in this case, it’s the JDBC jar file for MySQL, so specify the dependency for same as shown below, copy this snippet to required dependencies for the connector configuration of ‘Perform query in DB’ processor.
- Also, copy module dependencies as specified here or shown below in the generated POM.xml file.
- Now, trial license users are limited to running Mule applications using Maven without MUnit test cases. Hence the ‘-DskipMunitTests’ option was configured earlier along with the maven command.
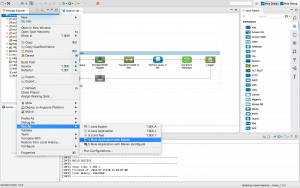
- So, for trial license users, Maven configuration is complete and can now run the Mule application as shown below (Right click on the project –> Run As —> Mule Application with Maven). This will build the project and then also run the project in the Studio. (Troubleshooting tip: In case of exceptions, right click on the project –> Mule –>Populate Maven Repository)
- In the real world, Maven will be used via command line script to build the project. It can be done as follows,
- On the command-line window, switch to the root folder of the project that contains the project pom.xml, e.g. /Users/prashantjoshi/AnypointStudio/How_To_DevOps/devops-howto_1.0.0/
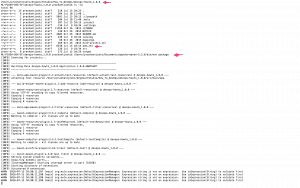
- Execute following on the command line – “<maven root folder>/bin/mvn package”
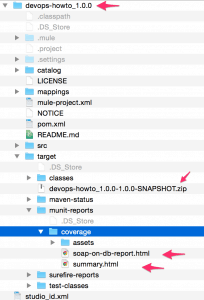
- This will build project zip file, that can be then deployed to mule runtime. The deployable zip file is generated in the <project root>/target folder, e.g. /Users/prashantjoshi/AnypointStudio/How_To_DevOps/devops-howto_1.0.0/target
- MuleSoft customers with enterprise license can also execute MUnit tests with maven. MuleSoft Enterprise Maven customer repository allows access to Mule Enterprise modules, connectors, and other components not included in the trial or community versions, credentials for same can be requested from MuleSoft Support.
- Delete the existing maven repository to repopulate with appropriate dependencies from enterprise repository, usual location of the repository on Windows is ” <Drive>Users<username>.m2″ and on Mac/Unix (/Users/<username>/.m2 – hidden folder)
- Configure settings.xml located in the Maven conf folder (<Maven home>/conf) to include the credentials and repository information as documented in the Referencing MuleSoft’s Enterprise Repositories section of the Mule documentation available online.
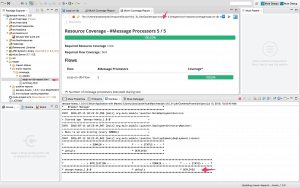
- All configuration is now complete and can now run the Mule application as shown below (Right click on the project –> Run As —> Mule Application with Maven). This will build the project, execute the MUnit test, generate test report and also then run the project in the Studio.
- A test report is generated in HTML format, open same with a web browser as shown below. Also, the console shows that project is deployed and running successfully.
- Again, in the real world, Maven will be used via command line script to test and then build the project. It can be done as follows,
- On the MUnit command-line window, switch to the root folder of the project that contains the project pom.xml, e.g. /Users/prashantjoshi/AnypointStudio/How_To_DevOps/devops-howto_1.0.0/
- Execute <maven root folder>/bin/mvn package
- This will run munit test cases and build project zip file, that can be then deployed to mule runtime. The deployable zip file is generated in the <project root>/target folder, e.g. /Users/prashantjoshi/AnypointStudio/How_To_DevOps/devops-howto_1.0.0/target
- Also, the test report is generated in the following folder,<project root>/target/munit-reports/coverage
Maven support in Mule is consistent across CloudHub/on-premise and standalone/cluster deployments.
The extensible nature of the platform allows the use of other tools as well. For example, there is already a GitHub project for Gradle plugin. Also, since all operations and monitoring capabilities of the platform are available as API’s, it becomes much easier to integrate with existing and future continuous integration practice and tools, leading to a more efficient and agiler DevOps organization.


