
A recent report by Rightscale, which surveyed 1,002 technical professionals, revealed that respondents run 41% of their workload in public clouds. A number of market research firms estimate that the public cloud market value will reach between $195B and $236B by 2020. Within this public market, Amazon continues to maintain its leadership position.
To serve our customers needs, we have introduced a number of Amazon connectors in the past – including S3, SNS, and SQS – in order to enable our customers to easily connect to Amazon Web Services.
Today, we are thrilled to announce the release of a new connector: Anypoint Connector for Amazon EC2. With this connector, MuleSoft customers can easily:
- Start, stop, and monitor instances;
- Manage Elastic Block Store;
- Assign and unassign IPv6 addresses, and more.
In this blog, I’d like to walk you through a simple demo app to show you how to use the Amazon EC2 Connector. Before you start, please download the demo app, then make sure you download the Amazon EC2 Connector from Anypoint Exchange.
Part 1: Configure the Amazon EC2 Connector
1. After you install the Amazon EC2 Connector and import the demo app into Studio, you will see the following flows:

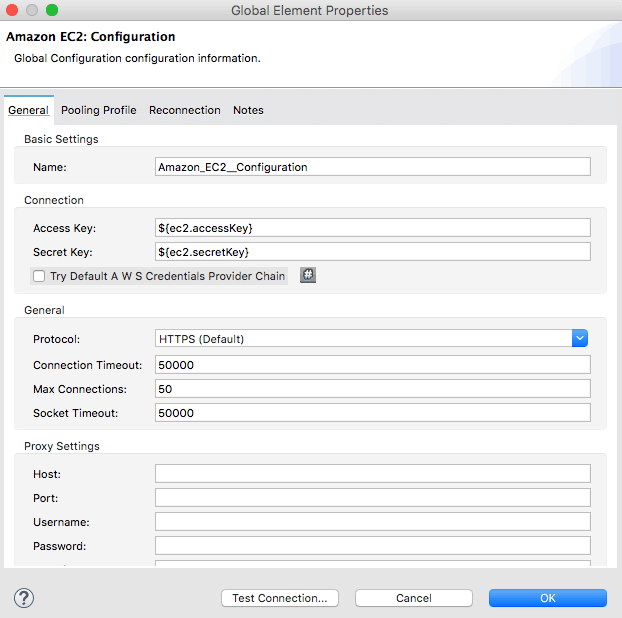
2. First, let us configure the Amazon EC2 Connector. If you go to Global Elements, you will find “Amazon EC2.” After you select “Amazon EC2,” please click on “Edit.”

3. You can directly add your credentials for the Amazon EC2 connector in the configuration; however, I recommend you use the properties file to add this configuration information.
mule-app.properties include the following keys-value pairs:
ec2.accessKey=
ec2.secretKey=
Part 2: Run the Demo App
4. Once you have finished the configuration for your Amazon EC2 environment, run the demo app.
Part 3: Implement the Functions for the Amazon EC2 Connector
The Anypoint Amazon EC2 Connector supports a number of functions, including:
- Instances
- Elastic Block Store
- Elastic IP Addresses
- Security Groups
- Elastic Network Interfaces
- Regions and Availability Zones
- AMIs
- Tags
- Key Pairs
In this step, I will show you how to implement the following functions: Instances, Elastic Block Store, Security Groups, and Elastic Network Interfaces.
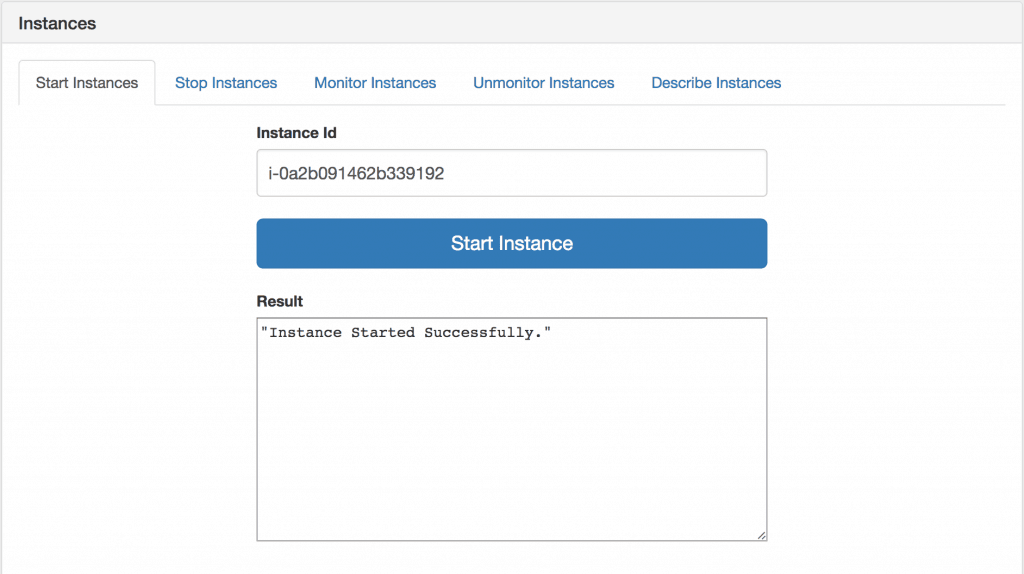
5. First, let us try to start an instance, monitor it, and stop it. Before you start, you need to have an “instance” and an “instance id” in your environment. By simply inputting the “instance id,” you can start the instance directly through the connector. Then, if you log into your AWS console, you will see it “running” in the Instance Status tab.

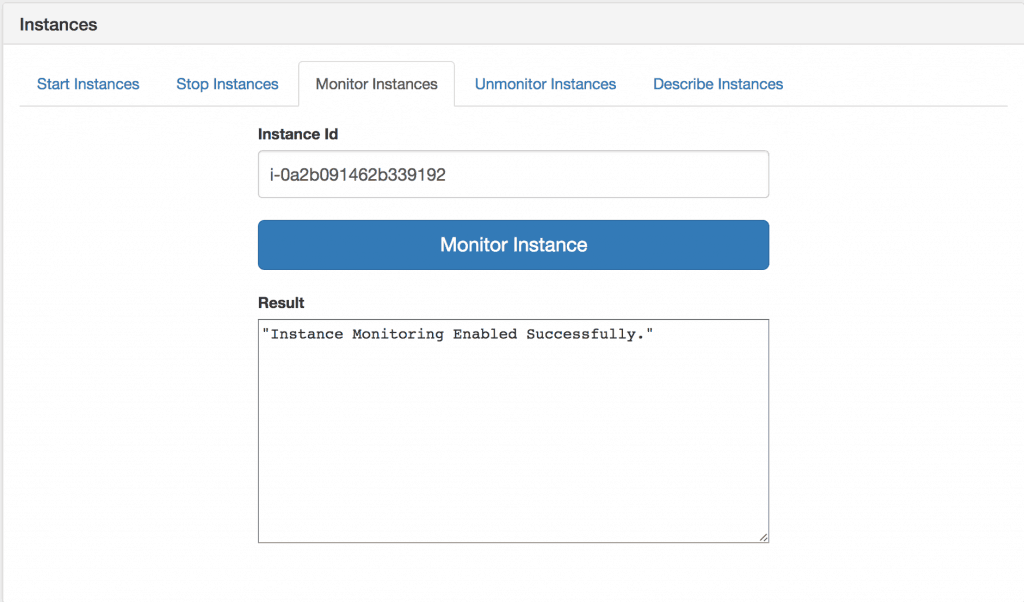
6. Next, when you execute “Monitor Instance” with the instance ID you used in the previous step, you will see that the status of the Monitoring tab in the AWS console has changed to “enabled.”

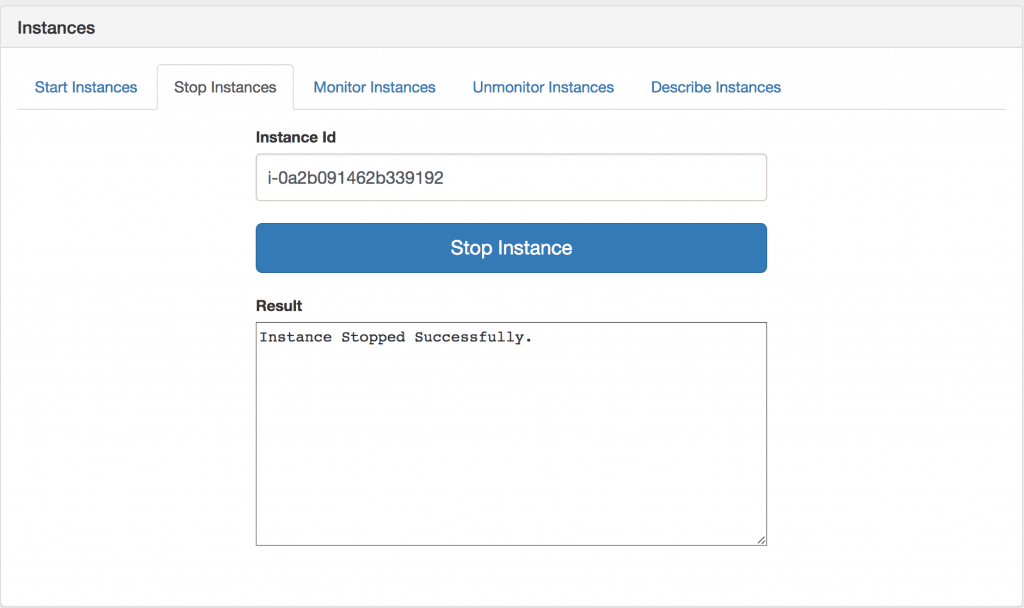
7. Now, you can simply stop the instance by passing the instance id.

8. In this step, let us assign IPv6 addresses for your instance. After you pass the “Network Interface Id” of the instance with the number of the IPv6 address you want to assign, the connector will show you a response with the two IPv6 addresses assigned. Please note that you might receive an error in this step; this is because each instance has a different limit in terms of the number of IP addresses you can assign.
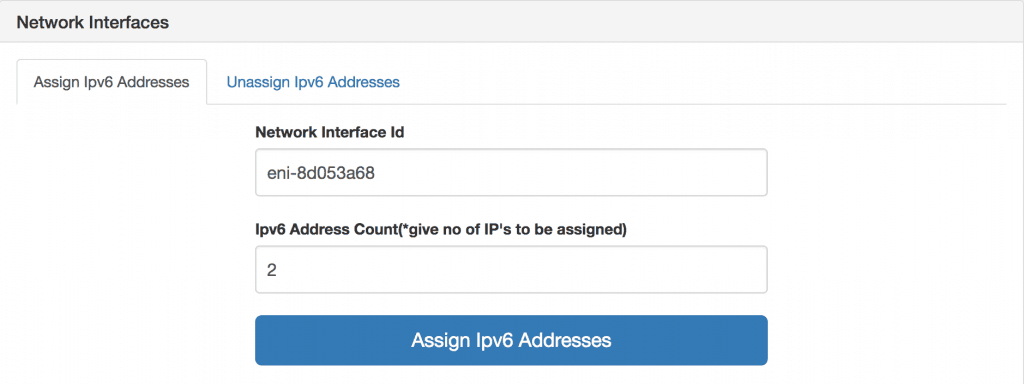
{"networkInterfaceId":"eni-8d053a68","assignedIpv6Addresses":
["2600:1f18:eb:8e00:25a7:6671:ee01:258e","2600:1f18:eb:8e00:3265:91c6:4109:830b"]}
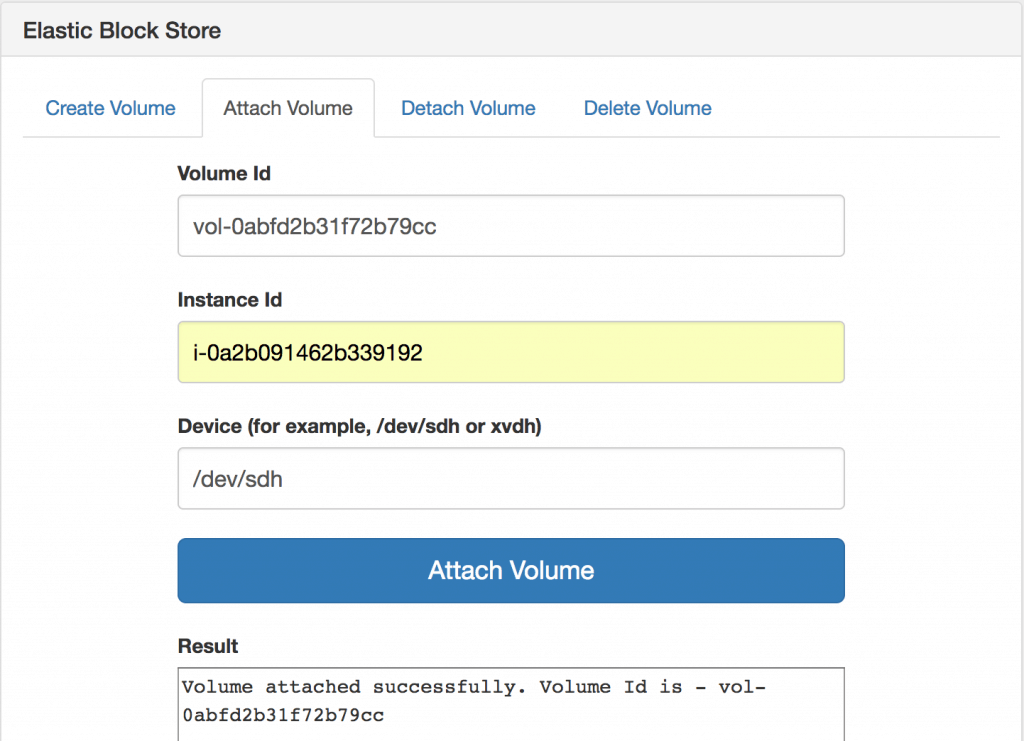
9. Next, we have the Amazon Elastic Block Store. The Elastic Block Store provides persistent block storage volume, which can be used with Amazon EC2 instances and managed with the Amazon EC2 connector. By inputting an Availability Zone (e.g. us-east-1a) and Size (e.g. 1GB), the connector helps you create an Elastic Block Store, which you can then attach to your instance.

Part 4: Create a Security Group
10. Before you begin the security group demo, please detach and delete the volume you just created in the previous step.
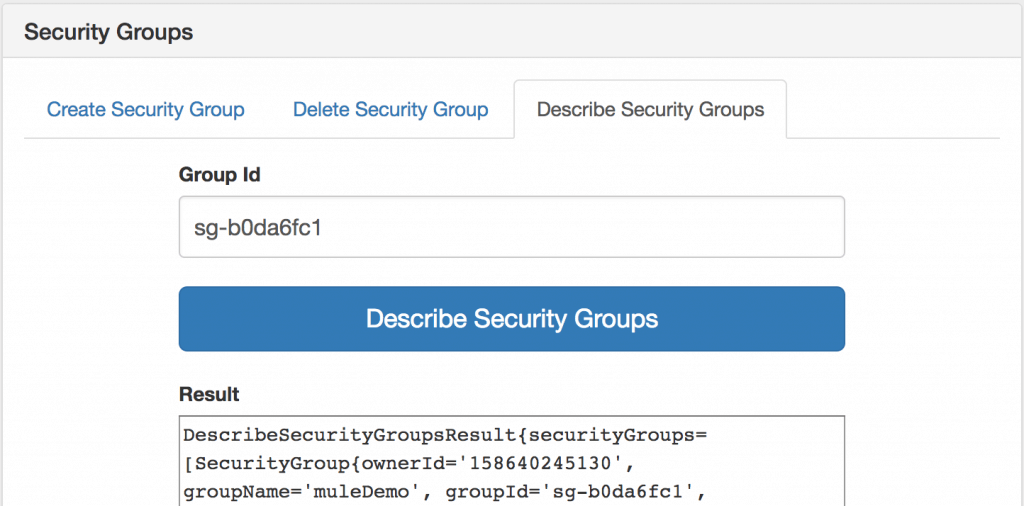
11. Create a security group by specifying the “VPC Id,” “Group Name,” and “Description” of the security group.
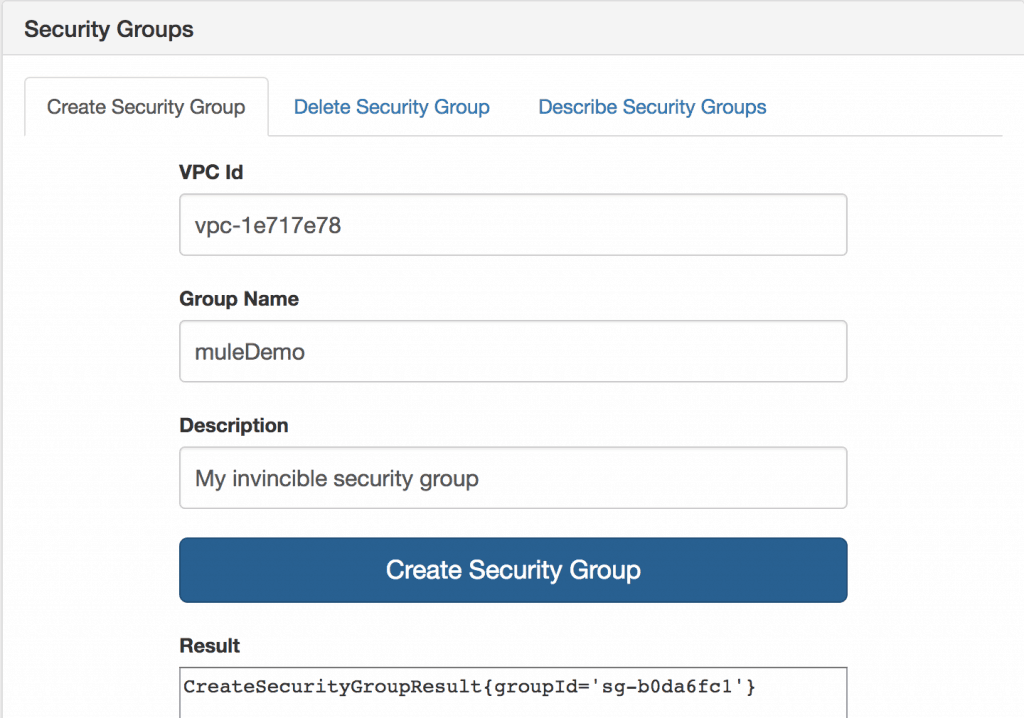
12. When you receive a result of the “Group Id,” you will also receive a detailed description of the security group.
And that’s the end of the demo!
For new users, try the above example to get started, and for others, please let us know how you plan to use the Amazon EC2 Connector!


