IoT Lights demo @ MuleSoft HQ
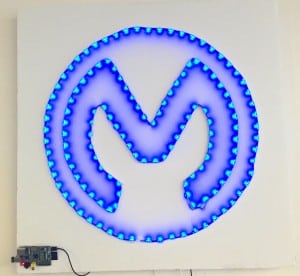
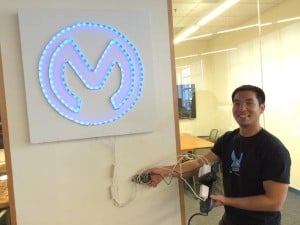
To liven up the 2nd floor of the MuleSoft SF office, we decided to showcase a slightly modified version of the IoT demo we gave in last year’s Chicago and New York MuleSoft Summits. The demo we have listens for any mentions of @mulesoft on Twitter. If found, a Mule app running on a Raspberry Pi makes the lights glow. Initially dim, the lights glow brighter with more mentions.
Now let’s dive into the specifics of this fun little demo we’ve created.
The genesis of this demo was a brainstorming session for a MuleSoft Summit keynote presentation. We wanted to show something that showcased IoT in conjunction with MuleSoft technology. We decided to simulate home automation via APIs, which essentially means using Internet of Things APIs to control the “things” around one’s home. In our case, the “things” we were controlling were Philips Hue light strips (which we shaped to form the MuleSoft logo). In addition, as is typical in many IoT architectures, we used a “controller” closely located to these “things” – think of how a Nest device (controller) manages the heaters (things) around a home. In our case, the controller we used was a lightweight Mule app running on a Raspberry Pi, which connects to both the external network to receive information, and to the internal network to control the lights.
Furthermore, many IoT architectures have more than just “things” and “controllers” close to them. They typically also involve external data centers that perform heavyweight data processing – think of how smart sensors (things) send their information to larger data centers, which do more analytics and processing. In our case, we simulated the “data center” component using CloudHub, MuleSoft’s enterprise integration platform as a service (iPaaS).
Finally, to make the demo more relatable to the audience, we threw in some social media (Twitter), and also used a lightweight machine-to-machine protocol, MQTT, to pass messages between CloudHub and the Raspberry Pi.
The basic architecture for what we have here in the office is shown below:
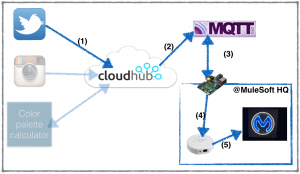
As you can see, there are several phases to the integration:
- Twitter is scanned to detect any tweets that mention @MuleSoft. Once this is detected, we ping a Mule app running in CloudHub.
- Side note: As you can see, the diagram above also includes grayed out icons for Instagram and a color palette calculator. We used these components when we delivered this demo live during Summits. In the live demo, we took a picture using a mobile phone and posted it to Instagram. The photo’s color palette was then calculated and fed to the light bulbs around the room as input. All the bulbs then lit up corresponding to the color palette.
- The CloudHub app stores a message into a queue via MQTT. The payload of the message is the number of tweets that mention @MuleSoft
- A lightweight distribution of Mule running on a Raspberry Pi retrieves the number of tweets from the MQTT queue and brightens the light strips by sending an API call to the hub.
I’ve placed the source code for the Mule application running on the Raspberry Pi in this Github repository. Below is a screenshot of a small part of that application:

Basically, the application runs a bunch of logic, which results in either adjusting the brightness of the lights, or setting the lights to “colorloop” mode, which makes the lights change colors frequently for a set period of time.
Every time you tweet to @Mulesoft our logo puts on a light show! #RaspberryPi #IoT https://t.co/LmQnsRfSdq
— MuleSoft (@MuleSoft) February 20, 2015
Of course, the Mule app we implemented is more complicated than the simple screenshot shown above. We introduced the concept of the light’s brightness “burning down”, which means the lights get dimmer a set amount of time (currently set to 1 minute) after the tweet is detected. We also used several connectors and message processors in the Mule flow, including the MQTT connector and Philips Hue connector.
The behavior of the demo is as follows: if a tweet is detected, the lights becomes brighter and stay bright for exactly 1 minute, after which it returns to its initial state. If more than 1 tweet is detected within a minute, the lights go into “colorloop” mode for 1 minute before finally returning to their natural dim state. The coolest part of this whole demo is that all the logic is controlled by a Mule instance running on a tiny Raspberry Pi!
Let us know you read this blog post by mentioning @MuleSoft on Twitter so you can put on your own light show!