
The need for an externalizing mapping definition comes up often in integration projects. It must be managed and maintained outside the Mule application code and for Mule to retrieve it dynamically.
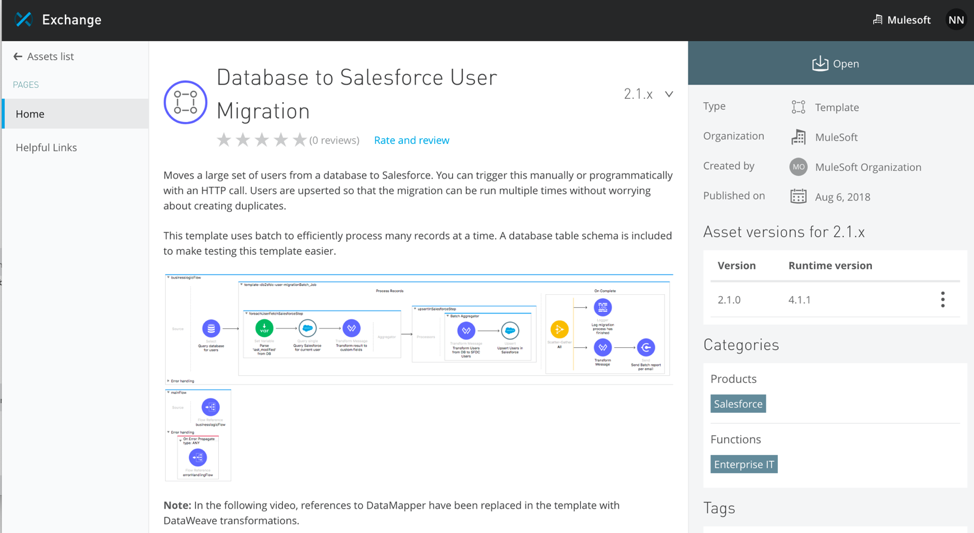
In this example, I have leveraged one of the templates from Anypoint Exchange – Database to Salesforce User Migration. We will use the mapping definition from Salesforce custom object to map the database user information to a Salesforce user.
Pros of an external mapping definition:
1. Establishing a configurable way of setting up new mapping rules rather than changing it in the mapping code in Mule which requires a redeployment.
2. Controlling the mapping externally by System Administrators making it less error-prone.
Pre-requisites:
You will need the following to make this demo work:
1. Sign up for a Salesforce developer account.
2. Create a Salesforce custom object “Mapping_Object__c” in Salesforce and set up the mapping definition for the source and target fields.
3. Set up the values for the source and target fields mapping.
4. Set up a local database with user details.
5. Import “template-db2 sfdc-user-migration” into Anypoint Studio and test.
Step 1: Sign up for a Salesforce developer account
Sign up for a Salesforce developer account at https://developer.salesforce.com/.
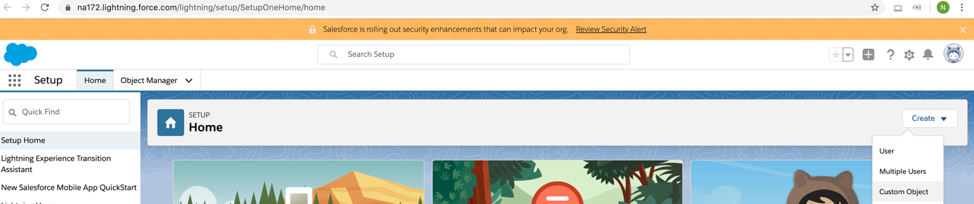
Once you have the account set up, open the developer account and click, “Setup.”

Step 2: Create Salesforce custom object – Mapping_Object__c
Select “Setup,” and click “Custom Object.”
Provide a meaningful name that represents the mapping definition. In this demo, I have called it “Mapping_Object__c.”
Create fields in ”Mapping_Object__c.” We will need fields that represent source, target, default value if applicable, and object name.
For the purpose of this demo, I have set up the custom object and its fields myself but you can ask your Salesforce colleagues to help you set this up.
Step 3: Setup the values for the source and target fields mapping
Once this is set up, we will need to load the values required for the actual mapping in Mule.
Again, for this demo, I have used the “create” operation in Salesforce connector.
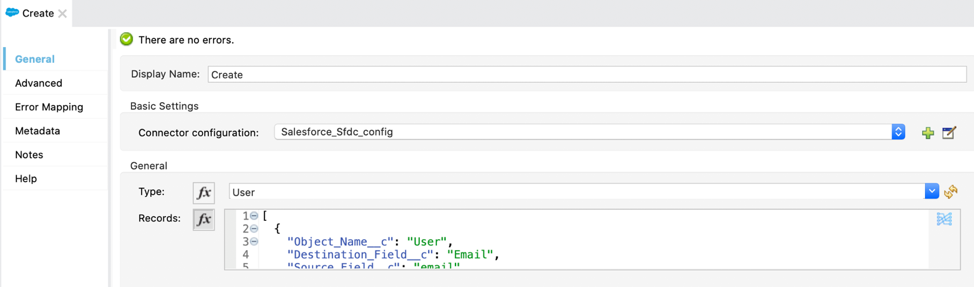
Below is the payload:
[
  {
"Object_Name__c": "User",
"Destination_Field__c": "Email",
"Source_Field__c": "email"
  },
  {
"Object_Name__c": "User",
"Destination_Field__c": "FirstName",
"Source_Field__c": "first_name"
  },
  {
"Object_Name__c": "User",
"Destination_Field__c": "LastName",
"Source_Field__c": "last_name"
  },
  {
"Object_Name__c": "User",
"Destination_Field__c": "CommunityNickname",
"Source_Field__c": "nickname"
  },
  {
"Object_Name__c": "User",
"Destination_Field__c": "Alias",
"Source_Field__c": "alias"
  },
  {
"Object_Name__c": "User",
"Destination_Field__c": "Username",
"Source_Field__c": "email"
  },
  {
"Object_Name__c": "User",
"Destination_Field__c": "ProfileId",
"Source_Field__c": "profileid",
"default__c" : "00e5w000001FNuXAAW"
  },
  {
"Object_Name__c": "User",
"Destination_Field__c": "EmailEncodingKey",
"Source_Field__c": "emailEncodingKey",
"default__c" : "ISO-8859-1"
  },
  {
"Object_Name__c": "User",
"Destination_Field__c": "LanguageLocaleKey",
"Source_Field__c": "languageLocaleKey",
"default__c" : "en_US"
  },
  {
"Object_Name__c": "User",
"Destination_Field__c": "LocaleSidKey",
"Source_Field__c": "localeSidKey",
"default__c" : "en_US"
  },
  {
"Object_Name__c": "User",
"Destination_Field__c": "TimeZoneSidKey",
"Source_Field__c": "timeZoneSidKey",
"default__c" : "America/Los_Angeles"

  }

  ]
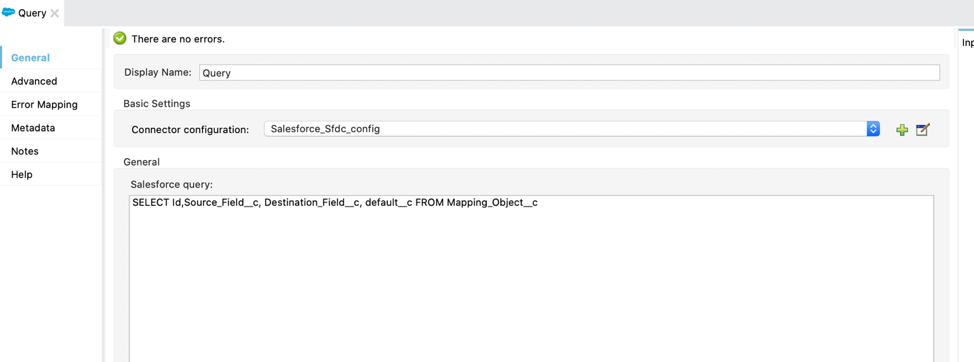
It will look like this in Salesforce when you query using the developer console.

Step 4: Set up Local database with user details
I have created the schema for the user table as shown below and inserted three records.
Step 5: Import “template-db2sfdc-user-migration” into Anypoint Studio and test
Now that the mapping definition is set up and the values for the mapping are created, we can use this in the Mule application code.
Import “template-db2sfdc-user-migration” from Anypoint Exchange in Anypoint Studio.
In the Mule application, in the configuration file, “businesslogicFlow,” query Salesforce to get the mapping definition and save it in a variable, “vars.mapping.” Use a caching strategy based on the requirement to refresh the mapping in Mule. In this demo, I have used the default caching strategy.
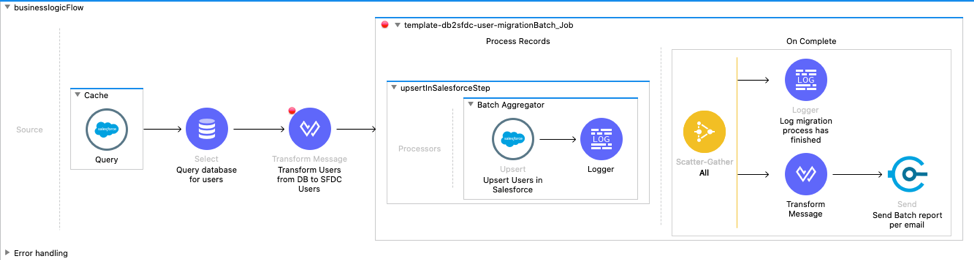
In the DataWeave mapping, use the below code to map the source and target. As you can see there is no hardcoded mapping for the fields.
%dw 2.0
output application/java
var applyMapping = (in, mappingsDef) -> (
   mappingsDef map (def) -> (
   {
   (def.Destination_Field__c) : (in[def.Source_Field__c]) default def."default__c"
 }
)
)
---

((payload map (item, index) -> (
applyMapping(item,vars.mapping)
) reduce ((item, accumulator) -> item ++ accumulator) ))
Input payload:
[
  {
"nickname": "JD",
"last_name": "Doe",
"alias": "JD",
"first_name": "Jane",
"last_modified": "2020-04-18T18:02:24",
"email": "jane.doe@xyz.com"
  },
  {
"nickname": "JB",
"last_name": "Burke",
"alias": "JB",
"first_name": "Jared",
"last_modified": "2020-04-18T18:02:24",
"email": "jared.burke@xyz.com"
  },
  {
"nickname": "JS",
"last_name": "Smith",
"alias": "JS",
"first_name": "John",
"last_modified": "2020-04-18T19:02:24",
"email": "john.smith@xyz.com"
  }
]
Output payload:
[
  {
"TimeZoneSidKey": "America/Los_Angeles",
"LocaleSidKey": "en_US",
"LanguageLocaleKey": "en_US",
"EmailEncodingKey": "ISO-8859-1",
"ProfileId": "00e5w000001FNuXAAW",
"Username": "jane.doe@xyz.com",
"Alias": "JD",
"CommunityNickname": "JD",
"LastName": "Doe",
"FirstName": "Jane",
"Email": "jane.doe@xyz.com"
  },
  {
"TimeZoneSidKey": "America/Los_Angeles",
"LocaleSidKey": "en_US",
"LanguageLocaleKey": "en_US",
"EmailEncodingKey": "ISO-8859-1",
"ProfileId": "00e5w000001FNuXAAW",
"Username": "jared.burke@xyz.com",
"Alias": "JB",
"CommunityNickname": "JB",
"LastName": "Burke",
"FirstName": "Jared",
"Email": "jared.burke@xyz.com"
  },
  {
"TimeZoneSidKey": "America/Los_Angeles",
"LocaleSidKey": "en_US",
"LanguageLocaleKey": "en_US",
"EmailEncodingKey": "ISO-8859-1",
"ProfileId": "00e5w000001FNuXAAW",
"Username": "john.smith@xyz.com",
"Alias": "JS",
"CommunityNickname": "JS",
"LastName": "Smith",
"FirstName": "John",
"Email": "john.smith@xyz.com"
  }
]
After the completion of the batch job, you can view the users created in Salesforce as shown in the picture below.

Learn more
I hope this example helps you think of more creative ways to utilize the dynamic mapping in DataWeave and use it in your integrations. To learn more about this feature, read how to dynamically map based on a feature.


