
Whether you’re new to Anypoint Platform or an integration expert, you may have SOAP-based services that you want to migrate “as is.” This can be done using MuleSoft (Mule 3) by migrating them as proxies. Often those SOAP-based services have WSDL that are not self-contained (WSDLs having dependencies on other WSDLs), this blog will give you some helpful tricks for this type of migration.
Creating WSDL-based proxy
Creating WSDL-based proxy on Anypoint Platform consists of:
- Creating an asset in Exchange.
- Creating an API Proxy using the Exchange Asset on API Manager.
- Deploy the API Proxy to Runtime Manager.
Below is a step-by-step approach to create a proxy on the Anypoint Platform using WSDLs:
Create an asset in Exchange
- Sign on to the right Business Group of Exchange and click on New. This will open a window as below.
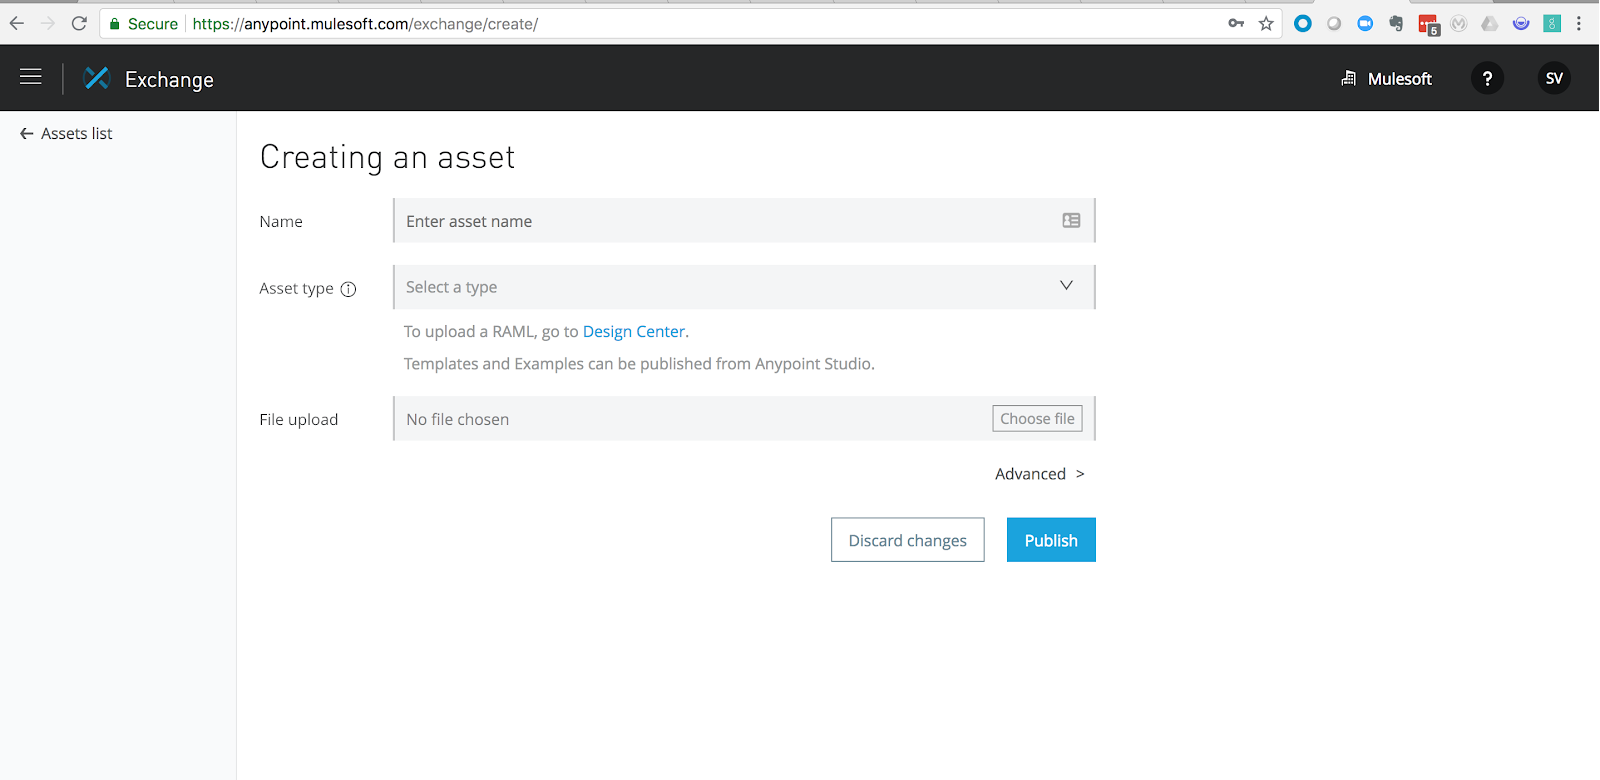
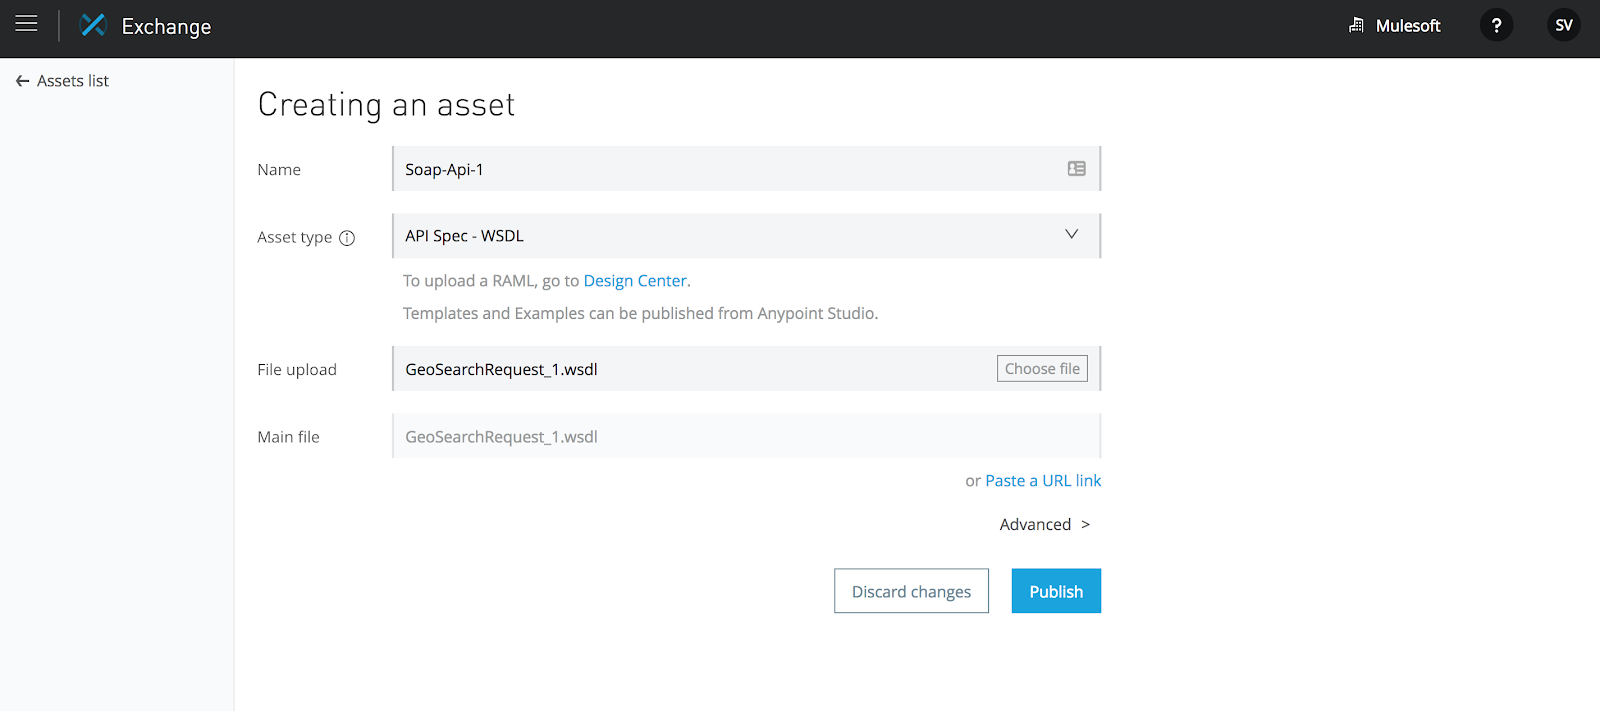
- Fill in the name of the asset, choose asset type as API Spec – WSDL, select the name of the WSDL file (main WSDL file if selecting locally) or paste the URL to retrieve the WSDL, and click Publish. This will create an asset in Exchange.
You can learn more about how to create an asset in Exchange here.
Create API proxy on API Manager
- From the Anypoint Platform navigation bar, click API Manager, This will open the API Administration page in your default environment, such as Sandbox.
- In the API Administration, select Manage API, then Manage API From Exchange.
- From the Manage API from Exchange page, click to the API Configurations page, select options as shown in the below image, which refer to the asset created in the “Create an asset in Exchange” section above.
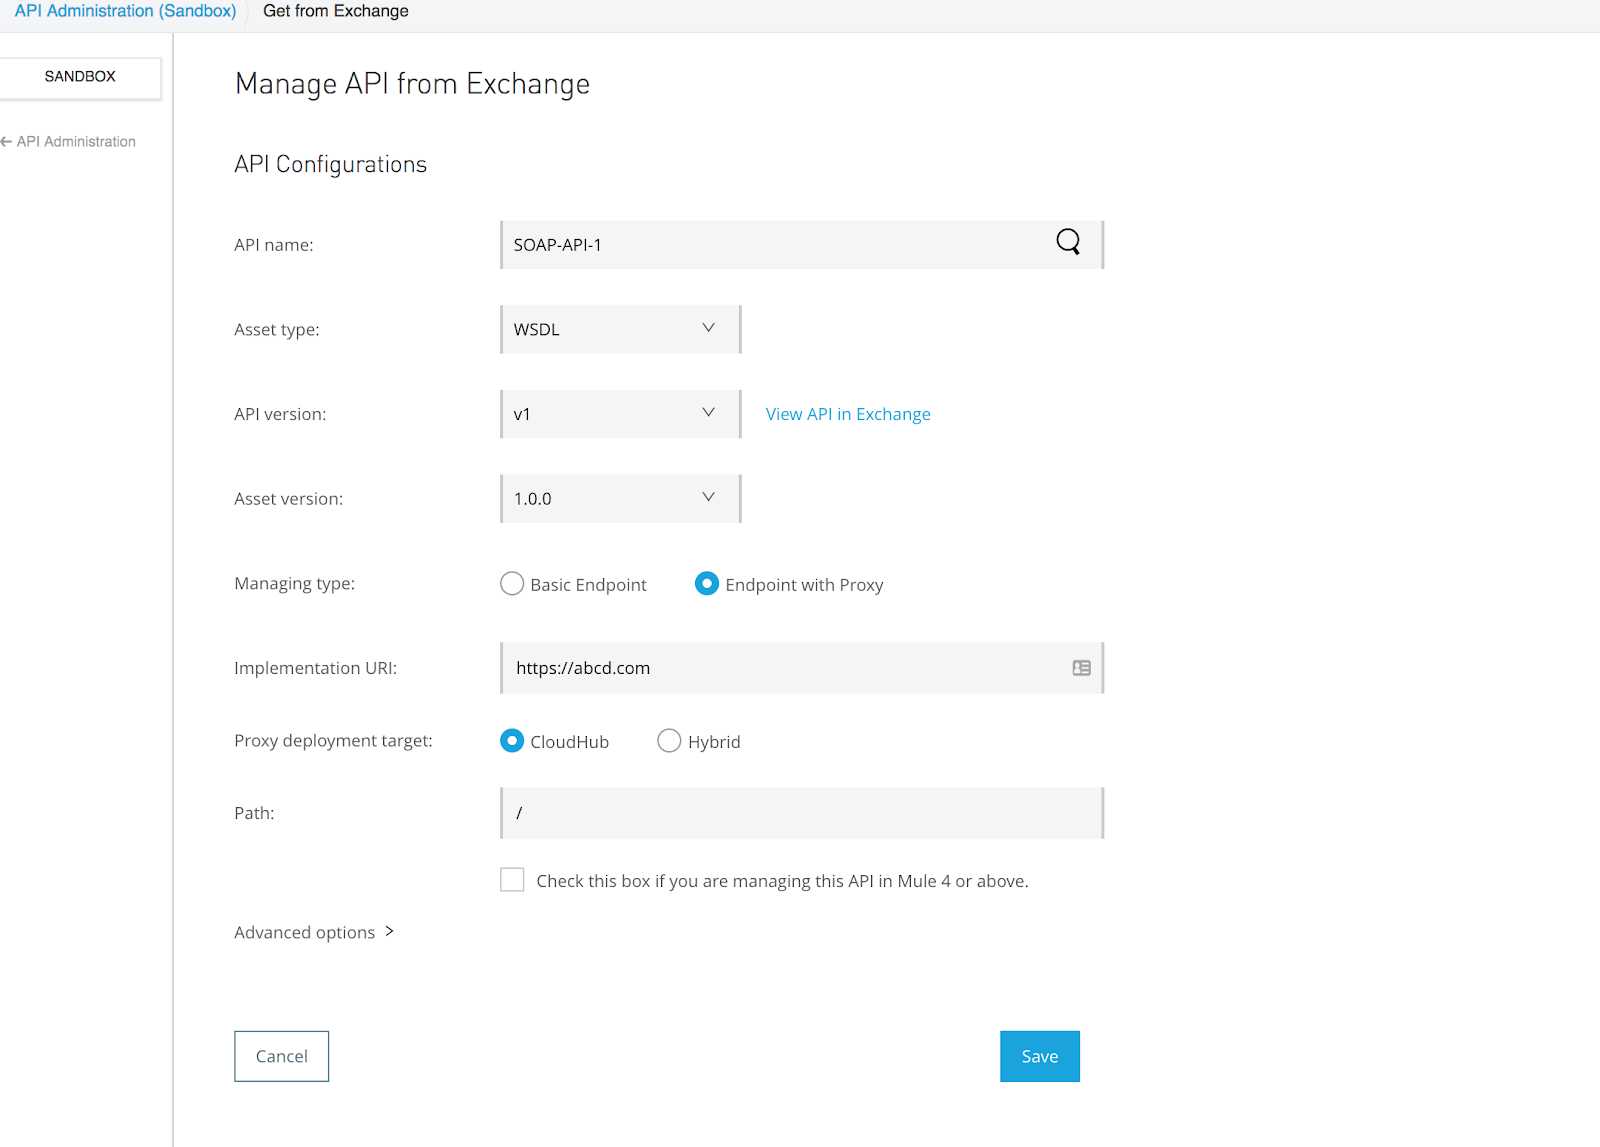
- Click the Save button to create an API Profile in the API manager.
You can learn more about how to Create API Proxy on API Manager here.
Deploy the API proxy to Runtime Manager
After clicking on the Save button in step number “d” in the “Create API Proxy on API Manager” section above, the screen in the below image will appear.
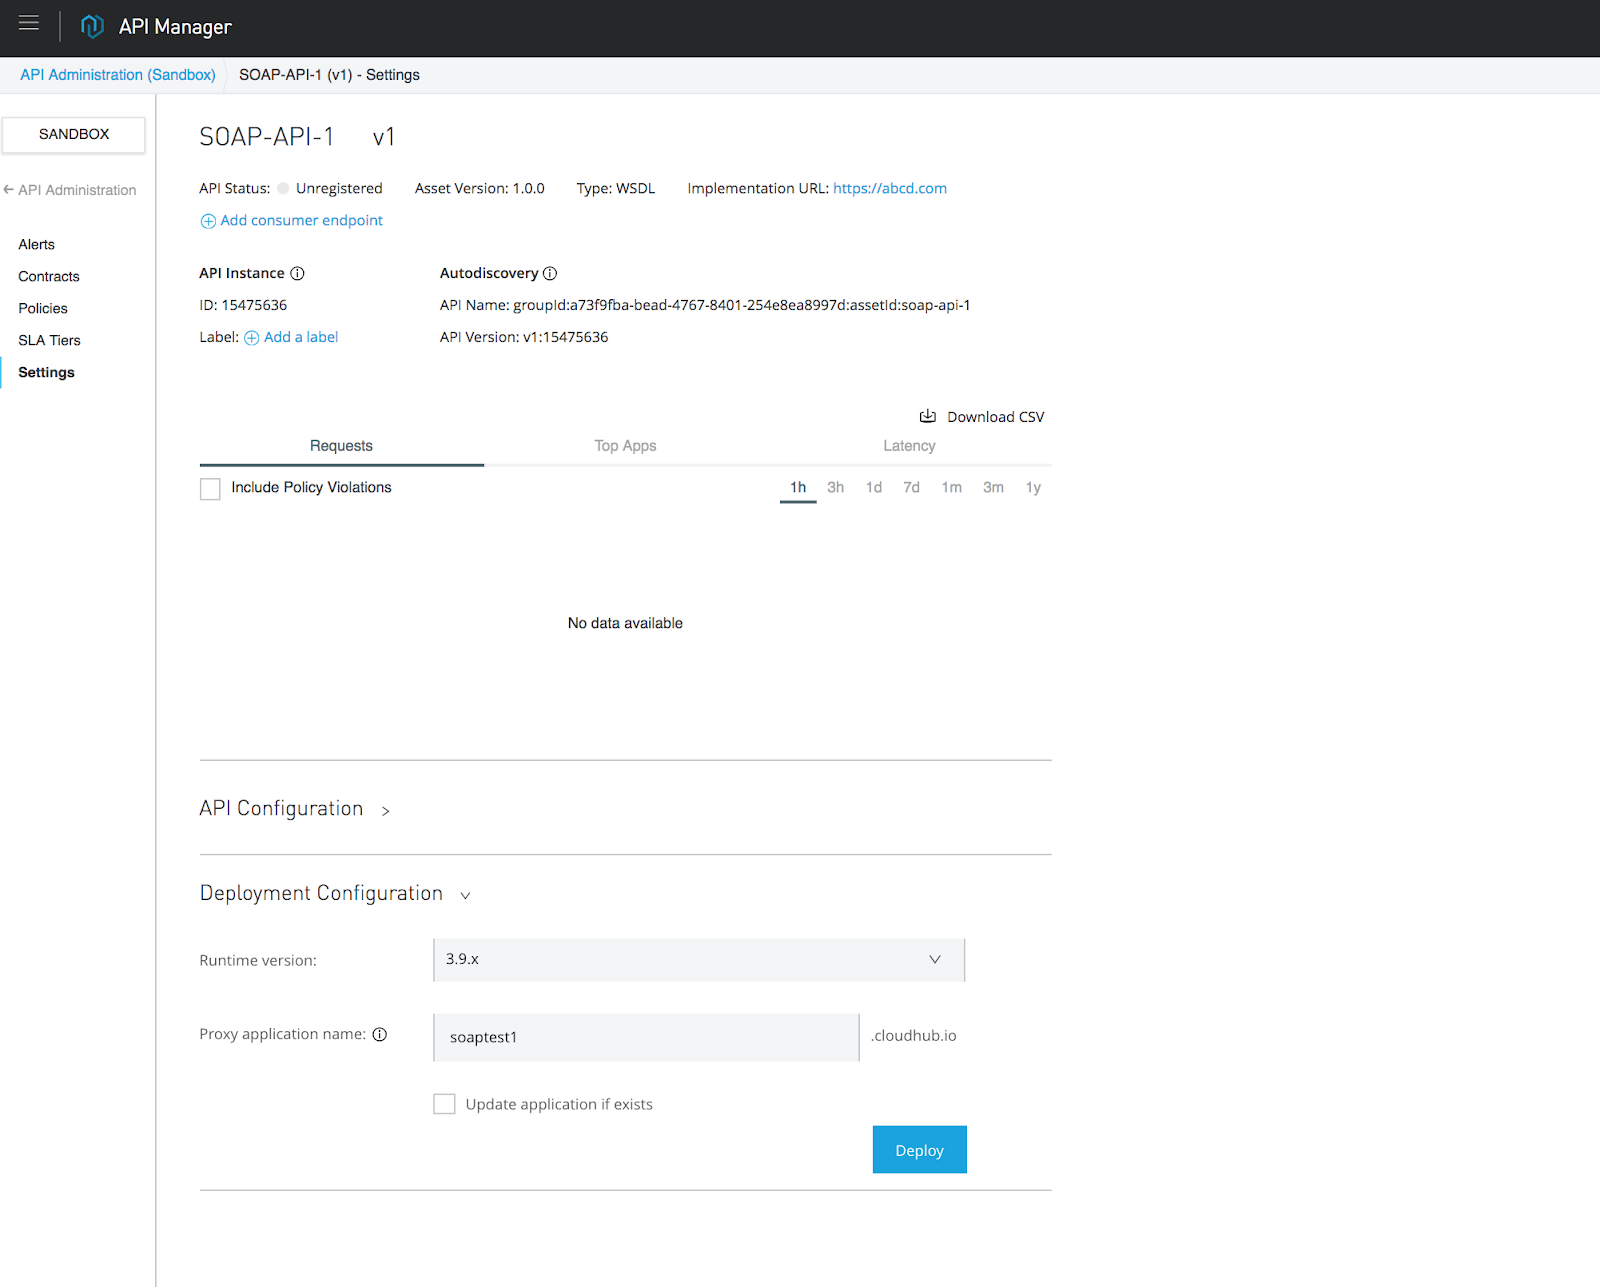
- Select the right runtime version and enter the name of the proxy application to be deployed on CloudHub and click Deploy.
- At this point, one of two things will happen:
- The deployment is successful.
- Deployment failed due to an error.
Successfully Deploying Proxy – Proxy deployment will be successful if the implementation URL given above is reachable and the WSDL structure is good.
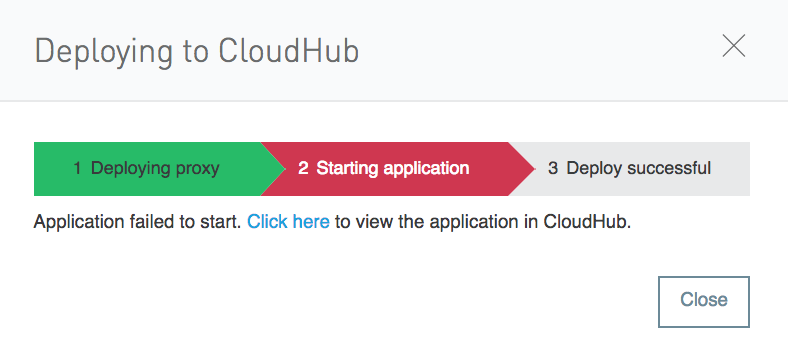
Deployment failed due to an error – When a deployment fails due to a WSDL issue or an incorrect or unavailable WSDL URL, the deployment may fail, showing the following error:
Could not resolve placeholder ‘wsdl(p[‘wsdl.uri’]).services[0].preferredPort.addresses[0].host’ in string value “<http:request-config name=”http-request-config” host=”![wsdl(p[‘wsdl.uri’]).services[0].preferredPort.addresses[0].host]” port=”![wsdl(p[‘wsdl.uri’]).services[0].preferredPort.addresses[0].port]” protocol=”HTTP”></http:request-config>”
The below steps can be taken to address failed deployment due to WSDLissues:
- Go to Runtime Manager, click Runtime Manager in the Anypoint Platform navigation bar.
- Choose the environment where you tried deploying the proxy.
- Click on the name of the proxy that has failed.

This will open a page like below:
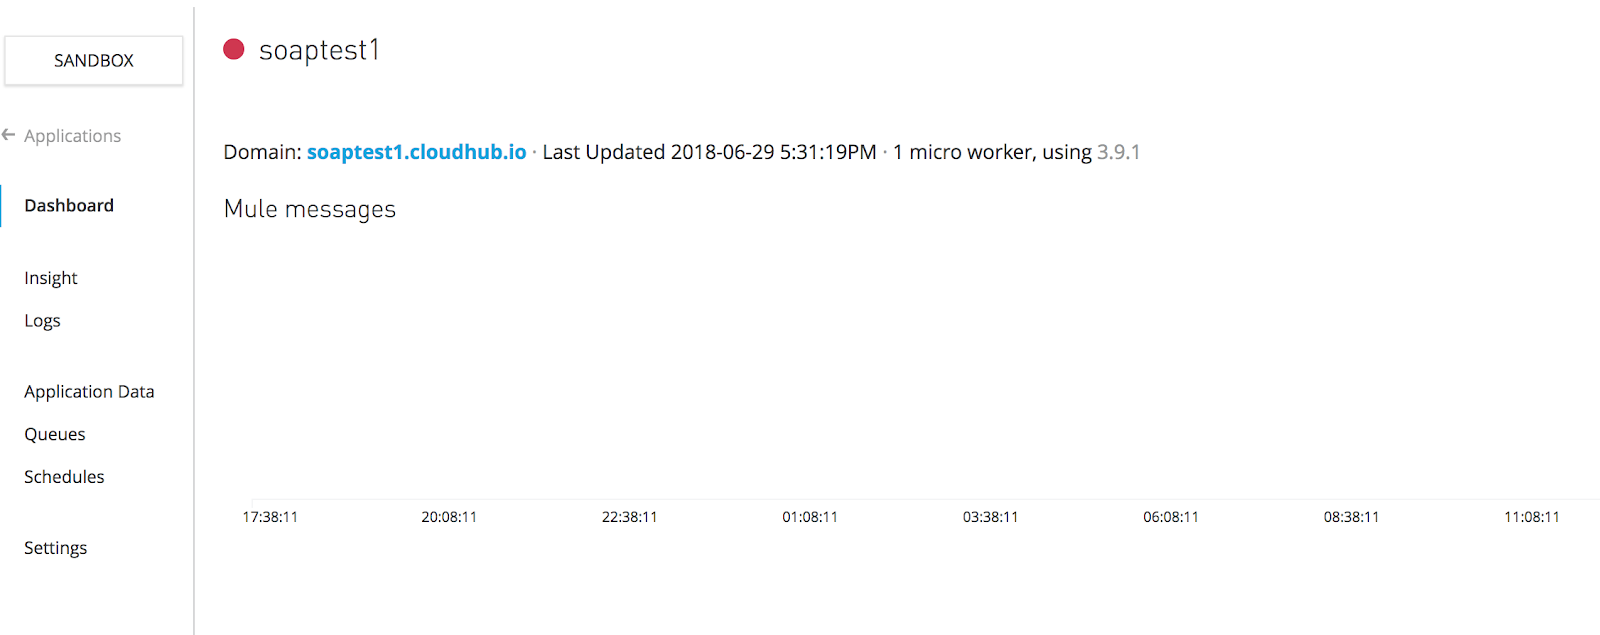
- Click on Settings on the left panel which will bring the settings view of the application. In this screen, click on the “Application File” name as shown in below screen “soaptest1-api-gateway.zip”
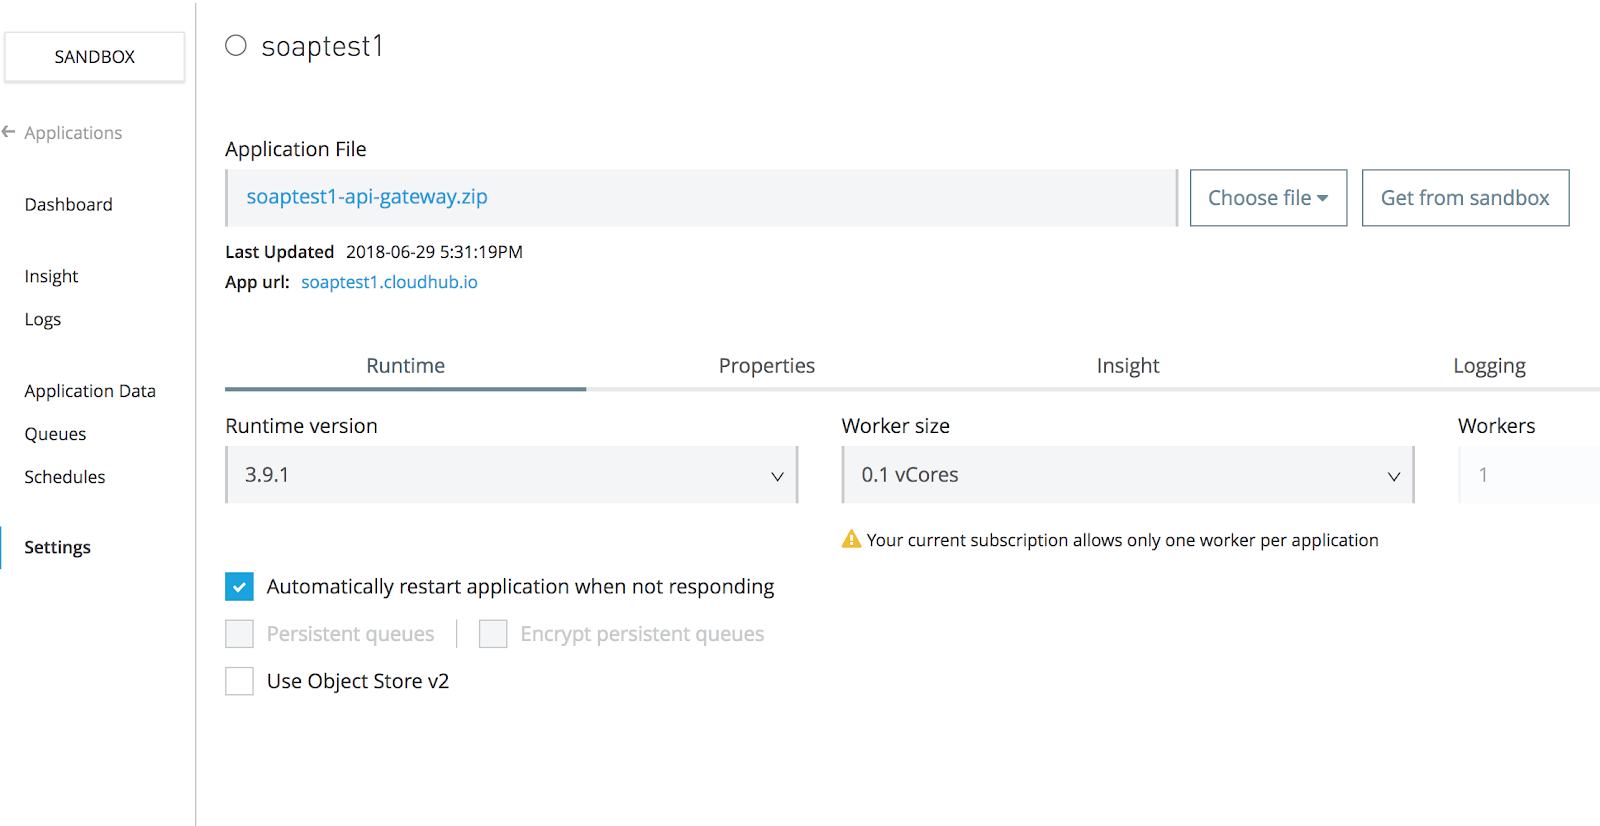
- This will download the .zip file.
- Import this file in studio file → import → Anypoint Studio generated Deployable Archive (.zip).
- At this point, in package explorer under the project, you will notice “src/main/wsdl” directory to be empty.
- Add The WSDL and dependent files to “src/main/wsdl” directory in your project in Anypoint Studio.
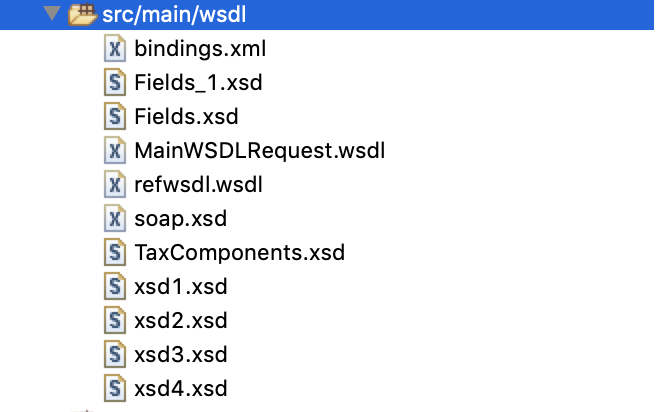
- Go to “src/main/resources” and open “config.properties” file
- Change the “wsdl.uri” property to point to the main WSDL file from `src/main/wsdl`. For this example MainWSDLRequest.wsdl
Note: If you don’t have the WSDL and you prefer to point wsdl.uri to actual backend service/?WSDL URL, then step “viii” to “ix” below can be skipped. - Save the project.
- Right-click on project, click Anypoint Platform, deploy to cloud.
- Sign in and choose the correct environment to overwrite the proxy which failed to deploy earlier.
- In the deployment window as shown below, use the exact name of the proxy as it appears in step 3 above, here it is soaptest1.
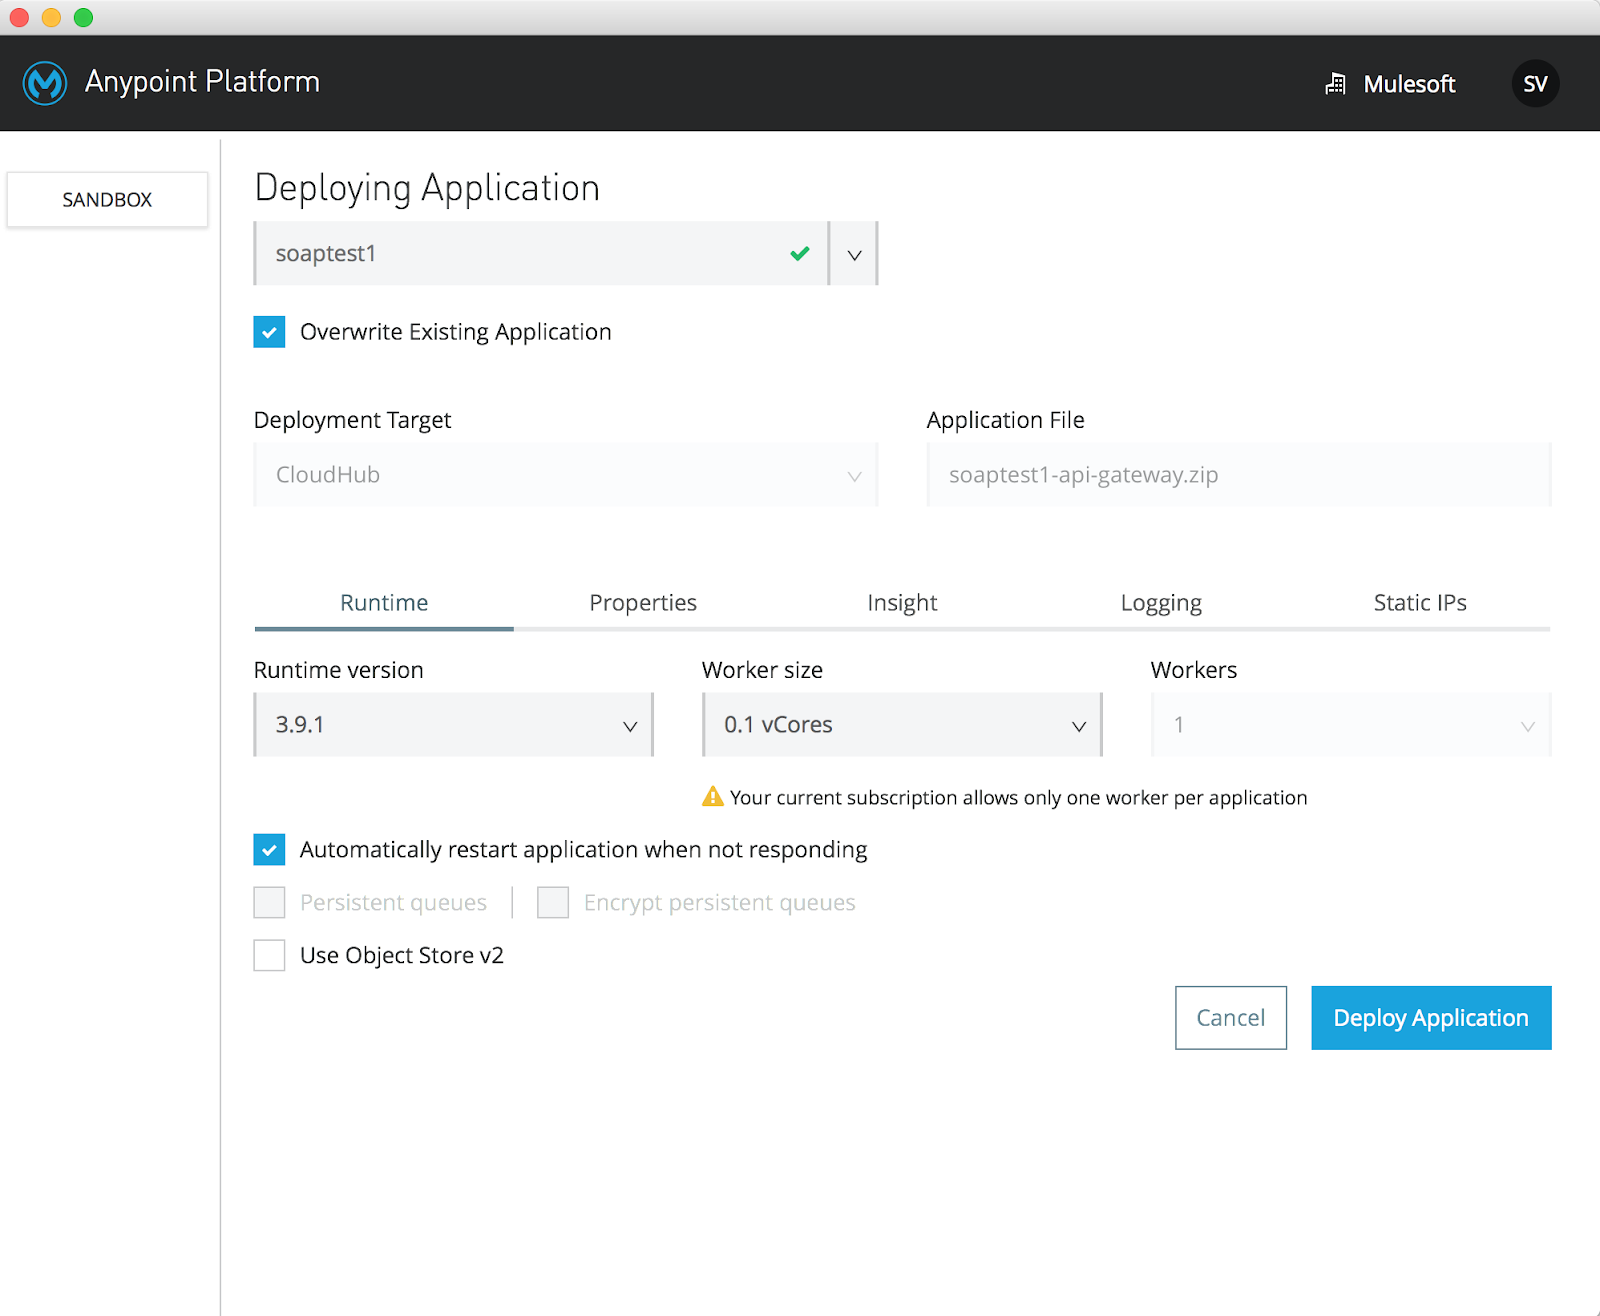
- Make sure the Overwrite Existing Application checkbox is selected. Chose the right runtime version, core, and other details and click on Deploy Application. This will deploy the proxy successfully to the runtime manager and it is ready to use.
You can learn more about how to deploy the API proxy to Runtime Manager here. MuleSoft Support Knowledge Base offers support for which talks about handling such failures.
Summary
Creating proxies on Anypoint Platform from SOAP services which have self-contained WSDL can be simple, but can become challenging when WSDLs have a number of dependencies on other WSDLs. Being able to quickly alter and know what to change, and where to make these changes can save you time and effort, making it easy to create the proxy in such scenarios.
For more information on API proxies, visit MuleSoft’s documentation site.


