Apache Kafka started at LinkedIn in 2010 as a simple messaging system to process massive real-time data, and now it handles 1.4 trillion messages per day at LinkedIn. According to Kafka Summit 2016, it has gained lots of adoption (2.2 million downloads in the last two years) in thousands of companies including Airbnb, Cisco, Goldman Sachs, Microsoft, Netflix, Salesforce, Twitter, and Uber. MuleSoft has also been using Kafka to power its analytics engine.
Companies use Kafka in various use cases: application monitoring, data warehouse, asynchronous applications, system monitoring, recommendation/ decision engines, customer preferences/ personalizations, and security/ fraud detection. Moreover, MuleSoft customers also use Kafka in various ways as well. One of our customers uses Kafka as an event bus to log messages. Another customer processes real-time data from field equipment for faster decision making and automation with Kafka, and others aggregate data from different sources through Kafka. To help our customers quickly and easily ingest data from Kafka and/or publish data to Kafka, MuleSoft is thrilled to release the Anypoint Connector for Kafka today.
Here is a quick example of how to use the Kafka Connector based on Kafka 0.9. This demo app allows you to publish a message to a topic and to ingest a message from a topic. The app consists of three flows; the first flow shows you a web page where you can publish a message to Kafka, the second flow is for Kafka consumer, and the third flow is for Kafka producer.
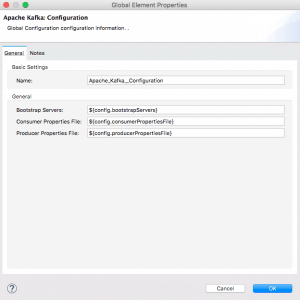
Let’s configure this Kafka Connector first. If you go to Global Elements, you will find “Apache Kafka.” After selecting “Apache Kafka,” please click on “Edit.”

In the “Apache Kafka: Configuration”, you can specify the configuration of your Kafka server. You could directly add your Bootstrap Server information in the configuration, but I recommend you use the properties file to add your configuration information.
mule-app.properties include the following keys-value pairs:
- config.bootstrapServers={your Kafka Server address}
- config.consumerPropertiesFile=consumer.properties
- config.producerPropertiesFile=producer.properties
- # Consumer specific information
- consumer.topic=one-replica
- consumer.topic.partitions=1
Since Kafka provides various settings for producer and consumer, you can add your own settings in consumer.properties for consumer and producer.properties for producer under src/main/resource.
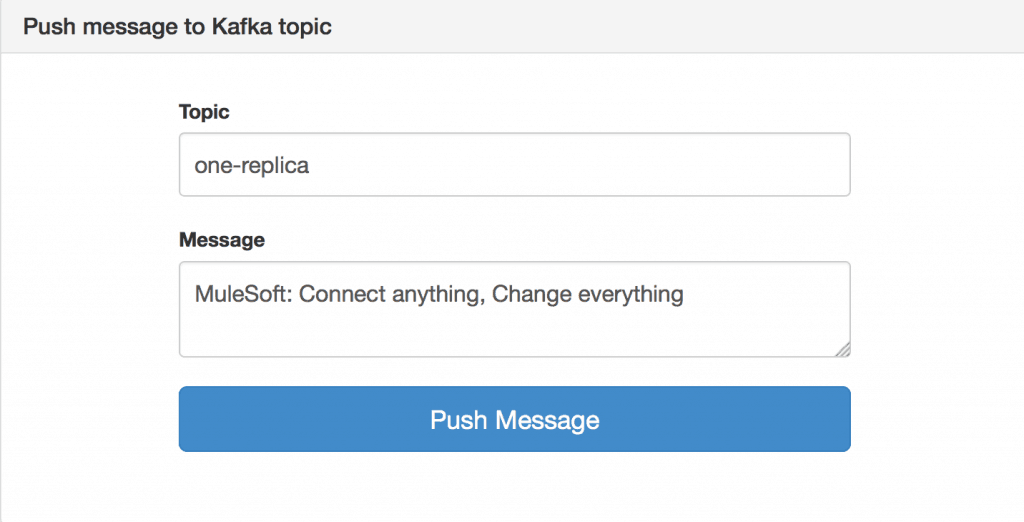
After you complete the configuration for your Kafka environment, run the app. When you open up a browser and hit localhost:8081, your browser will show the following page.
Since this demo app is listening to the “one-replica” topic, when you publish a message to the “one-replica” topic, you can see your message being logged in the Studio console by the consumer-flow.
For new users, try the above example to get started, and for others, please share with us how you are planning to use the Kafka Connector! Also, feel free to check out our Anypoint Connector to see what other out-of-the-box connectors we have to offer.


