
Alexandra Martinez is a member of our Developer Community and has been leading our Meetup Group in Toronto for a few years now. She brings her local community together on a regular cadence, each time with more and more attendees. For more information on how to join the MuleSoft Community, visit our Community page.
Before this app, our HR department at Bits In Glass (BIG) was manually posting messages to different Slack channels in our workspace. For example, they would log into our HR system every day to check whose birthday it was, and then posted a friendly message in our “BIG Life” Slack channel. There were also other messages being sent repeatedly; for example, every Tuesday at 2:00 pm. This was a huge productivity gap that could be resolved by having an automated message sender.
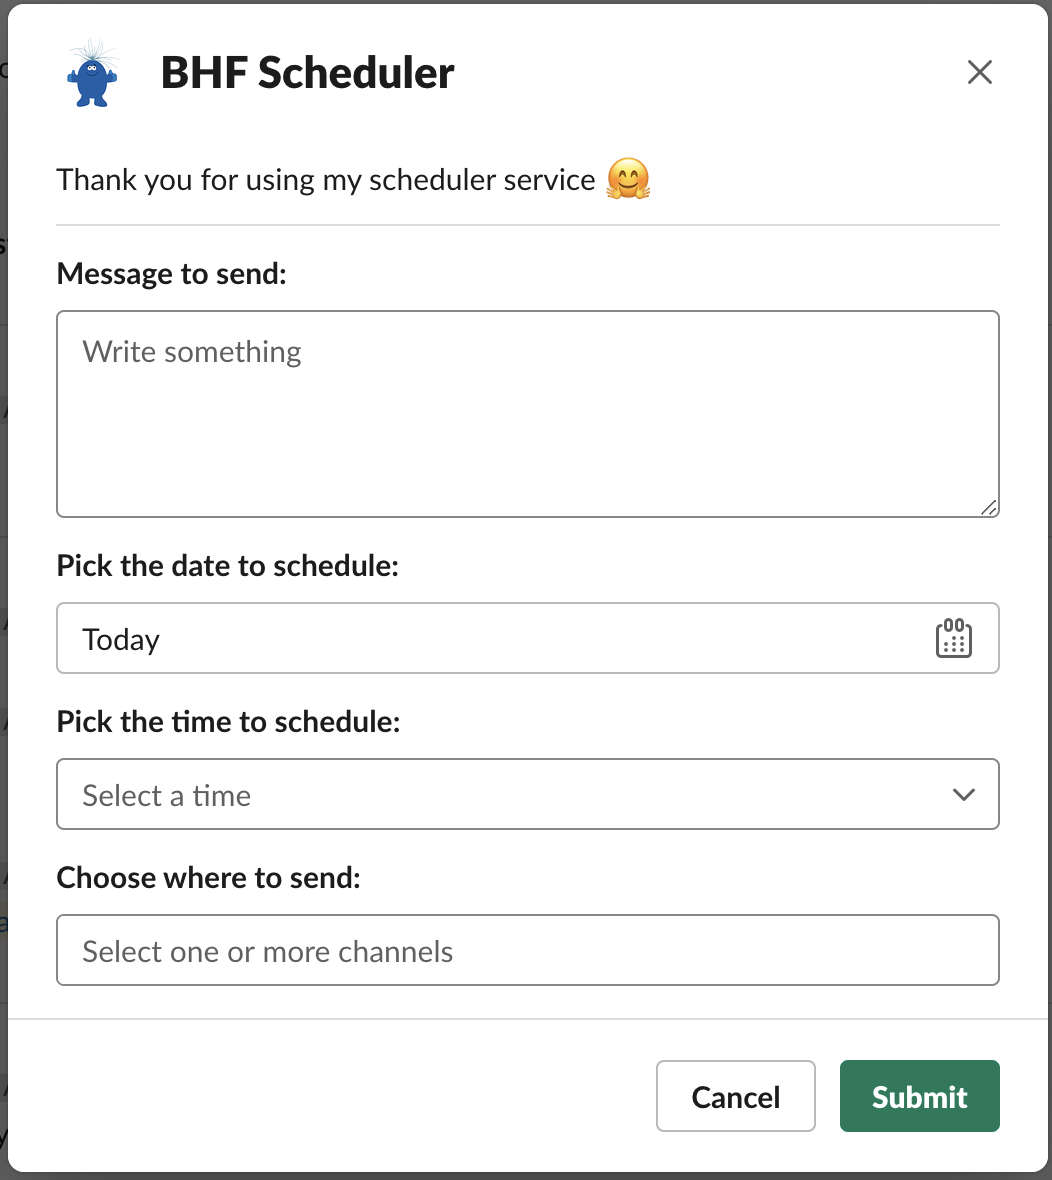
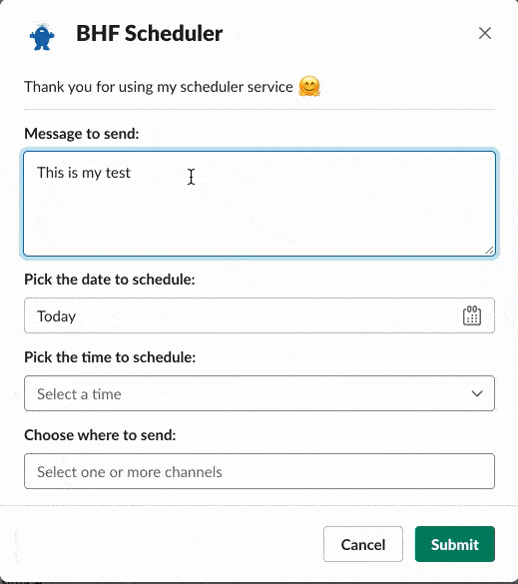
By setting up a Slack app on our workspace, a slash command, interactive components, and a bot user, I was able to send a modal view to Slack’s UI every time the user triggered the functionality with the slash command. This modal view then gets the appropriate information from the user: what text to send, the date and time to send it, and to what channel(s). Below is a screenshot of this modal view:
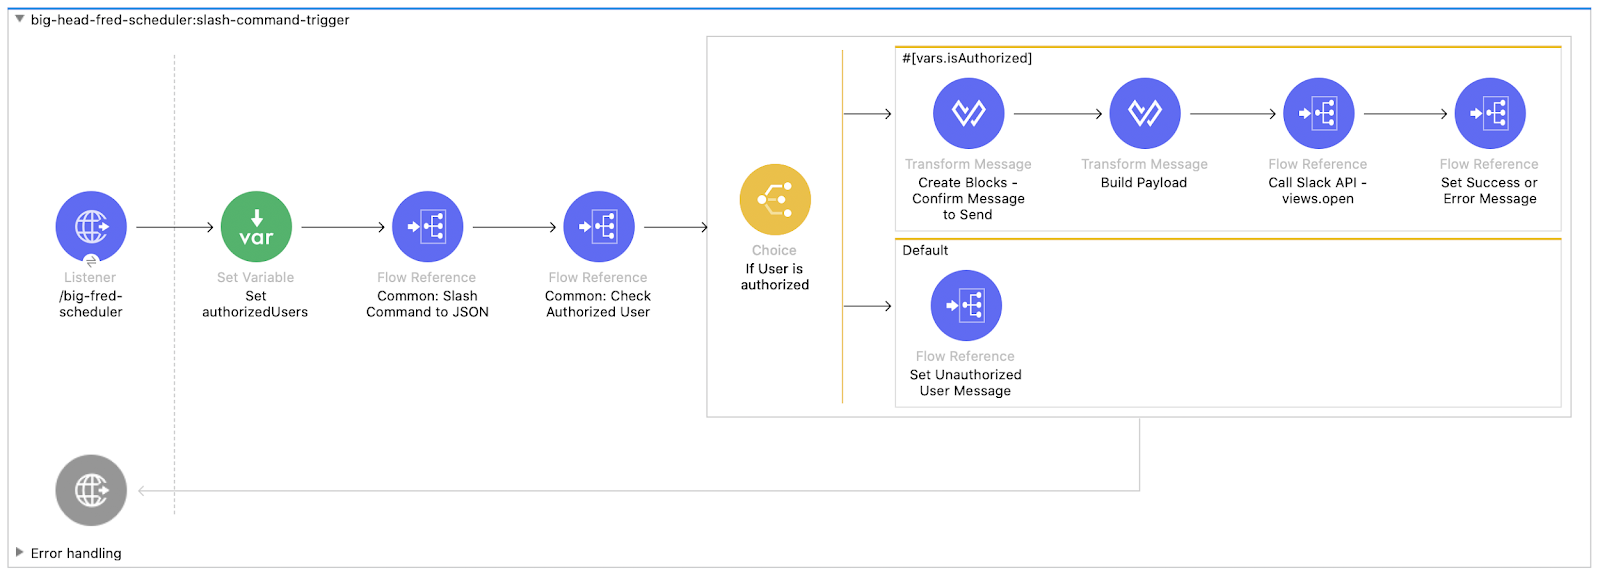
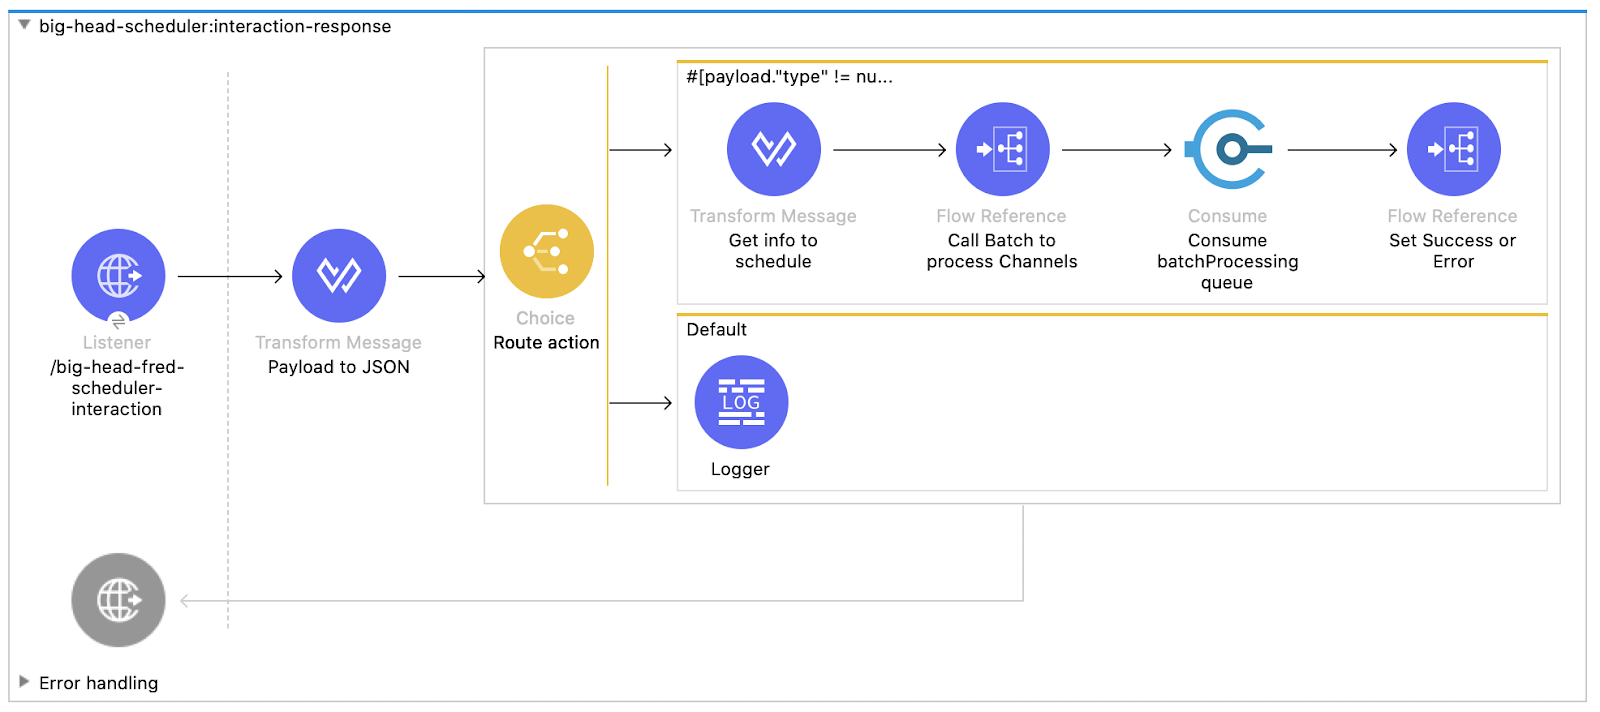
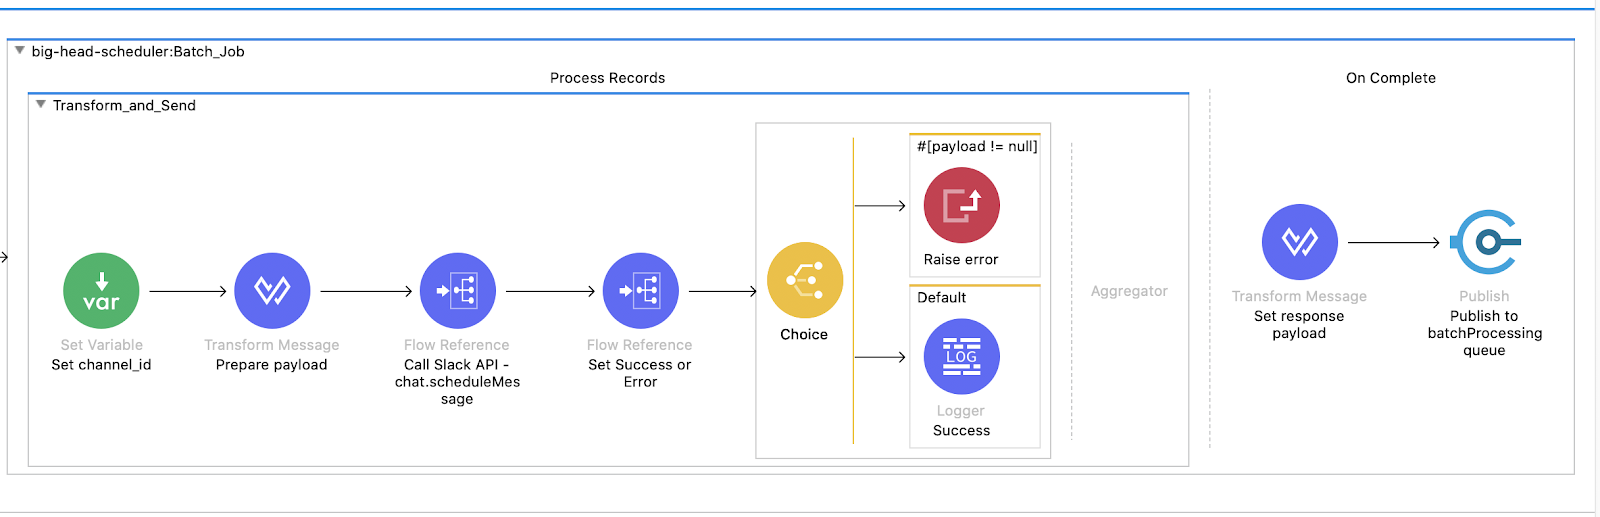
Below is a high-level diagram of how this is achieved (note that this is a happy path). To summarize it, the user first types the slash command in a Slack window and sends the command. The data is then sent to the Mule app, where it gets transformed and adds the code to generate the customized modal view (this code can be easily generated using Slack’s Block Kit Builder with just a few clicks!). Mule sends this generated payload to the Slack API, which will process and show it in the Slack window. The user then inputs the required information to schedule the message and clicks the “Submit” button. This triggers our second URL, which processes the input data and — using a batch job — sends the payload to the Slack API, for each channel that the user selected. After getting the 200 OK response from our Mule app, Slack automatically removes the generated modal view from the Slack window.

This whole process will take less than two minutes for the user. And now, instead of having to manually send the same Slack message every day or week, our HR department can now use this app to schedule all the necessary messages. The best part is that the scheduled messages are shown in a fun way, using BIG Head Fred’s account which has its own name and profile photo.
Here’s an overview of how the Mule app flows are set:
There are simple steps to follow if you’ll be creating your Slack app integration with Mule 4:
- Transform the slash-command input from application/x-www-form-urlencoded to Java or JSON. I personally prefer to work with JSON. This can be achieved by adding a Transform Message component with this code:
%dw 2.0
output application/json
---
payload
- You can create Slack’s Blocks with another Transform Message component that can even take some of the existing data. You can easily get this code if you use Slack’s Block Kit Builder. Just generate your modal view, copy the generated code, and paste it to your DataWeave code.

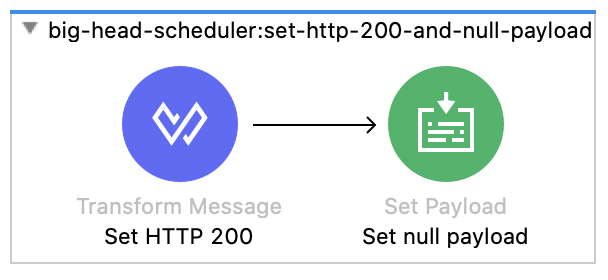
- Remember to create the code to handle your Modal View’s response. To tell Slack that the operation was successful, you just have to return a 200 OK http status code, and a null payload. They will take this as an acknowledgment to close the Modal View.
%dw 2.0
output application/java
---
attributes default {} ++ {
statusCode: 200,
reasonPhrase: 'OK'
}
Here’s a quick demo of the slash-command and then the modal in action:

If you want to create your own modal view or Slack app, I recommend you check out these sites:
- Using modals in Slack apps
- An overview of app interactivity
- Enabling interactivity with Slash Commands
- Slack API Methods


