In my previous blog, we covered some of the options for connectors that support Kerberos, today we will focus on two more connectors where Kerberos use cases frequently pop-up: the Anypoint Connector for Hadoop.
Anypoint Connector for Hadoop – HDFS
Before we cover security, let’s take a look at how we might connect to Hadoop and provide some context through a use case.
Let’s start with a simple CRUD API specification to make life easy. First, create a project in Anypoint Studio based on the API specification. For this example, we will create a “customer” API to gather information about our customer base:
#%RAML 0.8
title: Customer Data API
version: 1.0
baseUri: http://localhost:8081/api
/customers:
  post:
    description: submit data on a new customer
    responses:
      201:
  /{id}:
    put:
      description: update a customer by id
      responses:
        200:
    get:
      description: get data on a customer by id
      responses:
        200:
N.b. This is a quick way to build an API with minimal definition; however, it is not the best practice approach. For best practices guidance see here.
After installing the HDFS connector into Studio, create a global element of the type “HDFS: Simple Configuration” and set the correct values for the “NameNode URI” and “Username” for your environment as follows:
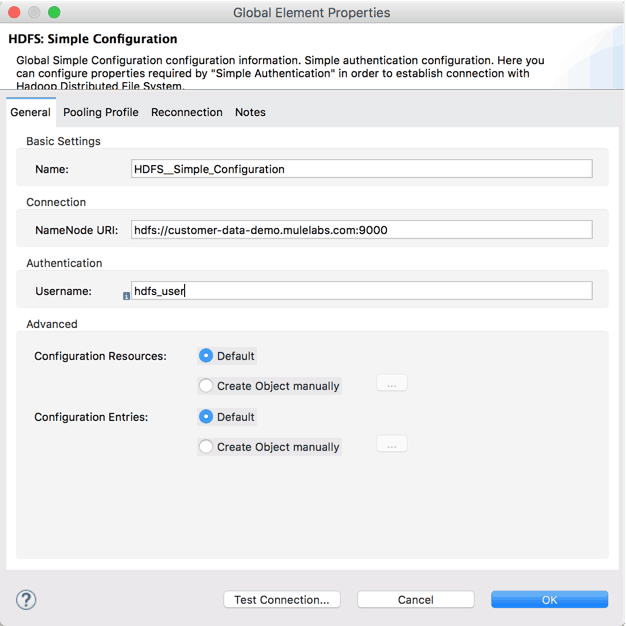
Use the “Test Connection…” button to make sure the connection parameters are correct and the communication is working as expected.
Now, in our message flows generated from our RAML specification, we drag-and-drop the Hadoop connector and configure the parameters. Here, I have configured the “Write to File” operation in the POST flow for my customer data:
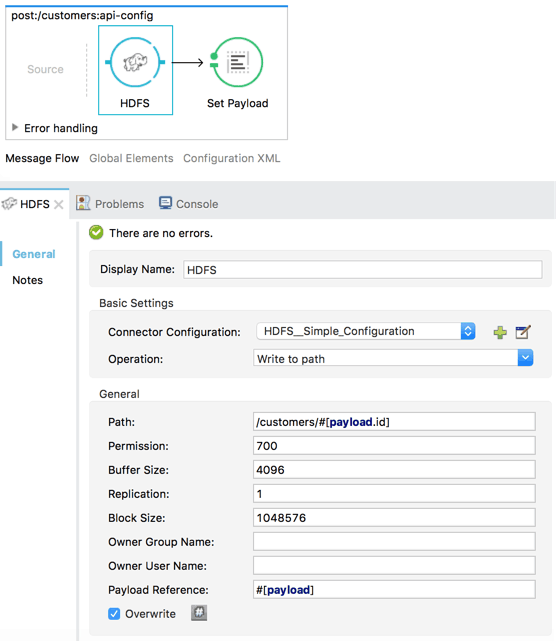
For the sake of this example, I made the assumption that the customer ID value is included in the payload. If we save and run this project, we have the first part of a working HDFS-based API.
Learn more about using and configuring the HDFS connector.
Hadoop: Secure mode
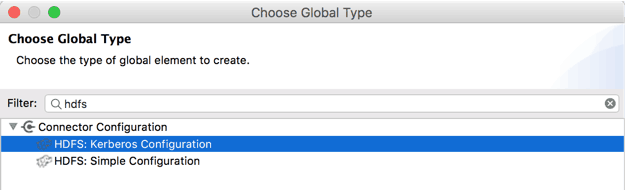
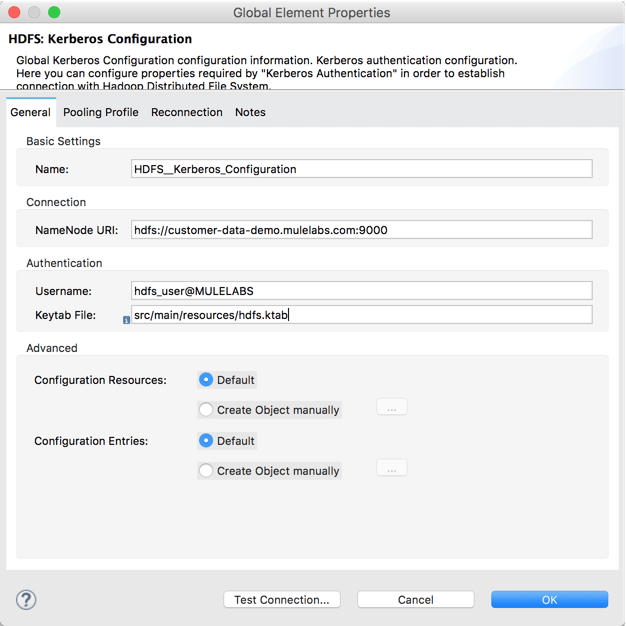
The only authentication option available to run Hadoop in “secure” mode is Kerberos. This documentation has explicit instructions for configuring Kerberos in the HDFS connector. If we take our previously created customer data project, we would need to re-work it to use the Kerberos version of the global element configuration:
This time, we need to amend our username to include the REALM or Domain, and then provide the location of the keytab file. We also have to make sure to consult our Hadoop administrator to confirm the connection parameters and obtain the appropriate keytab file.
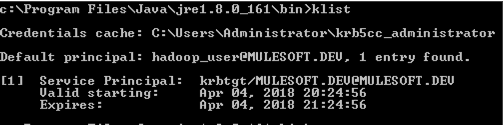
As per the documentation, we use a “keytab” file to authenticate; this file is essentially an encrypted set of credentials. When generating a keytab file, Windows does not validate the credentials when the keytab is generated, only when the keytab is used for authentication. It is important to make sure the keytab files are correct, this can be tested on a machine in the Kerberos Realm (or Windows Domain) by executing the following commands found under the “jrebin” folder:
- “kinit -k -t <keytab file>”
- “klist”
If the execution is successful, you should see you user as a line item in the cached credentials list, an example of this is shown below with an entry for my “hadoop_user@MULESOFT.DEV” user:
It is important to set the additional properties required for a CloudHub deployment as highlighted in Part 1 of this blog and shown in the documentation.
Learn more
As you can see MuleSoft provides robust support for Kerberos authentication across our set of third-party connectors, further documentation on these and others can be found in Anypoint Exchange. I encourage you to download and try them out with Mule 4 and Studio 7 for the latest experience. Get started by downloading today! Check out our other blog posts on Mule 4 and register for our upcoming webinar on what’s new in Mule 4.