
Over the last few years at MuleSoft, I have had the opportunity to work with many different customers covering a wide range of use cases, inevitably requiring data transformations of one sort or another. I have observed some recurring patterns and “gotchas” when DataWeave is used in the real-world and I will address these in this 3-part series.
One of the most common things I see for users who are new to DataWeave, especially if they have worked with MuleSoft in the past, is the use of the variable and property setter components before a DataWeave-based transform.
The “Variable”, “Session Variable” and “Property” components have been around for some time in the Anypoint Studio palette and are based on MEL (Mule Expression Language), our legacy syntax for accessing payload content. These components are used to set the value of a flow variable, session variable or property. If you need to set a number of variables at once, with just these components to choose from, you create some very long flows which are both difficult to read and inefficient.
If I need to set many variables at once, my flow looks like this: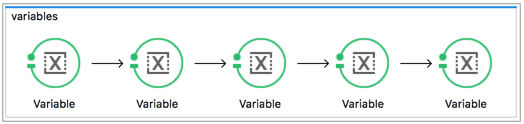
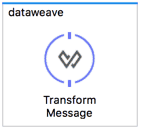
Almost all of the online examples for DataWeave focus on payload transformation and pass over the fact that a single “Transform Message” component can also output Variables, Session Variables and Properties. A single “Transform Message” component can achieve the same result as my five set “Variable” components and makes for a much cleaner flow:
There, isn’t that nicer!
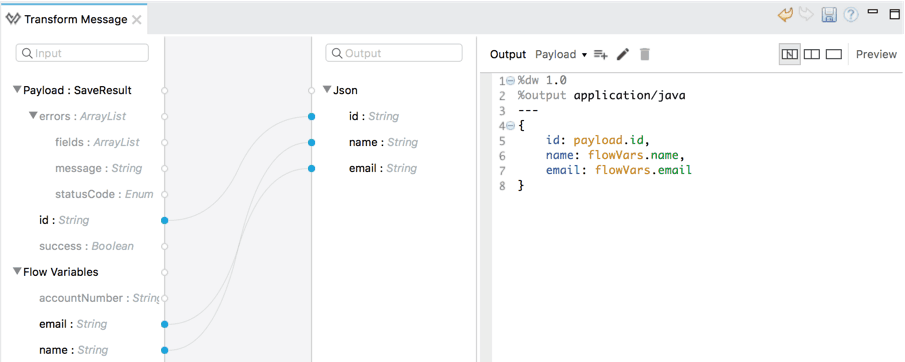
Let’s take this transformation as an example, we are receiving a JSON input and transforming it to a Salesforce Account object as part of an ordering API.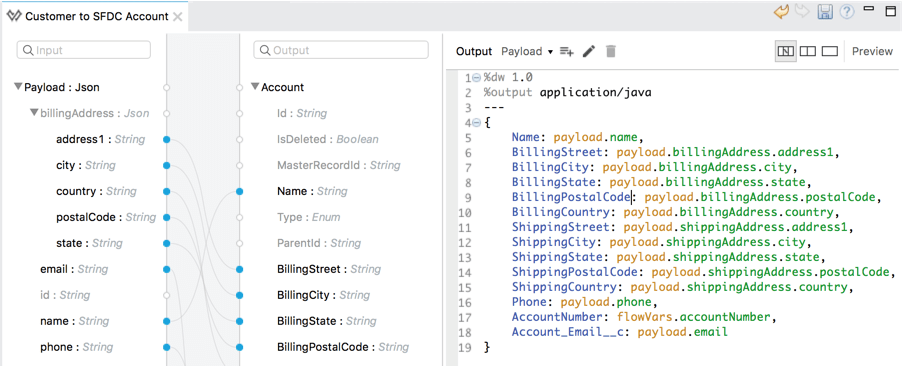
As we know, when a connector is involved, the output from a connector becomes the new payload content, but what if we wanted to send out an email to the person placing the order after we send this data to Salesforce?
We need to capture the “name” and “email” fields and store them in variables for use after the Salesforce connector. That can be achieved by selecting the icon below:
The Selection dialog that pops up allows us to choose from “Variable” (a flow variable), which is the default, “Session Variable” or “Property”.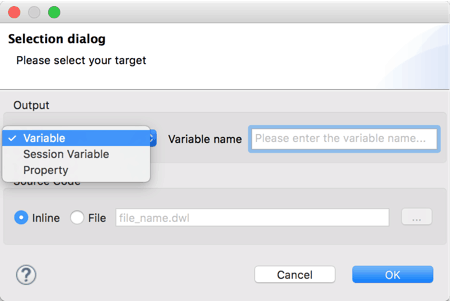
The same approach in this how-to can be used whether you select “Variable”, “Session Variable” or “Property” from the drop-down menu. The same rules described in this blog regarding variable and property scope.
In our case, we want to use a flow variable, select “Variable” then enter a name for the variable, such as “email”:

Once back to our Transform Message properties, we can enter the necessary mapping for the variable:
At this point, you may wish to select “Define metadata” so we know what the data type or variable will be when used later. In the popup dialog box, create a new metadata type of “String”.

This should give us a tidier display in the UI and also means other developers who support this project will understand the usage.
Your mapping should now look like:

We can repeat this same process for the “name” field we wish to capture as a variable. Once complete, we can select the drop-down for the DataWeave scripts and we will see that multiple transformations are taking place in this single Transform Message component:
This manifests in the XML as:

In this example, we captured simple String values, but the full power of DataWeave transform capabilities is available for use in the variables if needed.
Of course, later in our flow, we will need to map our variable back into the payload object to send to our email notification service. Utilizing a variable in DataWeave is as easy as using the incoming payload object, we can either drag and drop the values to map them or enter the DataWeave script directly, which results in:
And there you have it, the behavior of the “Variable”, “Session Variable” and “Property” setting components can be implemented using a “Transform Message” component. When multiple properties or variables are being set, the use of single “Transform Message” component shortens the number of message processors and makes the flow much cleaner and easier to read.
In the next blog post in this series, we will address functions and how we can use them to make our DataWeave scripts easier to support.


