We recently introduced our HowTo blog series, which is designed to present simple use-case tutorials to help you as you evaluate Anypoint Platform. This first blog in Series 1 will show you how to insulate your backend systems like databases by exposing a system API using SOAP over HTTP. The principle behind this approach is our API led connectivity methodology, which is an evolution of SOA.
For years, most organizations have tightly coupled their front end applications with the backend enterprise systems like ERP and databases. The logic to access and process data from backend systems is baked directly into these front end applications. If there is any change in the backend system, it turns into a very costly exercise to propagate that change to each dependent application.
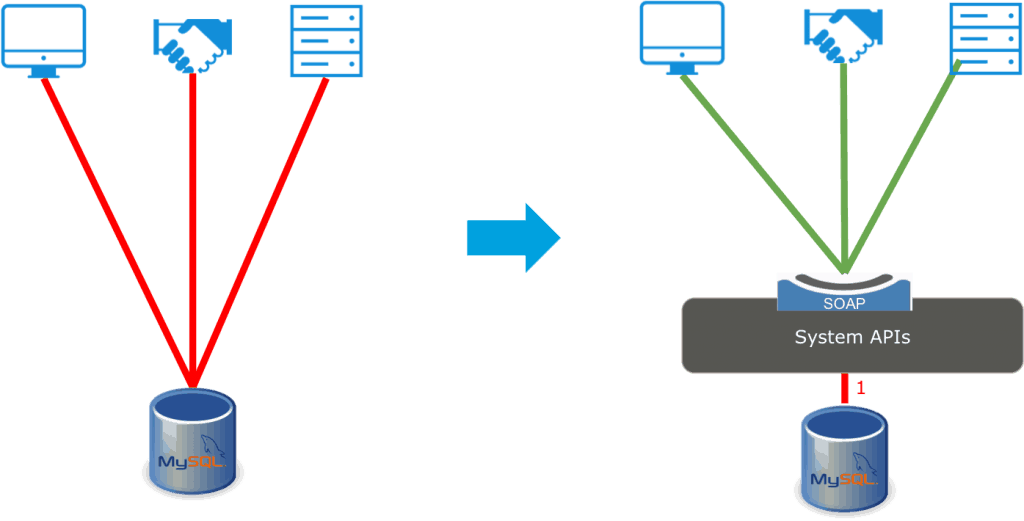
Therefore, there is a need to insulate these enterprise systems and provide an abstraction layer using a system level API. Having a system API decouples the front end consuming applications from interface changes in the backend enterprise systems, exposes information in your business specific semantics and provides flexibility to make changes with less impact. Although some systems like SaaS applications do have vendor provided APIs, having a system API layer still allows the user to abstract the complexity of these vendor APIs. These APIs will be highly reusable for different integrations, will change more infrequently and will be governed by Central IT given the importance of the underlying systems. As a best practice, we first define the API contract (in this case, for a SOAP interface, so we’ll use a WSDL) before implementing the API. This approach helps to decouple the consumers of the API from the provider to speed development, provide reusability of assets like schemas, security schemes, and transport resources and help with versioning of the APIs.
Pre-requisites:
- Anypoint Platform – MuleSoft Anypoint Studio.
- WSDL created with Eclipse editor. The eclipse plugin installed into Mulesoft Anypoint Studio.
- SOAP UI for testing.
- A database where we can create and load a sample table required for this project. In this example, we will use an instance of the MySQL database.
- The Mule project downloadable from Anypoint Exchange.
- To follow the example in this guide, run the SQL script loan.sql to set up the table and load it with some sample data. You will find the loan.sql file in the project under the folder src/main/resources
Steps:
- Start Mulesoft Anypoint Studio and point to a new workspace.
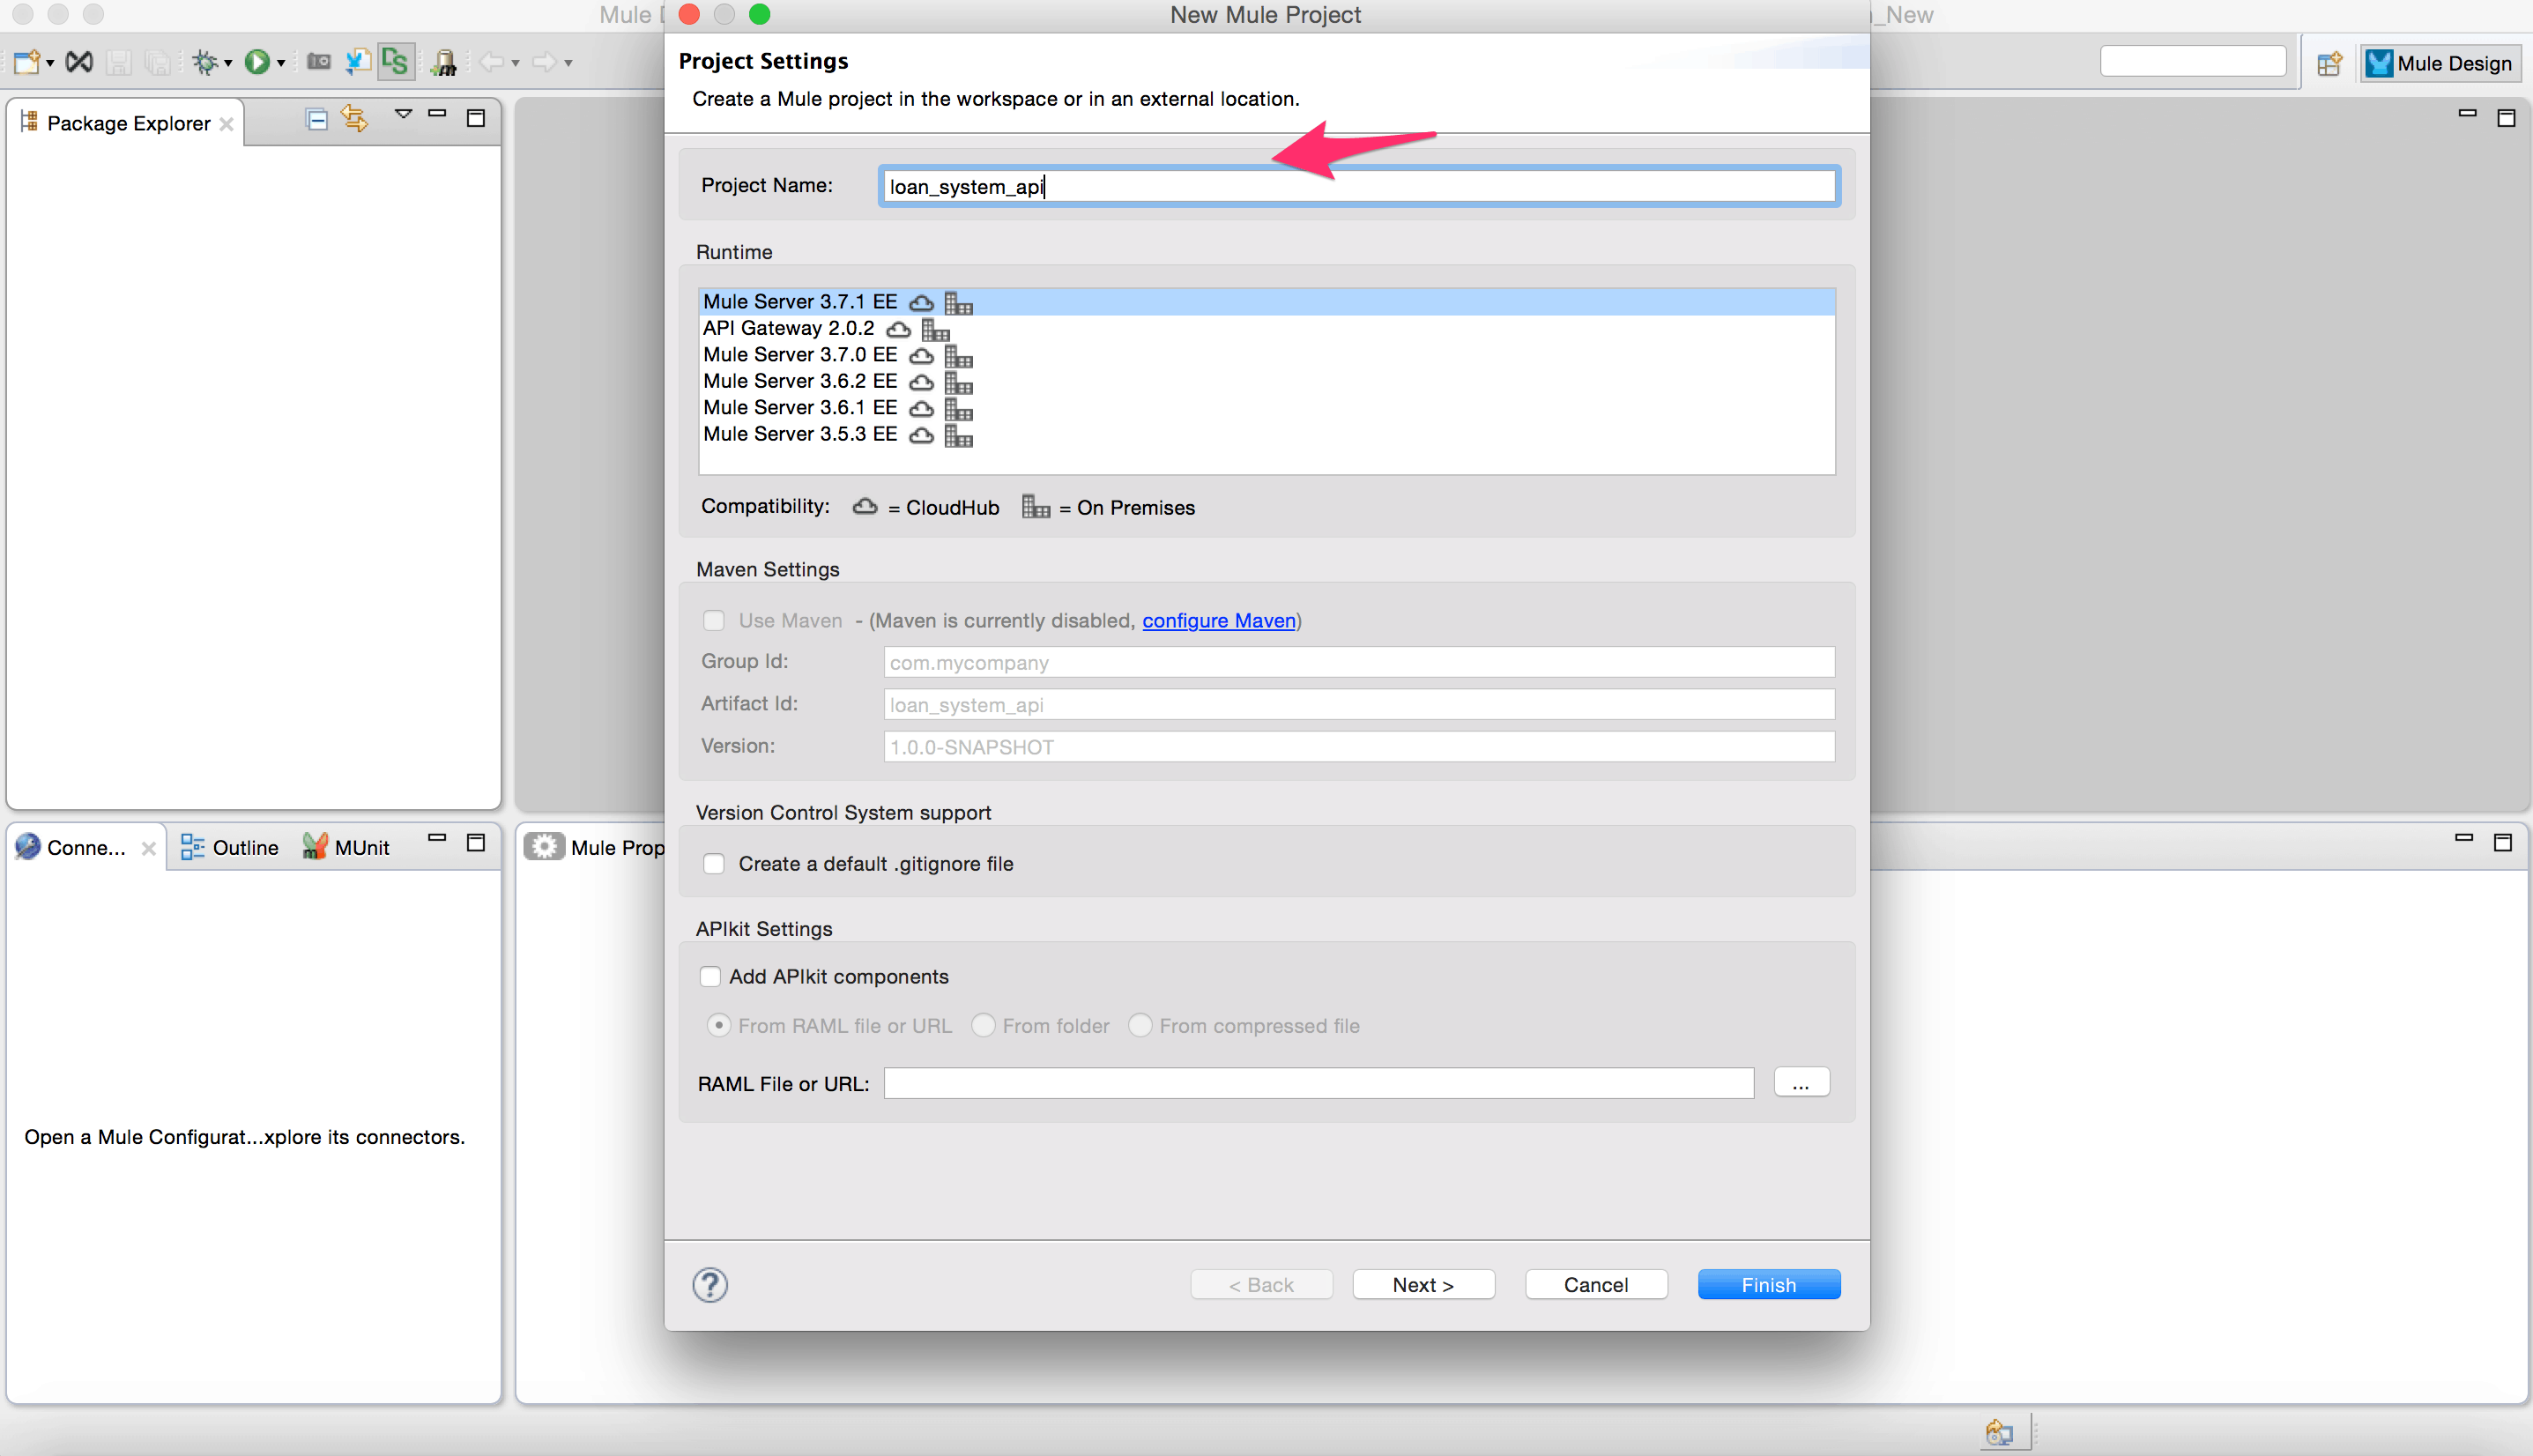
- Create a new project. File -> New -> Mule Project
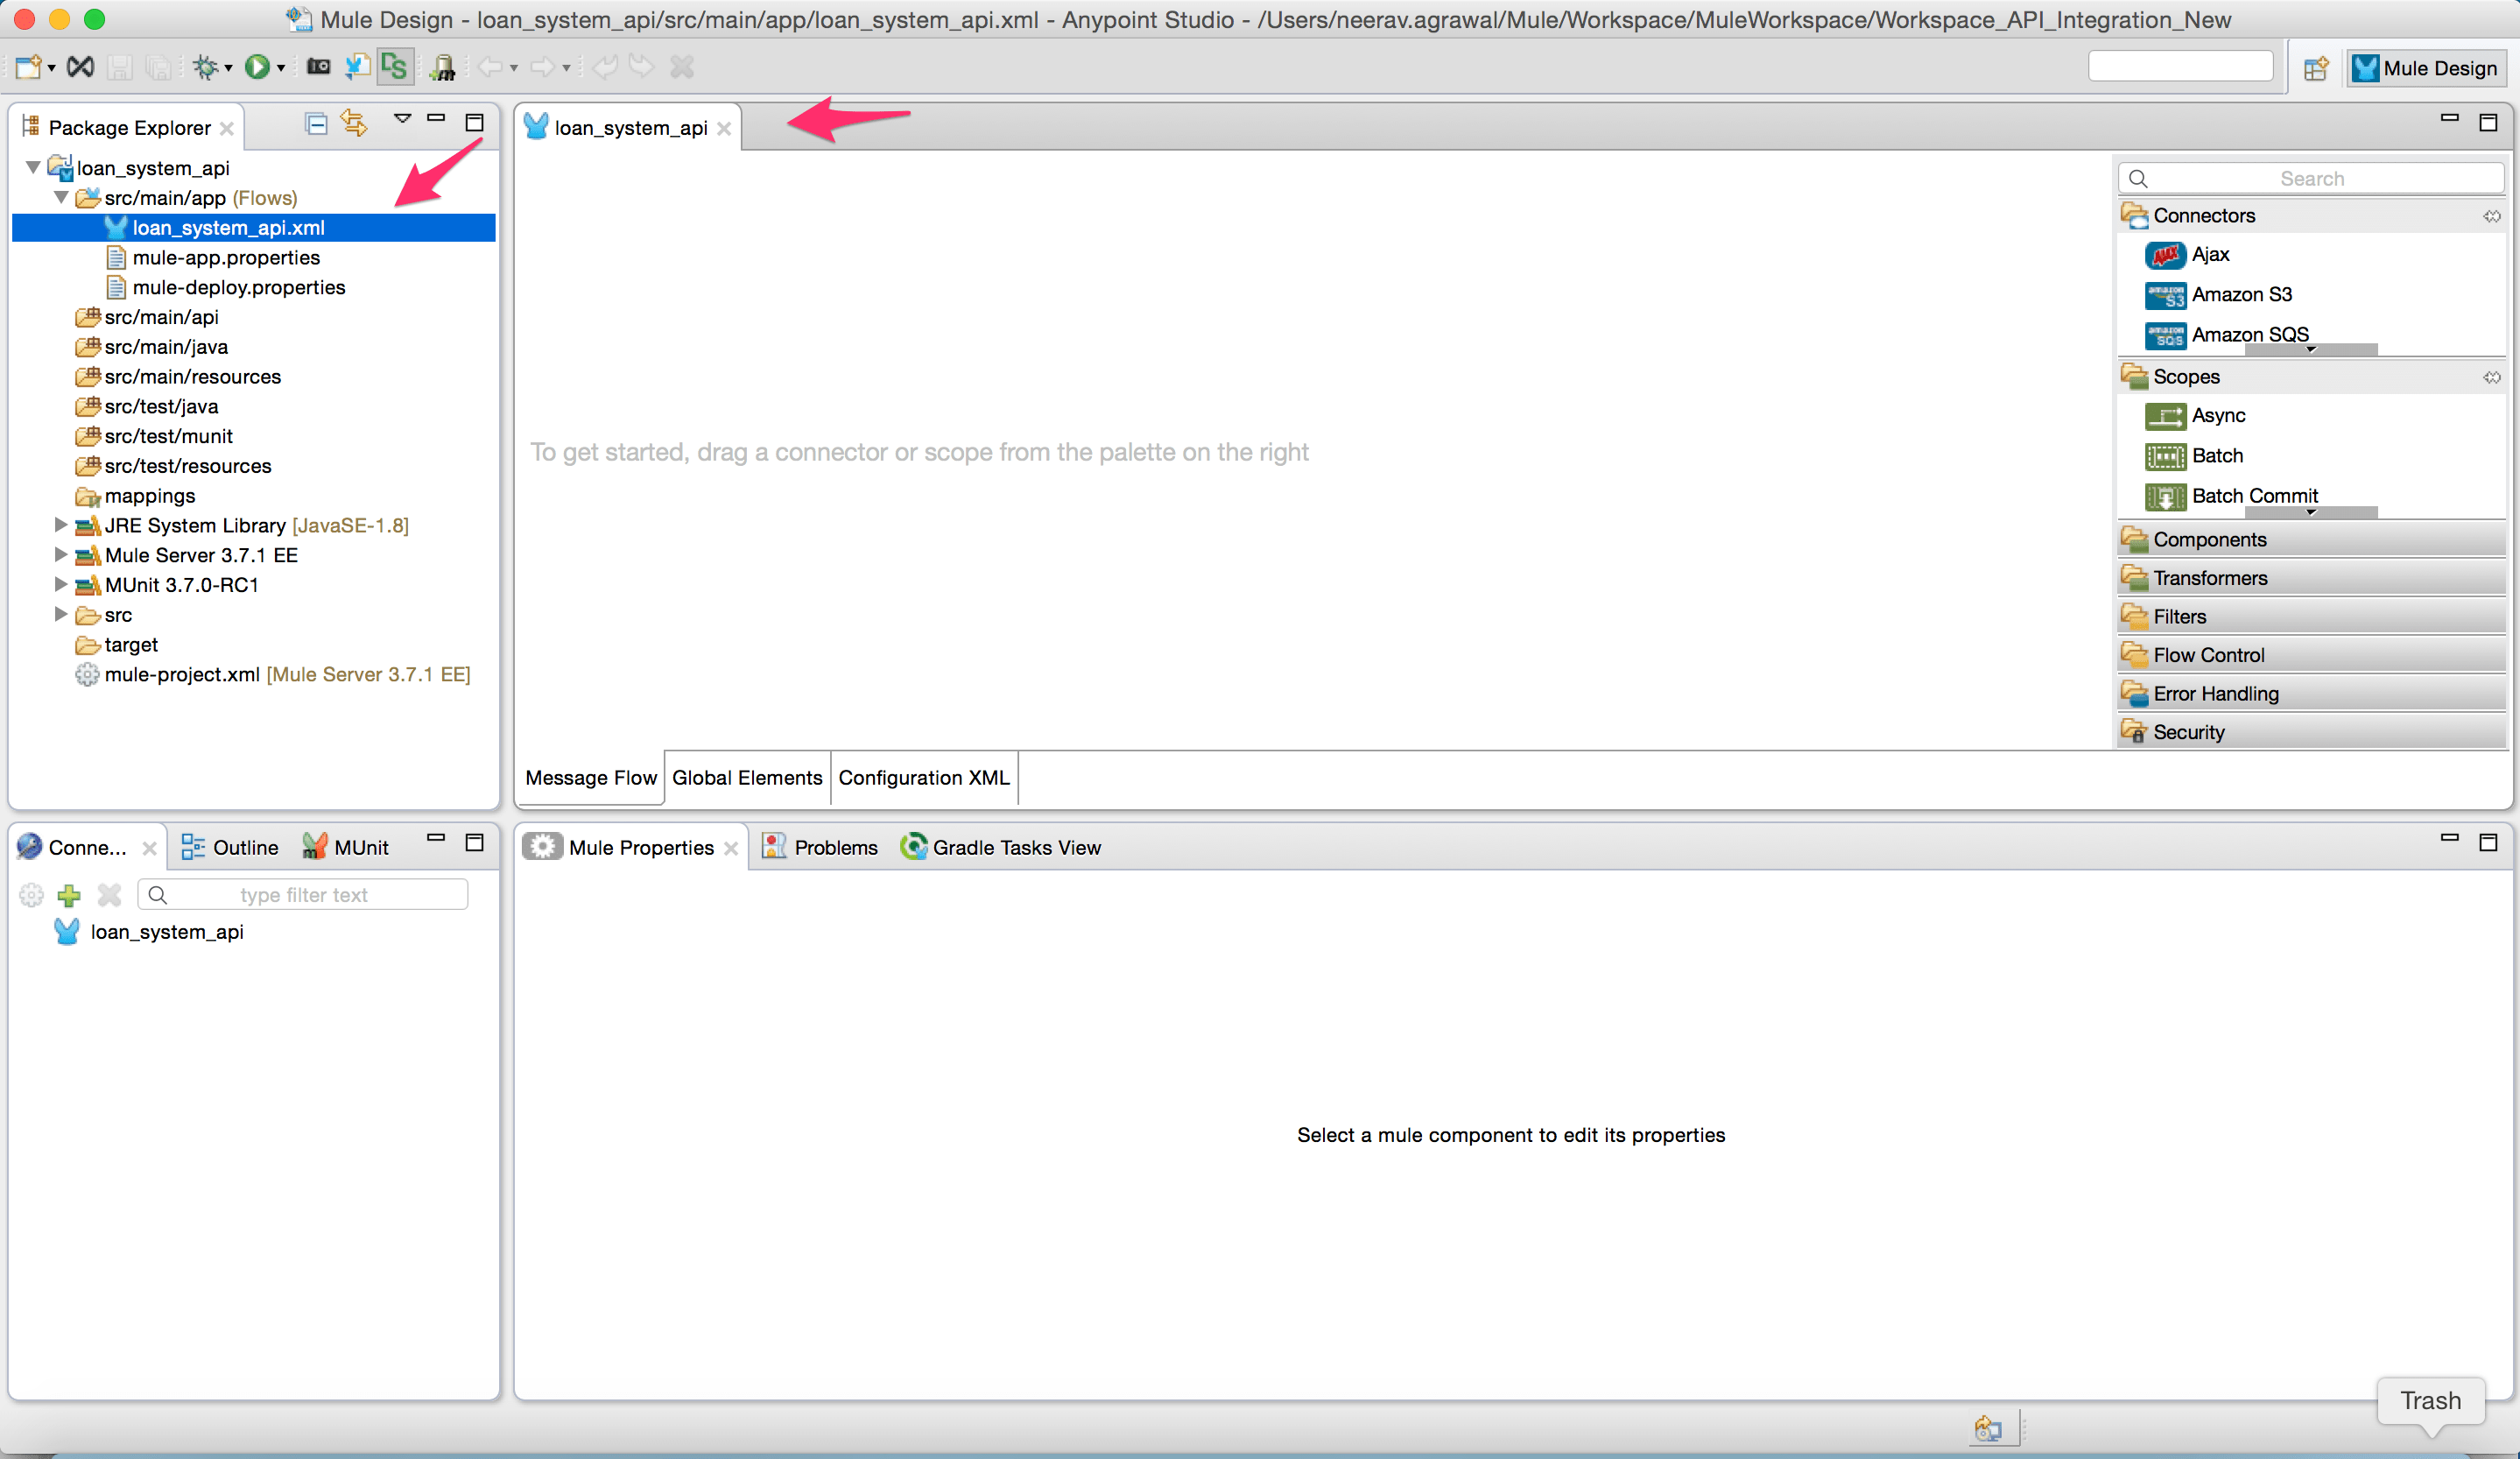
- Give a name to the project and click finish. You will see the mule configuration file where we can now add the Mule flows.
Here is more information to understand Mule configuration. - Copy the schema and WSDL for loan service in the following directory path of the project, loan_system_api /src/main/resources
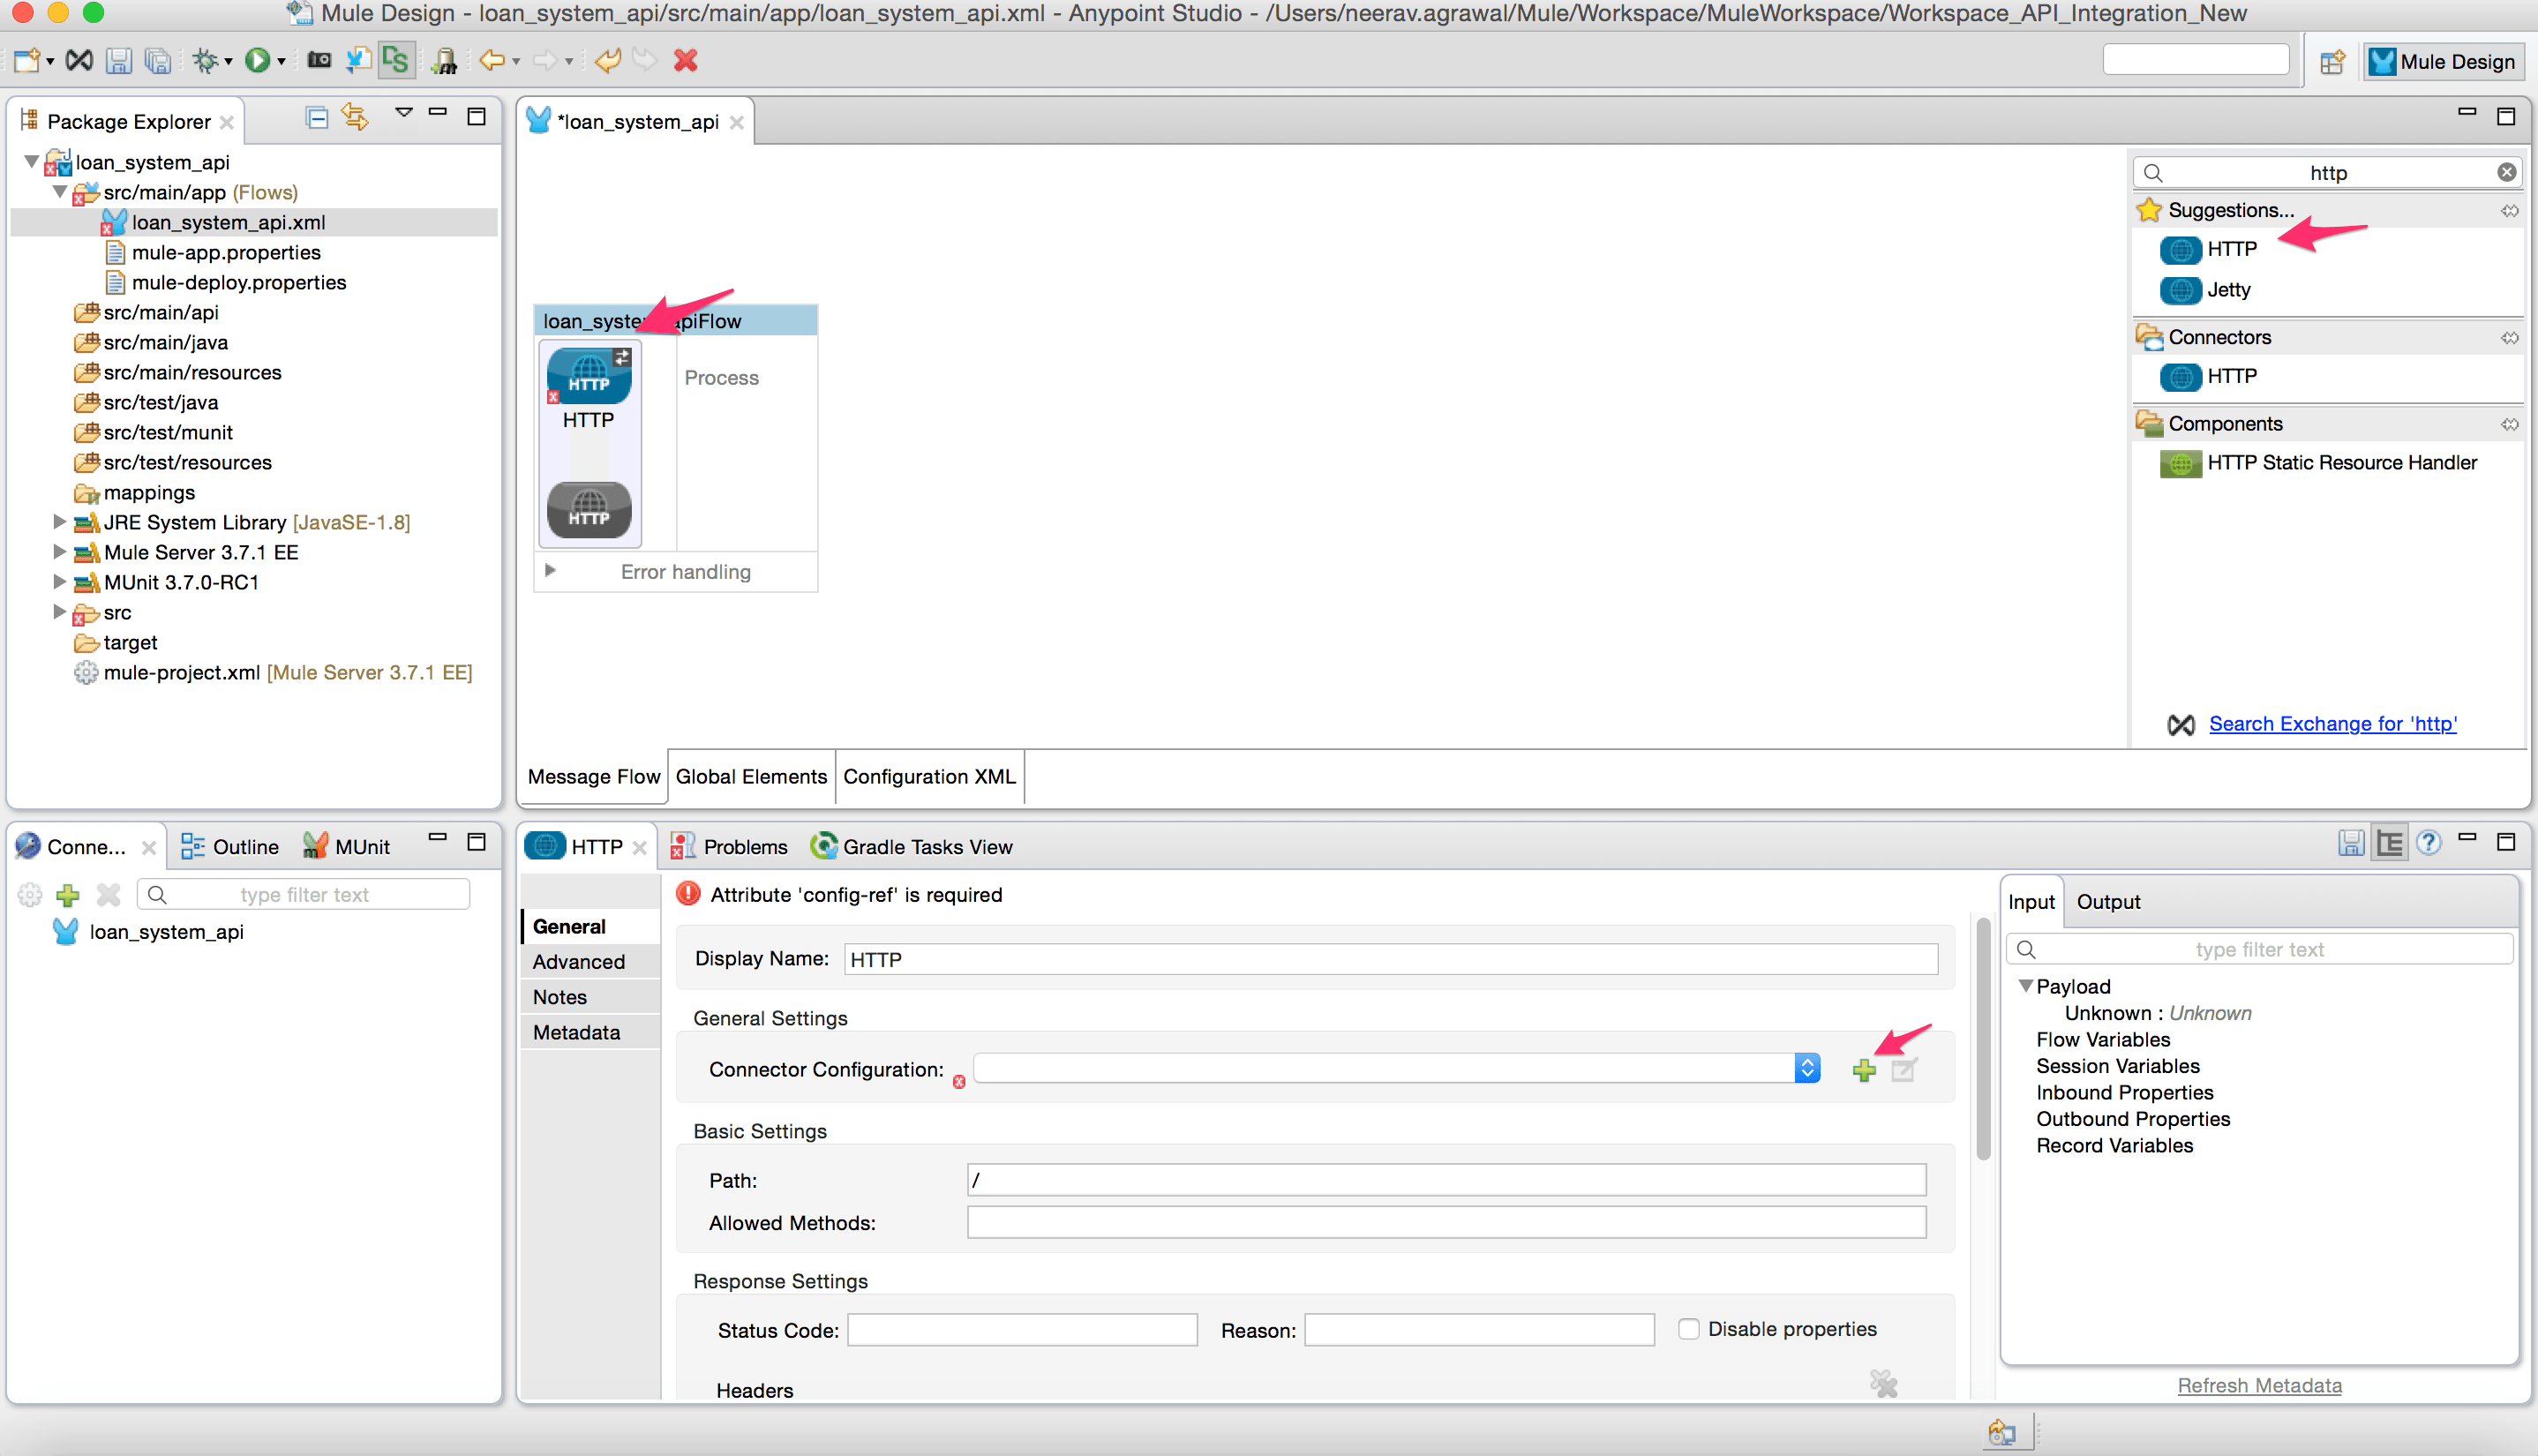
- Add HTTP endpoint to the Mule configuration file. Dropping the HTTP endpoint on the canvas will automatically create a flow (What is a mule flow?). In the HTTP endpoint properties tab below click on connector configuration.
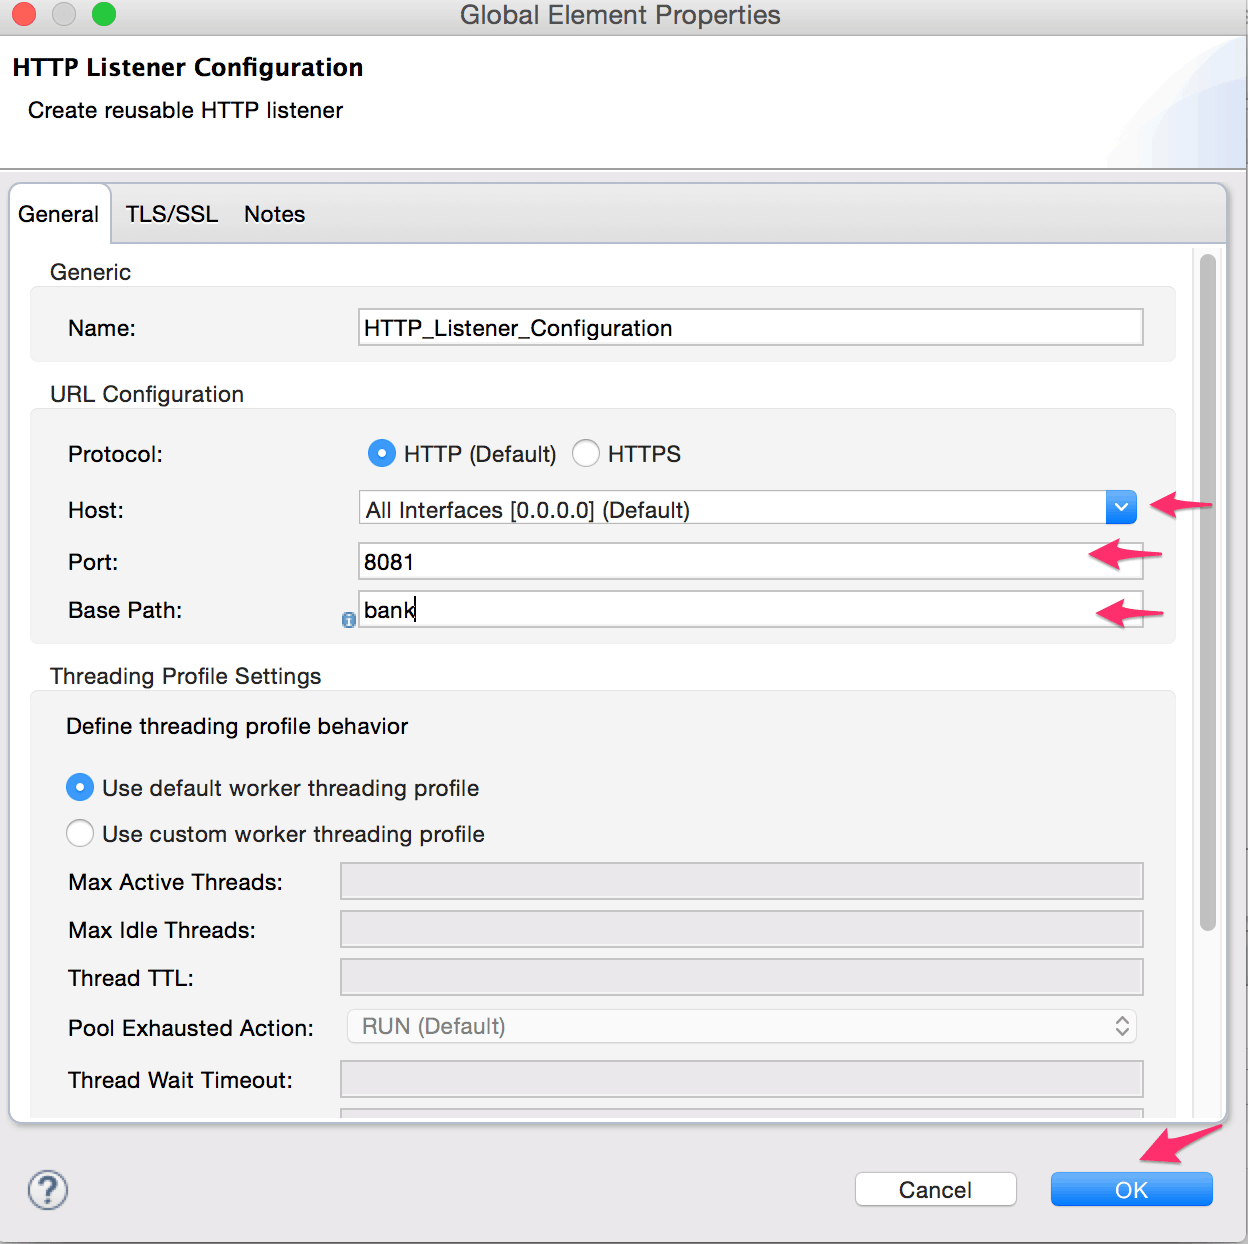
- Configure as below and click Ok.
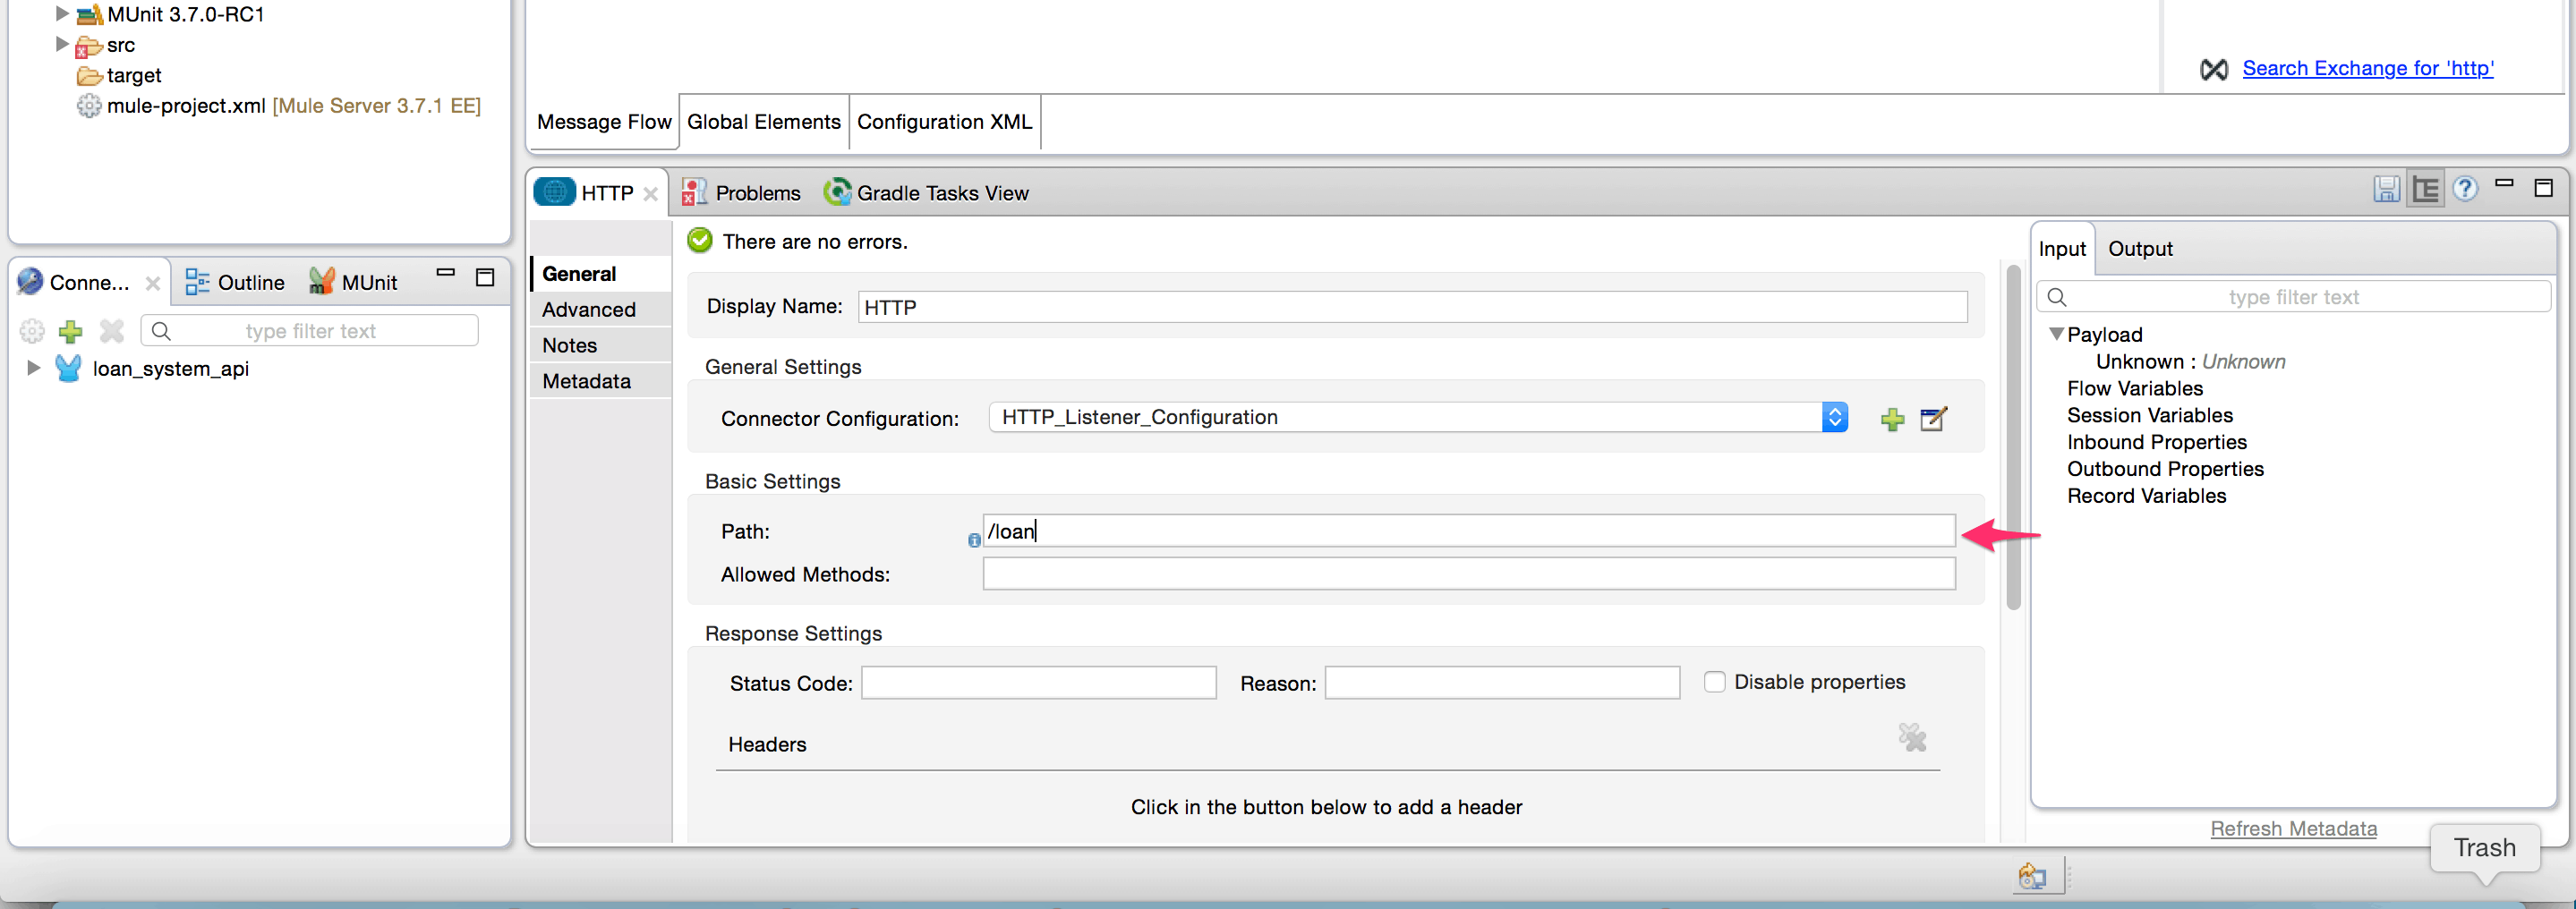
- Add value “loan” to the path variable in HTTP property.
- Add the CXF component to the flow.
(Here is more detail on the CXF component.) - Change the configurations for the CXF component to match the parameter from the WSDL. Add the WSDL location in the advanced tab.
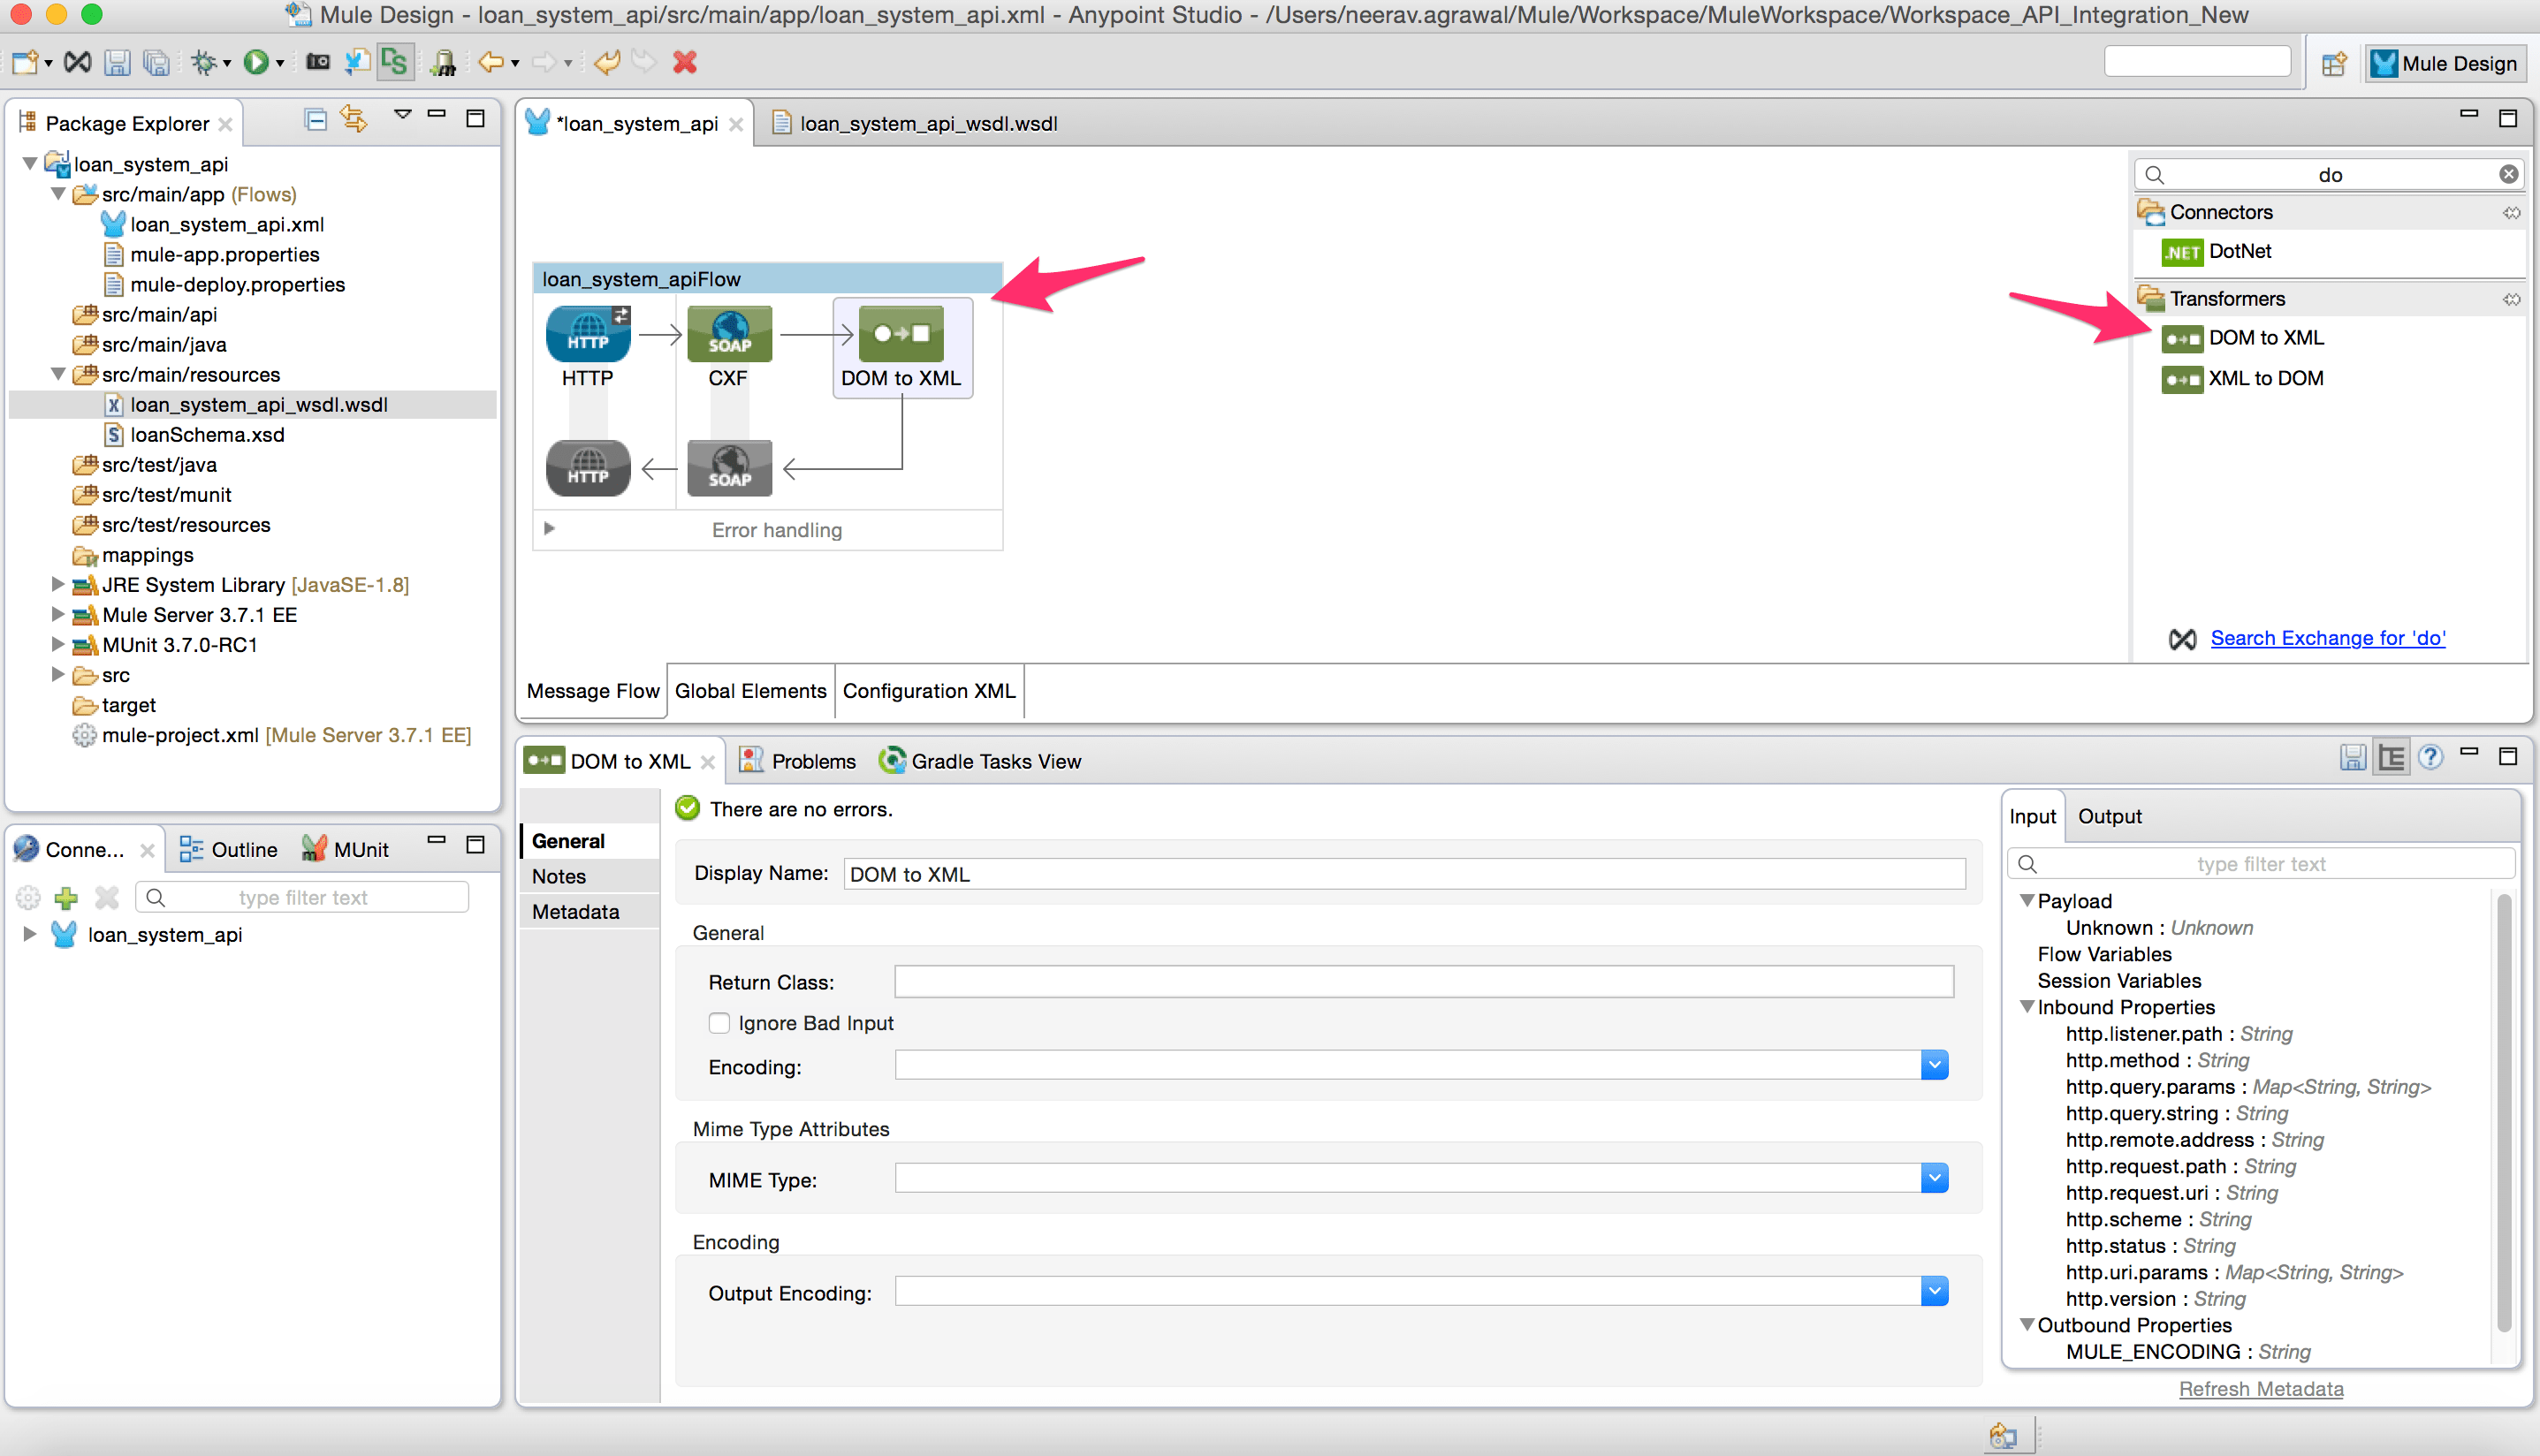
- Add transformer “Dom to XML”.
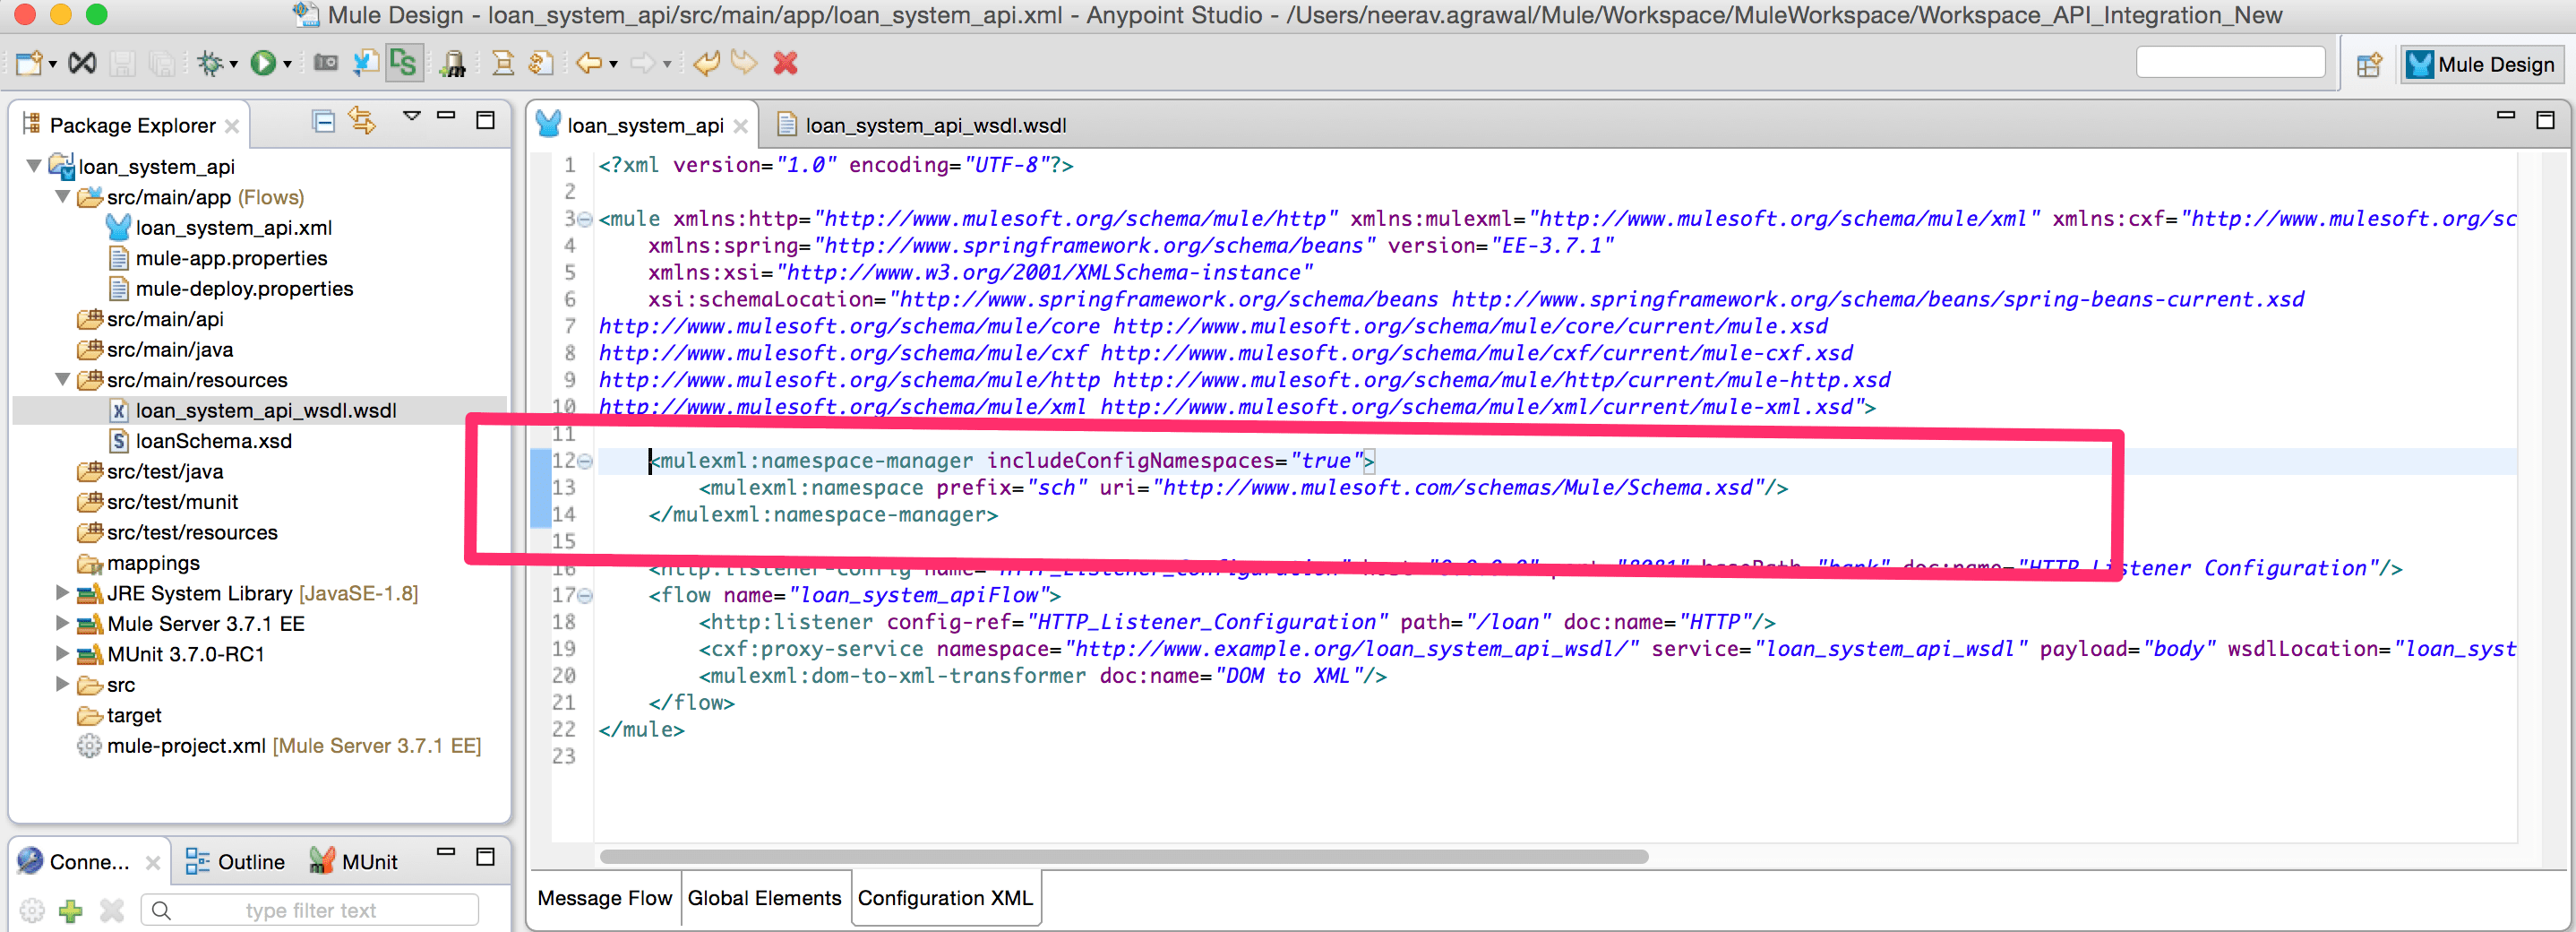
(Note: This transformer will convert the org.w3c.dom.Document object to XML message. This way we can apply XPath expressions to extract various values from the incoming message payload.) - To parse the XML, SOAP request message switch to the Configuration XML view and add the following.
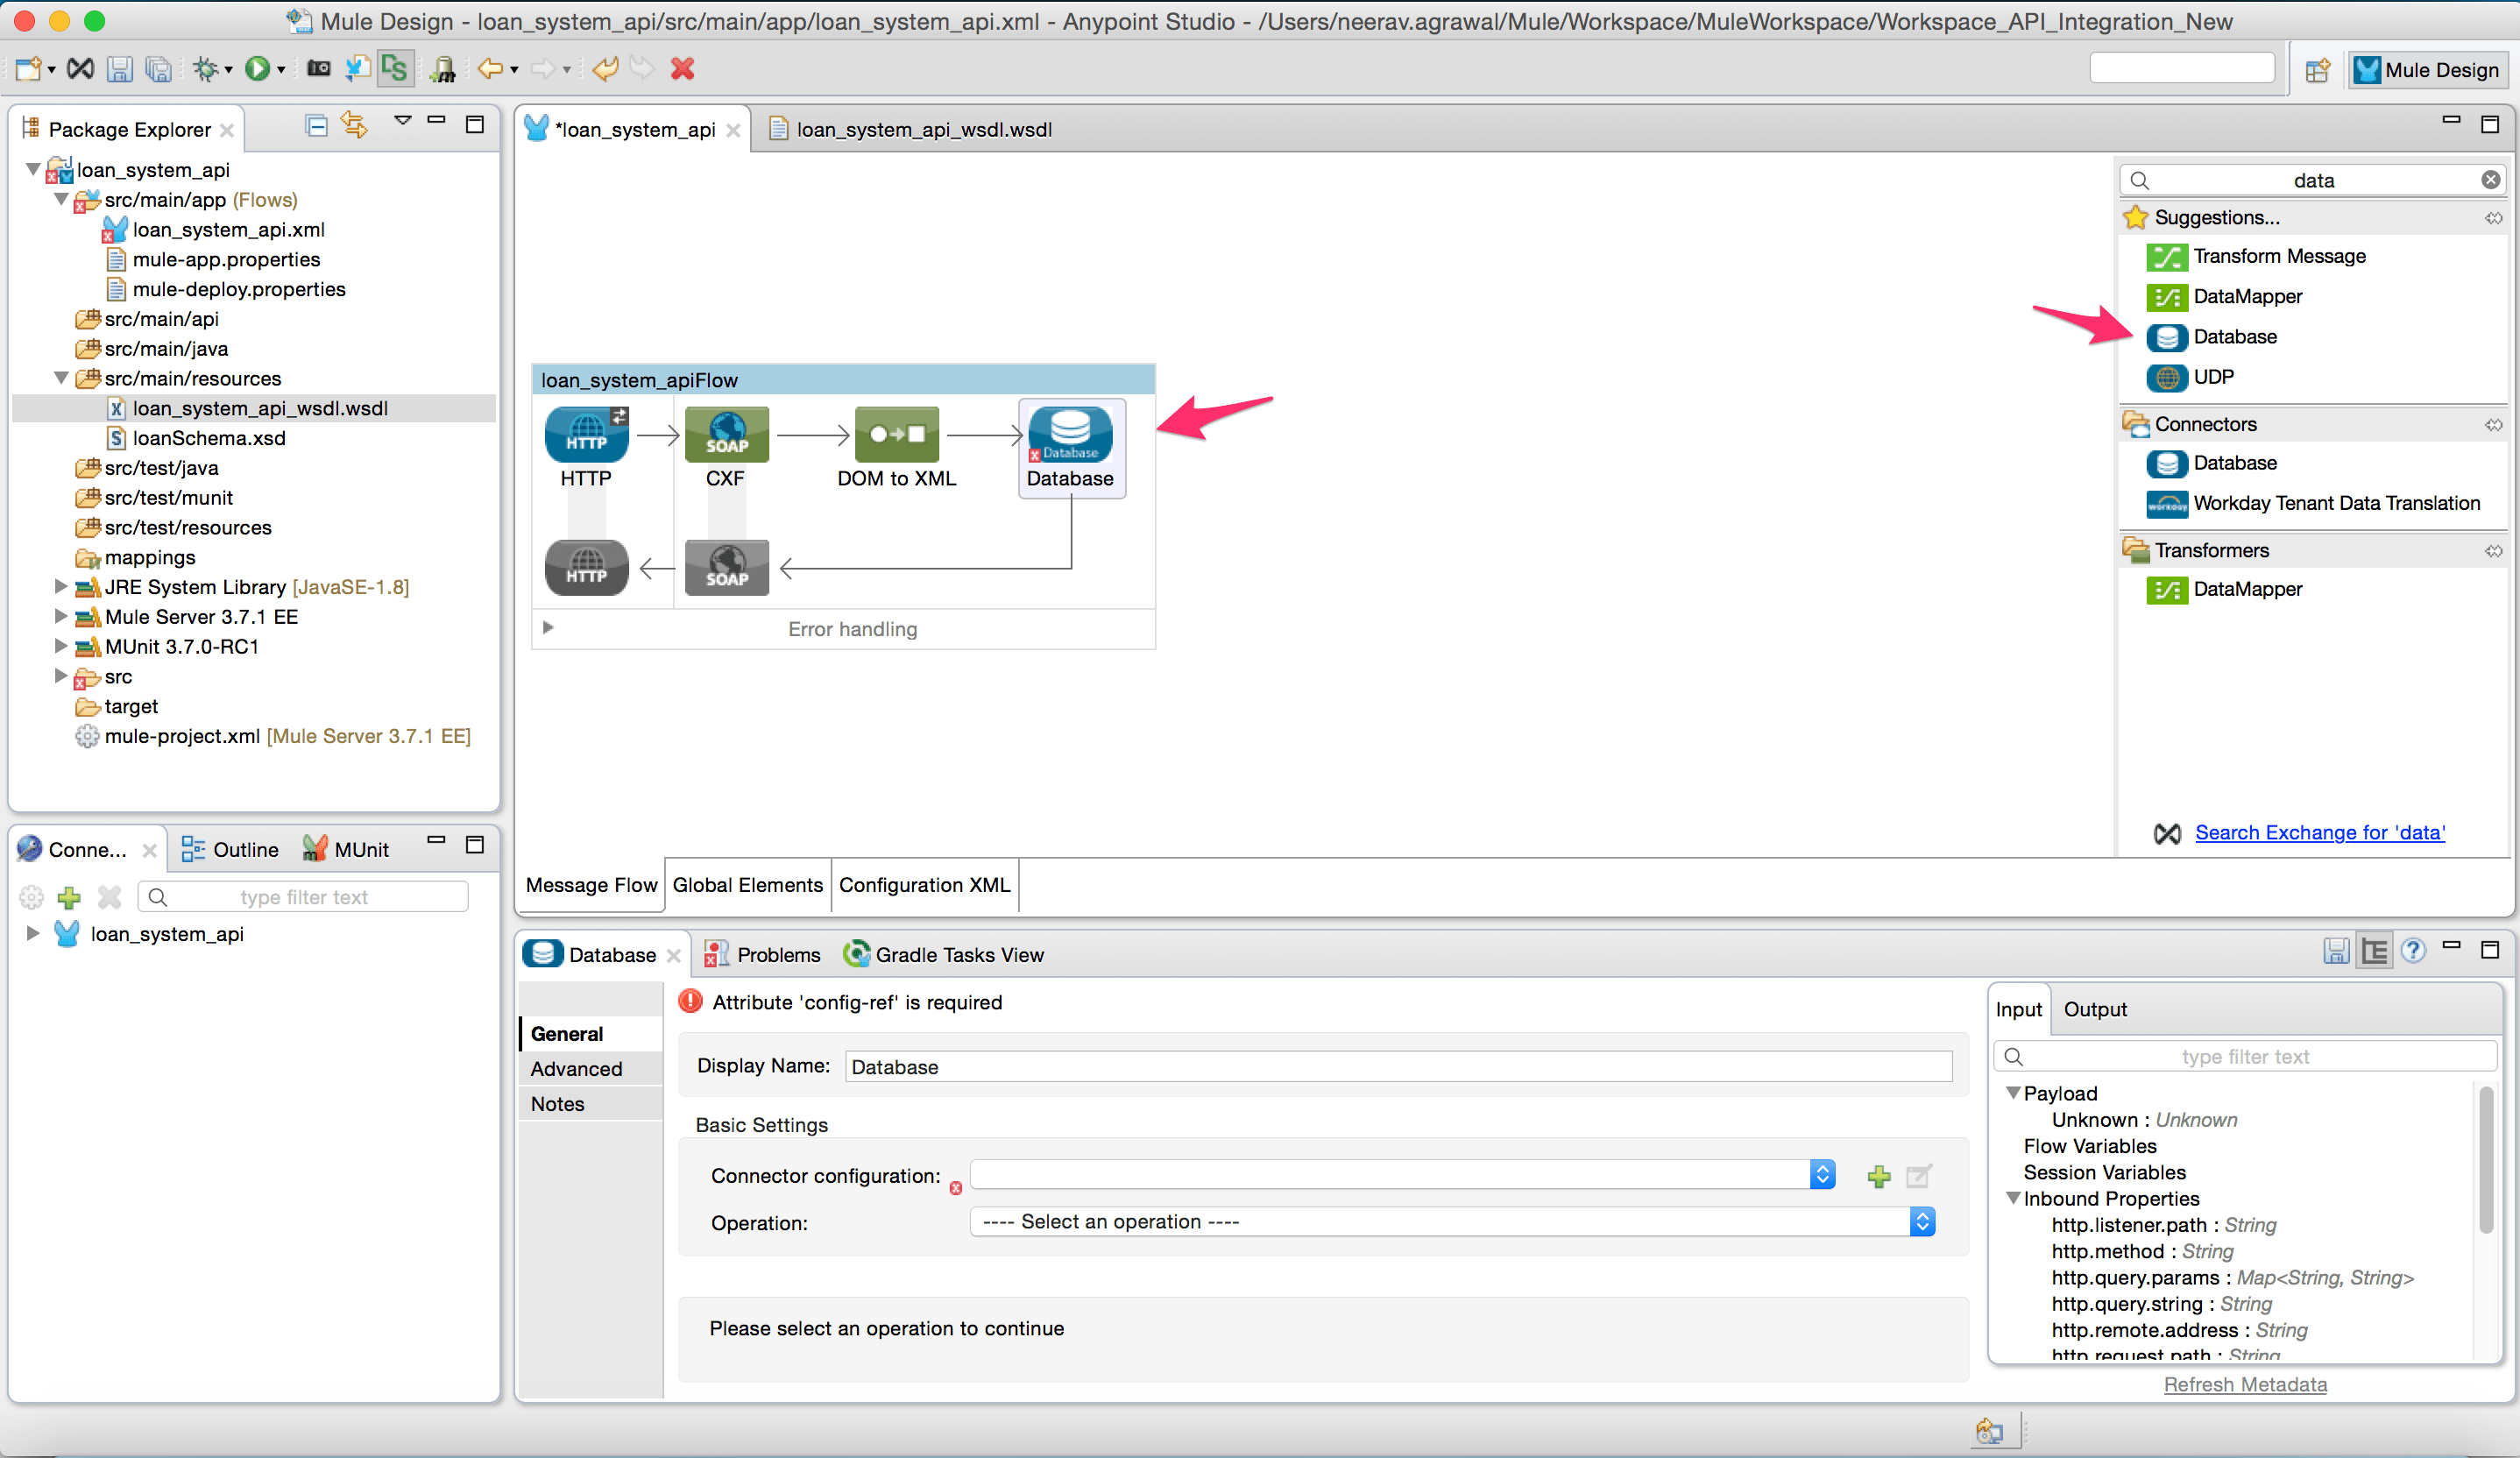
This namespace is obtained from the WSDL (Here are more details on how namespaces are handled in MuleSoft). - Add the database connector to look up the table.
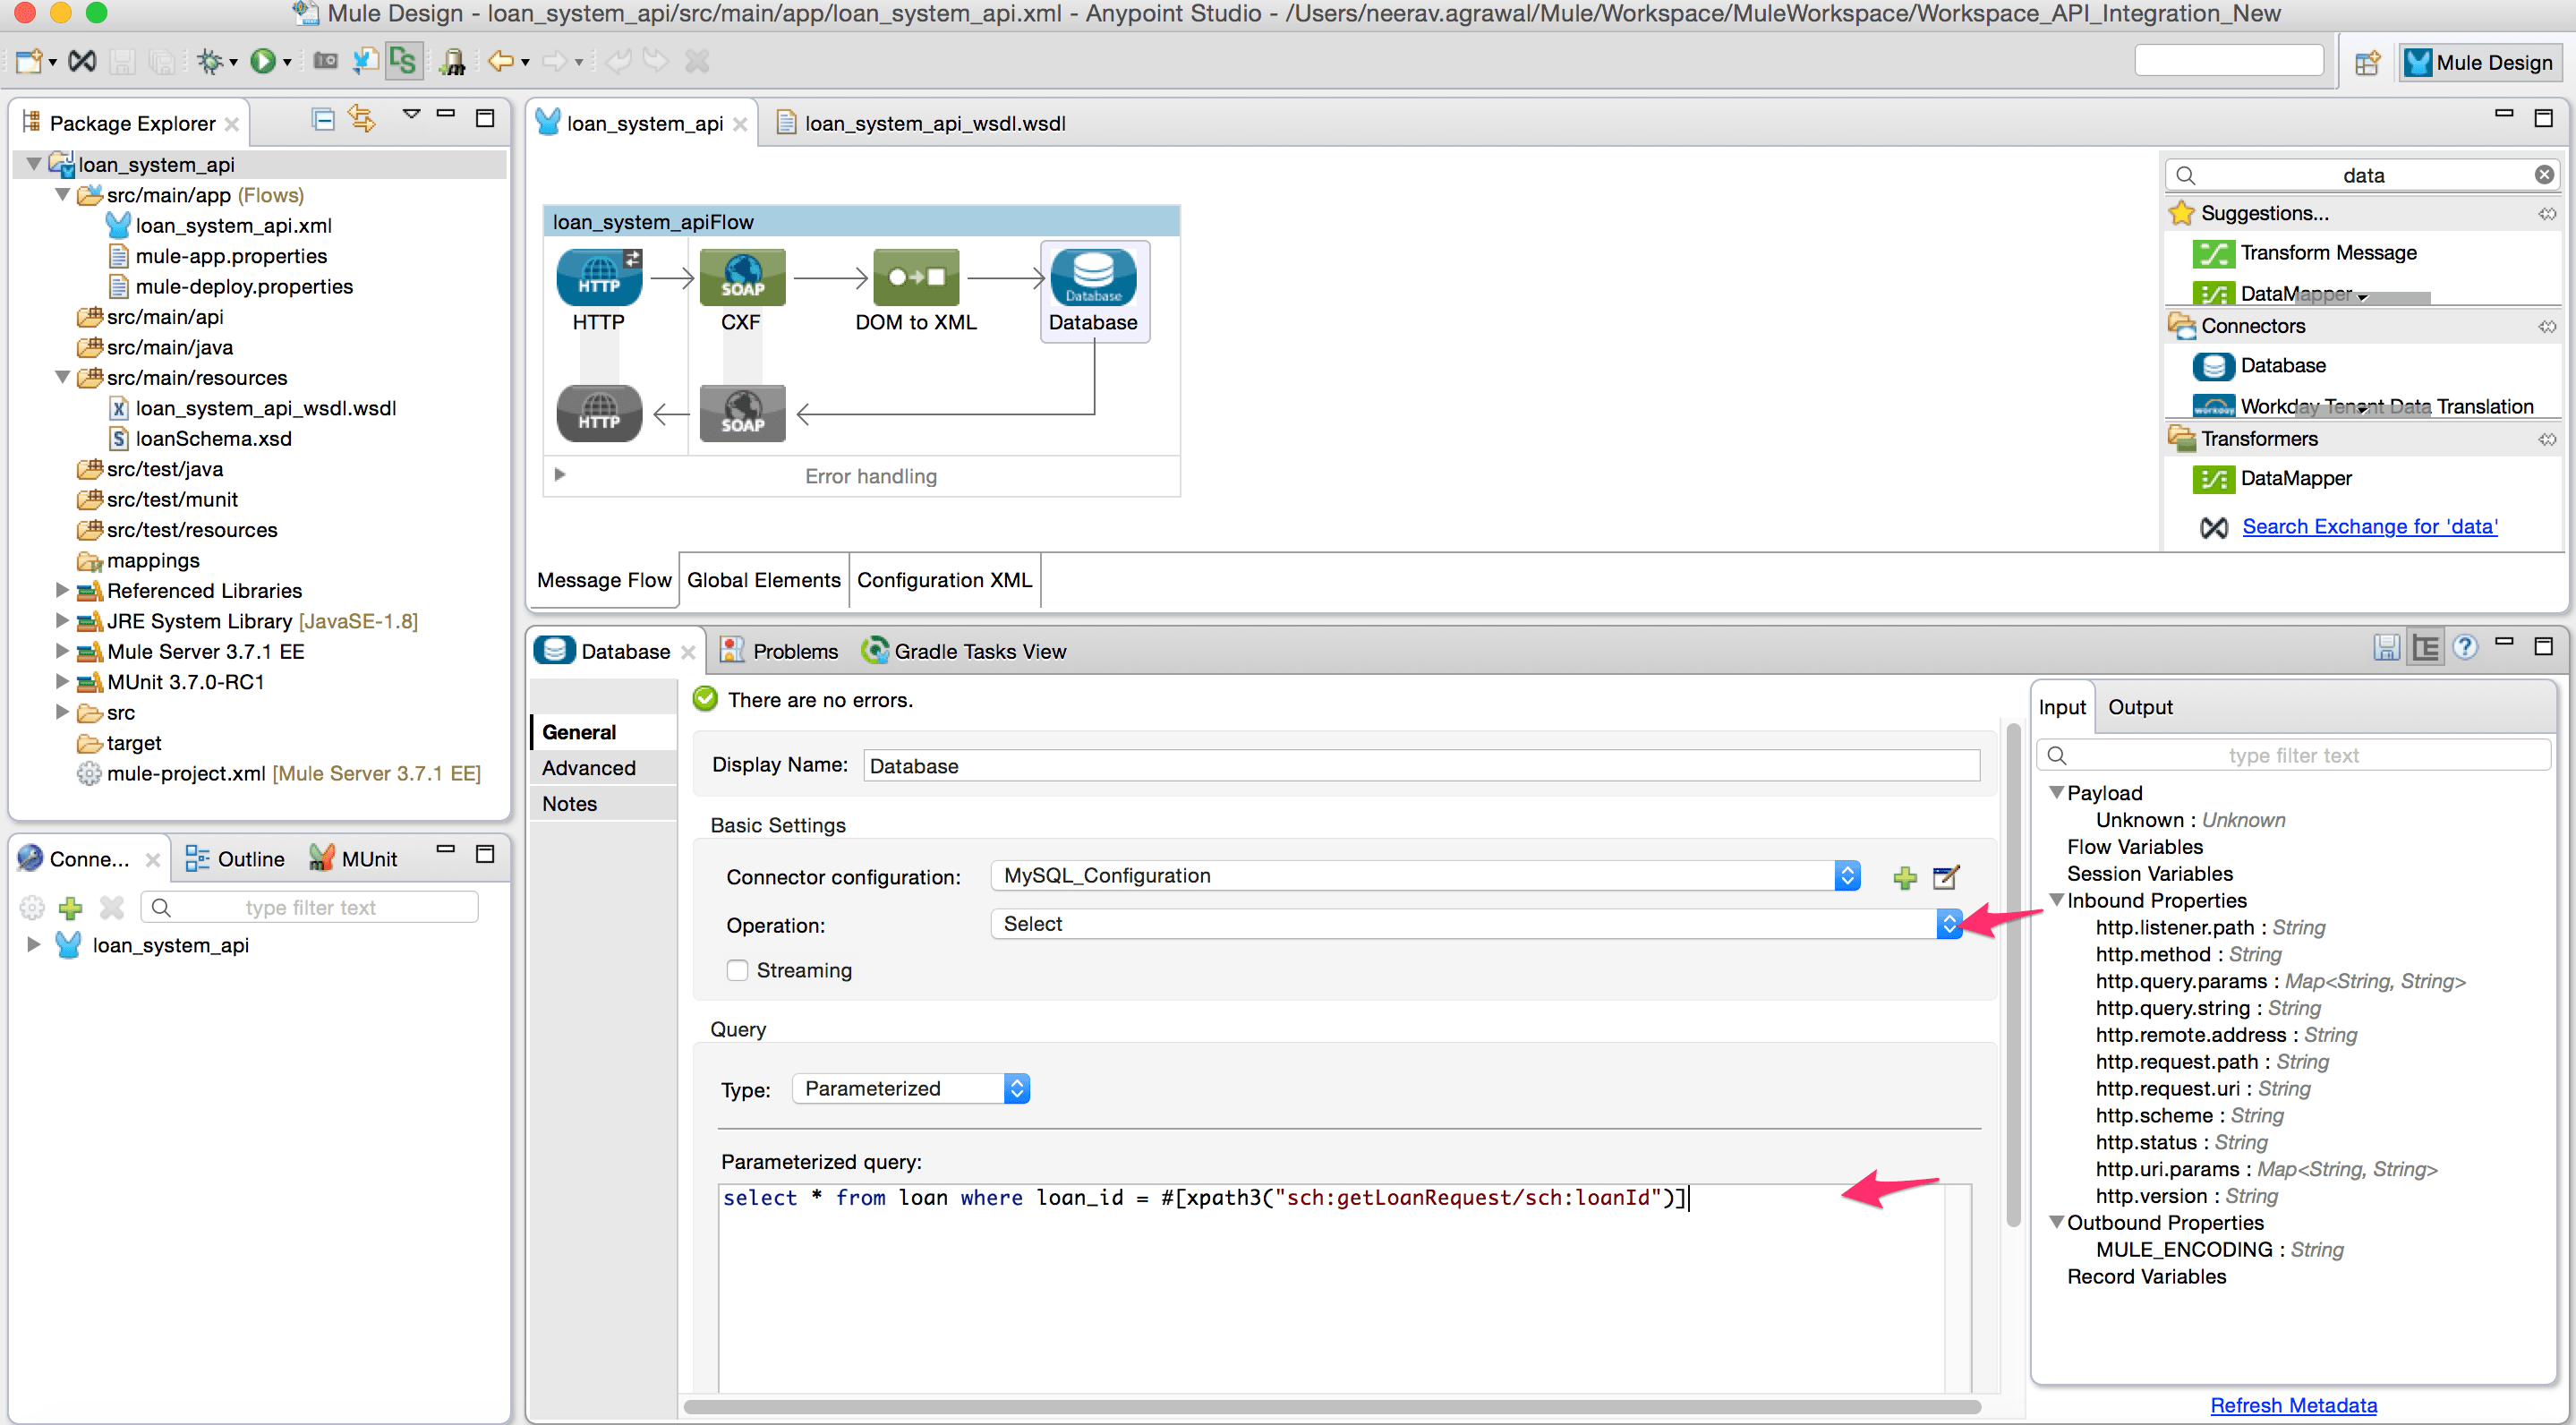
- Configure the database with all the parameters.
- Configure the database connector property with the following select query by using the XPath query to extract the input parameter from the request payload.
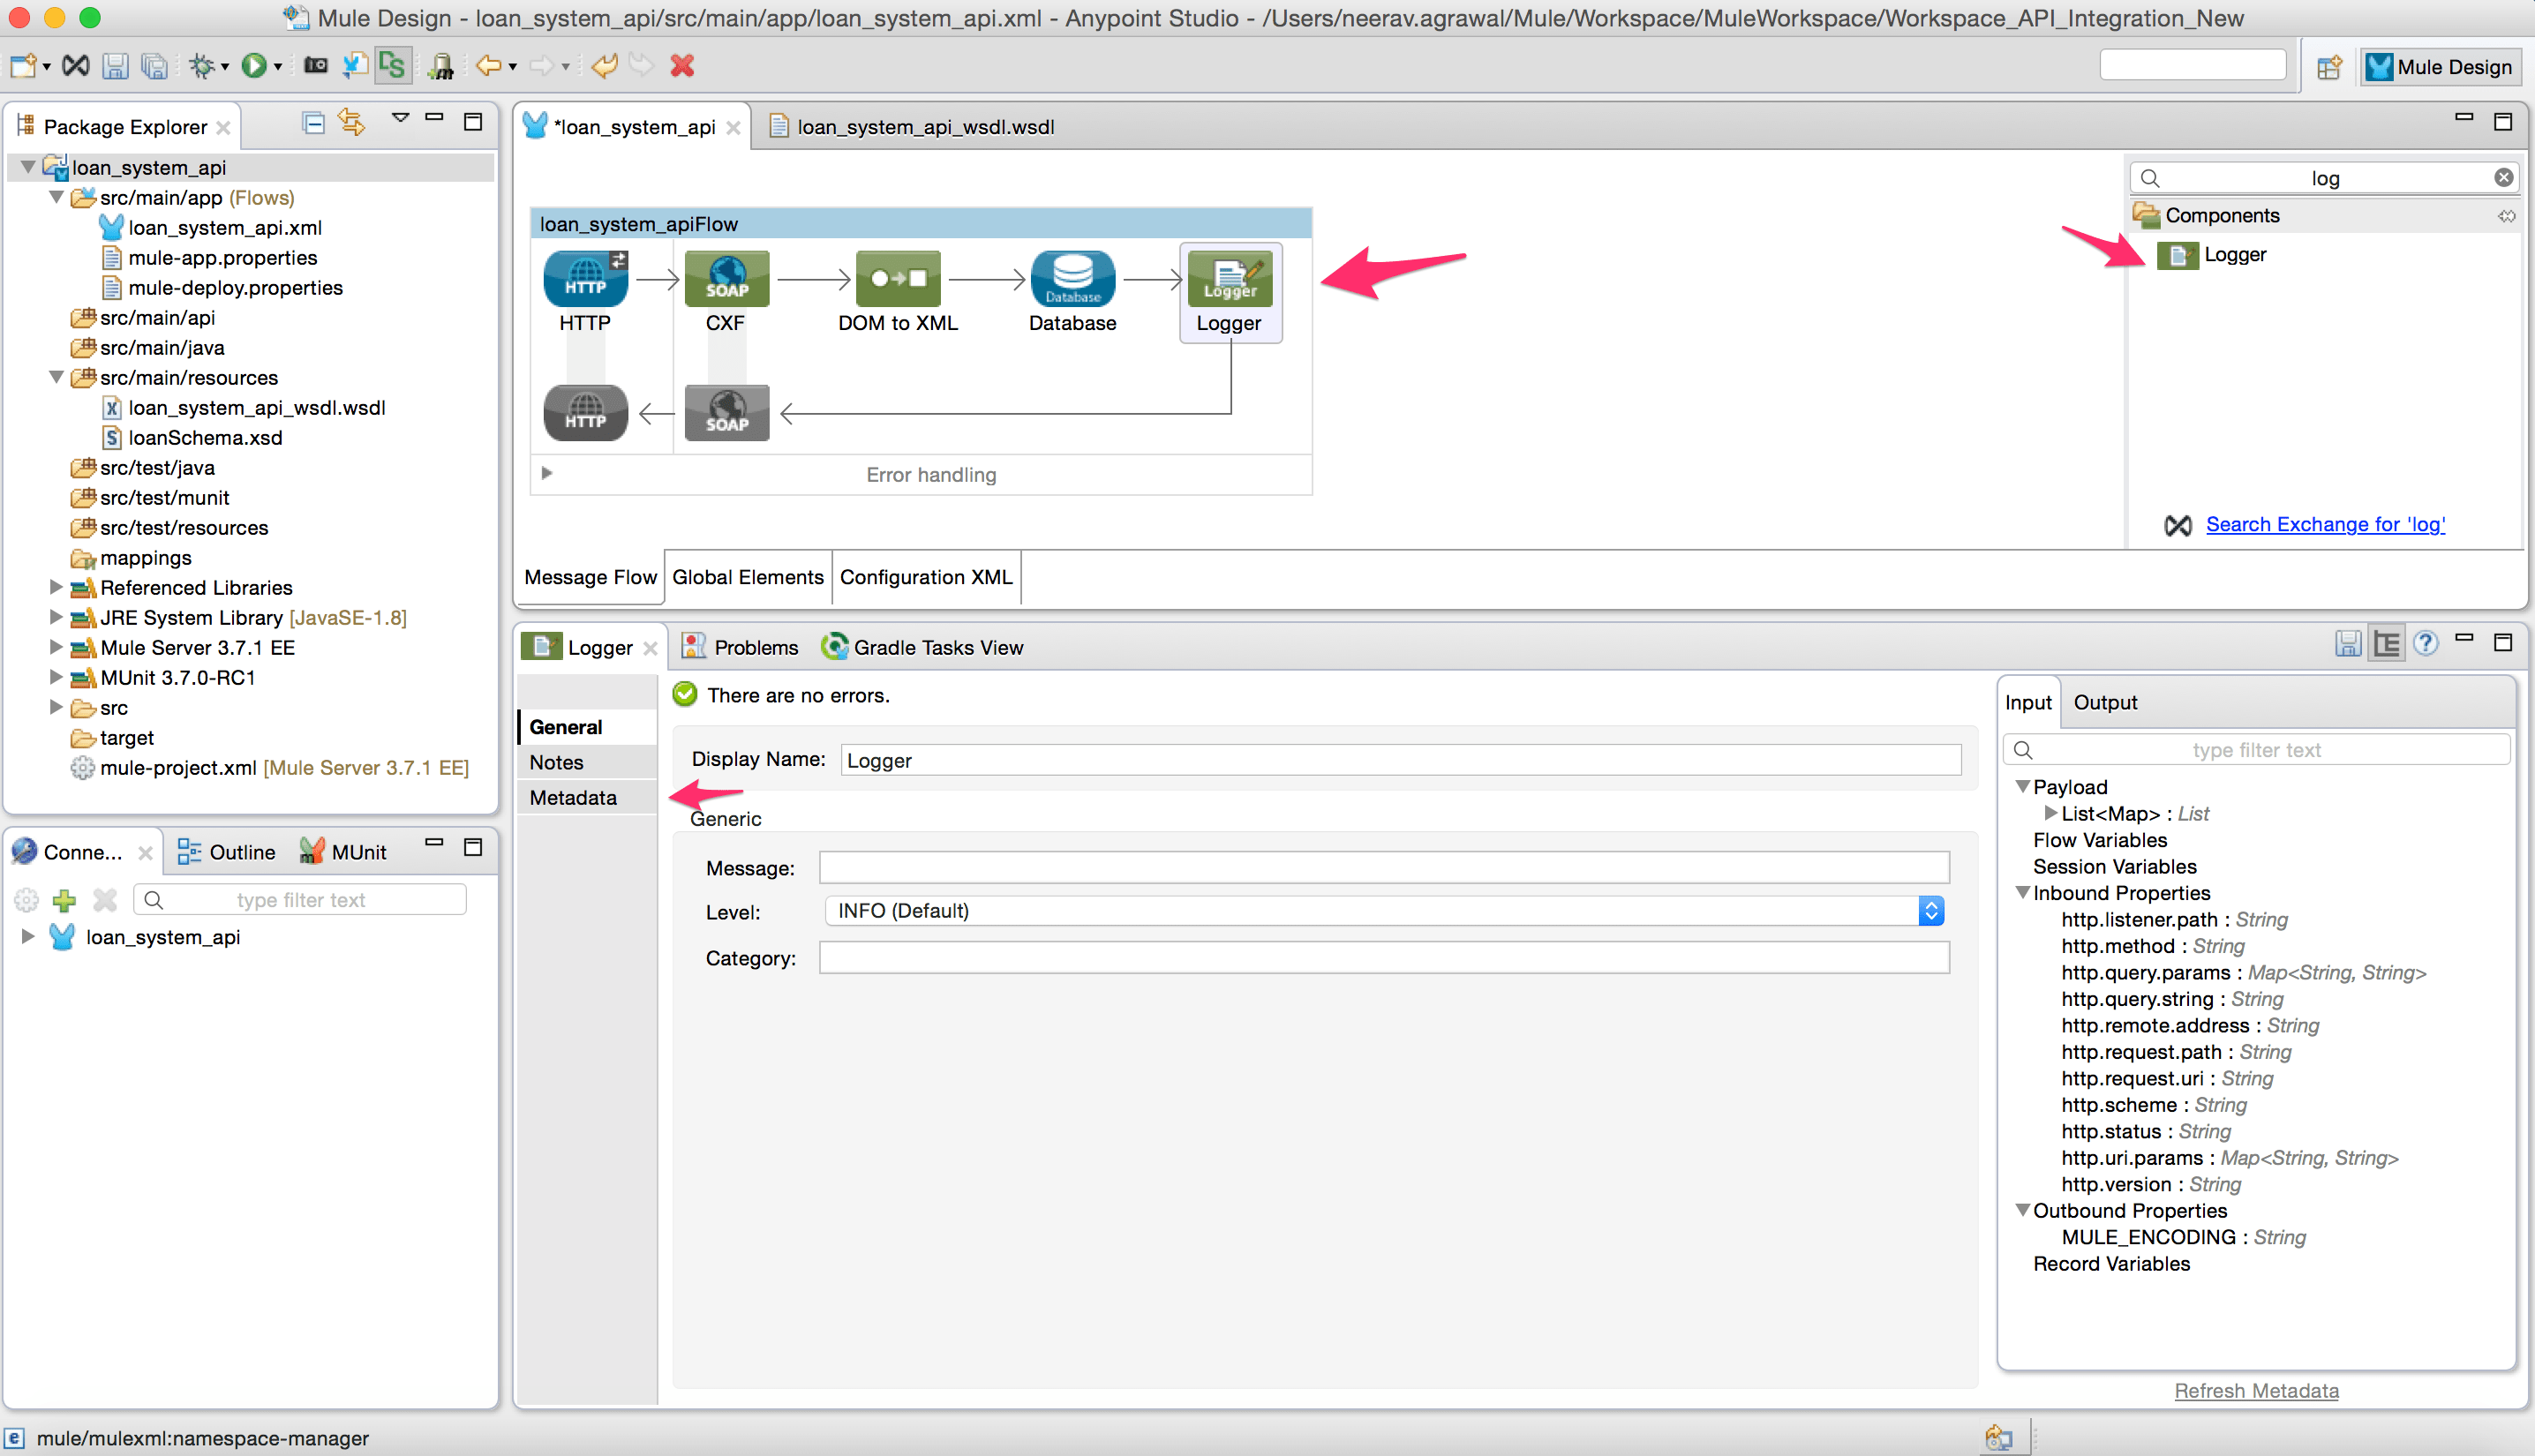
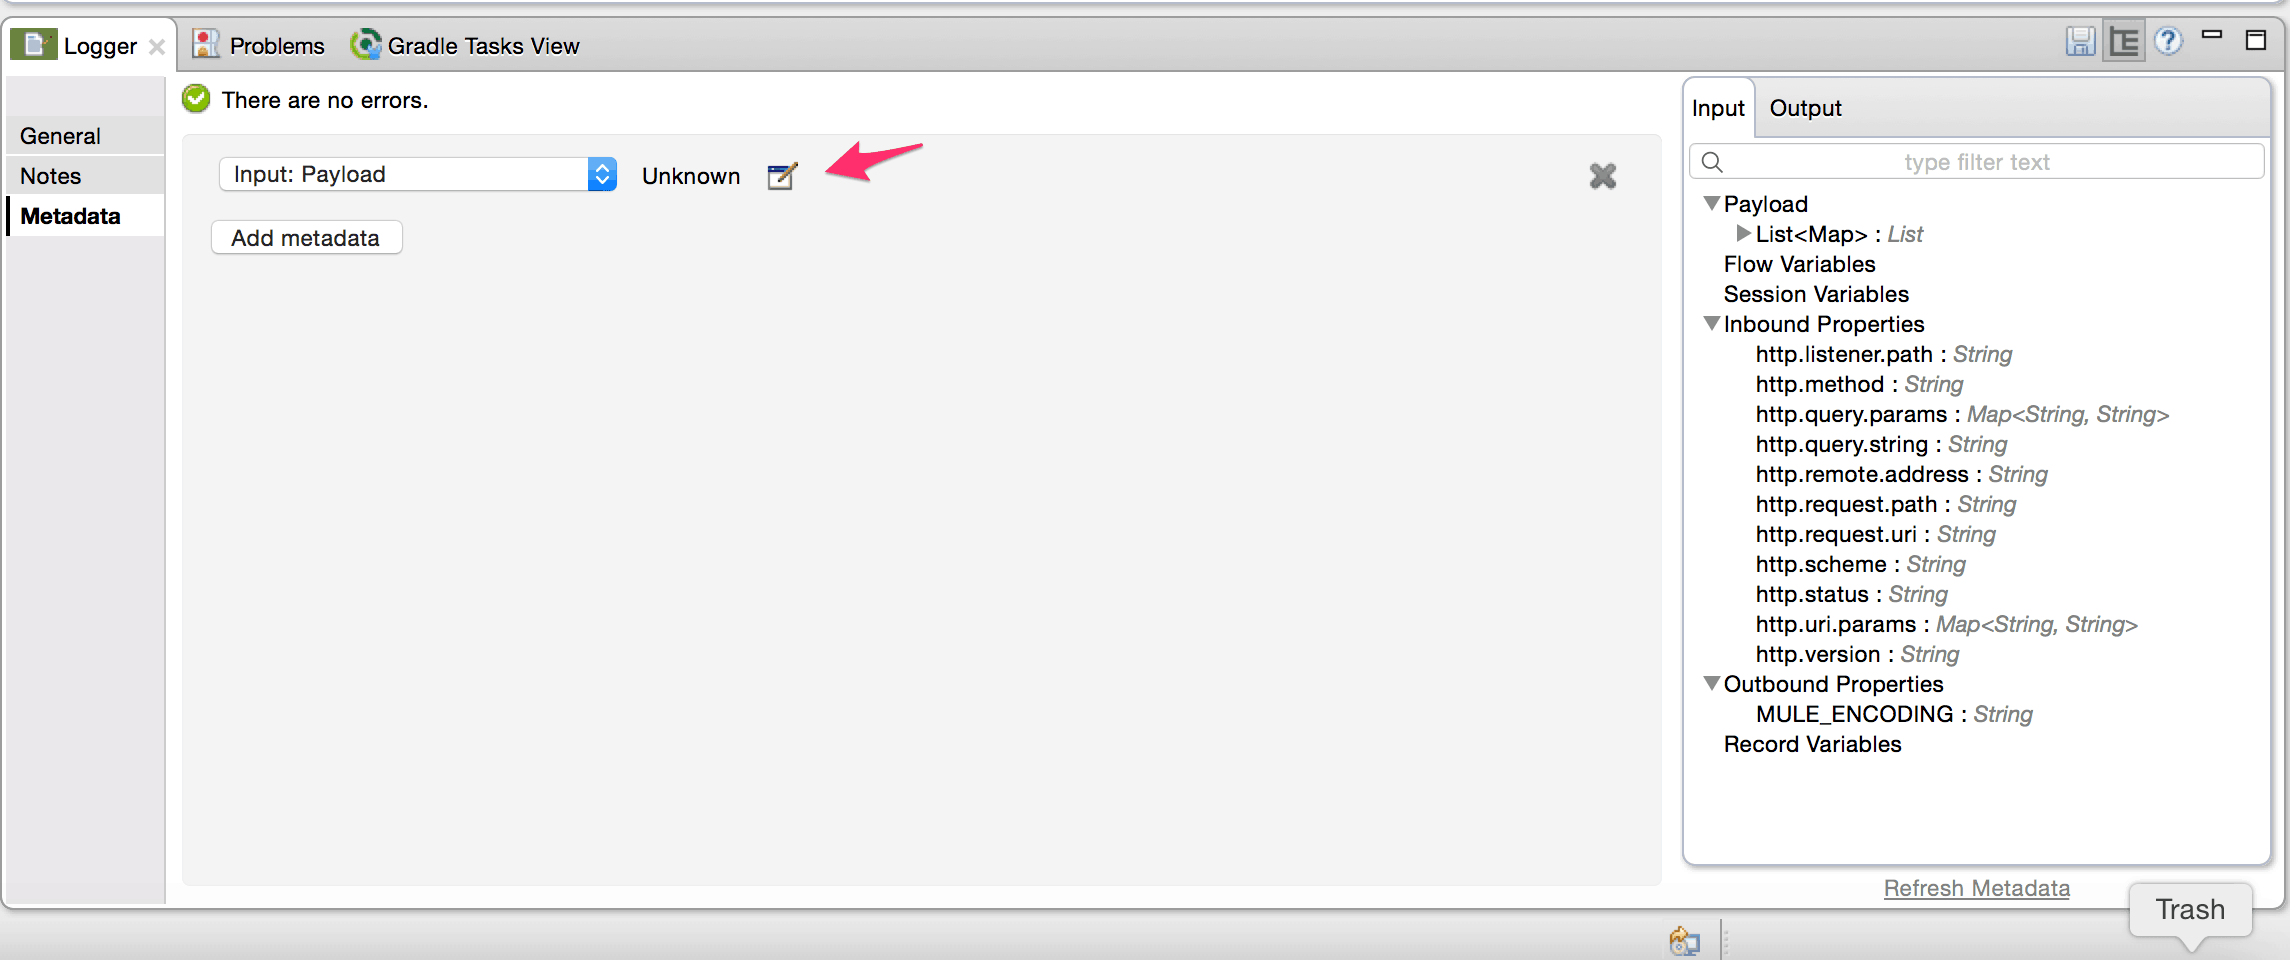
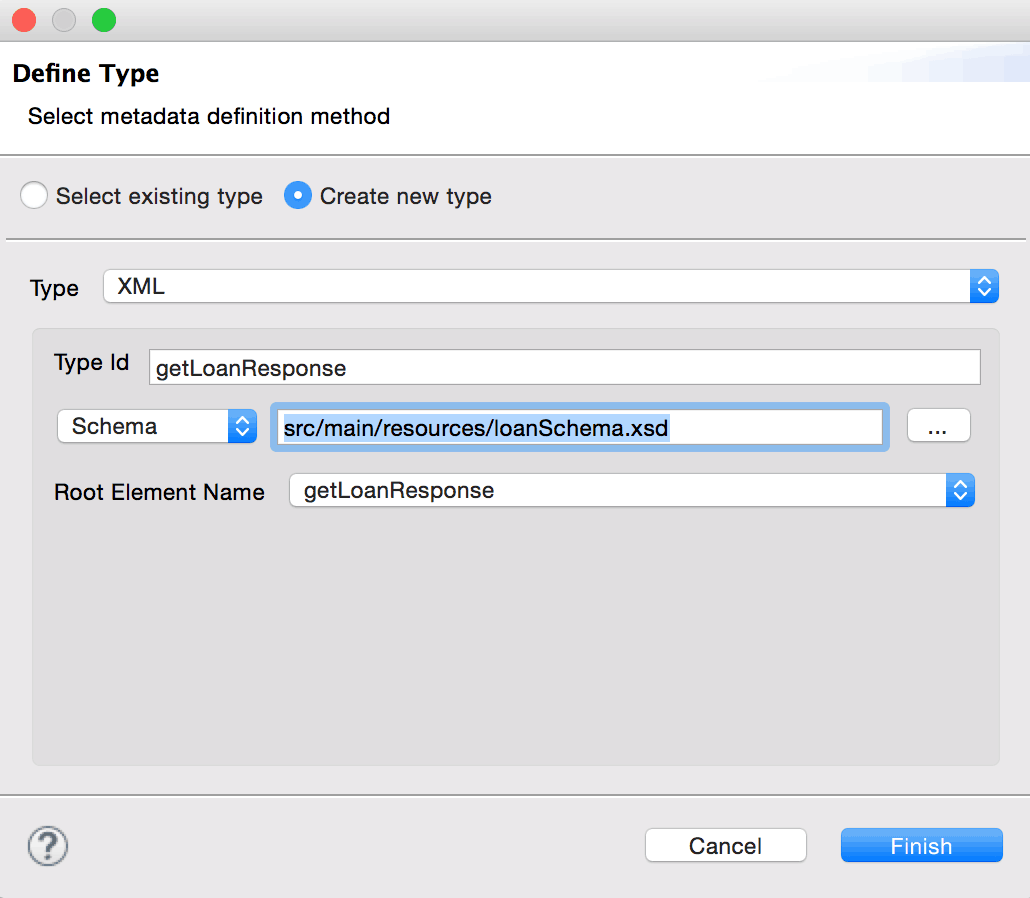
select * from loan where loan_id = #[xpath3("sch:getLoanRequest/sch:loanId")] - Add a logger component. Configure the metadata of the logger component with the schema object of the SOAP response message. This is done to assist with data mapping in the next step.
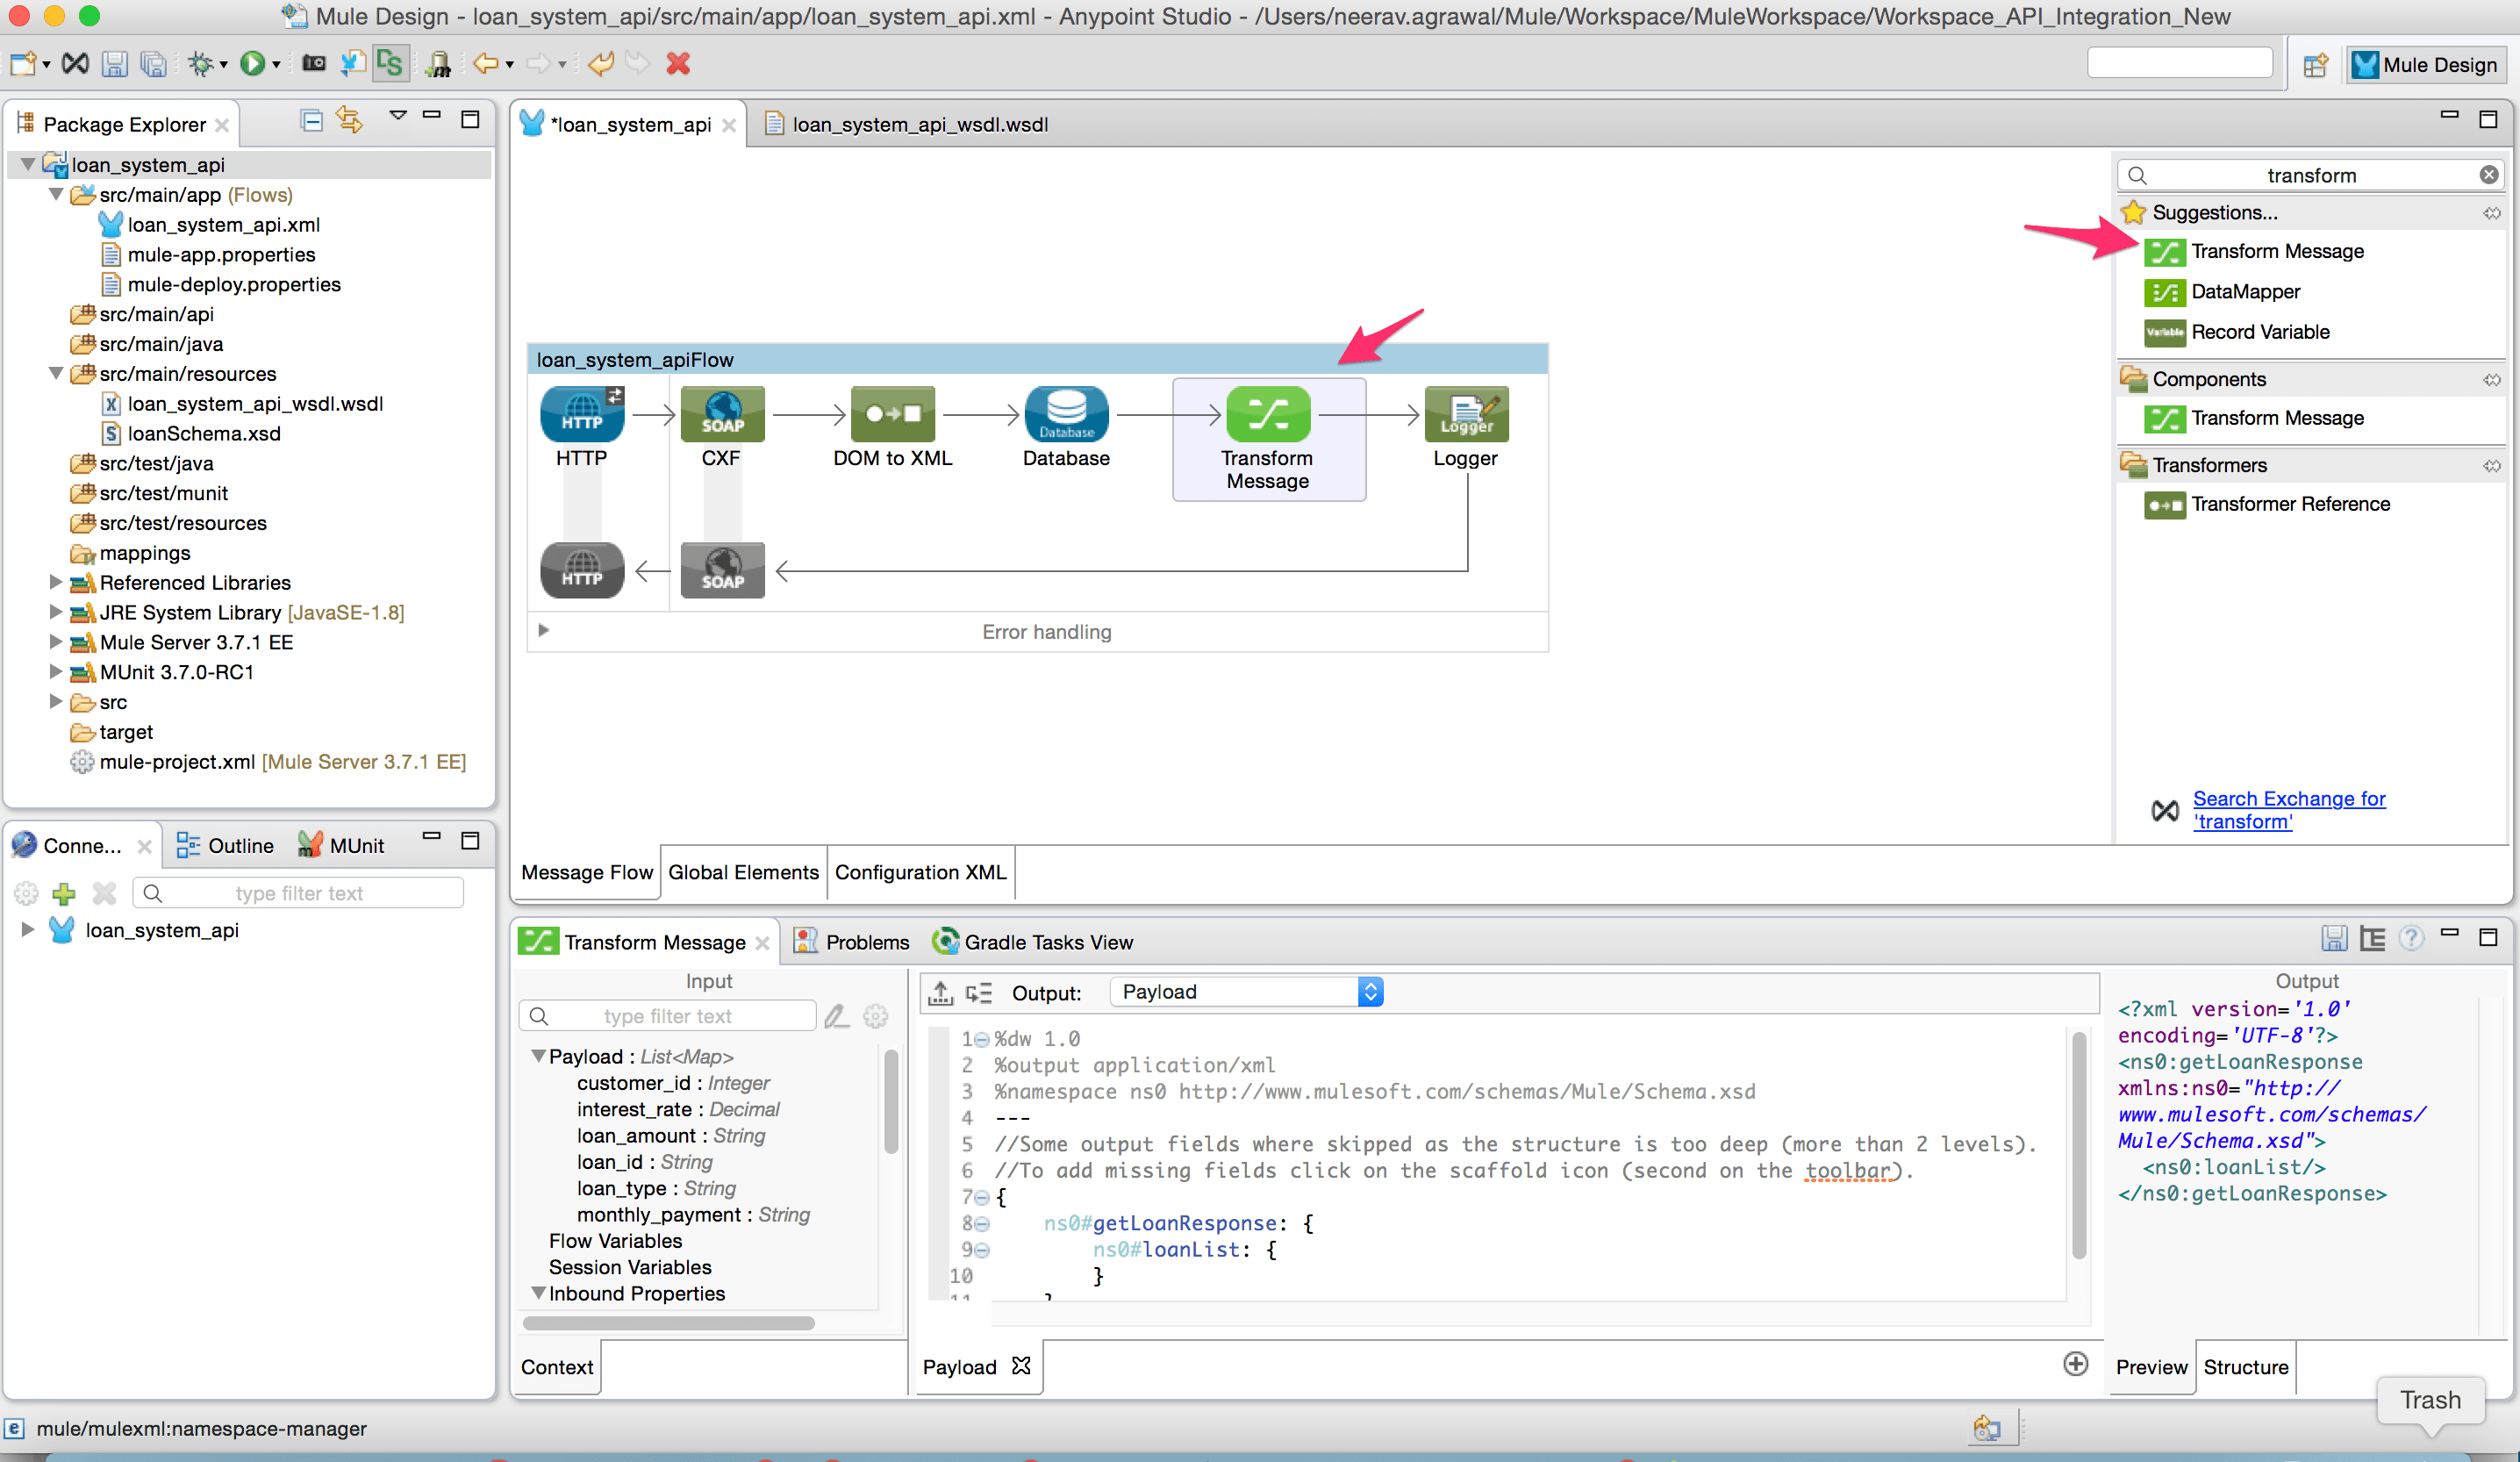
- Add the component “Transform Message” in between the database connector and logger (Here is more detail on Transform Message).
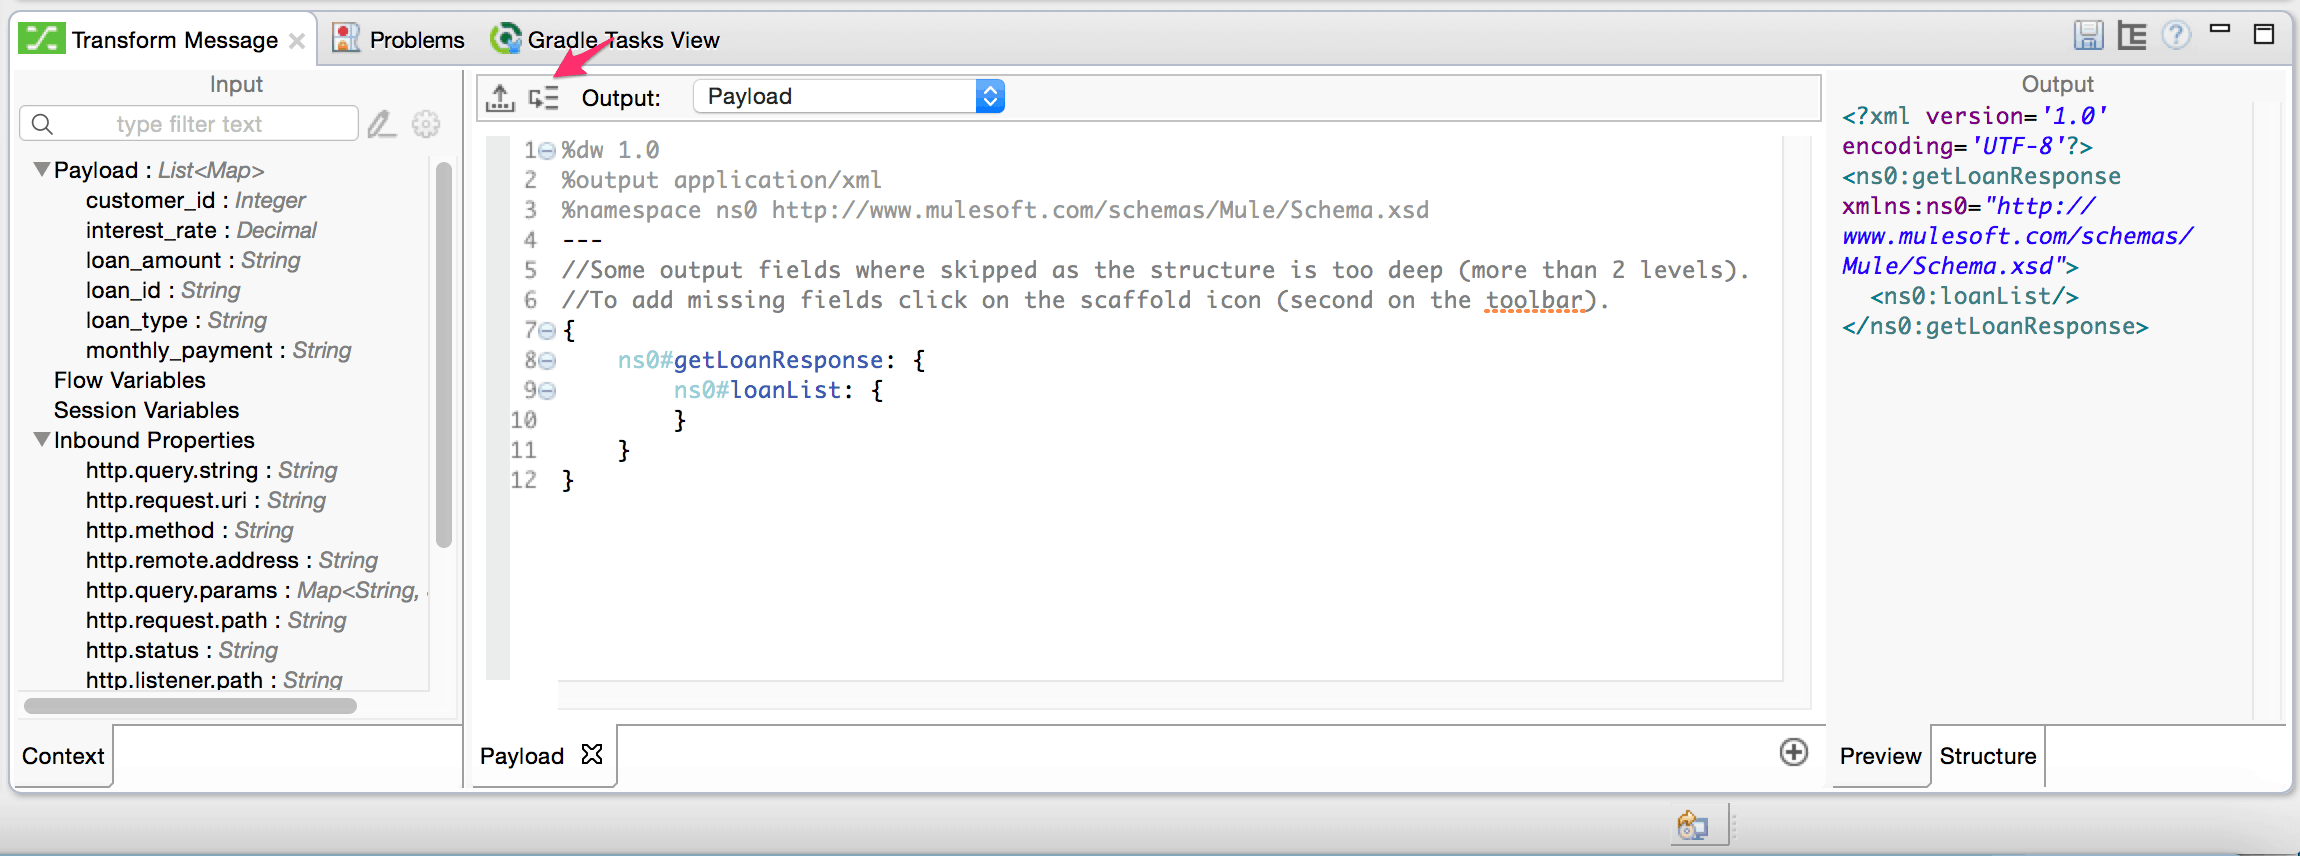
- To see all the fields click the button to show the scaffold output structure.
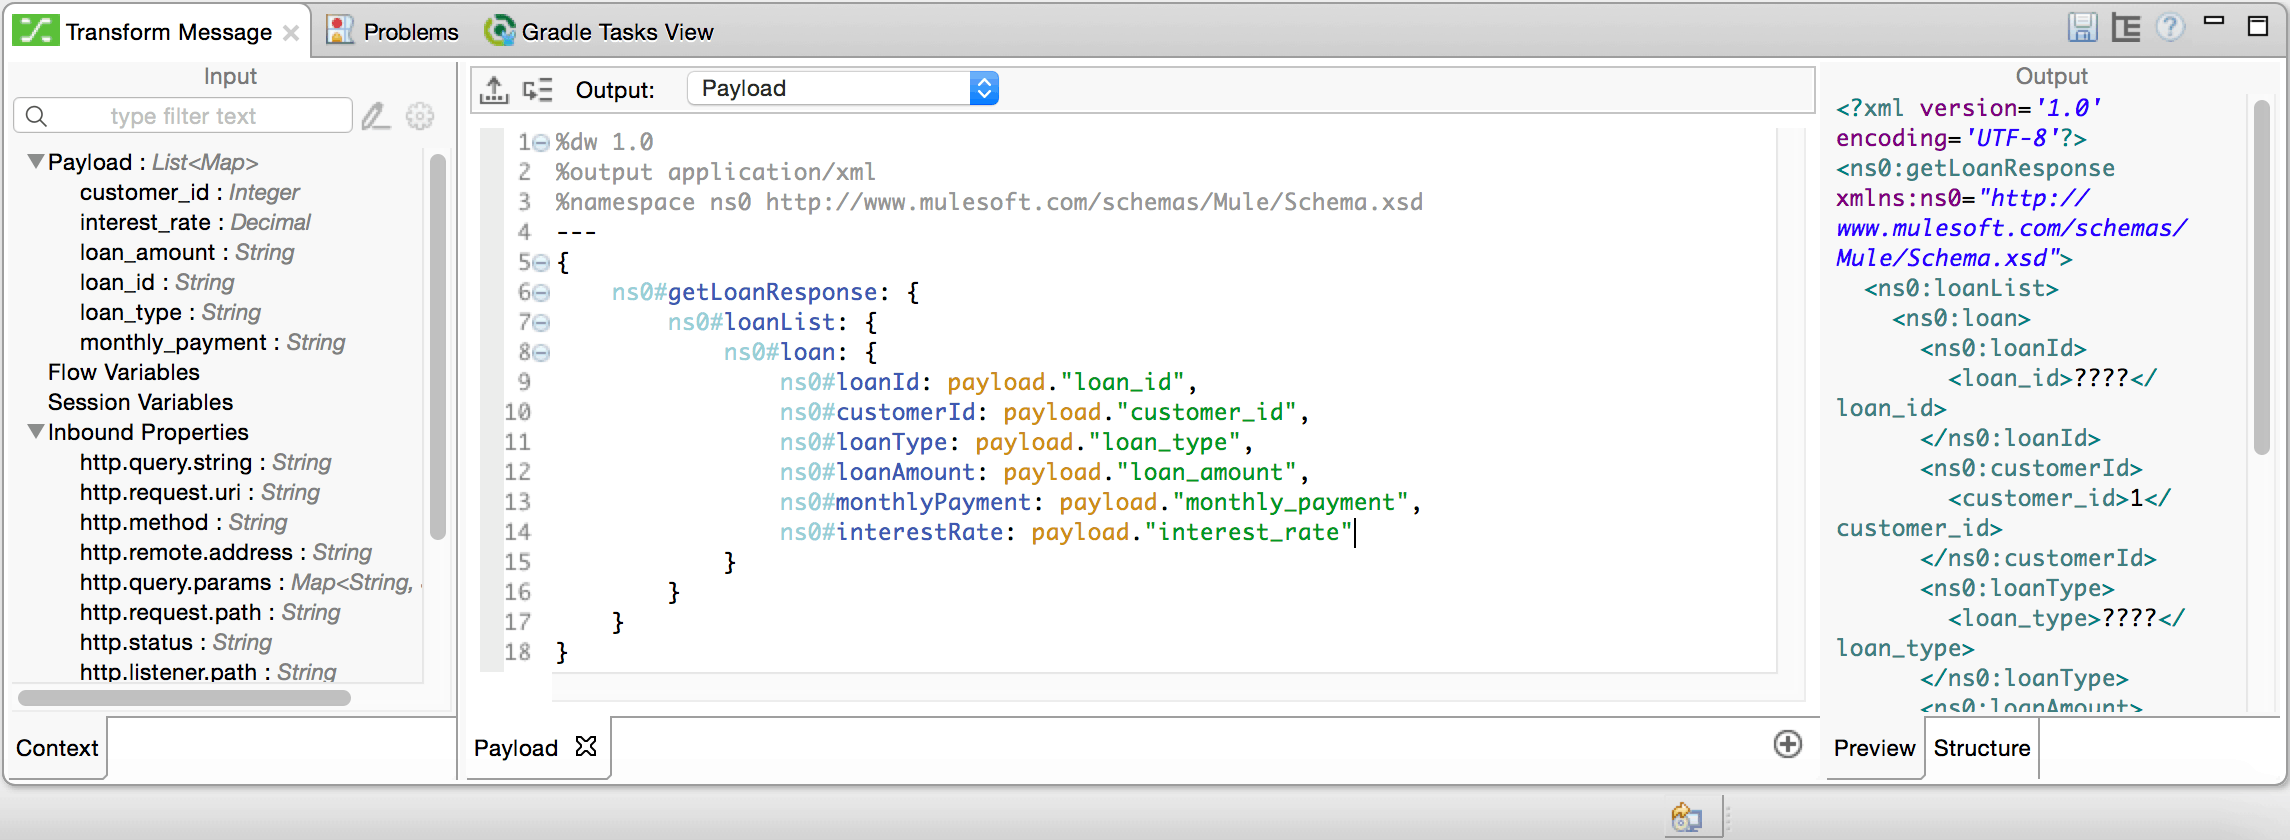
- Map the response from the database connector to the SOAP response message.
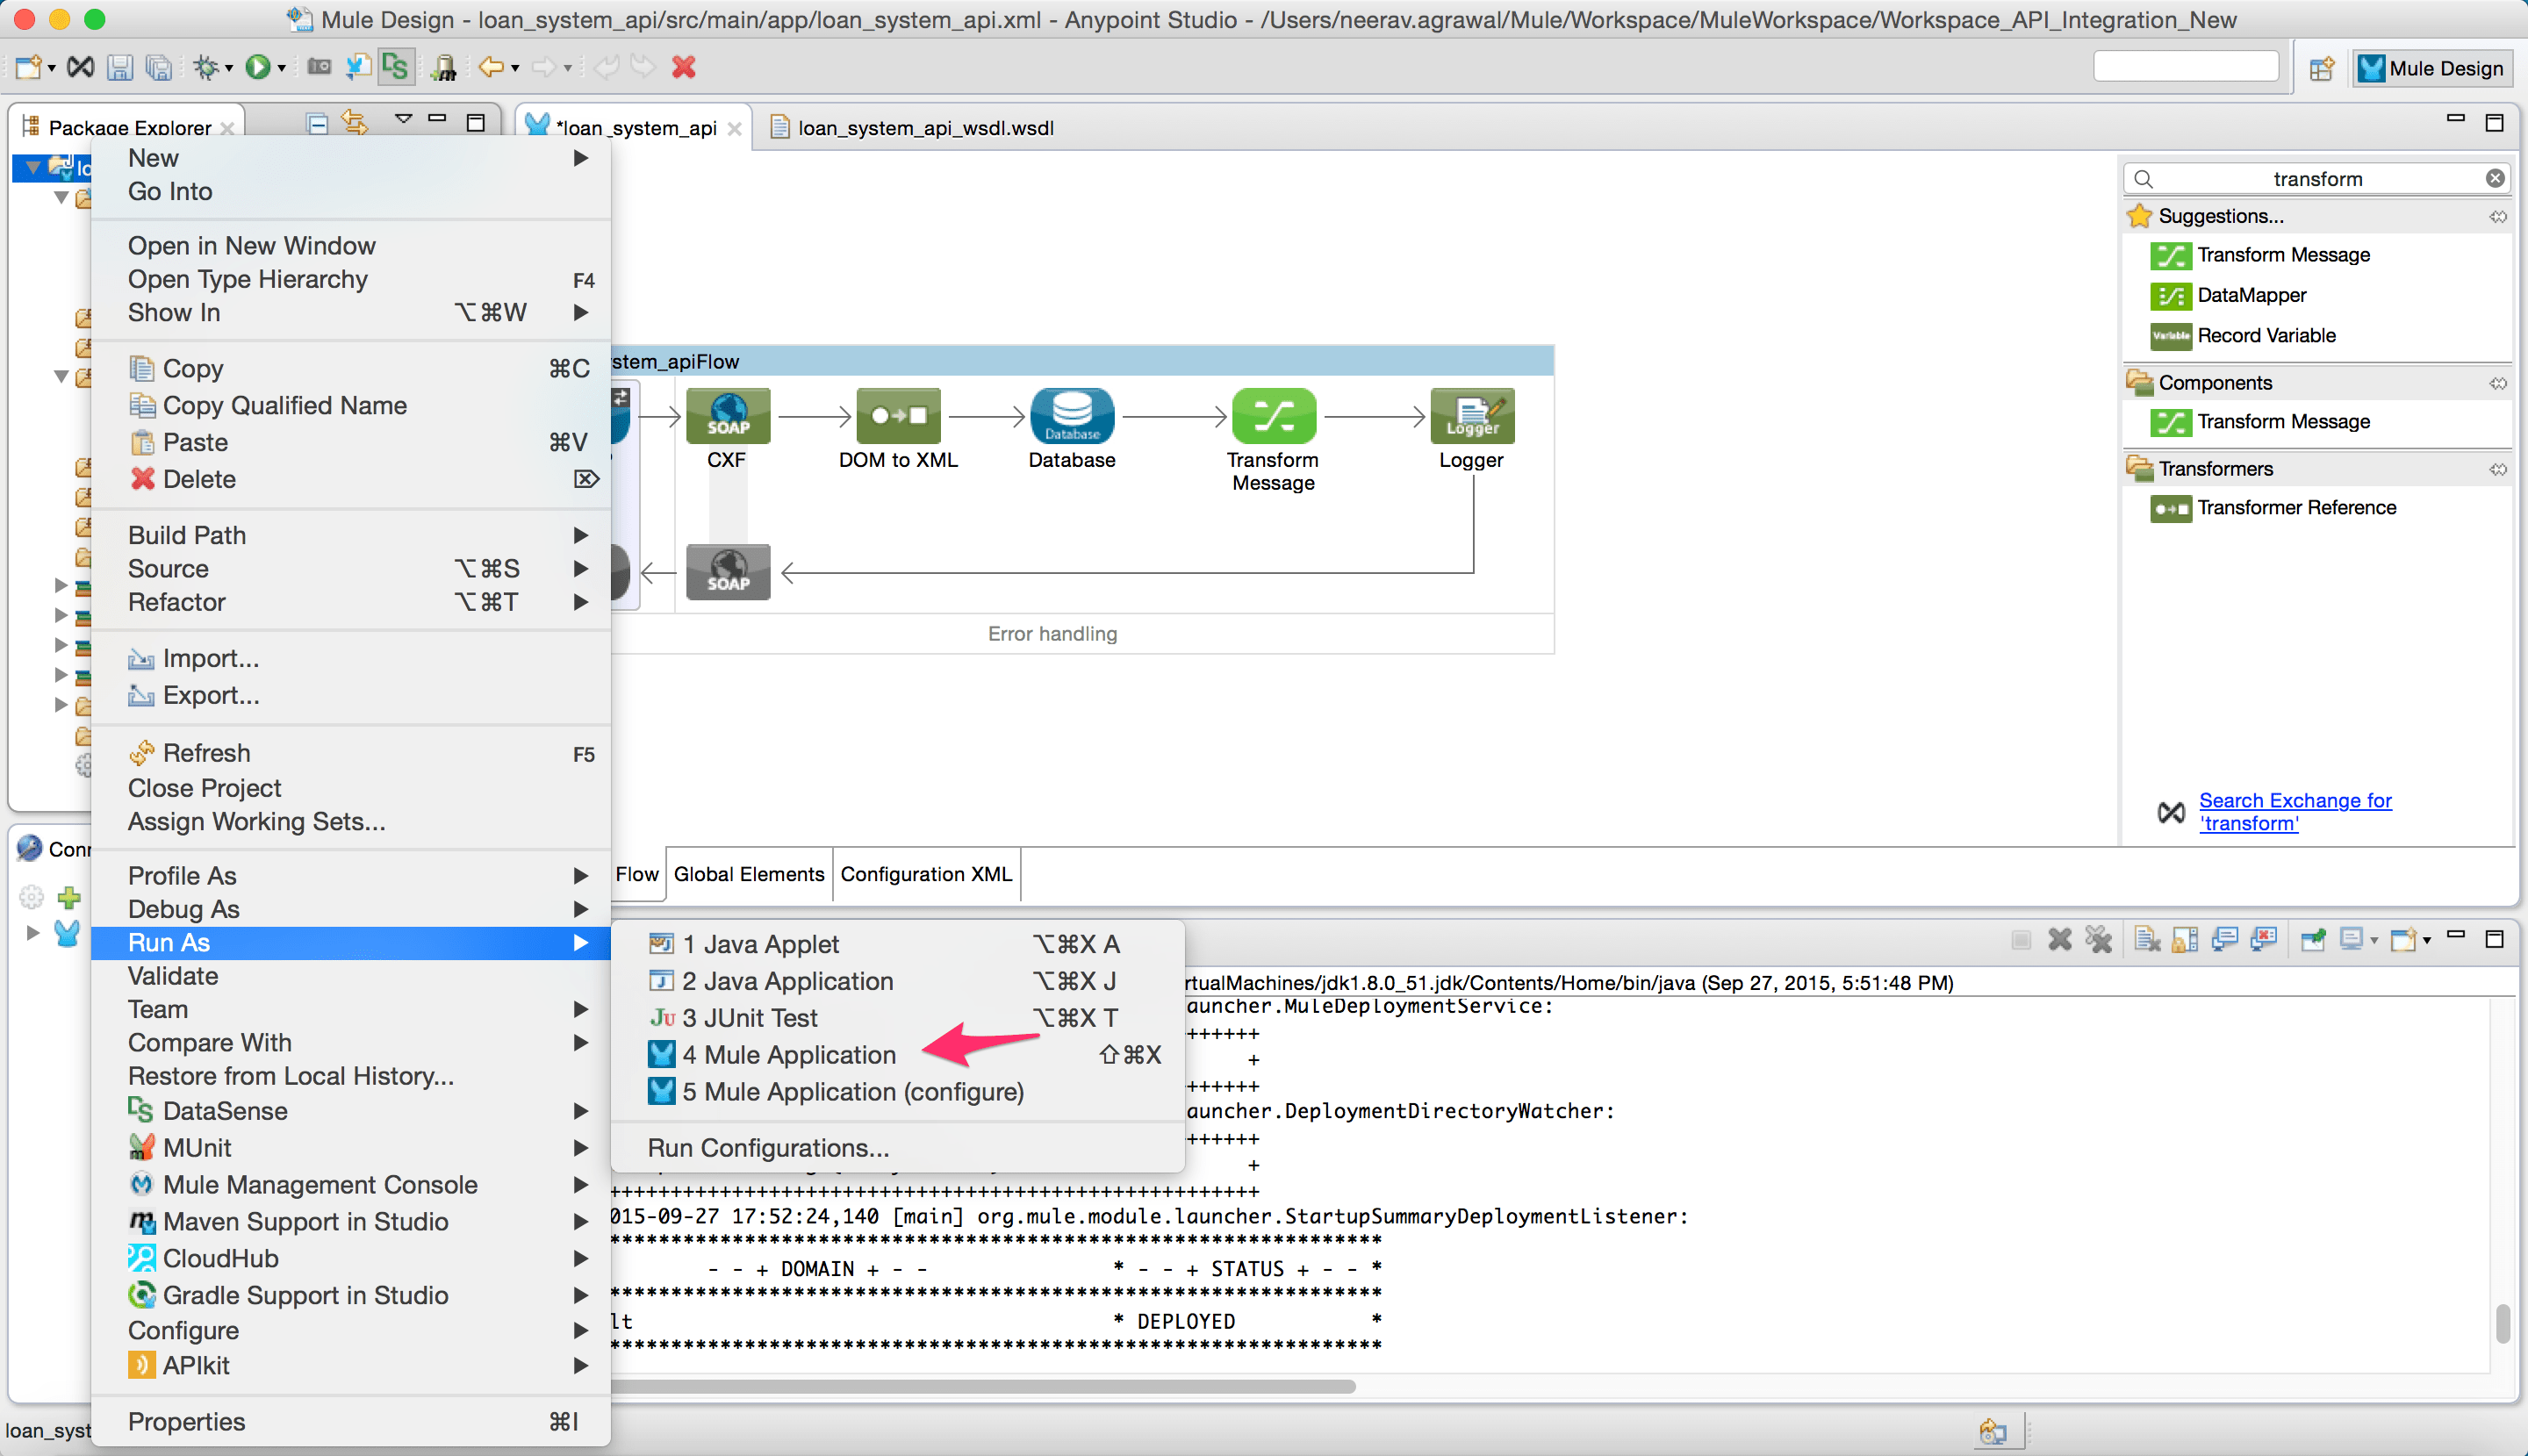
- Right-click the project and choose the run as “Mule Application” option. This will run the project in Anypoint Studio embedded Mule runtime.
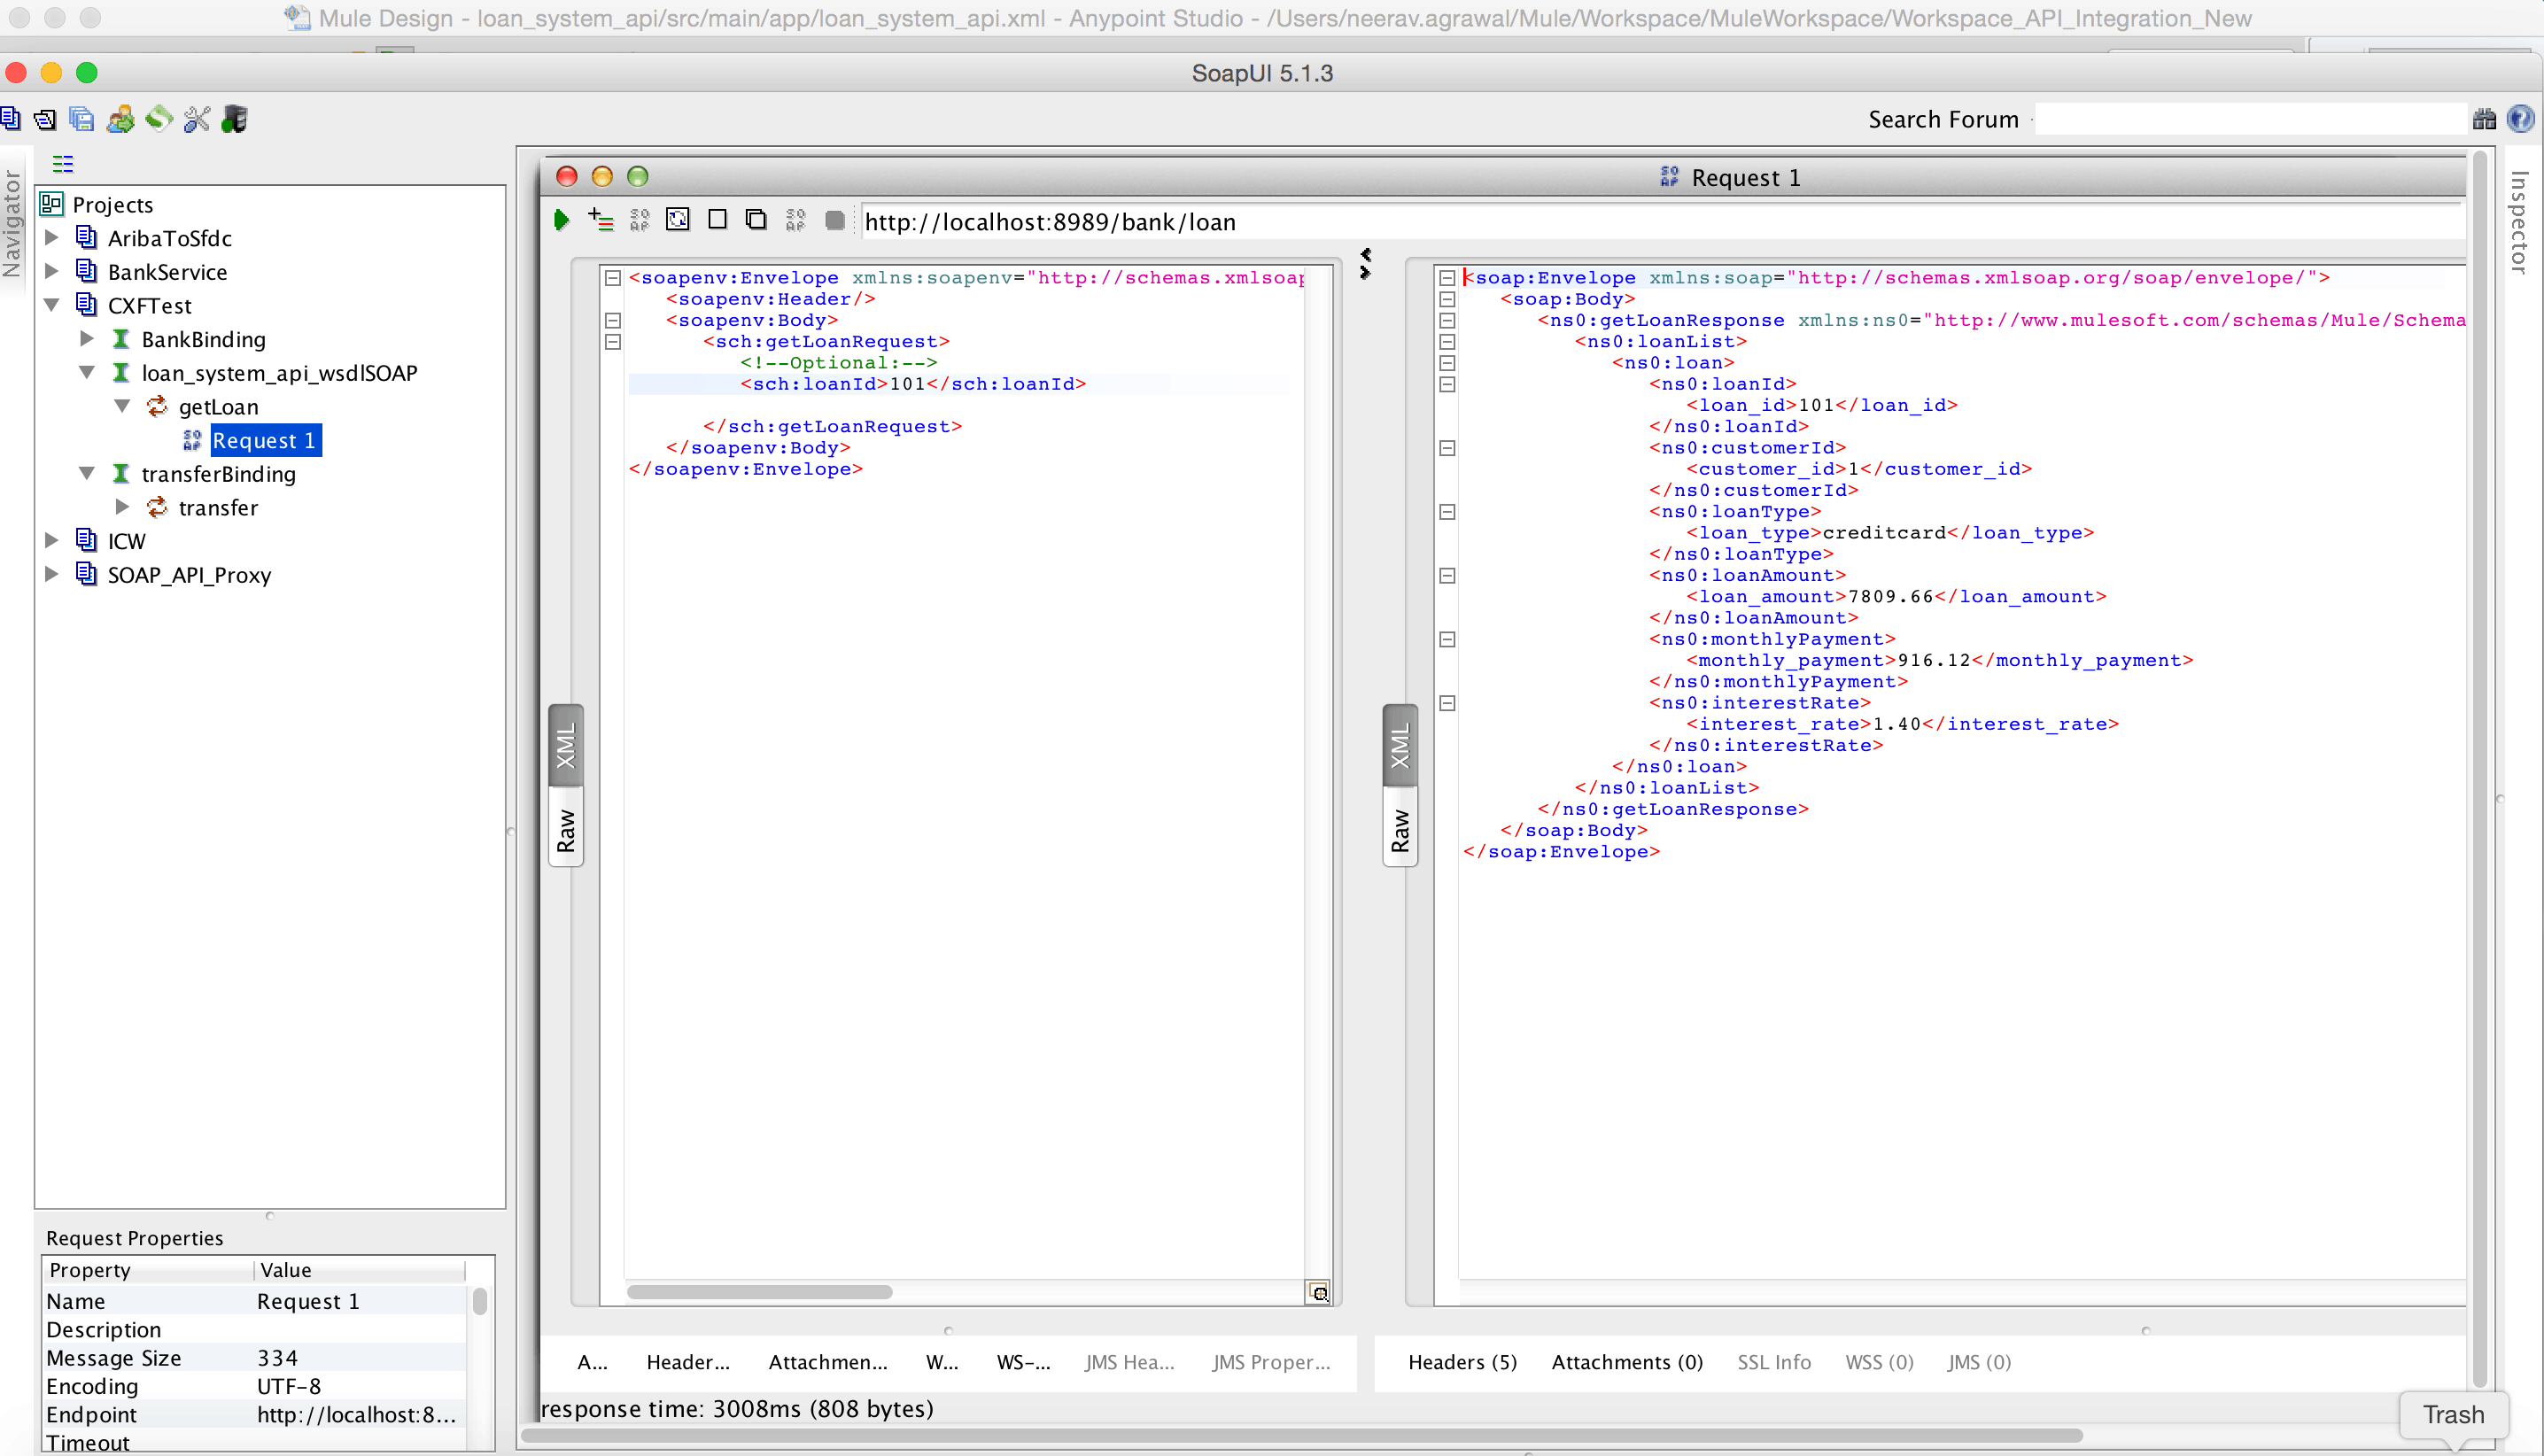
- Start SOAP UI and create a new project. Add a new WSDL and enter the link as follows: http://localhost:8081/bank/loan?wsdl
Run the request and check the response.
We have now successfully created a system API in front of a database, thus decoupling it from the user requesting the data.
To create this system API we have leveraged the following features of the Anypoint Platform:
- Open standards support i.e. full support for WS* standards and open source services framework like Apache CXF.
- Drag and drop and configure the CXF components that speed up development.
- Database Connector: Allows you to connect to almost any relational database.
- DataSense uses message metadata to facilitate application design.
- Mule Expression Language (MEL): Lightweight Mule-specific expression language that can be used to access/evaluate the data in the payload.
- Transformers/DataWeave: A simple, powerful way to query and transform data using the platform.
We have seen a growing need for APIs emerging from new business processes, applications, devices, and interfaces. These requirements from several consumers, it becomes necessary to define a lightweight and easy to consume REST API.
In part 2 of this series we will walk through creating a REST API on top of an existing SOAP service.


