In this blog post, I’d like to show you a step-by-step guide on how to set up an OAuth2 configuration using the HTTP Connector in Studio 6.0. I will use the GitHub RAML using the OAuth2 configuration to get a list of emojis supported by GitHub. You can also follow this example to set your OAuth2 configuration using the HTTP Connector for different RAMLs or APIs.
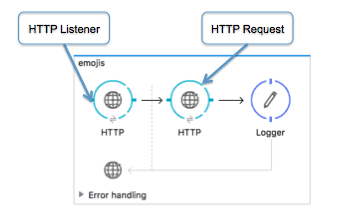
Step 1 – Create a simple Mule flow in Studio
Note: You can use the same HTTP Connector for both HTTP Listener and HTTP Request
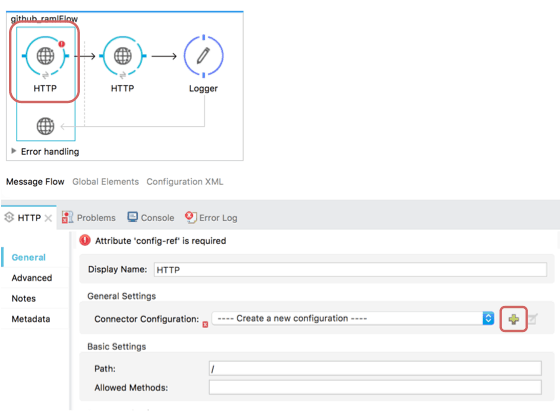
 Step 2 – Configure the HTTP Listener
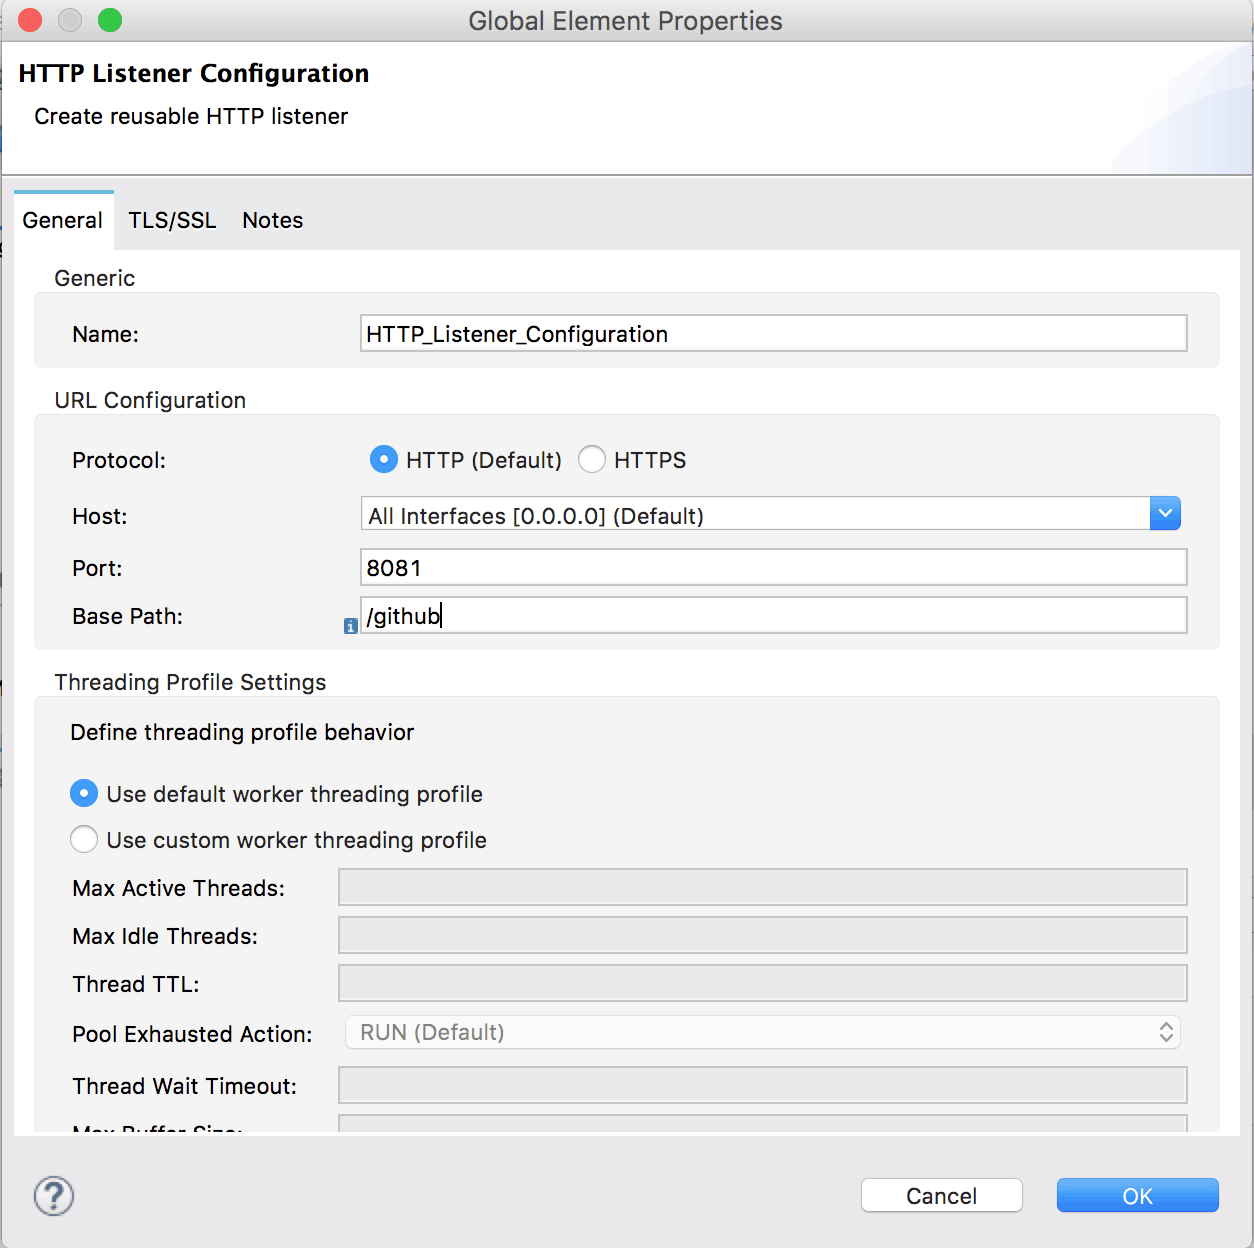
When you click on HTTP Listener (the first HTTP) and click on + in the panel, you will see the HTTP Listener Configuration.
For this demo, I will make my Mule app listen to localhost:8081/github.
Step 3 – Get the GitHub RAML from Anypoint Exchange
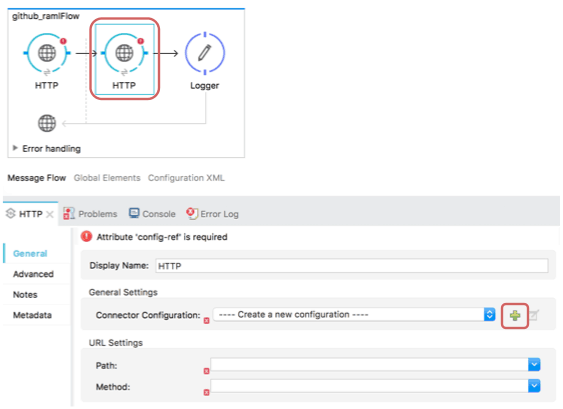
When you click on HTTP Request (the second HTTP in the flow), click on + in the panel, and you will see the HTTP Request Configuration.
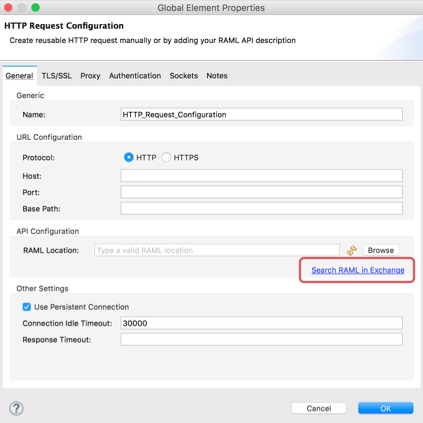
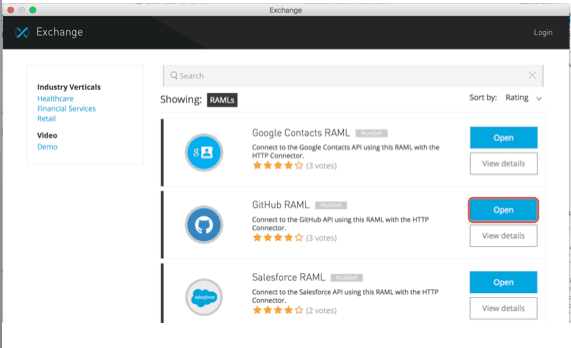
Click on “Search RAML in Exchange” to get the GitHub RAML from the Exchange.
Step 4 – Configure OAuth2
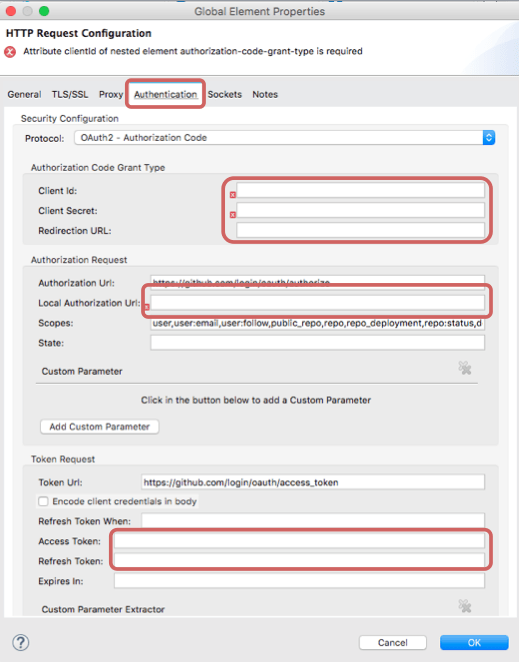
When you click on the “Authentication” tab in the HTTP Request Configuration, you will see some fields such as Authorization Url, Scopes, and Token Url automatically filled out from the GitHub RAML. Make sure that the below six fields are filled out in the OAuth2 configuration: Client Id, Client Secret, Redirection (Callback) URL, Local Authorization Url, Access Token and Refresh Token.
- Find Client Id, Client Secret and Redirection (Callback) URL from GitHub. You can find this information in Settings -> OAuth applications -> Developer applications in GitHub.
- Pick a local authorization URL. Local authorization URL will be used to initiate an“OAuth2 dance.”
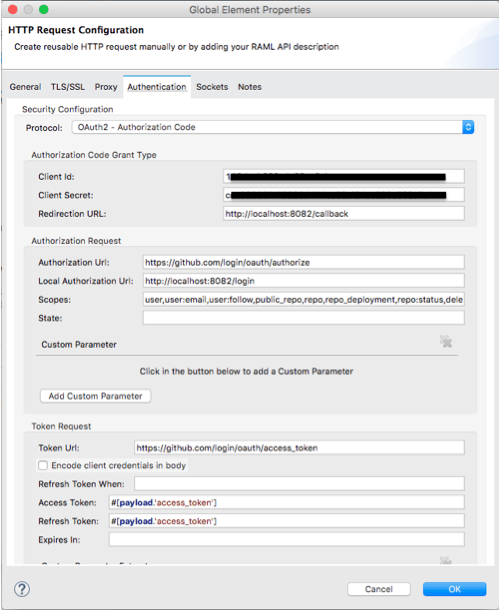
- Write an MEL expression to extract an access token and a refresh token. In GitHub’s case, it doesn’t return a refresh token, so I will put the same expression for the access token and refresh token. (#[payload.’access_token’]) However, since the format of the response to this request to the token URL is not defined in the OAuth spec, each service could return a different response format.
After you complete the step 4, your Authentication Configuration should look like the image below.
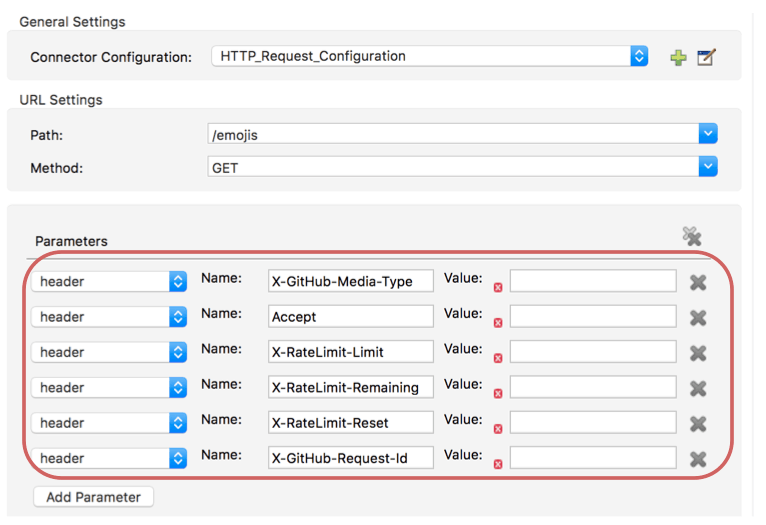
Step 5 – Select “emojis” in Path
Since “emojis” doesn’t require any parameters, you can remove the following parameters in the header.
Step 6 – Get a list of the emojis that GitHub supports
After running the Mule app, initiate an “OAuth2 dance” by hitting the local authorization URL () specified in the HTTP Request Configuration. Once an access token is created, you can receive a list of the emojis GitHub supports by hitting .
For new users, try the above example to get started, and for others, please share with us which RAMLs or endpoints you are connecting with HTTP Request.


