We recently introduced our HowTo blog series, which is designed to present simple use-case tutorials to help you as you evaluate MuleSoft’s Anypoint platform. In this blog post, we show how an organization can use Anypoint Platform to communicate with their partners using a secure file-based solution.
When an organization communicates with its business partners, there are many different options such as traditional B2B exchange, file transfers, fast-growing API based approaches etc. B2B and APIs are usually the preferred modes of communication, especially with larger organizations, since they are near real-time and less error-prone. But these options typically require a sophisticated IT team to set up. Hence, some partners may demand a simpler approach to integrations such as file transfers — i.e. file-based B2B exchange. Another important aspect to consider during file-based B2B is how to secure the communication and data exchanges.
In this blog, I will demonstrate an example which satisfies some the most typical requirements for a file-based B2B exchange. The requirements for this use case are:
- Poll for a flat file (CSV) which contains the product catalog data
- Transform this data into a format specified by the partner
- Encrypt this data using PGP (Pretty Good Privacy)
- Transfer this data as a flat file (CSV) to the partner using a secure file transfer protocol
Some might question the value of encrypting the payload data since we are already ensuring transport security by using SFTP. But SFTP does not protect against unauthorized access to the files at the target location. PGP encryption also ensures that the file has not been modified in transit or sent by an unauthorized party.
Pre-requisites:
- Anypoint Platform – MuleSoft Anypoint Studio.
-
Anypoint Enterprise Security – Installation Instructions.
- A Public key ring file and Secret key ring file along with the secret passphrase used for PGP encryption – Instructions for creating these files.
- An active SFTP server.
- The Mule project downloadable from Anypoint Exchange.
- To run the example, you will need a flat file (sample.csv) copied into the src/main/resources/input folder. You can copy this file from the project under the folder src/main/resources/archive
Steps:
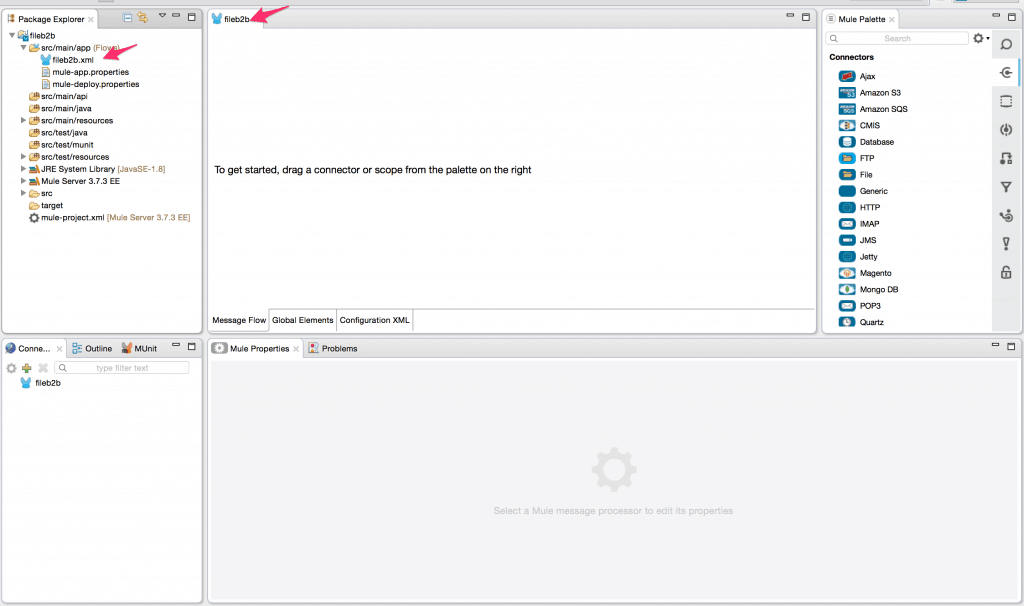
- Start MuleSoft Anypoint Studio and point to a new workspace.
- Give a name to the project and click finish. You will see the mule configuration file where we can now add the Mule flows. Here is more information to understand Mule configuration.
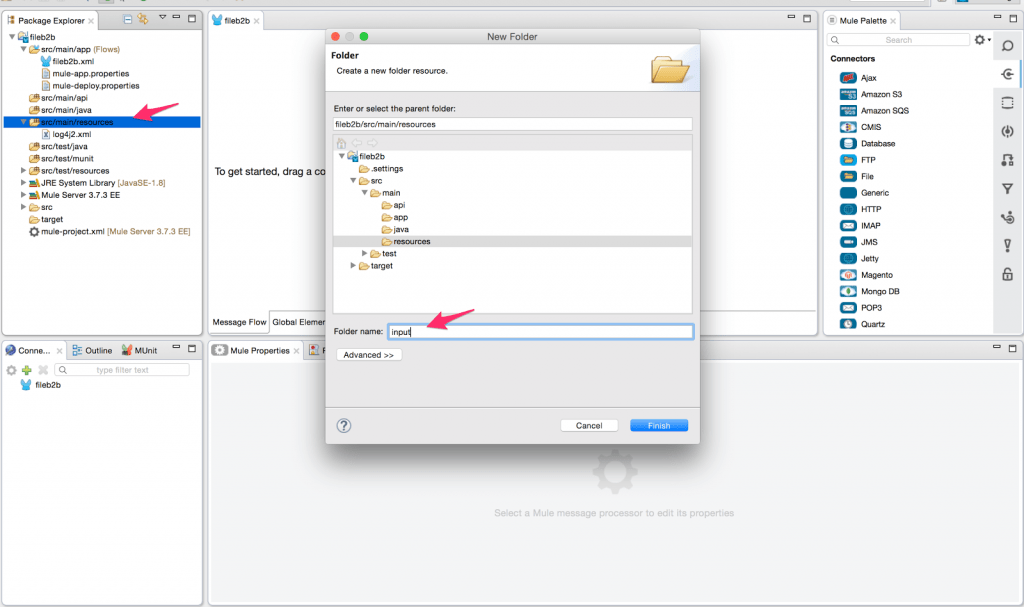
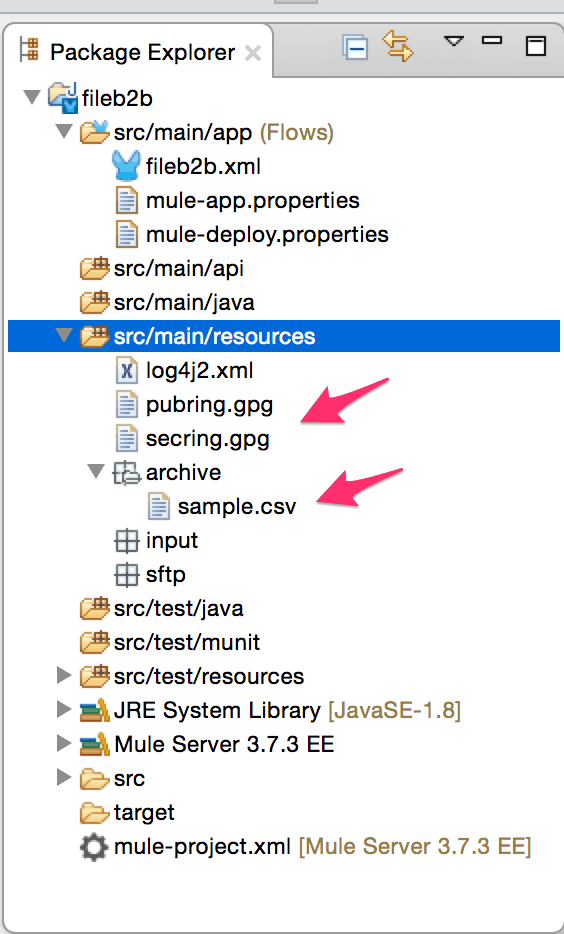
- Create three folders under the src/main/resources folder and call them ‘input’, ‘sftp’ and ‘archive’.
- Copy the sample.csv into the src/main/resources/archive folder. Also, copy the pubring.gpg and secring.gpg into the src/main/resources folder.
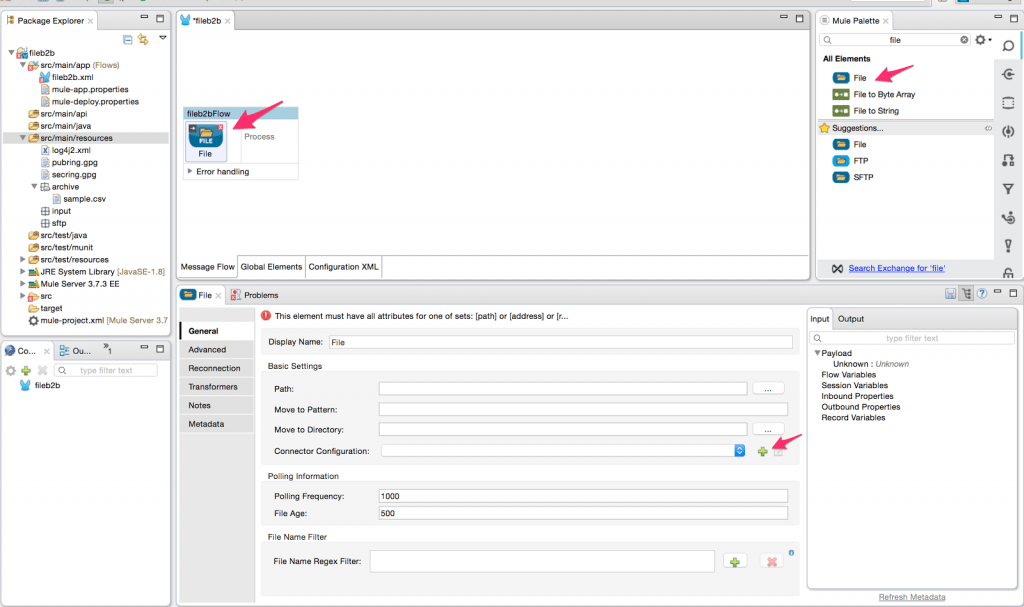
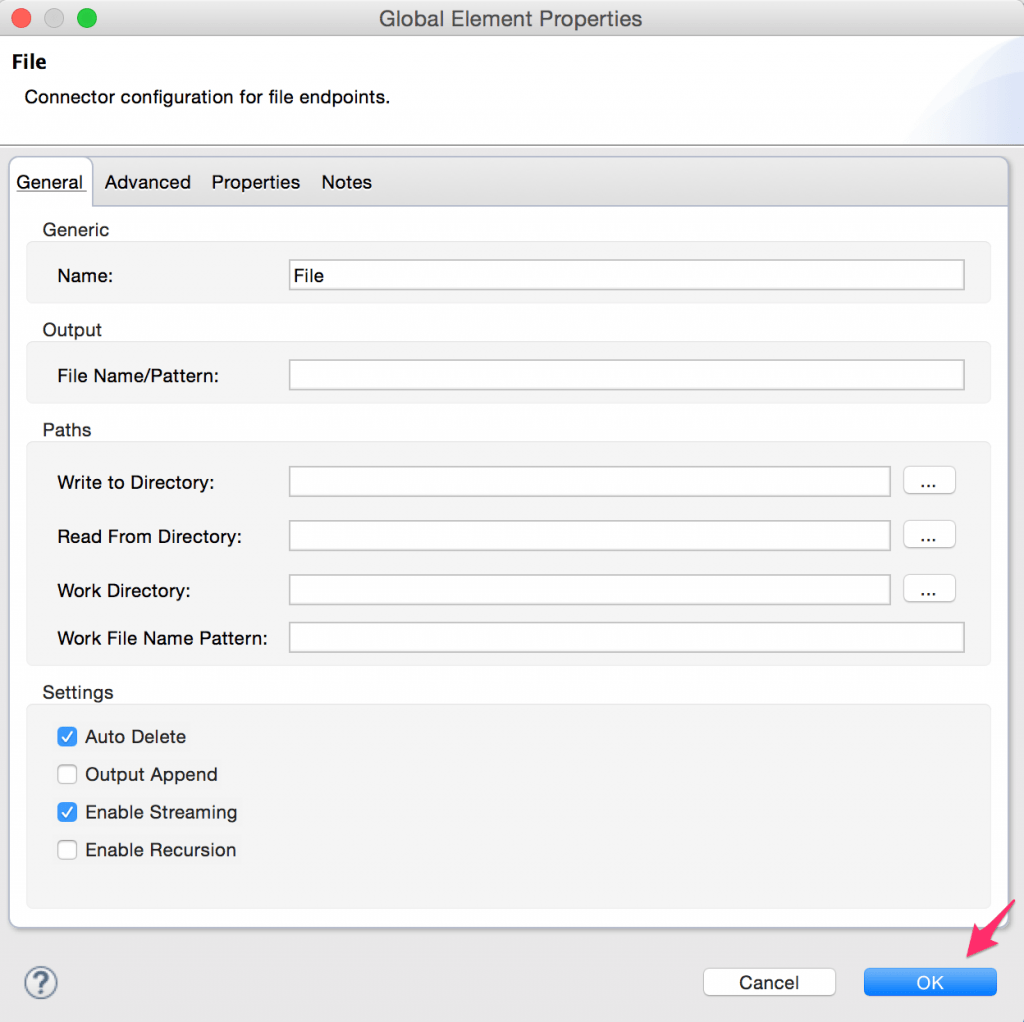
- Add File endpoint component to the Mule configuration file and this will automatically create a flow (What is a mule flow?). In the File endpoint properties tab below click on connector configuration.
- Select the default File connector configuration as shown below and Click OK.
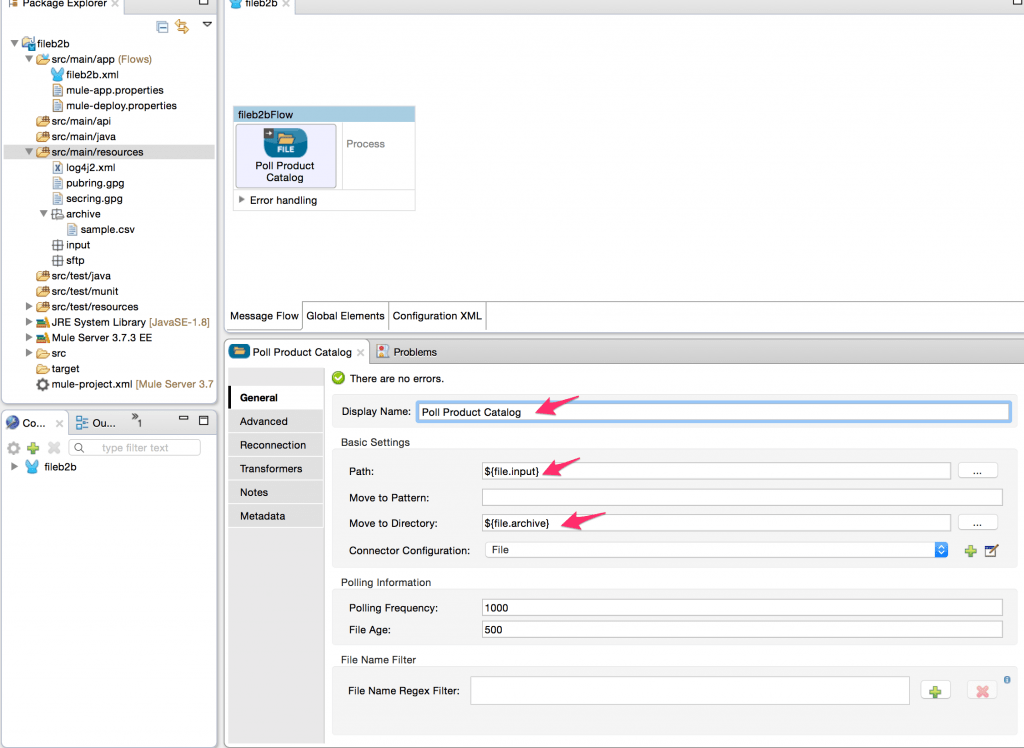
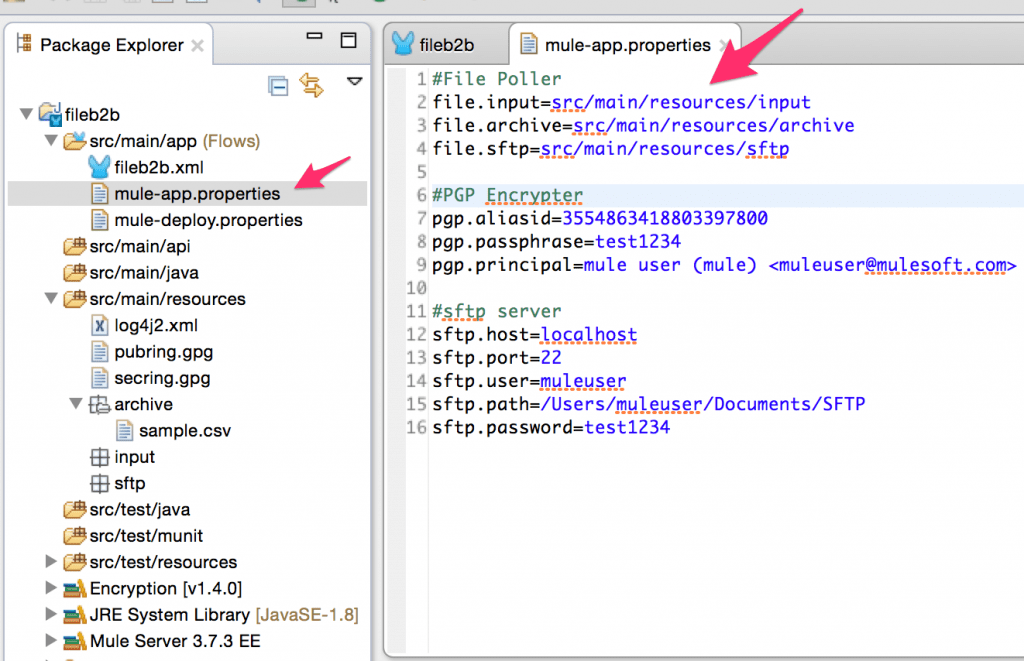
- Rename the display name for the file endpoint to ‘Poll Product Catalog’. Add the path to the file endpoint input and the directory where the file needs to be moved after reading. As you can see from the below snapshot, these endpoints can be configured as properties, the values for which can be set in src/main/app/mule-app.properties file.
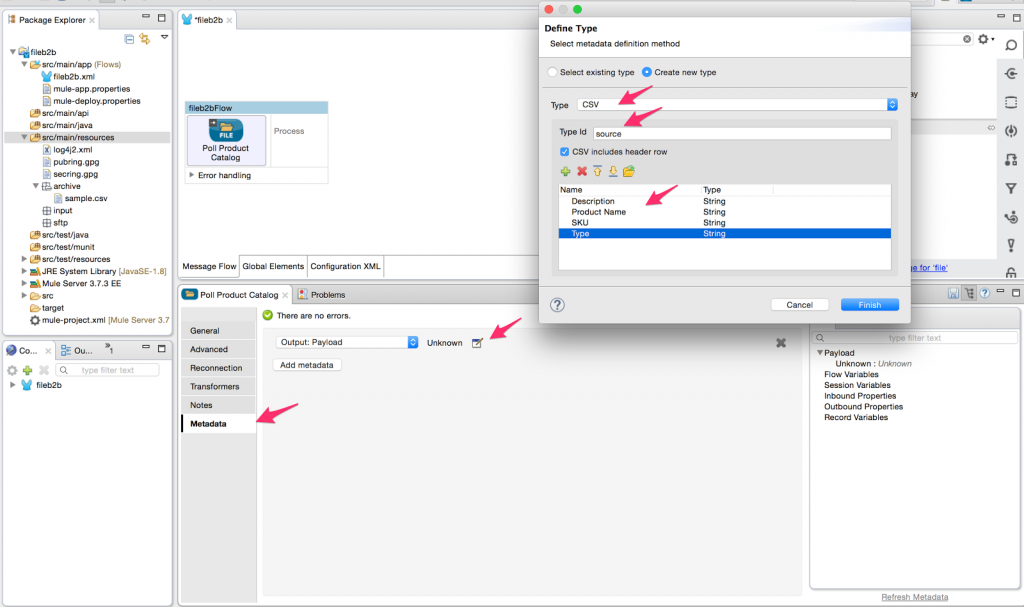
- Click on the Metadata tab on the left-hand side of the File endpoint to configure the output metadata for the flat file as shown below.
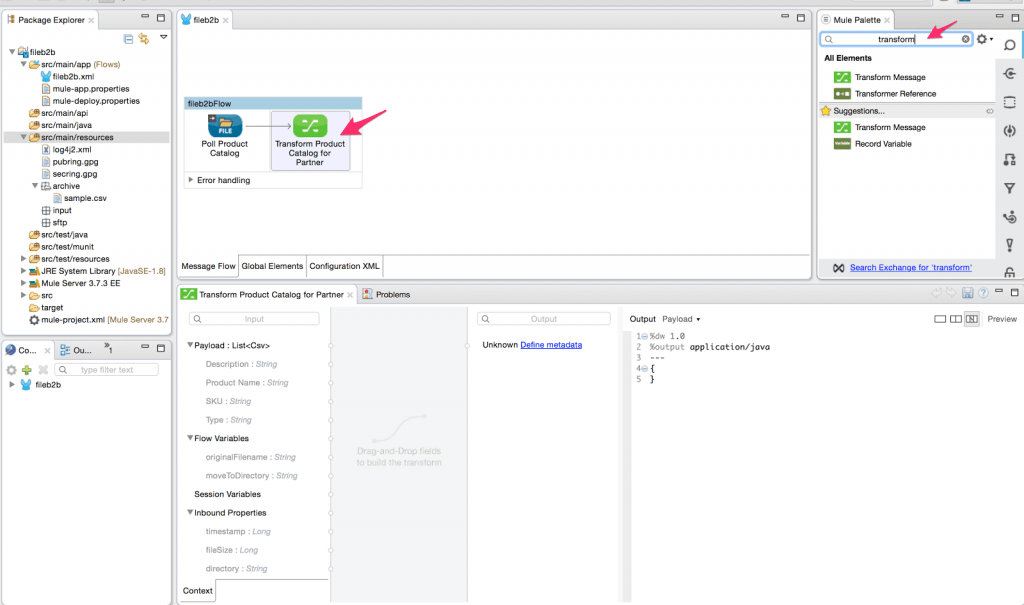
- Now that we have the file endpoint set up to read the flat file, drag the transform message component (DataWeave) to the flow and rename it to ‘Transform Product Catalog for Partner’. (Here is more information on the DataWeave component).
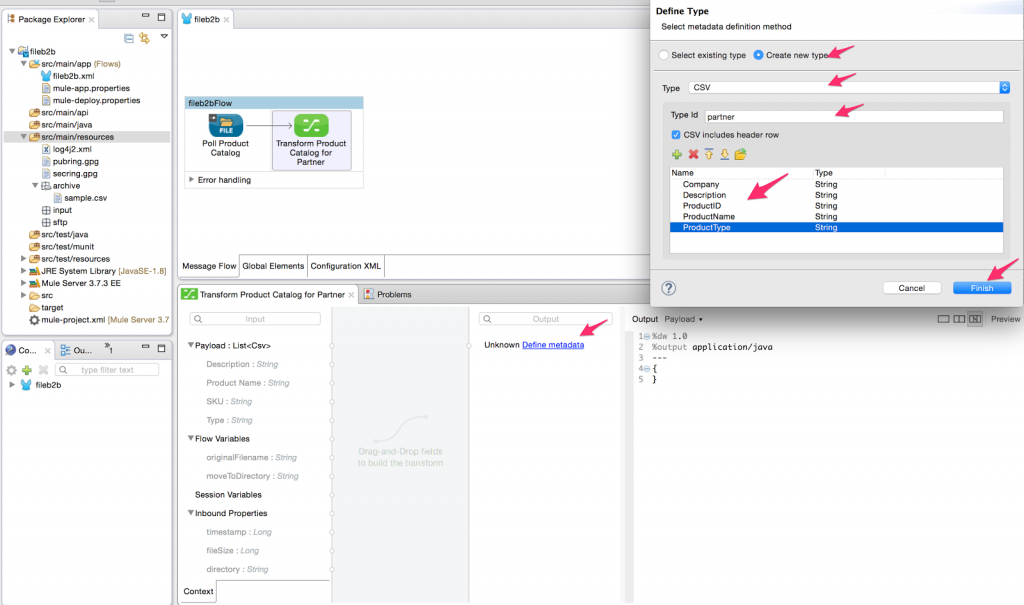
- Now let’s set the output metadata for the transform message component to match the flat file format as specified by the partner. Click on Define metadata -> Create new type -> Type = CSV -> Type Id = partner. Then configure the fields of the flat file as shown below and then click Finish.
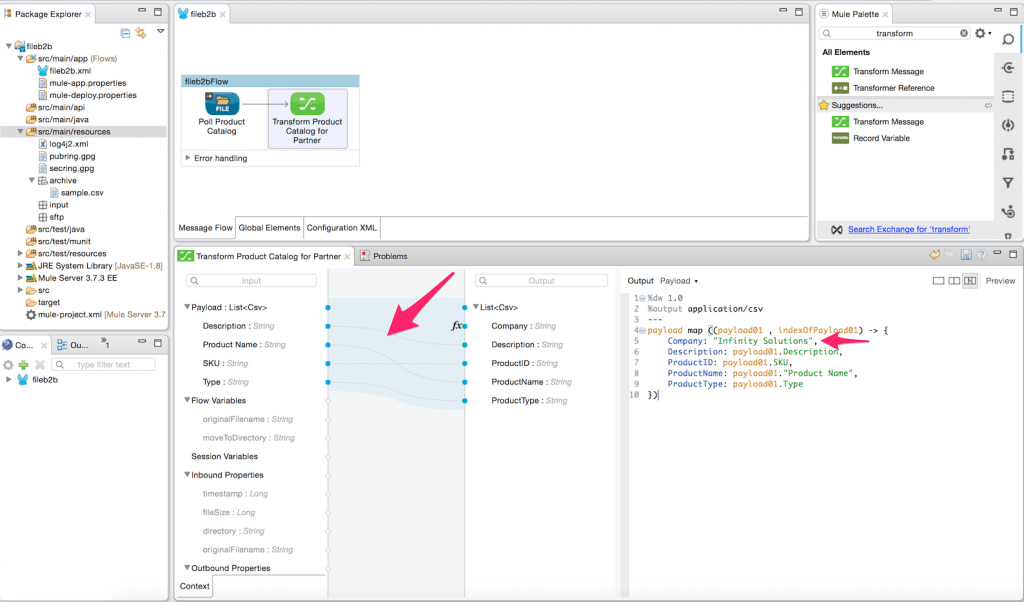
- Then map the data in DataWeave using drag and drop from source (left) to target (right). You need to hardcode the field Company with the value ‘Infinity Solutions’ as shown below.
- After the mapping is complete, we need to convert the output of the DataWeave component to a string format so that we can encrypt the payload. So drag the Object to String transformer from the palette into the flow and rename it as ‘Convert to String for Encryption’ as shown below.
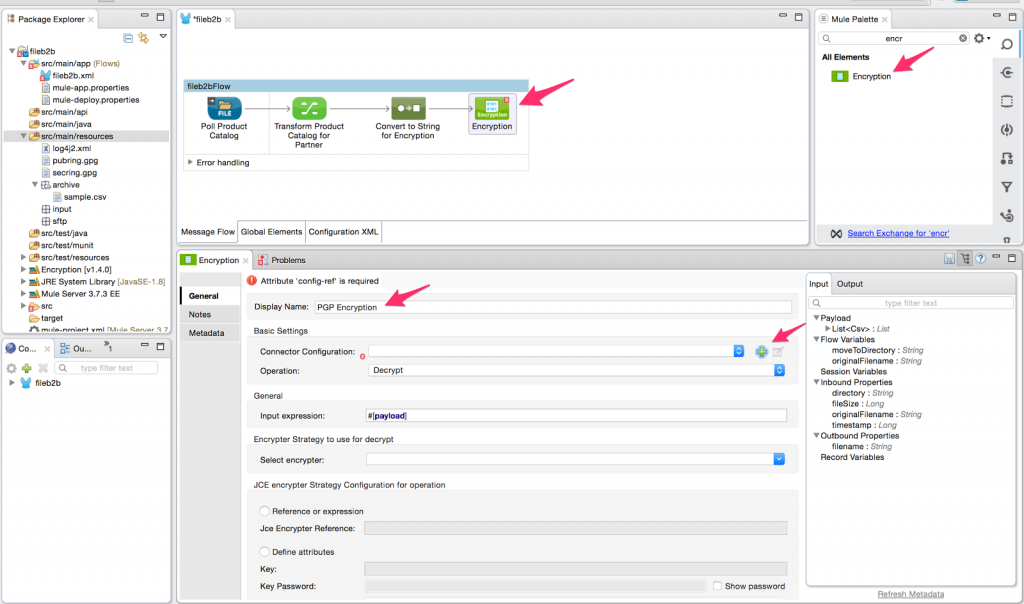
Now add the Encryption component from the palette to the flow. Rename the display name to ‘PGP Encryption’ and click on the + to create a new connector configuration. (Here is more detail on the PGP Encrypter).
Select “PGP_Encrypter” as the Default Encrypter and then click on the PGP Encrypter tab to configure the encrypter component as shown below and then click OK.
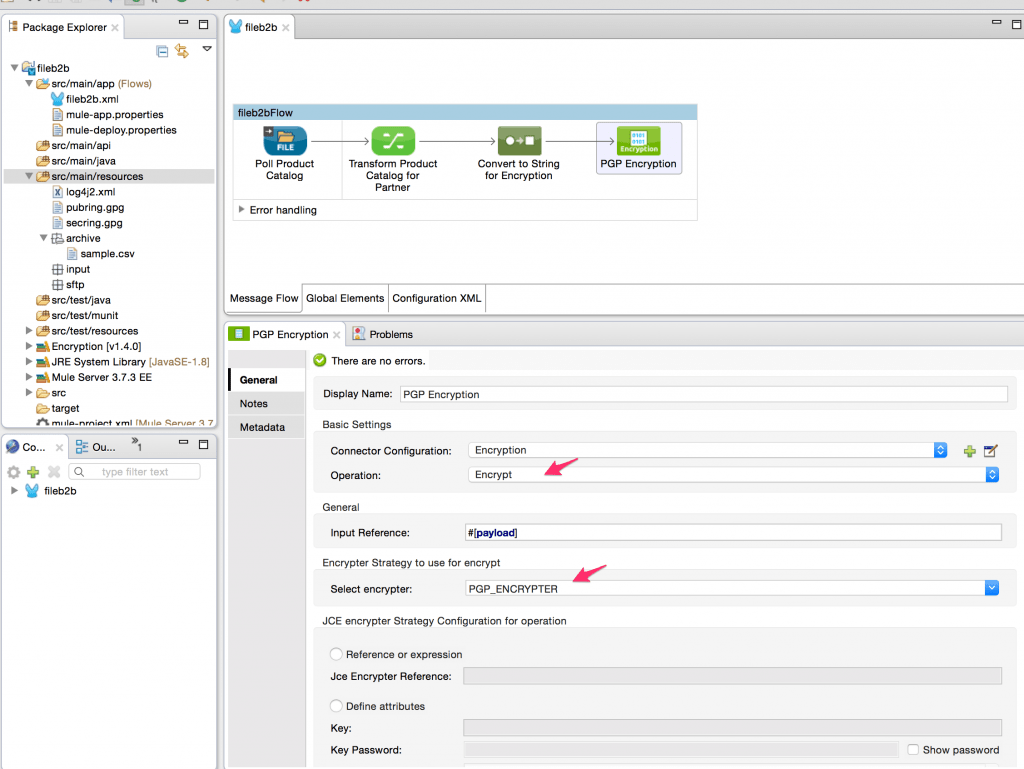
- Configure the rest of the Encrypter configuration as shown below. Here we are selecting ‘Encrypt’ as the operation and ‘PGP_Encrypter’ as the encrypter.
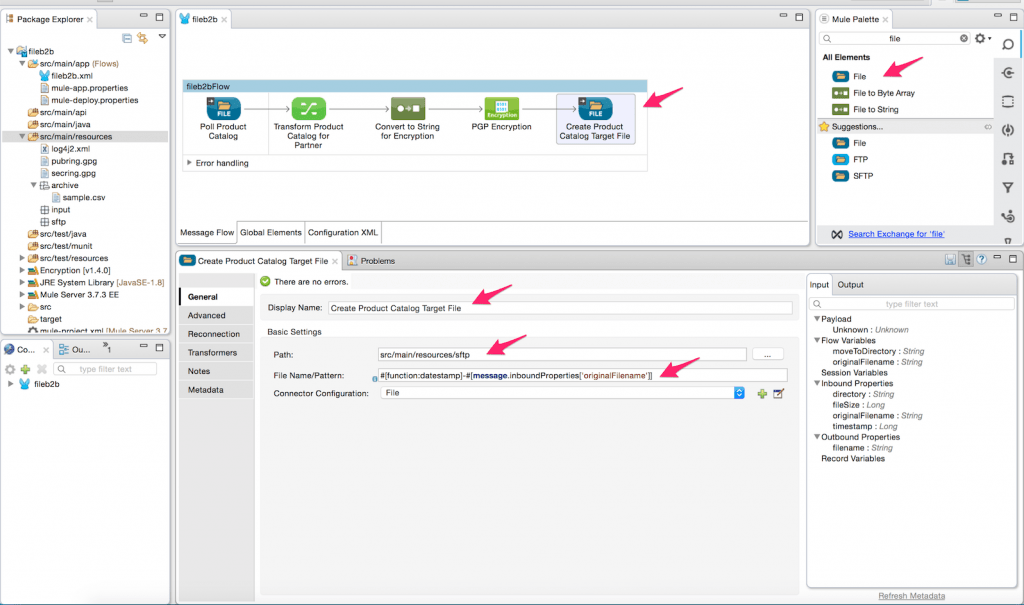
- Now add the File component from the palette to the flow. Rename the display name to ‘Create Product Catalog Target File’. We will change the path to point to the SFTP folder we created in Step 4 above. We use a MEL (Mule expression language) expression – #[function:datestamp]-#[message.inboundProperties[‘originalFilename’]] for the File Name/ Pattern to prepend the datestamp to the original file name. In the end, the configuration should look like the snapshot shown below. (More information on MEL expression is available here).
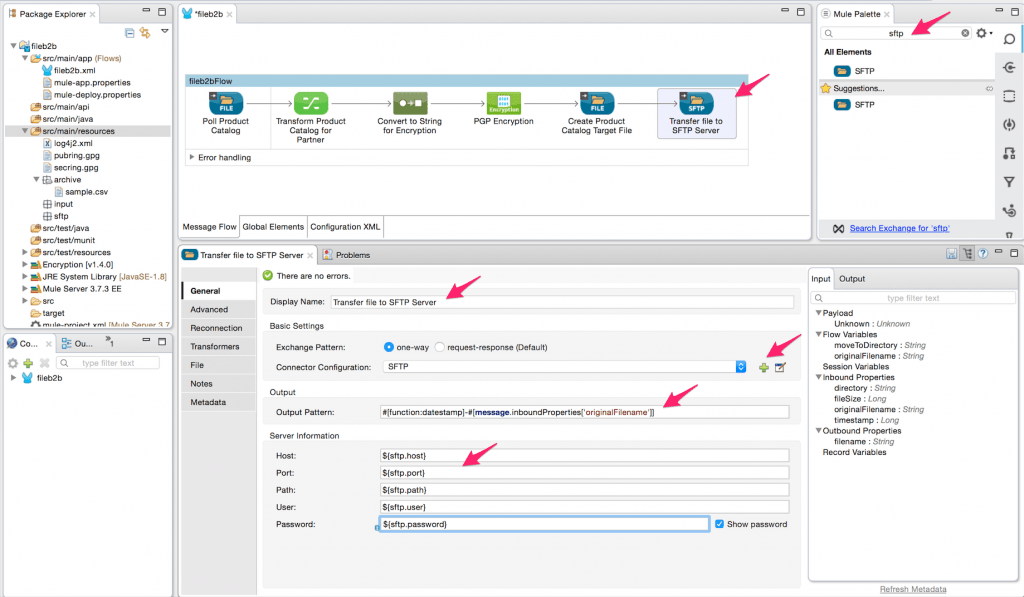
- Now that we have the flat file in the required target format drag the SFTP component from the palette into the flow. Rename the display name as ‘Transfer file to SFTP Server’. Click on the + to add a connector configuration. In the connector configuration settings, leave the defaults as is and click OK. We will use a MEL expression – #[function:datestamp]-#[message.inboundProperties[‘originalFilename’]] for the Output Pattern. Then, we can complete the configuration by adding the target SFTP server settings as shown below.
- The last step is to now setup the mule-app.properties file with your environment specific values. You can download and fill out the sample mule-app.properties file from the project which has blank placeholders. You can then replace the file at src/main/app/mule-app.properties with this file.
- Now run the project and copy the sample.csv file from the src/main/resources/archive folder to src/main/resources/input folder. The process will pick up the file, process it and then transfer it to the specified SFTP server location.
We have now successfully created a file-based B2B process which enables an organization to communicate securely with partners.
To create this file-based B2B we have leveraged the following features of the Anypoint Platform:
- File Connector, which can be used to read and write files including different formats such as CSV, XML, JSON, etc.
- The Encrypter component is used to enforce security at the payload level. Different encryption strategies such as JCE, XML, and PGP used out of the box using single click and configure approach.
- DataSense uses message metadata to facilitate application design.
- Mule Expression Language (MEL): Lightweight Mule-specific expression language that can be used to access/evaluate the data in the payload.
- Transformers/DataWeave: A simple, powerful way to query and transform data using the platform.
As you can see from the above example, it is very straightforward to set up a file-based B2B exchange to communicate with individual partners who do not have the flexibility to set up more sophisticated B2B communication. With files so ingrained in the B2B exchanges across many organizations, the best strategy is to have multiple options to communicate as organizations evolve to API-based B2B communication.


