
When you’re running your workloads on any multi-node Kubernetes environment — such as Runtime Fabric on self-managed Kubernetes — you’re bound to run into cases where you’ll need to manage its nodes. Nodes are the physical machines or VMs that run the workloads scheduled by Kubernetes and thus correlate to the amount of resources Kubernetes has available to run your deployments. Common scenarios that may involve managing your nodes include:
- Scaling up: Adding resources to allow for more running deployments
- Scaling down: Removing resources when not in use to reduce cost
- Rolling: Taking nodes offline and bringing them back online, one-by-one, to perform maintenance such as upgrading the host operating system.
What to consider
Of the three scenarios described above, scaling up the nodes in a Kubernetes environment is the simplest in terms of what to consider since it doesn’t affect the running pods or deployments.
Before scaling down a node, you may want to consider the deployments which are running on it. While it’s true that Kubernetes will automatically reschedule any workloads which are deployed on the node, it is not instantaneous and may cause a temporary disruption of service while doing so. Methods to mitigate this include the following:
- Deploying multiple replicas of your applications with “anti-affinity” rules to inform the Kubernetes scheduler to deploy each replica on different nodes.
- Note: Runtime Fabric supports this option if selecting “enforce deploying replicas across nodes” during application deployment.
- Ensuring your Kubernetes environment has enough resources across it’s remaining nodes for it to reschedule all the displaced workloads successfully.
And lastly, a rolling node operation is essentially a combination of the prior two scenarios performed in a sequence. The key consideration with this type of operation is with the amount of workload shifting that’ll occur as each node is taken offline. In general, you’ll want to:
- First, add a node to your Kubernetes environment that has equal to or greater resources (like CPU, memory and disk) than the node that you’ll take offline.
- Ensure your deployments are deployed with multiple replicas running on other nodes, so service disruption is minimized.
- Cordon the node you’ll take offline, so Kubernetes will prevent new deployments from being scheduled on it.
- Remove the node from Kubernetes, which will prompt Kubernetes to reschedule the workloads running on it to another node. This is where the node you added in the first step comes in handy, to ensure there are enough resources for Kubernetes to reschedule the deployments.
- Perform your maintenance on the offline node.
- Repeat.
How to manage nodes with AKS
With these considerations in mind, it may feel like an involved task to scale or perform maintenance on your Kubernetes nodes. But, there’s good news for those of you who are running on a managed Kubernetes service, such as Amazon Elastic Kubernetes Service (EKS), Azure Kubernetes Service (AKS), or Google Kubernetes Engine (GKE); these services have capabilities that simplify node management. Let’s have a look at how these node management operations are handled in Azure when using Runtime Fabric on AKS.
Using node pools
Nodes that are added to an AKS cluster are grouped by a concept called a “node pool”. A node pool is a set of nodes which have the same configuration. When creating an AKS cluster, you’ll have the option of adding and configuring one or more node pools to host your workloads on.
If you already have an AKS cluster, you can find it’s node pools by navigating to the Kubernetes Service and selecting “Node pools” under the “Settings” group on the right side bar.
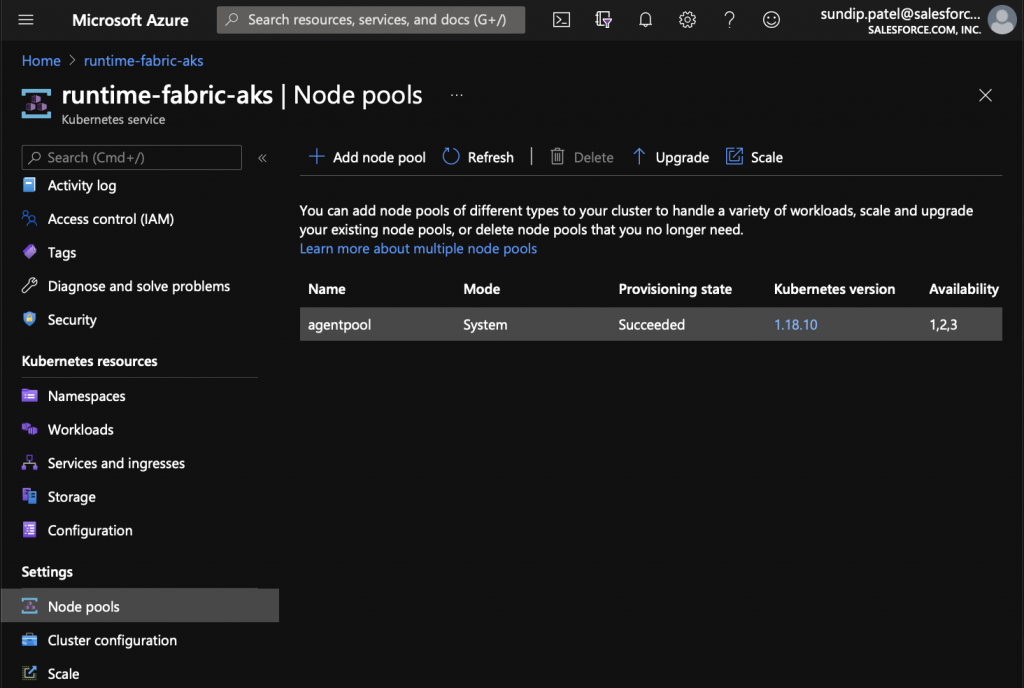
In the screenshot above, you can see my “runtime-fabric-aks” cluster has one node pool under it. By scrolling to the right, I can see more information such as how many nodes are running, and what instance type is used.
When I created my AKS environment, I chose to manually scale this node pool. However, AKS supports node pool autoscaling. EKS and GKE also support similar node autoscaling with their managed Kubernetes offering, so check out their documentation to learn more.
To configure node pool autoscaling:
- Select your node pool and click the “Scale” button on the row of actions above it.

- Under the scale method, click the scale method to toggle to “Autoscale.”
- Set the minimum and maximum values the node pool can scale down or up to. When choosing these values, you may want to consider what environment you’re running this AKS cluster on, and how much funding you’re budgeting for this cluster. It’s recommended to have three or more nodes in a production cluster to protect against node failures and to allow Kubernetes to schedule replicas across different nodes.
- Click apply.
After applying your changes, AKS will begin to deploy a component called the cluster autoscaler, which monitors the pods running on your AKS cluster and triggers the appropriate scaling event. The result is that your AKS cluster will now actively scale up nodes when it detects the desired deployments exceed the resources available, and will also scale down when there is more than enough resources to satisfy its current deployments.
Node updates on AKS
AKS also helps relieve the burden of applying patches to nodes. By default on Linux nodes, AKS will automatically check for and apply security updates nightly. Some updates may require a node reboot before they take effect. The AKS documentation does a great job explaining how to check for and automate this reboot process.
AKS also makes it easy to manage Kubernetes upgrades for the components which run in the nodes, as well as the Kubernetes control plane. After upgrading the Kubernetes control plane, you’ll have the option to upgrade your node pool. (Keep in mind that each node pool applies the same configuration across all its nodes.)

- Select your node pool in the Azure portal under your AKS cluster settings.
- Click the “Upgrade” button on the row of actions.
- Select your desired Kubernetes version from the drop down menu. AKS shows the Cluster version to make this easier.
- Click apply.
AKS will automatically rotate the nodes, and perform the steps necessary to cordon, drain and redeploy your applications for you. Now that’s a managed experience!
Managed Kubernetes FTW
Anyone who’s tried to manage nodes manually on a live Kubernetes environment will appreciate how simple it is using a managed Kubernetes service like AKS. Pairing Runtime Fabric with a managed Kubernetes service gives you the native integration with Anypoint Platform and simplifies the work needed to carry out common Day 2 operations like node management.
Learn more about our best-practices approach to microservices or check out our developer tutorials to get started today.


