
What is hMailServer?
hMailServer is a free, open source, e-mail server for Microsoft Windows. It supports the common e-mail protocols like IMAP, SMTP and POP3.
Let’s have a look at a simple example of sending emails using hMailServer Administrator. Here, hMail administrative server is used for configuring email server on local machine. We need to do following 3 steps for sending emails via MuleSoft:
- hMail server setup on local machine for setting up email server and creating domain and different usernames
- Mulesoft project setup
- Outlook configuration for viewing mails
Steps for configuration:
hMail setup
1. Download latest version of hMailServer from internet and execute the exe.
2. Provide the admin password while installation of hMailServer. It will be required for admin purposes and for connecting to domains.
3. On the hMailServer UI, click on Add domain and enter any domain you like. I have selected localhost which is the default domain for this. Click Connect button after highlighting the localhost domain. This will prompt for the password. Provide the admin password set in step 2. Your hMailServer Administrator is now connected.
4. The next step is to add accounts to your server. I have added 2 accounts under localhost.com (ekta@localhost.com and jayesh@localhost.com). To do this expand the Domains node in the tree to the left. Click on the domain localhost.com and Click Add account. Do settings for the added accounts as in the below image. You can add any number of accounts. For test purposes I have added only 2 accounts as seen in the image below.
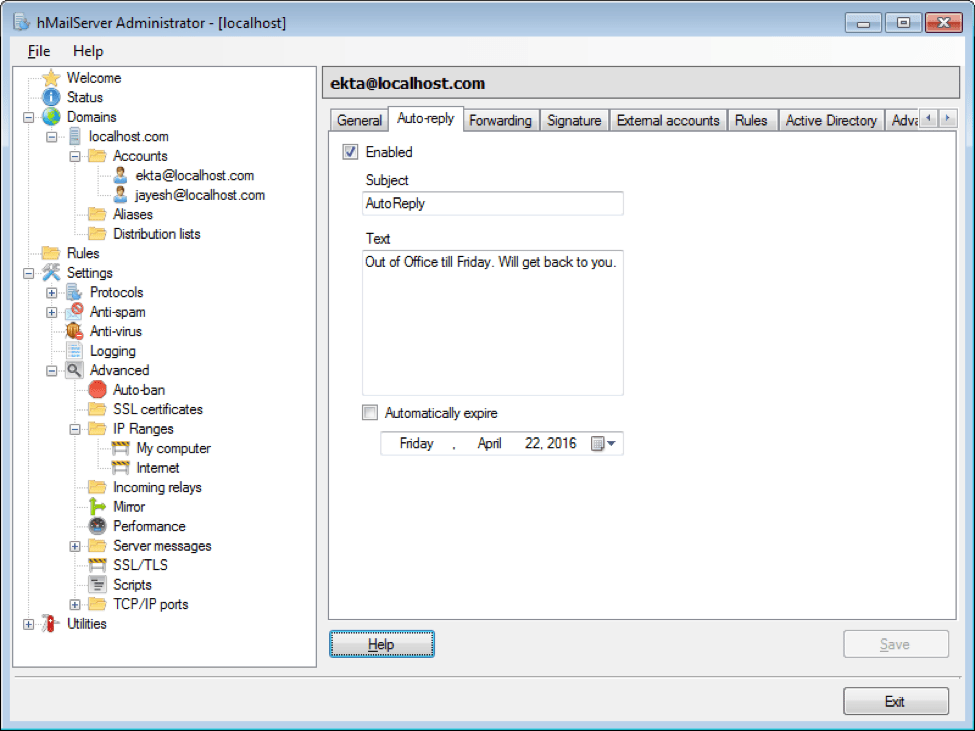
5. I have also set Auto reply just for testing purposes as below.
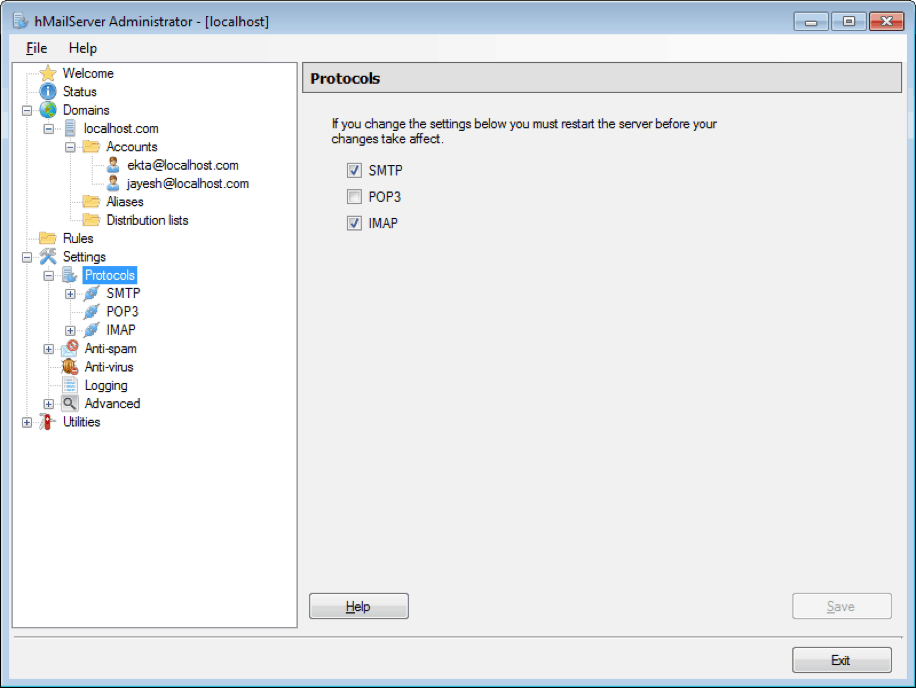
6. Under Settings -> Protocols, following should be selected.
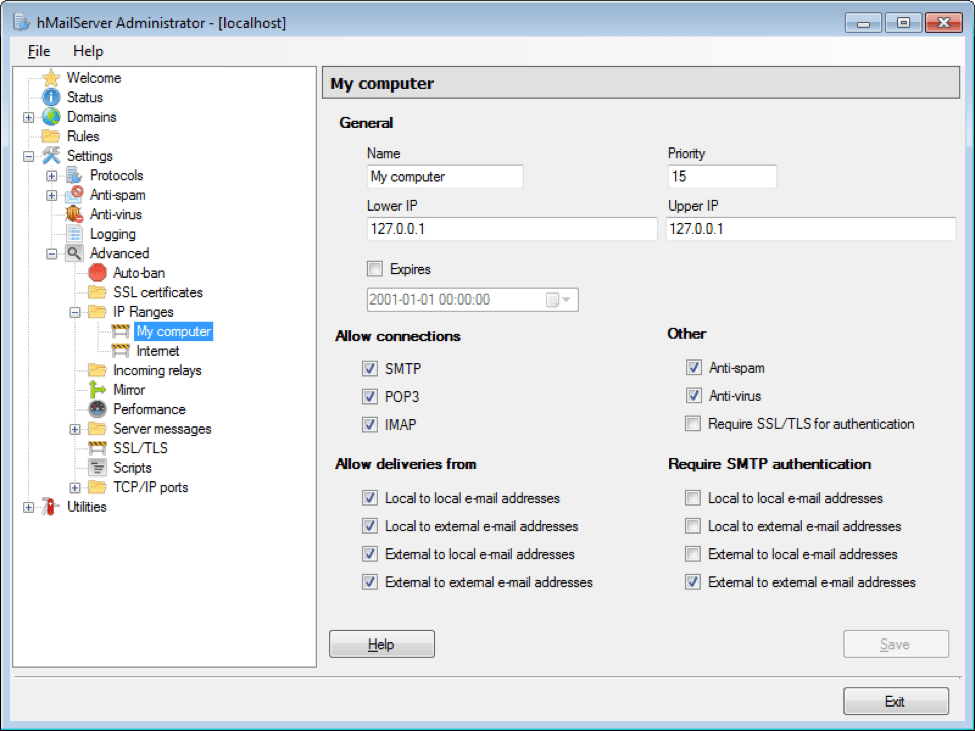
7. Under Advanced-> IP ranges -> My computer, do the following changes:
Project setup
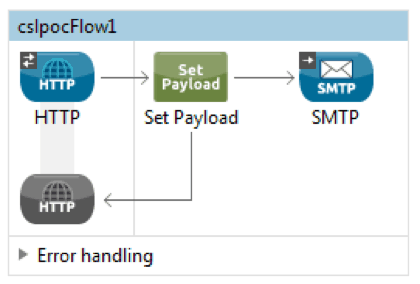
1. Below is the sample flow for sending emails using Mulesoft as an ESB. Here, SMTP connector is used for configuring mail properties.
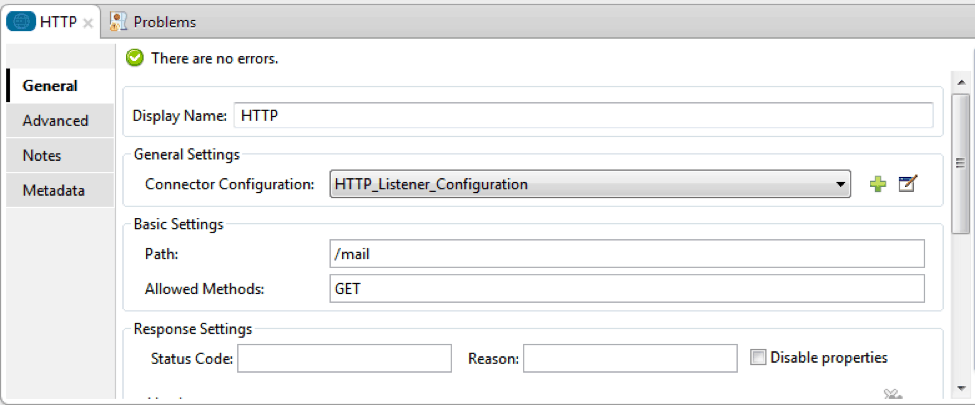
2. HTTP connector changes are as follows:
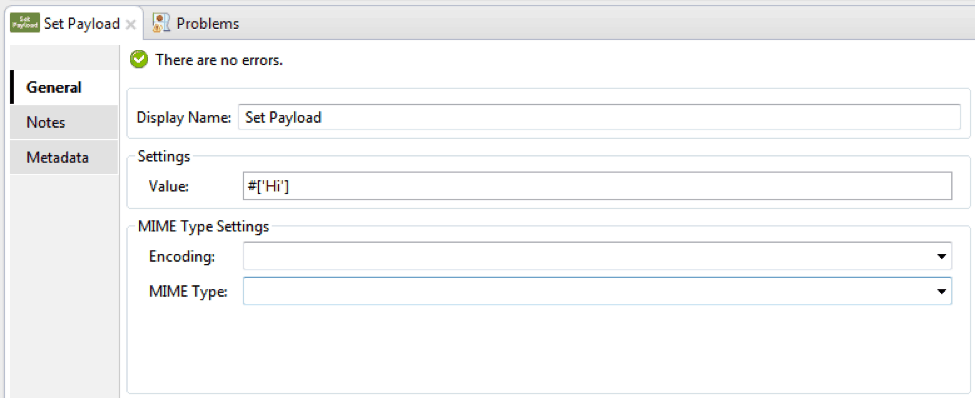
3. Set Payload changes are as follows. This payload value will be displayed on your browser on successful execution.
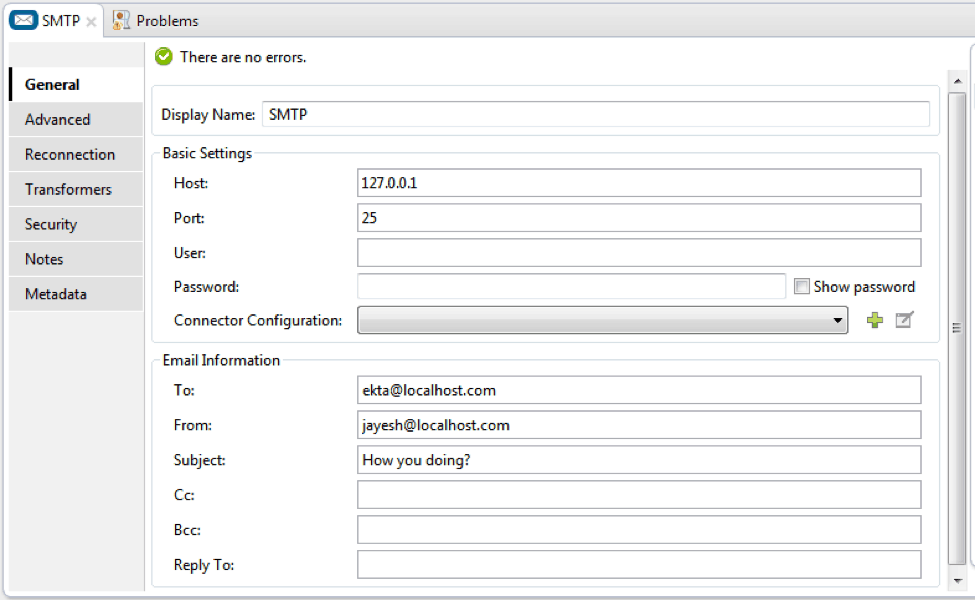
4. SMTP connector changes are as below. Host is 127.0.0.1 which represents localhost and default SMTP port is 25.
Outlook Configuration
1. In your Outlook, Go to File -> Add accounts and select Manual setup or additional server types and click Next.
2. Select POP or IMAP account and click Next.
3. Add following details:
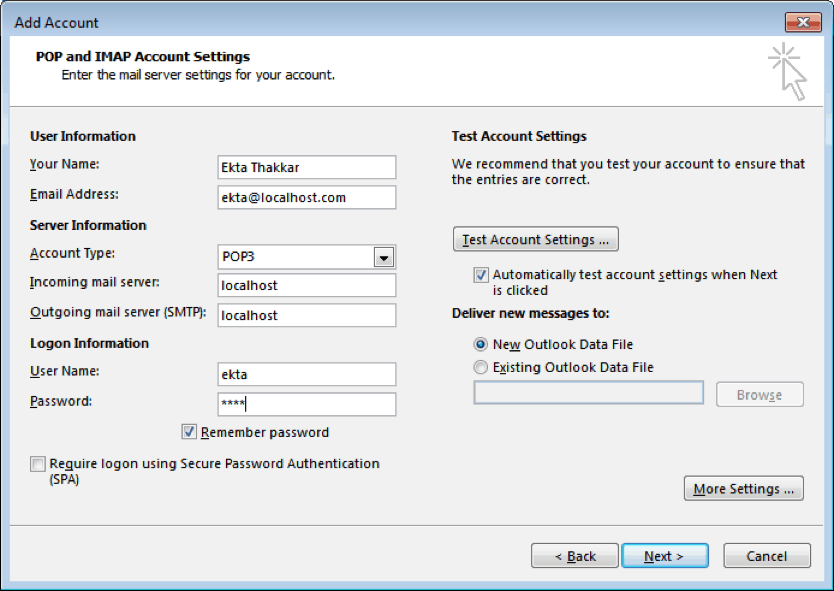
Note that the incoming mail server and outgoing mail server will be localhost for any domain you use. In my case the domain name is also localhost.com so please don’t be confused with that.
4. After adding above details, Test connection by clicking on Test Account Settings button.
5. Click next for completing the outlook configuration. You can add other account similarly.
6. Now execute the mule project to see if you can receive the mail from one user to another in your outlook mail box. Make sure that the hmail instance is open locally. Also see if you have received the Auto reply in case you have set it like me.
That’s all folks! Happy mailing and check out MuleSoft Anypoint Platform for all your connectivity needs. 🙂


