
In my last article, I provided an example of how you can use Anypoint Platform to connect and expose a Blockchain Proxy Layer API. The proxy layer, on top of MultiChain, provides all the benefits of Anypoint Platform and gives you granular control to share data and monitor transactions. MultiChain is just one of a growing number of blockchain platforms in the market. Within the market, there are two types of blockchain networks: public and private.
Public Blockchain
In a public blockchain, the network is completely open and anyone can join and participate. The network generally provides an economic incentive to encourage more participants to join, and they use either a proof-of-stake or proof-of-work algorithm. Ethereum and Bitcoin are the largest and most well-known public blockchains.
Private Blockchain
A private blockchain requires users be invited and validated in order to join the network. These blockchains are generally owned by a single entity or enterprise that prefers a higher level of control in order to reduce the exposure of sensitive data over the public internet and blockchain. MultiChain is an example of a private blockchain. Hyperledger Fabric is another example, which I’ll examine in another post.
In this article, I’ll provide an example of how MuleSoft can provide connectivity to a public blockchain, in this case, Ethereum. I’ll walk you through how to start an Ethereum client using Geth. Additionally, I’ll show you how to use the public Ethereum test environment and test ether using the Rinkeby Crypto Faucet, which will save you the trouble of mining your own ether.
Requirements
- Anypoint Studio 6.4.4
- Anypoint DevKit 1.1.5
- Ether wallet – MyEtherWallet
- Ethereum client – Geth
- Ethereum Connector
1. Start a client
Start up an Ethereum client, such as Geth, if you don’t already have one running. You can run it locally or just spin up an EC2 instance on Amazon AWS.
1.1. Provision an EC2 instance. I selected an Ubuntu Server and provisioned a t2.medium machine.

1.2. Once you SSH into the machine, run the following to update the instance and add some build tools.
sudo apt-get update
sudo apt-get dist-upgrade -y
sudo apt-get upgrade -y
sudo apt-get install build-essential -y
sudo apt-get install python -y
1.3. Next, run the following commands to install Geth.
sudo apt-get install software-properties-common
sudo add-apt-repository -y ppa:ethereum/ethereum
sudo apt-get update
sudo apt-get install ethereum -y
1.4. Lastly, run the following command to start Geth and connect to a test network––in this case, Rinkeby.
geth -rpc -rpcaddr "0.0.0.0" --rpcport 8545 --rinkeby
1.5. Back on AWS, open port 8545 for the inbound rules in the Security Groups to just your IP. This is the port for RPC communication.

1.6. If everything is set up correctly, you’ll see Geth start syncing with the Ethereum blockchain.

2. Get some ether
In order to test out the Etherum connector on the Ethereum test environment, you’ll need ether. Every computation that occurs as a result of a transaction incurs a fee and is paid in a denomination called “gas.” Gas is the unit of measurement and the smallest denomination is a “wei.” Think of a wei as a penny but it’s even a smaller fraction of 1 ether. One ether is equal to 1e18 wei (1,000,000,000,000,000,000).
In order to get ether for testing, you’ll need to use your Twitter, Google+, or Facebook account. You’ll also need an Ether wallet in order to receive and store your test Ether. MyEtherWallet is a simple solution for this test case. For this article, we’ll need to create two wallets. One wallet will be the From address, the other will be the To address.
2.1. In your browser, navigate to the following URL. On the top right, change the drop-down to Network Rinkeby (infura.io)

2.2. Under New Wallet, enter a password and click on Create New Wallet.
2.3. Click on Download the Keystore File and then click on I understand. Continue. You’ll need this keystore file in order to use the Ethereum connector.

2.4. Copy down the private key and save that somewhere. Then, click on Print Paper Wallet. That will generate a PDF file that you should also save somewhere. It has your public and private key. Then, click on Save Your Address.

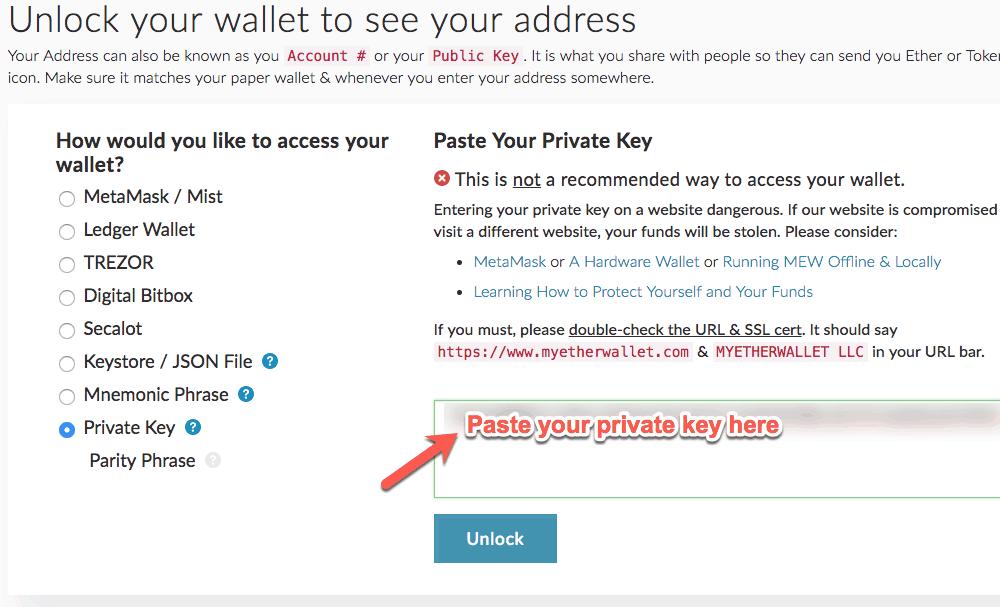
2.5. To unlock your wallet, click on the Private Key radio button and paste your private key. As noted, this is not the recommended way to access your wallet, but since we’re just using the test network and using test Ether, this will be fine for now. Click on Unlock.
2.6. The screen will show your address, private key, and QR code. You’ll see your current balance is currently 0 RINKEBY ETH. Repeat steps 2.2 through 2.4 so you have two wallets.

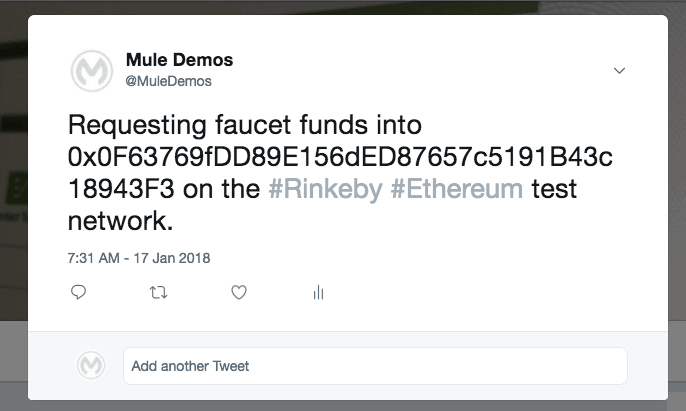
2.7. You should have two wallets setup now. In order to test the connector, we need to fund one of the wallets where we will be sending Ether from. To do this, we can use the Rinkeby Authenticated Faucet to request test Ether. In order to use the Rinkeby Authenticated Faucet, requests are tied to common third-party social network accounts. To get Ether for testing, first, post your public address to create a publicly available URL. An example of this can be found on the MuleSoft Demo Twitter account.
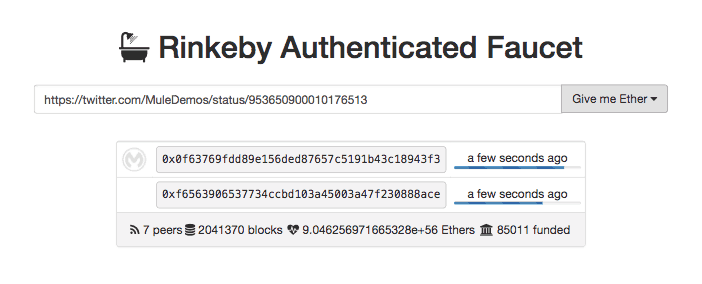
2.8. Next, paste the URL into the Rinkeby Authenticated Faucet and click on Give me Ether. After a few seconds, you should have Ether deposited into your Ether wallet.
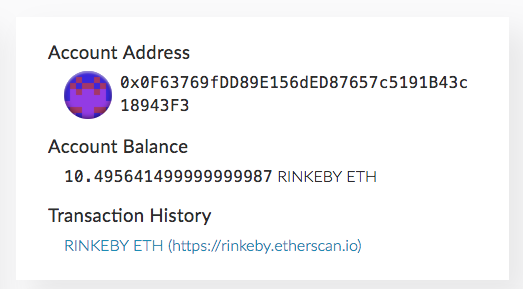
2.9. To check that this worked, switch back to MyEtherWallet and check the balance of your account using your public address.
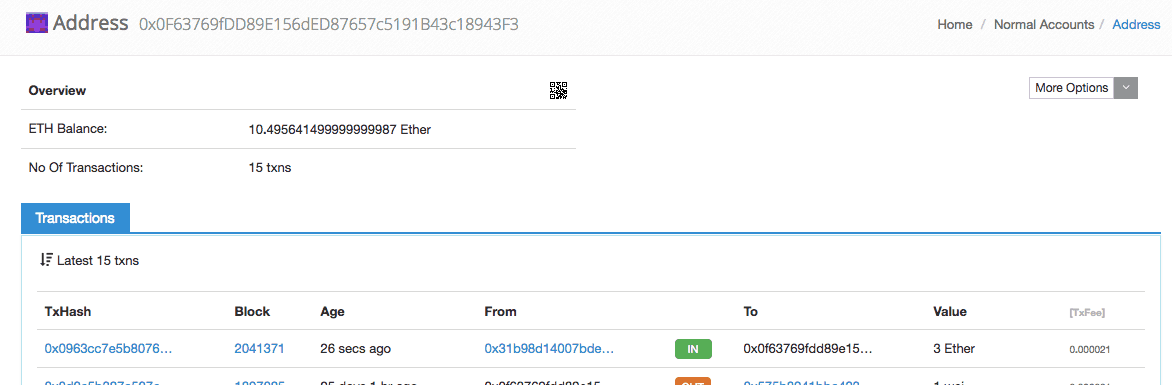
2.10. Etherscan is another great place to check and see that the transaction was written to the blockchain.
If you’ve followed all the steps so far, you should have an active Ethereum client setup and running and two Ether wallets. Now, read my next blog post, I’ll show you how to use an Ethereum connector developed using Anypoint DevKit to send funds from one wallet to the other.


