
Blockchains are slowly creeping their way into the enterprise and gaining acceptance. As Harvard researchers reveal, “No matter what the context, there’s a strong possibility that blockchain will affect your business. The very big question is when.” But what are Blockchains?
Here’s a primer that gives a pretty good overview. But in short, a Blockchain is a digital transaction ledger that, instead of resting with a single provider, is shared among a distributed network of computers. Each transaction is shared and continually reconciled across the network.
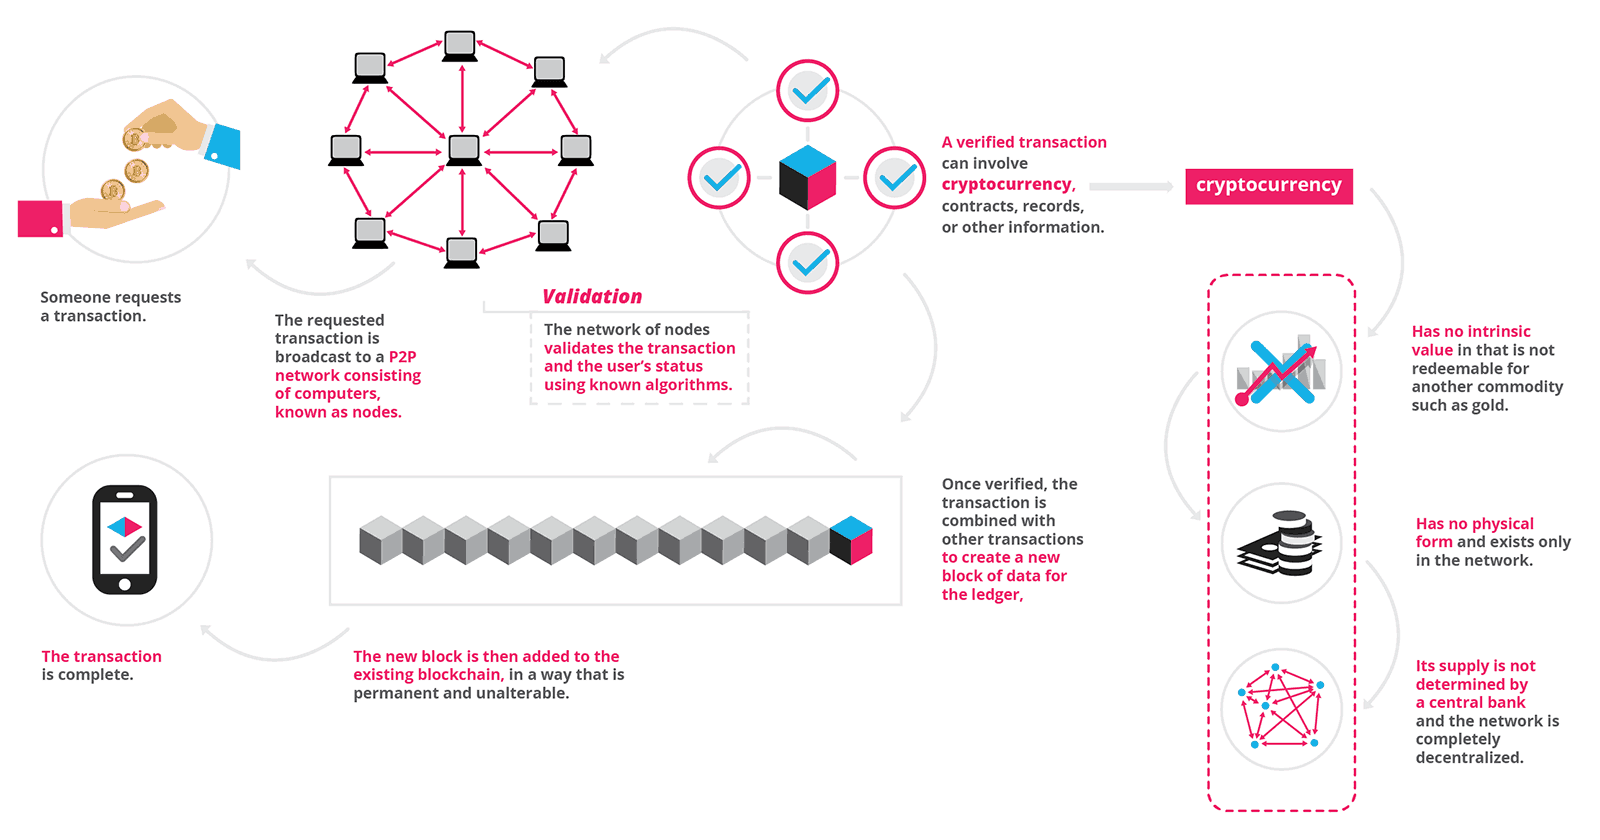
Source: Blockgeeks.com
So where does MuleSoft come in when considering Blockchains as part of your enterprise? Through our API-led connectivity approach, Anypoint Platform provides a holistic way to connect Blockchains through reusable, built-for-purpose APIs. And in this blog post, I will show you how MuleSoft gives you granular control around sharing data and monitoring transactions within and outside the Blockchain. The guide provides a way to setup your own Blockchain using MultiChain and deploy a pre-built Mule application with an API to expose those capabilities.
In this guide, I provide a public AWS AMI image for you to start up and play around with Blockchains and learn about nodes, assets, orders, and streams. If you have MultiChain already setup, you can jump to Step 3 and configure it for your node.
The image has two MultiChain Blockchain nodes installed and includes the Web Demo Interface that allows you to play around with the Blockchain environment.
Additionally, you can start up the MultiChain Explorer that allows you to read the MultiChain block file.
Steps to Creating Blockchain with Anypoint Platform
1. Create and Start Blockchain
In this step, you’ll start an Amazon EC2 instance using an AMI that has two MultiChain nodes installed. Once started, you’ll create a new chain on the instance called ‘mulechain-core’. When you spin up a new instance, you’ll connect to this node to create a Blockchain.
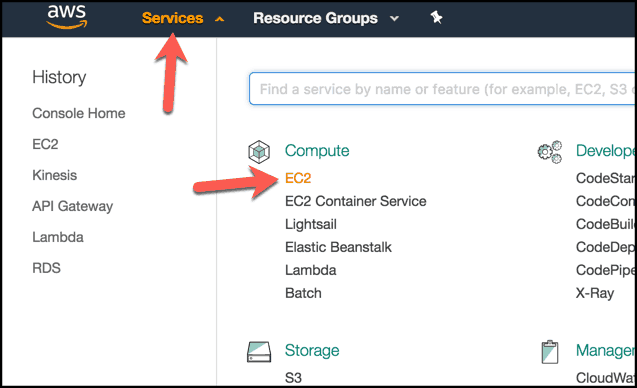
1.1 – Login to your AWS account.
1.2 – Click on Services and click on EC2.

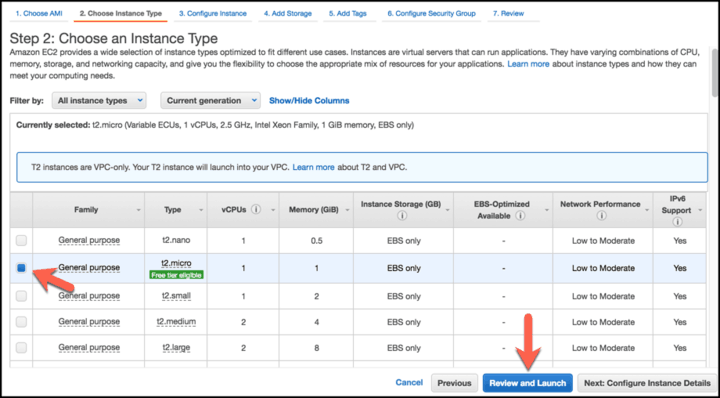
1.3.a Keep the t2.micro instance type and click on ‘Review and Launch’
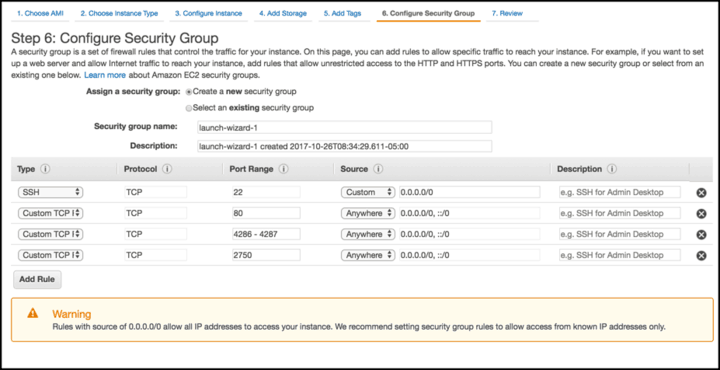
1.3.b Before launching the instance, click on ‘Edit security groups’
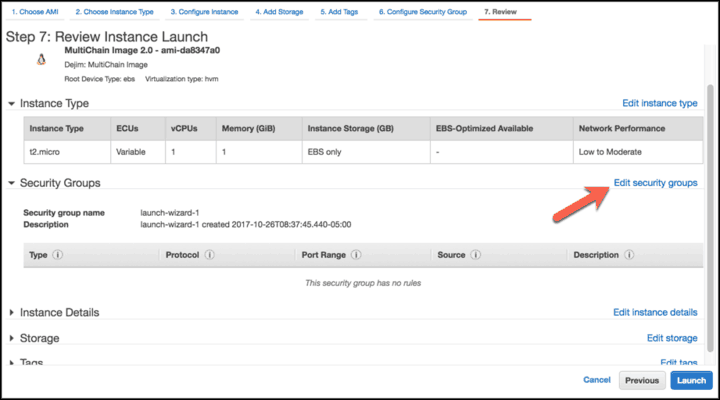
1.4 – In order for you to access the machine from a browser, you’ll need to open some ports. Create a new security group and expose the following inbound ports: 80, 22, 4286 – 4287, and 2750. Set the source for each to be either ‘Anywhere’ or ‘My IP’ and then click ‘Review and Launch’
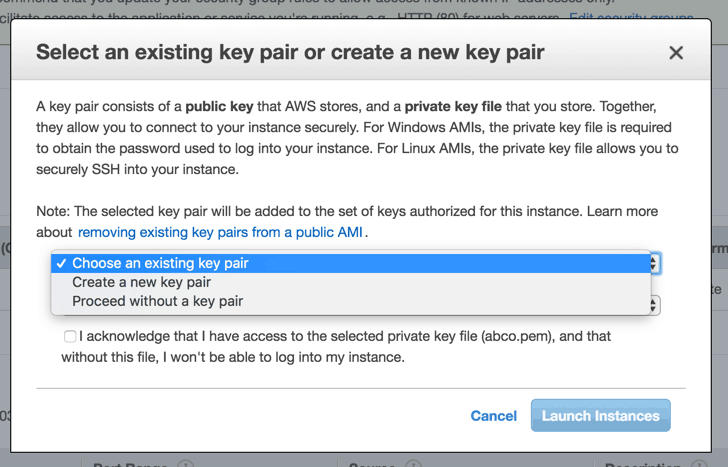
1.5 – Click Launch and then either create a new key pair or use your existing key pair.
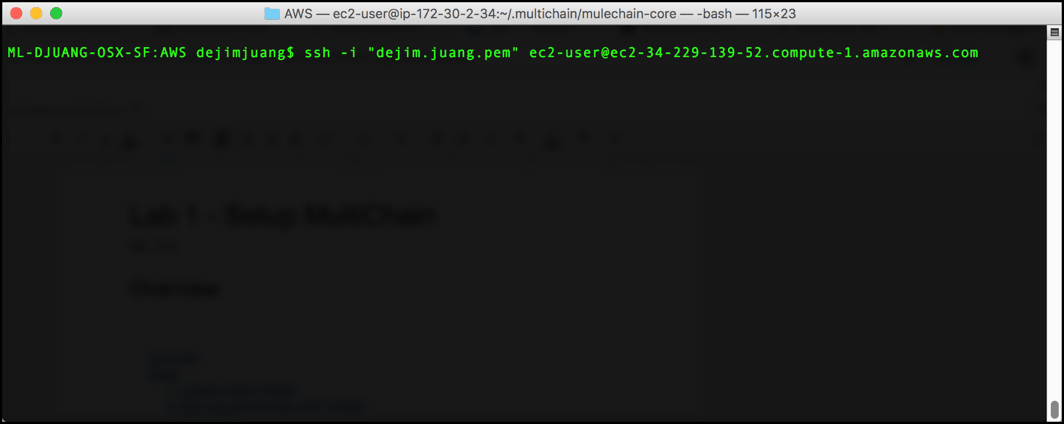
1.6 – Connect to the AWS instance using the following command in a terminal window and being sure to reference the location of your .pem file. – ssh -i “<your .pem file>” ec2-user@ec2-34-202-166-170.compute-1.amazonaws.com
1.7 – Run the following command to start the core chain: multichaind chain1 -daemon -datadir=/home/ec2-user/node1

1.8 – Once the node has been started, start the other node: multichaind chain1 -datadir=/home/ec2-user/node2 -rpcport=4333 -port=4335 -daemon

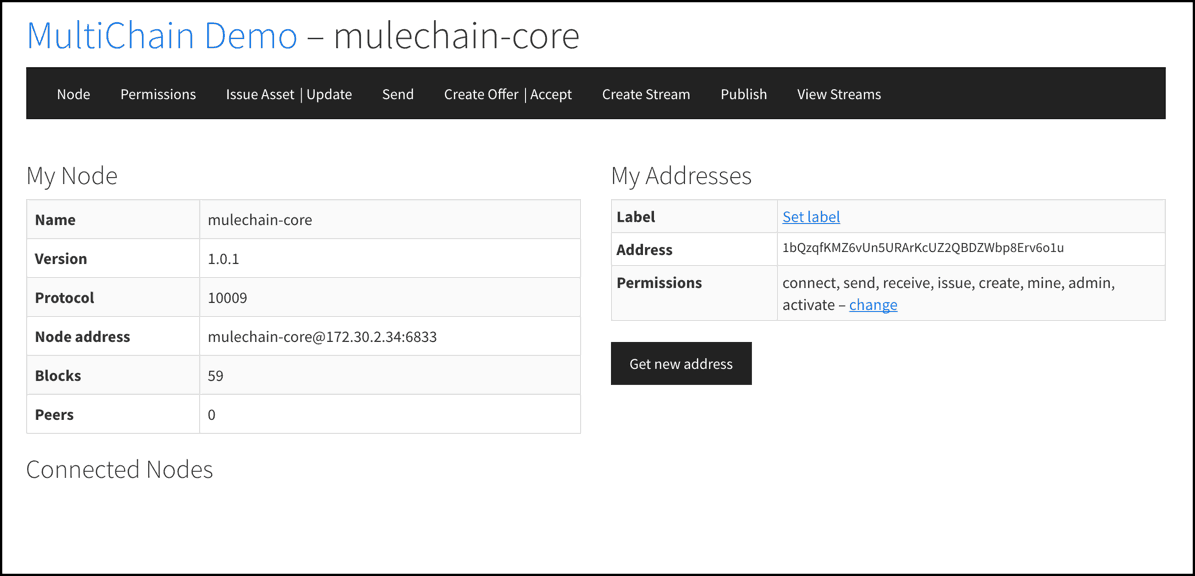
1.9 – Open a new tab and navigate to the URL for the instance using the public URL of the server: e.g. http://34.229.139.52. Then click on the link for the node.

1.10 – That’s it for the Blockchain setup. You can play around with the Web Demo interface and add and send assets. The interface is only configured to interact and browse through one node.
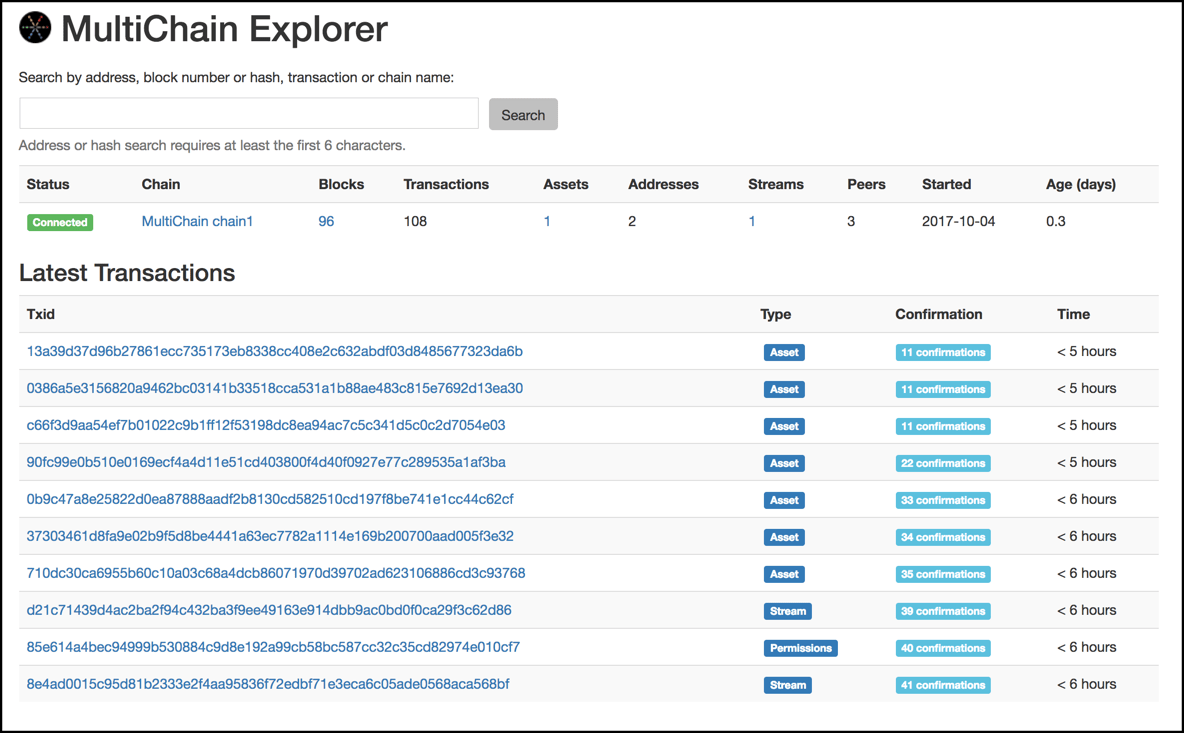
2. Run MultiChain Explorer
MultiChain Explorer is a free block chain browser for MultiChain blockchains.
2.1 – Back in the Terminal, navigate to the following folder: cd ~/multichain-explorer-master/
2.2 – Run the following command: python -m Mce.abe –config chain1.conf

2.3 – Switch back to Chrome and open the following URL: http://[EC2 Public URL]:2750, for e.g. http://34.229.179.52:2750/
3. Deploy Mule Application
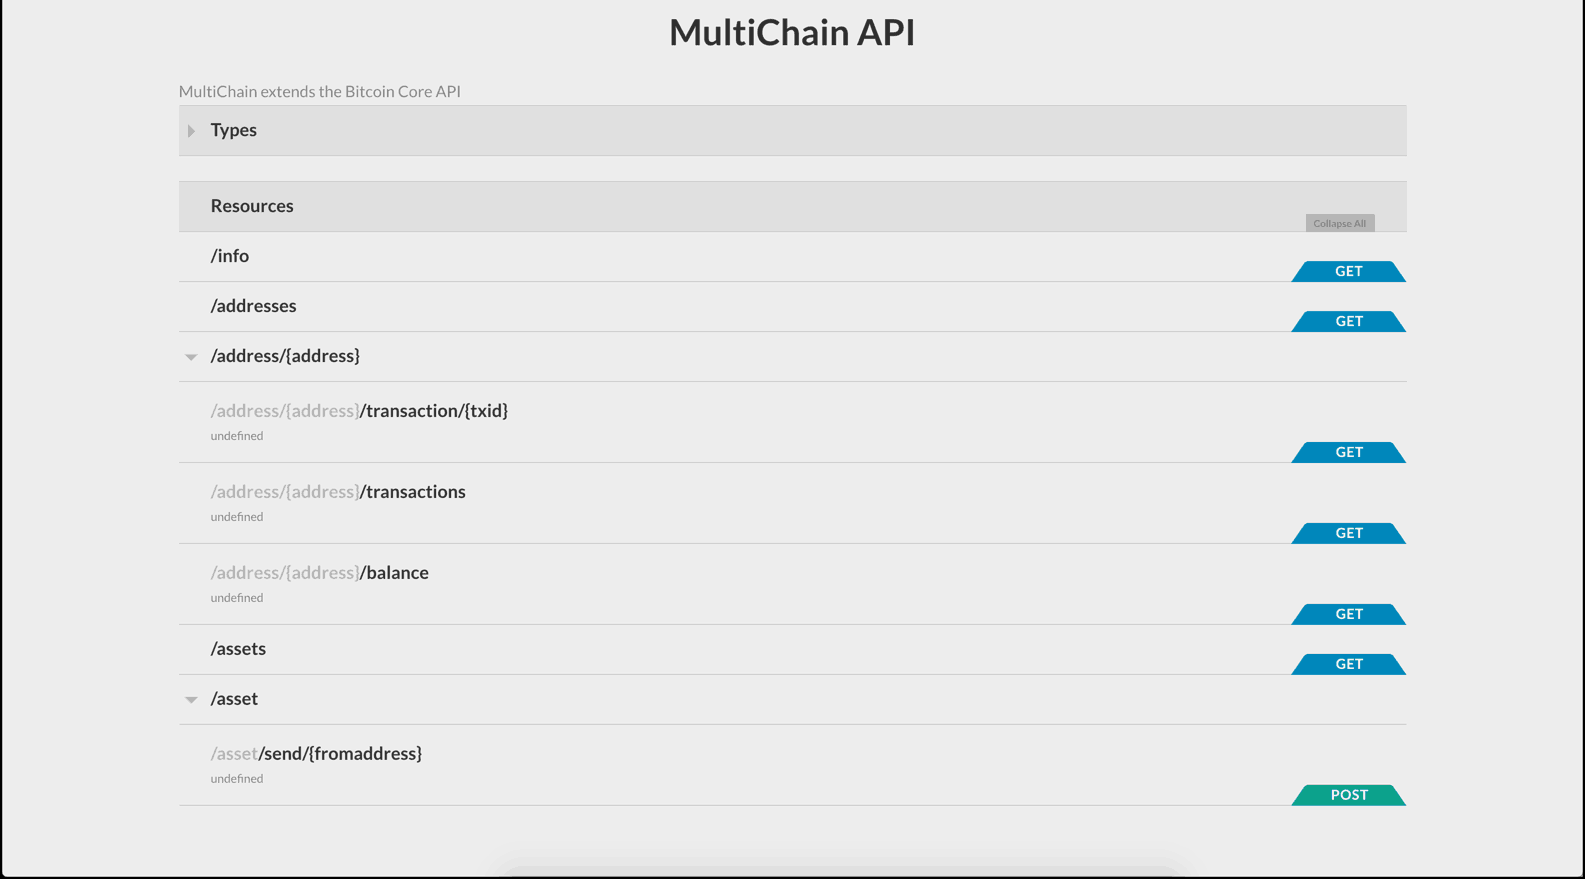
This step provides a Mule project with a defined RAML that wraps the MultiChain JSON-RPC API. Once deployed, you can play around with a small subset of methods and resources around the MultiChain API.
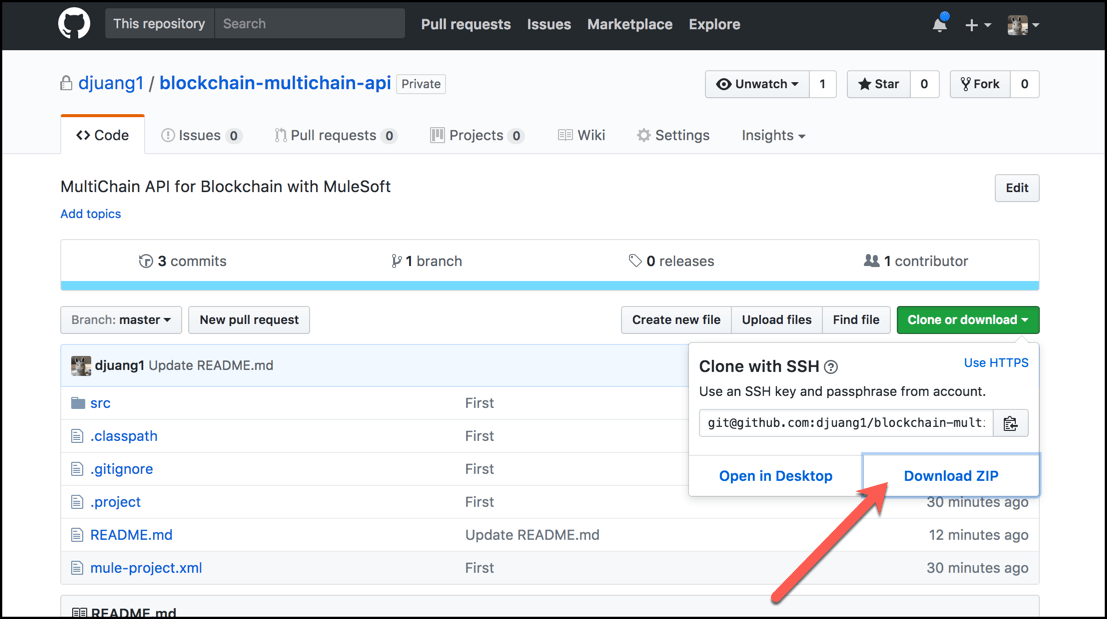
3.1 – Download the project from Github and unzip the file to a folder.
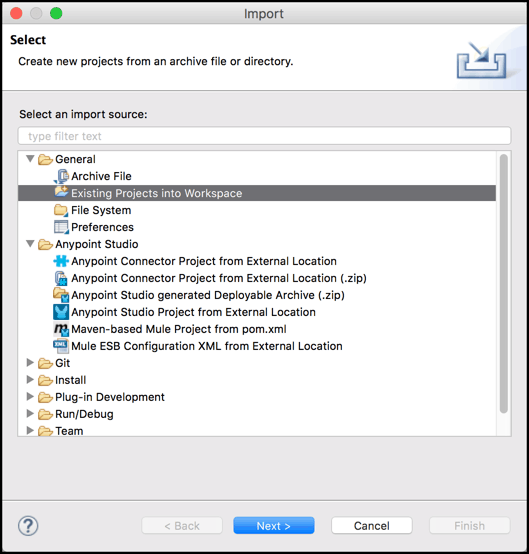
3.2 – Import the project in using General > Existing Project into Workspace in your Anypoint Studio.
3.3 – Open the mule-app.properties file and fill in the properties for the core node.
rpchostip=34.202.166.170
rpcport=7736
rpcuser=multichainrpc
rpcpassword=9wbcNf1QiadfadKr6J7jos2XraktctieAuySwCaYd9Rj
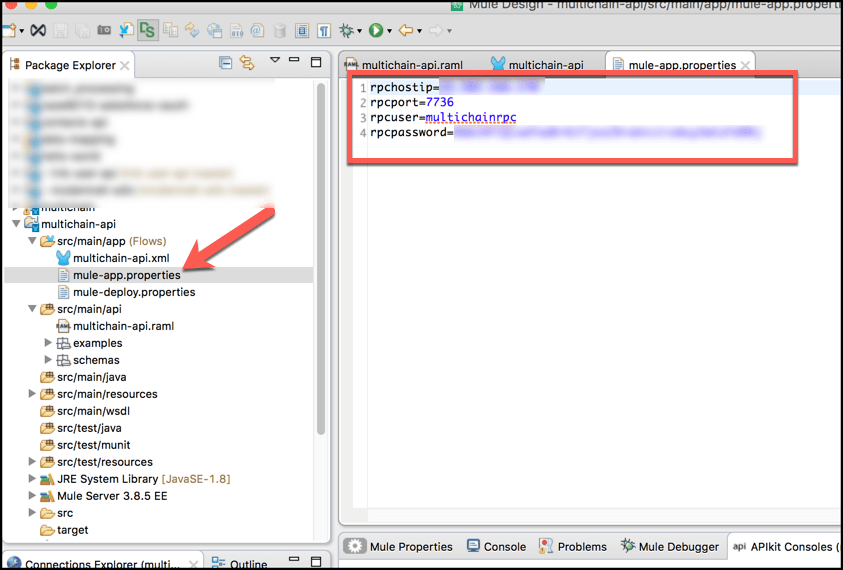
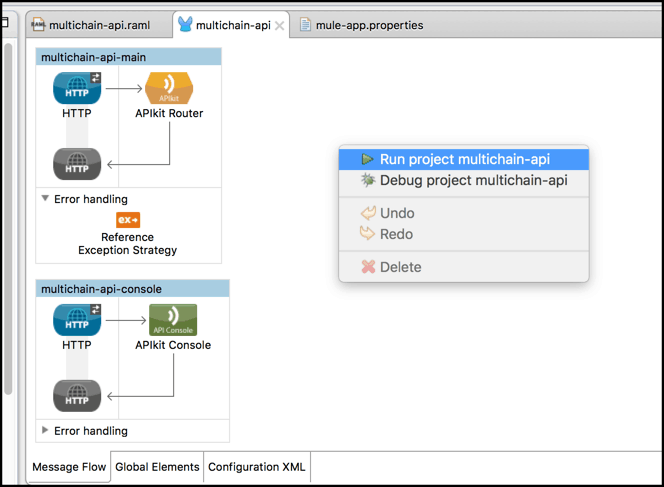
3.4 – Open the multichain-api.xml file and run the project.
3.5 – Open a new browser tab and navigate to http://localhost:8081/console
Summary
Blockchain technology saw an increase in adoption and implementation in 2017 and we’ve only just started seeing new business applications. Smart contracts, supply chain auditing, and file storage are just a few of the up and coming applications of this technology.
By providing an API-layer over the Blockchains infrastructure, organizations move to this new disruptive technology gradually by exposing the components you need and having the ability to govern and monitor the usage of this endpoints.
What new business applications can you think of and build with Blockchains and the application network?


