In my last article, we saw how we can install Mule 4 on a Raspberry Pi. And while Mule 4 runs perfectly fine on the latest Raspberry Pi’s, you may find yourself in need of a more scalable solution than a bare-metal runtime installation. In this post, we will look at running Mule in a Docker container on Raspberry Pi.
These days it seems like everyone has jumped on the container-bandwagon, and probably for good reason. But how is this relevant to our Raspberry Pi setup? The answer is quite simple: scale. Raspberry Pi is a low-cost, low-resource computer that can easily be used for building IoT solutions. A single Pi is already interesting, but what if you have dozens of them?
The process of manually installing Mule runtime on Raspberry Pi can be a bit challenging, especially when you’d have to configure 750 Pi’s, like the Los Alamos National Laboratory’s High Performance Computing Division did last year. Or what if you would like to run multiple Mule runtimes on a single Pi? Enter Docker!
With Docker, we can easily deploy containers to any platform that is supported by Docker. Fortunately, these days Docker is fully supported on Raspberry Pi. First, we will have a look at installing Docker on Raspberry Pi (Part 1). Next, we will dive into the details of getting Mule to run as a Docker container and how to deploy it to a Raspberry Pi (Part 2).
Part 1: Installing Docker CE
In order to install Docker on the Raspberry Pi, you need the following items:
- Raspberry Pi 3 B+ with Raspbian Stretch, the latest “official” Linux operating system for the Pi.
- Docker CE for Raspbian Stretch.
Note that an active internet access is required for downloading packages and installation files. This how-to guide also assumes that you are already somewhat familiar with Linux, the operating system for the Pi.
To learn more, the Raspberry Pi Foundation provides excellent documentation on setting up your Pi device, we will not cover this topic in this blog post.
1.1. First, we need to download and install a Docker distribution for Raspberry Pi. To make our lives a little bit easier, a convenient installer is provided by the Docker project. This automated script will create a systemd service file and copy the relevant Docker binaries into /usr/bin/ on our Raspberry Pi.
$ curl -sSL https://get.docker.com | sh

1.2. Docker can only be used by the root user or members of the “docker” user group. Therefore, if you want to run Docker as the default user “pi”, add this user to the “docker” group. If you happen to use a different user than “pi,” make sure to include that username instead of “pi” in the command below.
$ sudo usermod -aG docker pi
1.3. For our own convenience, let’s make sure Docker is started automatically when booting your Pi.
$ sudo systemctl enable docker
1.4. By now, Docker has been installed and configured. Time to start the Docker daemon.
$ sudo systemctl start docker
1.5. To verify that Docker is running, type the ‘docker version’ command.
$ docker version

1.6. And that’s it! With just a few commands we installed Docker on a Raspberry Pi. In theory, all models of the Pi are supported, but it is highly recommended to use models 3/3B/3B+ only.
Part 2: Mule as a Docker container
In my last post, we saw that a few manual steps are needed to install Mule runtime on a Pi. While it is possible to automate these steps, this may not be the best solution for every situation. Fortunately, Docker provides an online registry for hosting and retrieving Docker images. It is also possible to set up a private Docker registry within your company or development team, for example.
The huge benefit of having a registry is a central place to store and get Docker images. This means you can get a wealth of pre-built Docker images. Before diving into getting Mule runtime in a Docker container, let’s explore the mechanism of the cloud registry.
2.1. First, test that your installation works by running the simple Docker image, hello-world:
$ docker run hello-world
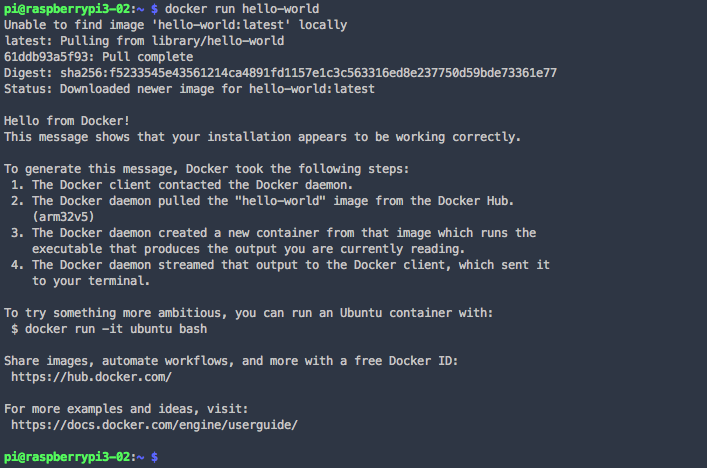
The output provided by the command explains what just happened. Please note that an active internet connection on your Pi is required!
2.2. Now that pulling images from the online Docker Store works, we can start looking at Mule containers. There are already a number of pre-built Mule images available on https://store.docker.com, but most of them were not built for the Raspberry Pi. This blog post has more details on the specific steps involved.
2.3. I created a Docker image of Mule 4 EE (the 30-day trial version) that is patched specifically for the Pi. More information on this image can be found on its Docker Store site.
2.4. Now let’s use that image to get Mule “up and kicking” on our Pi. First, get the Docker image using the ‘docker pull’ command:
$ docker pull rprins/mule4-trial-rpi:latest
2.5. Next, run the image using the ‘docker run’ command with some parameters.
$ docker run -ti --name="mule4-rpi" -p 8081:8081 -v ~/mule/mule4-trial-rpi/apps:/opt/mule/apps -v ~/mule/mule4-trial-rpi/logs:/opt/mule/logs rprins/mule4-trial-rpi

2.6. The Docker image will configure to start Mule when launching the container. And with that (and some patience), we have a Mule 4 container running on our Raspberry Pi!
2.7. Keep in mind Mule runtime is started in console (or foreground) mode, which does not release the command prompt. To enter a new command, either create a new SSH connection to your Pi, or restart the Mule Docker container in detached mode using this command:
$ docker run -d --name="mule4-rpi" -p 8081:8081 -v ~/mule/mule4-trial-rpi/apps:/opt/mule/apps -v ~/mule/mule4-trial-rpi/logs:/opt/mule/logs rprins/mule4-trial-rpi
A major difference between running Mule directly on a server and running Mule in a container is that the container is sandboxed. It is not possible to directly access the files and directories of the Mule 4 container. This is great from a security point of view, but there are situations where you will need to be able to access Mule’s files and directories.
Just think of examples such as view log files, deploying applications or changing configuration files. The rather elaborate command we used for starting the Mule container allows us to “map” some directories of the Mule 4 container to our local file system.

2.8. Deploying a Mule app to our container is simply a matter of copying a Mule deployable archive (in .jar format) to the directory /home/pi/mule/mule4-trial-rpi/apps.
2.9. Here is a very basic ‘Hello World’ app for Mule 4, which we will deploy to the Docker container using the mounted directory.

2.10. For the sake of simplicity, a deployable version of this app can be downloaded directly from its GitHub repository.
$ sudo chown -R pi /home/pi/mule
$ wget
https://github.com/rajprins/helloworld-mule4/releases/download/v1.0/helloworld-mule4.jar
$ cp helloworld-mule4.jar ~/mule/mule4-trial-rpi/apps/
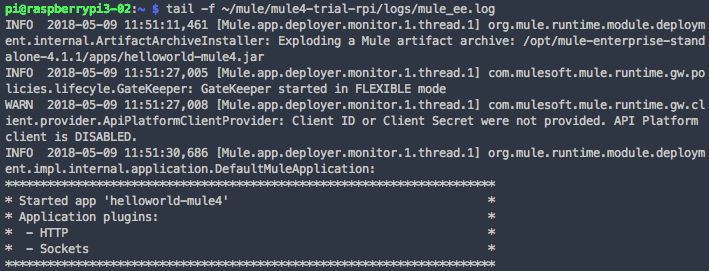
2.11. This will download the deployable archive of the ‘Hello World’ app and copy it to Mule’s apps directory, which in turn will trigger the deployment of the application. Check the log files to ensure the app is really deployed.
$ tail -f ~/mule/mule4-trial-rpi/logs/mule_ee.log
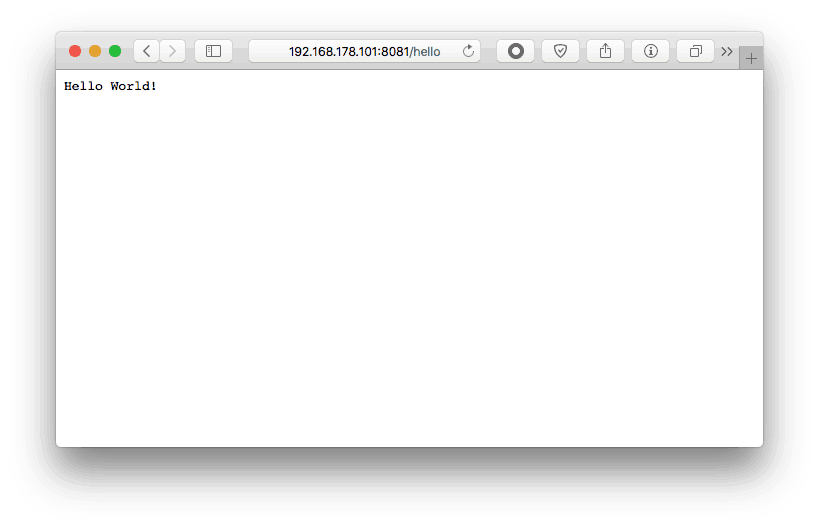
2.12. The final step is to test the Mule app from a local machine. Open a browser or API/REST client and use this address:
http://<ipaddress.of.your.pi>:8081/hello
Conclusion
With Docker, we can easily deploy one or more containers with Mule runtime to a Pi. And though the Pi is resource-constrained, it is possible to run multiple Mule runtimes on the same device. Docker makes it easy to manage and monitor the containers. If you wish to start another Mule runtime, just launch a new instance of the Docker image we downloaded in step 2.4 using this command:
$ docker run -d --name="mule4-002" -p 8082:8081 -v ~/mule/mule4-002/apps:/opt/mule/apps -v ~/mule/mule4-002/logs:/opt/mule/logs rprins/mule4-trial-rpi
With just a single command we can start a whole new Mule runtime (in this case named “mule4-002”), all thanks to Docker’s container technology. Just imagine you need to set up a large number of Pi’s and install Mule runtime on them; with Docker, that task becomes a lot simpler.
In the next post, we will explore this use case further and look at how you can set up a cluster of Mule containers. Happy hacking!