
In my blogpost last week, I shared how, in just 5 minutes, you can expose MySQL, DB2, SQLServer, Oracle or SAP datasource as an OData API into Salesforce using Anypoint Data Gateway for Lightning Connect.
But let’s say what Data Gateway offers out-of-the-box is not a perfect fit for what you want to do. Maybe you want to create an OData API for a different datasource, expose a legacy API as an OData API or do data orchestration before exposing data into Salesforce. So what do you do?
Introducing OData extension for APIkit
APIkit is an open-source Maven tool within Anypoint Studio that enables developers to create well-designed REST APIs. We are excited to introduce a new OData extension, which allows users to create and expose OData/REST APIs in three simple steps:

Before moving forward, please notice the OData extension for APIkit is still in Beta! GA is planned for mid-2016.
Step 1: Defining the model
For starters, we need to define the model to be exposed. First, create a model.json file within your Studio project with a clear definition of the entities and the properties, so that it can be exposed as OData entities.
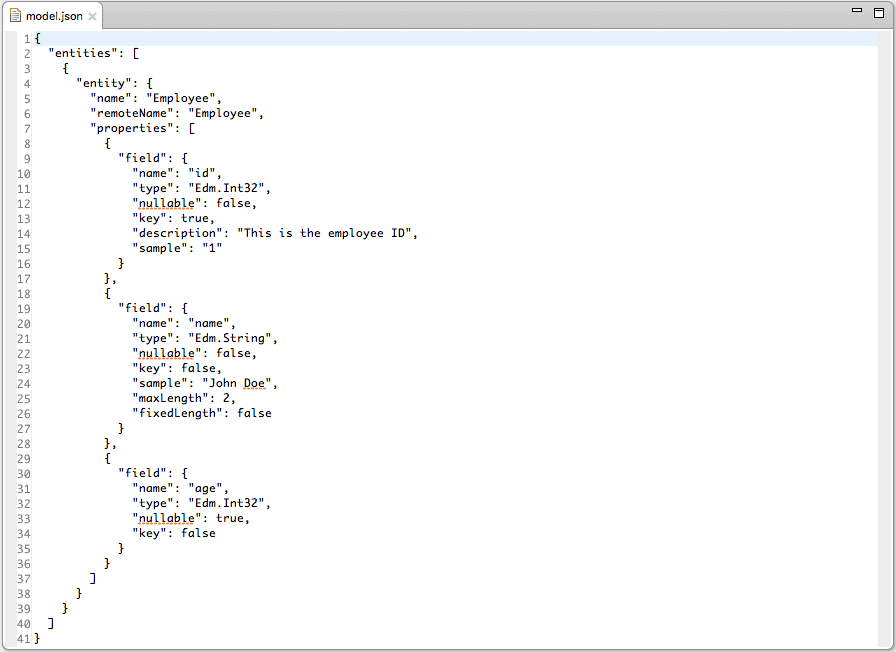
In this example, we have a “workers” entity with a single key (the “workerId” integer field) and a “firstName” string field. This entity is what we will expose through the OData API.
Details about the supported data types and model.json definition can be found here.
Step 2: Implementing the API
Now that we have the model.json file completed, we need to implement it in Studio. We will do so by using the APIkit OData extension. Once the plugin is installed, right click on the model.json file and select “APIKit > Generate flows” to generate two new elements in your project: a RAML file and an api.xml file.

The RAML file
This RAML file is the documentation for your RESTful API. All entities defined in step 1 are available as resources with proper CRUD operations, both at the collection and the element levels.
The api.xml file
Following the familiar APIkit flows-generation process, this xml file has the entry HTTP point and the scaffolded flows for your API.
With these steps, we can now implement the API in any way we want. We can pull data from any supported datasource or API, do data aggregation, orchestration and/or transformation. At this point, you can use all the connectors and operations available within Studio. The only requirement is to conform to the expected flows output defined in the RAML file.
Step 3: Running / Deploying
With our REST/OData API ready, we can now run it in Studio or deploy it in a mule runtime. This newly created app exposes two endpoints: a RESTful API accessible through “/api”, and an OData API accessible through “/api/odata.svc”.
And there’s more. Do you need an OData API for a set of SAP BOs/BAPIs? Need a bidirectional OData API for your Oracle, DB2 or Azure DB? Or do you need to do complex data orchestration within your OData API? All of that (and more) is possible with this extension.
For more information, feel free to check out the OData for APIkit documentation.


