In this blog post, I’ll give you some background information about JDBC, explain what Mule ESB and Studio do with JDBC, and demonstrate how can you use it in a simple example.
A little reference for JDBC:
JDBC, which stands for Java Database Connectivity, is basically an API that enables users to execute operations over a Data Source using the Java programming language. This API allows you to connect to almost any Data Source system, from relational databases to spreadsheets and flat files and, using the proper SQL syntax, you can perform queries, updates, deletes, or even execute store procedures.
What Mule ESB and Mule Studio do with JDBC
Now let’s see how this is architected in Mule ESB. What Mule ESB does is to make this Java code layer transparent to you. Simply importing a jar file with the driver for a specific data source (MySQL, Oracle, etc) and writing some easy XML code will make you able to connect to a Data Source and manipulate the data in it. Studio comes with a friendly User Interface, which makes Mule XML code very easy to create and edit. The image below gives you a better idea of how all this works:

At the very end of the line is your data source, which can be fed by any other application. Next you have the JDBC driver. As we mentioned earlier, this is the Java API interface provided by the vendor code of the Data Source that will allow Mule to connect to the Data Source and manipulate the data in it. What comes next is our Mule ESB instance, which will be the service that will be executing the Mule XML code. And finally we have Mule Studio and you.
Studio gives you the framework to easily create the XML code you need and will allow you to test it by executing the code in an embedded Mule ESB instance. So by using Studio, the other layers will be transparent to you.
My kingdom for a Driver!
Before configuring a JDBC connection the first thing we need is the Driver. If you want to keep your kingdom you should first go to the vendor website and look for a JDBC driver file, which should be in a jar format. Keep in mind that there are some vendors, like Oracle, that may require a license to use the driver. NOTE: On www.jarvana.com you can look for the Driver class you need and download the jar file from there. In the example explained below we are going to work with a MySQL database. You can download the Driver file from here (registration required) or look for the connector class in jarvana.
Putting hands to work
Open new Mule Project in Studio, and then follow these steps to get your flow working: a. Import the driver b. Create a Datasource, c. Create a Connector that uses our Datasource, and finally d. Create a simple flow that uses our connector.
a. Import the Driver
Once you have the jar file, the next steps are very simple:
- In the Package Explorer, right-click over the Project folder ( in this case “jdbcprj”).
- Look in the menu for Build Path > Add External Archives…
- Look for the jar file in your hard drive and click Open.
Now you should see in the package explorer that the jar file is present in “Referenced Libraries.” This will allow you to create an instance of the Object driver you will need. [yframe url=’http://www.youtube.com/watch?v=9fqtSqngy1c’]
b. Creating a Datasource
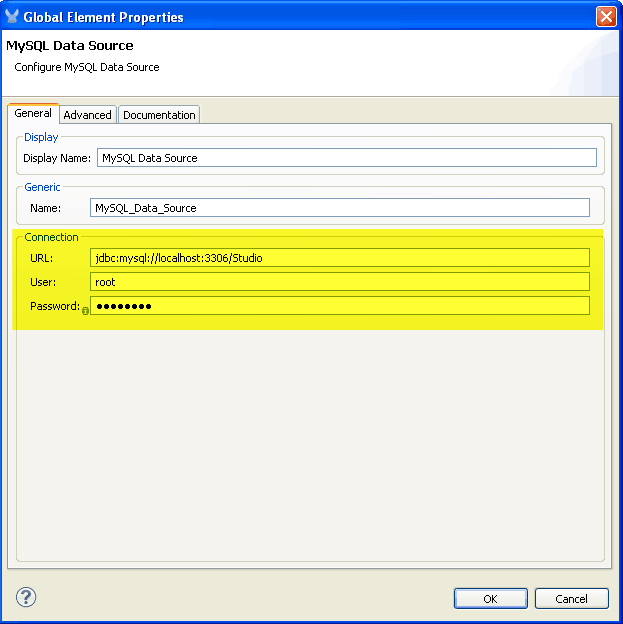
Mule and Studio come with some predefined configuration elements for the most common datasources: Derby, MySQL, Oracle and PostgreSQL. If you want to use another datasource, you can do it by creating a bean object with the configuration and using the bean as the Datasource. No let’s create a MySQL datasource for our connector:
- Go to the Global Elements tab and click on the Create button, which will display a new window.
- Look for Data Sources > MySQL Data Source and click the OK button.
- In the Data Source configuration window only 3 things are need to make this work: the database name in the URL, the User and the Password. Enter those attributes according to your database configuration and click OK.
c. Create the Connector
Now that we have the datasource with its driver we need a Connector.
- From the Global Elements tab, click on Create and look for Connector > Database (JDBC). Then click OK.
- The only thing that we need to do here is tell the connector which datasource to use. To do this click on the ‘Database Specific’ drop-down list and look for our datasource created in the previous step. Then click OK.

Optionally, you can go to the Queries tab now and create the queries or SQL statements that you want. If you don’t do this now you will have to do it when configuring an endpoint.
d. Creating a flow
Now, we have the half of the work done. To use our Datasource in a flow, we need an inbound endpoint or an outbound endpoint, depending on what we want to do, you can use a jdbc inbound endpoint if you want use de information from a database to feed your flow and do some process or use an outbound if you want to write the information you process in your flow in a database. In any of these cases you need to do this:
- In the Studio Message Flow view, add a JDBC endpoint (either inbound or outbound) in the flow, and open the configuration window by double-clicking on the endpoint.* Note: To add the endpoint you just need to look for it in the palette and drag and drop it into the canvas, if you drop it in the canvas out of any flow then a flow scope will be created and you endpoint will be an inbound endpoint, if you drop it in a flow after any element, then you will have an outbound endpoint. Studio automatically perform this conversions as flows should always start with inbound endpoints:

- Go to the reference tab and in the connector drop-down list, look for the JDBC connector created in the step C. We are telling the endpoint how to connect to the data source by specifying a reference to a connector. The connector configuration is something global so it can be reused in any amount of endpoints that you want.
- Go to the General tab and select the Query Key you want to use in this endpoint. The JDBC endpoint can execute one SQL statement. If you have not created the query in the connector then you can do it now by going to the Queries tab.* Queries Tab and a New Query * Query selected in the Query key drop down list:


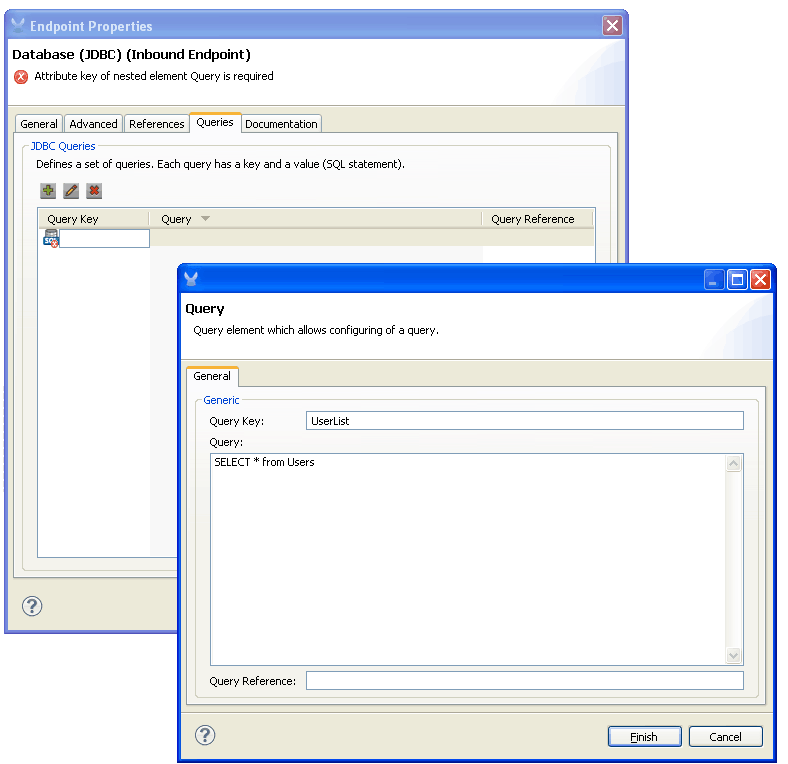 * Query selected in the Query key drop down list:
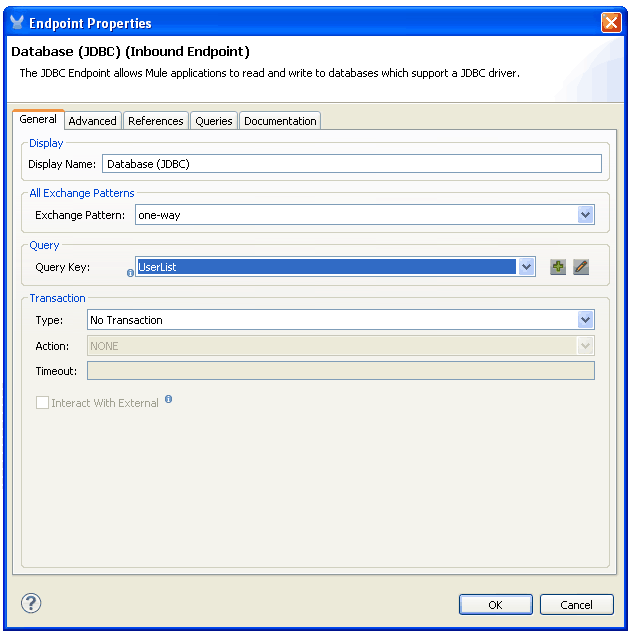
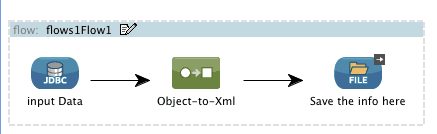
Following these steps you are ready to feed your flow by doing queries to your database or create new database registers with the information processed in your flow, or execute any statement you need over your data source. Here you have an example flow. To use this just copy the configuration and paste it in the XML Configuration tab and save the project. You should see a flow like this in the message flow view: