This blog is the fourth and final part in a 4-part series on how to use a Slack bot to extract LaunchDarkly data. If you haven’t already, check out part one, part two, and part three of the series before pursuing the final steps of this demo.
In the final blog of the series, we will create flow designer custom types to easily manipulate data. When everything is in place, we will promote the application to a production environment.
Creating flow designer custom types
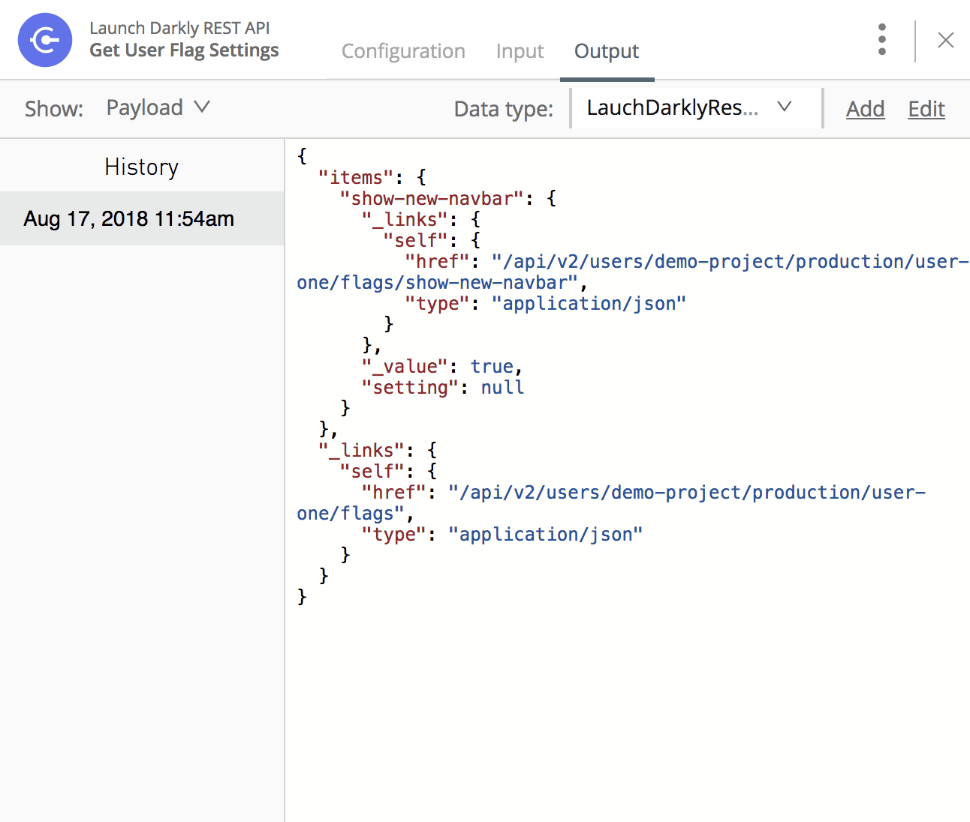
1. Go back to flow designer, open the Launch Darkly REST API card, and go to the output tab. You should see theLaunchDarkly (LD) response body as the image below.
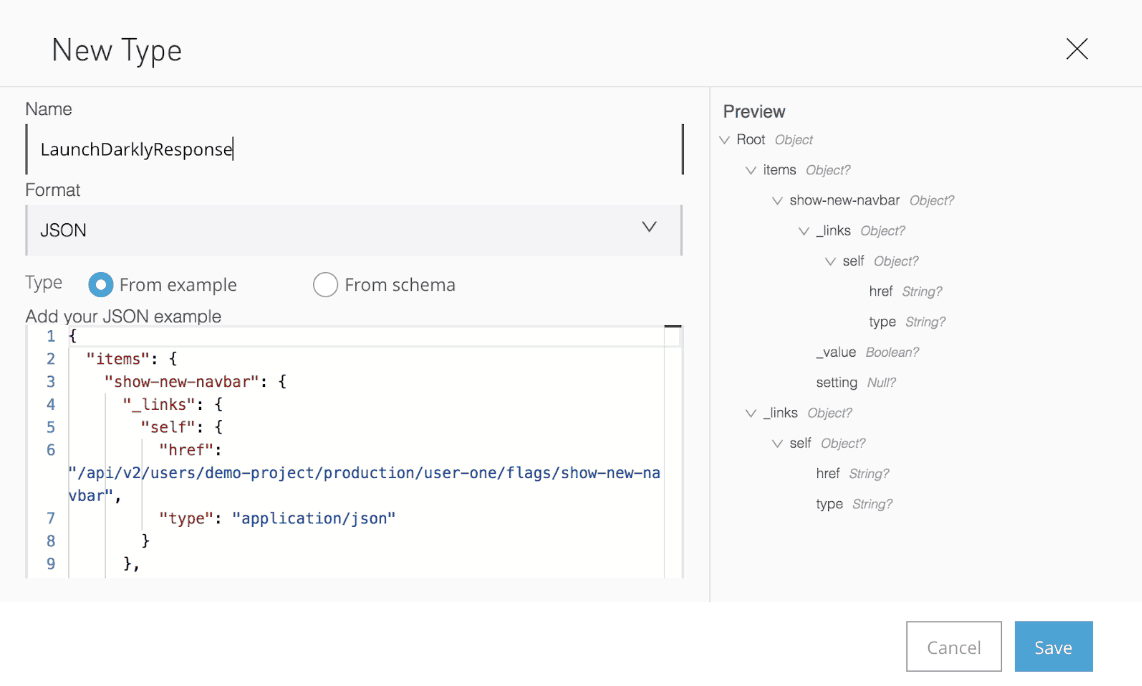
2. Click the Add button in the card header, this will open a modal to create a custom type. Name it LaunchDarklyResponse.
3. Save it and close the card.
4. Add a Transform card at the end, after the Launch Darkly REST API card.
5. Click on the Create new data type button.

This will open the modal to create a new custom type.
6. Name it BotResponseMessage and copy and paste the following JSON in the JSON example field.
{
  "response_type": "in_channel",
  "text": "Response from Lauch Darkly",
  "attachments":[
      {
           "color": "#36a64f",
           "text": "Feature1=value1;Feature2=value2",
           "fields": [
               {
                   "title": "awesome-feature-one",
                   "value": "true"
               },
               {
                   "title": "show-new-navbar",
                   "value": "true"
               }
           ]
      }
  ]
}
At the end, it should look like the image below:

7. Save it.
8. Go to the script tab, then copy and paste the following script:
%dw 2.0
output application/json
---
{
 response_type: "in_channel",
 text: "Response from Lauch Darkly API",
 attachments: [
 {
     "fields": ((payload.items default {}) pluck (featureObject, featureKey) -> {
       "title": (featureKey),
       "value": (featureObject."_value") as String
     }),
     color: "#36a64f"
   }
 ]
}
Slack formatting needs to create a JSON object with an attachment property containing a list of fields with the titles and values.
There are a number of functions available within DataWeave to support more complex mapping requirements like the pluck function used. See DataWeave documentation for more information.
9. Run the application.
10. Go back to Slack and trigger the integration by writing: /demo user-one
11. We will get the response with a nicer format like the image below.
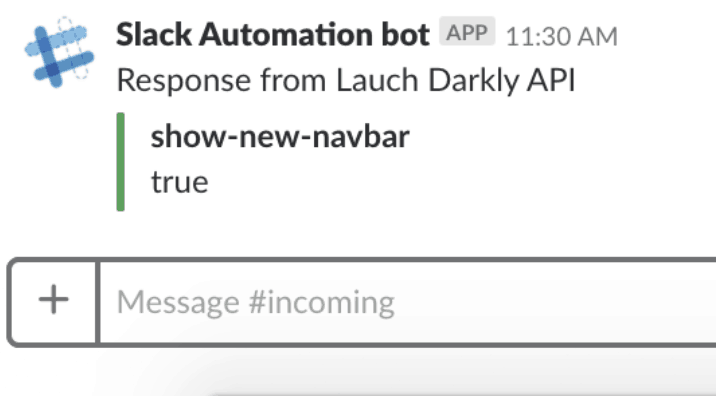
Note that also the command will be displayed.
Deploy your application to production
When we are done designing our project in flow designer, the next step is to deploy the application to a production environment.
1. In flow designer, click the Deploy button in the top navbar.

2. Select Production as the target environment
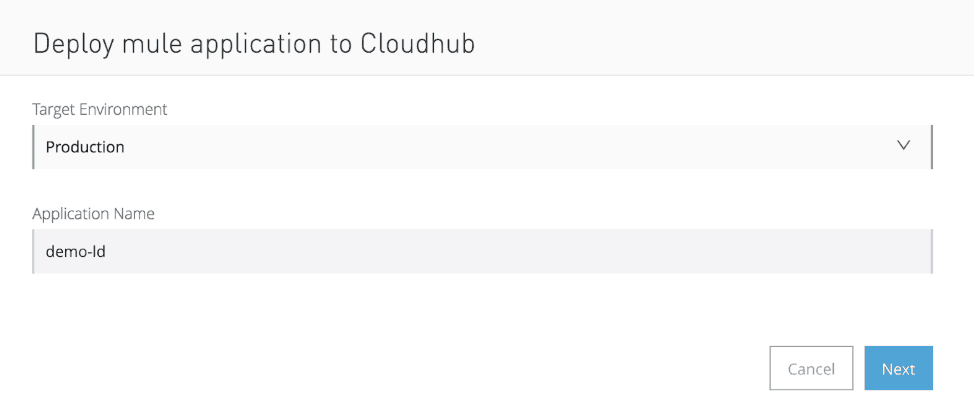
3. Click Next and in the next screen click Deploy.
4. Check the new public URL after deploying. In order to point to that new environment, we must update the slash Request URL in Slack to point to this new permanent URL. Check part three step three.
5. Done! We have deployed our application to a production environment.
Conclusion
As mentioned in my earlier blog post, software development processes always involve ensuring that users have the correct permissions and visibility. This often requires constantly and, sometimes, manually, checking a user’s profile, including their flags and permissions.
This demo has demonstrated how you can use flow designer, along with LaunchDarkly and a Slack bot to easily retrieve information regarding a user and the permissions that they have. Why use flow designer instead of another tool? Flow designer is a great tool for this use case because:
- Flow designer is already running in the cloud, so it is much easier for Slack (or any other cloud tool) to communicate with it.
- Flow designer is powered by Anypoint Platform, which enables you to have a unified experience when integrating data sources––from using API designer to write the RAML to use Anypoint Exchange to publish the asset.
- Flow designer also allows you to implement the above integration use case, as well as others, in a quick manner. For example, this integration only takes about 30-60 minutes to complete.
Excited about flow designer? Learn more about it today and tell us what you think about the demo in the comments!